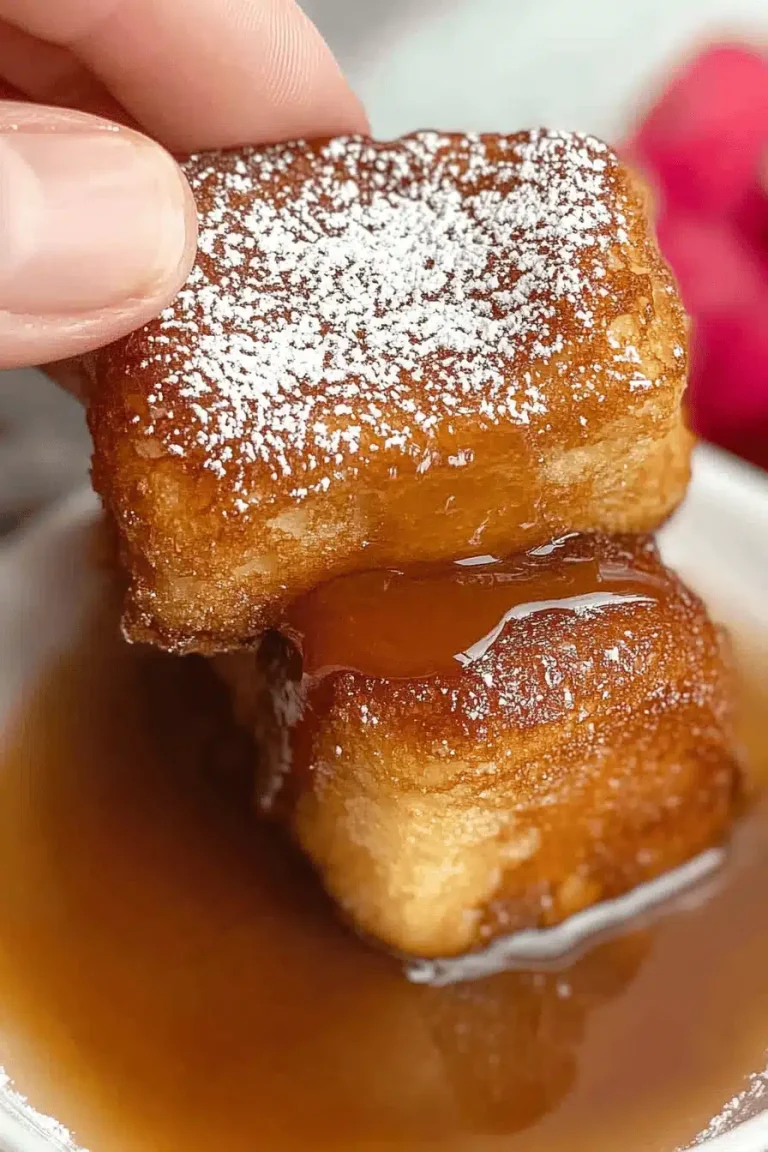
I remember the days of Saturday mornings, the smell of my mom’s cooking wafting through the house, and the pure, unadulterated joy of sitting down to a stack of golden, fluffy pancakes. But lately, I’ve been craving something a little… *more*. Something that feels special, a bit more decadent, but still incredibly easy to whip up. Enter this incredible homemade waffle recipe. It’s the kind of recipe that makes you feel like a culinary superhero, even on a Tuesday morning when you’re desperately in need of a pick-me-up. Forget those sad, limp frozen waffles; this is the real deal. It’s the perfect balance of crispy edges and a wonderfully soft, fluffy interior, and honestly, it’s become my secret weapon for making any day feel like a holiday. If you’ve ever felt intimidated by waffle making, or if your previous attempts have resulted in disappointment, then trust me, this is the homemade waffle recipe you’ve been searching for.
What is the perfect home made waffle?
So, what exactly *is* a perfect homemade waffle? For me, it’s more than just batter cooked in a waffle iron. It’s about achieving that magical textural contrast. Think of it as a delicate dance between a satisfying crunch on the outside, thanks to the Maillard reaction happening in those little squares, and a light, airy, almost cloud-like tenderness within. It’s not dense or heavy; it’s just… delightful. The name “homemade waffle” itself conjures up images of comfort and tradition, and this recipe aims to deliver exactly that. It’s essentially a slightly richer, thicker pancake batter, designed specifically to hold its shape and crisp up beautifully in the unique environment of a waffle iron. It’s a simple concept, really, but when done right, it’s pure culinary magic that transforms a regular breakfast into something truly memorable.
Why you’ll love this recipe?
Oh, where do I even begin with why this homemade waffle recipe is a total game-changer? First off, let’s talk about the taste and texture. This isn’t just *any* waffle; it’s a waffle that practically sings. The exterior gets wonderfully golden and delightfully crispy, especially if you have a good waffle iron that gets nice and hot. But the inside? It’s unbelievably tender and fluffy, like a little bite of heaven. It’s the kind of waffle that holds onto syrup beautifully without getting soggy, and it’s sturdy enough to hold your favorite toppings without collapsing. And the smell when they’re cooking? Forget about it! It fills your kitchen with this warm, comforting aroma that’s guaranteed to bring everyone to the table, no matter what. It’s truly a sensory experience.
Then there’s the simplicity. I know “homemade” can sometimes sound daunting, but this recipe is ridiculously easy. You likely have most of the ingredients in your pantry right now. It comes together in just a few minutes, and the actual cooking time is super fast. This is a lifesaver on busy mornings when you want to treat yourself or the family but don’t have a ton of time. I’ve even made these on a weekday when a serious craving hit!
Cost-efficiency is another big win here. Compared to buying fancy waffle mixes or, heaven forbid, those expensive cafe waffles, making them from scratch is incredibly budget-friendly. You’re using basic pantry staples, which means you can enjoy this luxurious breakfast or dessert experience without breaking the bank.
And the versatility? Oh, it’s off the charts! These waffles are your blank canvas. They’re perfect for a classic breakfast with butter and maple syrup, but they’re also amazing for brunch with fresh berries and a dollop of whipped cream. Feeling adventurous? Try them as a base for Fried Chicken (yes, it’s a thing and it’s delicious!) or even as a base for a sweet dessert with ice cream and chocolate sauce. I’ve even experimented with adding a touch of cinnamon or a little lemon zest to the batter for a different flavor profile, and they were fantastic. This recipe is so reliable, so forgiving, and so utterly delicious, it’s easily one of my most treasured kitchen staples. It’s the kind of recipe that makes you feel like a pro without any of the stress.
How do I make a homemade waffle?
Quick Overview
The magic of this homemade waffle recipe lies in its simplicity and the fantastic results it yields. We’re talking about whisking together a few key ingredients to create a batter that’s just right – not too thick, not too thin. The key is to mix the wet and dry ingredients gently to avoid overworking the batter, which is crucial for that fluffy texture. Once your batter is ready, it’s a matter of preheating your waffle iron and cooking each waffle to a perfect golden-brown. It’s a straightforward process that anyone can master, and the payoff is immense – warm, crispy-on-the-outside, fluffy-on-the-inside waffles that taste so much better than anything you can buy.
Ingredients
For the Main Batter:
This is where the foundation of our delicious homemade waffle recipe is laid. It’s a simple combination that packs a flavor punch. I always use all-purpose flour because it’s readily available and works beautifully. Make sure your baking powder is fresh – that’s the key to that wonderful lift and fluffiness. For the sugar, I use granulated sugar because it dissolves easily and gives just the right hint of sweetness. Don’t skimp on the salt; it really enhances all the other flavors. Using large eggs at room temperature is also a little trick I learned; they incorporate more easily into the batter, leading to a smoother consistency. And for the fat, I swear by unsalted butter, melted and slightly cooled. It adds such a rich flavor and helps with that delightful crispiness. Some people use oil, but butter, in my opinion, is just superior for waffles. And, of course, milk! Whole milk gives the richest flavor and texture, but I’ve tested this with 2% and even almond milk (for a dairy-free option, though it’s a bit less rich), and it still turns out wonderfully. It’s all about achieving that perfect batter consistency.
For the Vanilla Essence:
This might seem optional, but I truly believe a good quality vanilla extract makes all the difference. It adds a subtle depth of flavor that complements the other ingredients beautifully without overpowering them. Just a teaspoon is all you need to elevate these homemade waffles from good to truly outstanding.
Step-by-Step Instructions
Step 1: Preheat & Prep Pan
Before you even think about mixing ingredients, the first thing you need to do is get your waffle iron heating up. Most waffle irons have an indicator light that tells you when they’re ready. I usually set mine to a medium-high heat. This initial heat is crucial for getting those lovely crispy edges. While it’s heating, give your waffle iron a light brush or spray with cooking oil or melted butter. This prevents sticking and helps ensure your first waffle is a masterpiece, not a mess. Don’t skip this step, even if your waffle iron is non-stick; a little extra greasing never hurt anyone!
Step 2: Mix Dry Ingredients
In a large mixing bowl, I whisk together the all-purpose flour, baking powder, granulated sugar, and salt. Whisking them together really well ensures that the leavening agent (baking powder) is evenly distributed throughout the flour. This is super important for getting uniformly fluffy waffles. You want to see no lumps of baking powder, just a nice, homogenous blend of dry goodness. This step takes all of 30 seconds but makes a big difference in the final texture of your homemade waffle.
Step 3: Mix Wet Ingredients
In a separate, medium-sized bowl, I whisk together the eggs until they’re nice and lightly beaten. Then, I add in the milk and the melted, slightly cooled butter, along with the vanilla extract. Give it all a good whisk until everything is well combined and you have a smooth, emulsified mixture. Making sure the butter isn’t too hot when you add it to the eggs is key, otherwise, you’ll end up with scrambled eggs in your batter, and nobody wants that! The slight cooling time prevents this.
Step 4: Combine
Now for the magic moment: combining the wet and dry ingredients. I pour the wet ingredients into the bowl with the dry ingredients. Then, using a whisk or a spatula, I gently stir everything together. And I mean *gently*. You want to mix until just combined. It’s perfectly okay if there are still a few small lumps in the batter. In fact, a few lumps are a good sign that you haven’t overmixed! Overmixing develops the gluten in the flour, which can lead to tough, rubbery waffles, and we definitely don’t want that. We’re aiming for tender and fluffy, remember? So, stop mixing as soon as you don’t see any large pockets of dry flour.
Step 5: Prepare Filling
This step is optional, but if you’re feeling fancy and want to add a burst of flavor or texture, now’s the time! For a simple fruit filling, I love using fresh or frozen berries, maybe with a sprinkle of sugar and a squeeze of lemon juice. If I’m feeling decadent, I might chop up some chocolate or even add a swirl of Peanut Butter. You can get creative here! Just make sure your filling components are ready to go because you’ll be adding them right before cooking.
Step 6: Layer & Swirl
This is where the visual appeal really comes into play. Ladle about half a cup to three-quarters of a cup of batter onto your preheated and greased waffle iron. The amount will depend on the size of your iron, so you might need to experiment a little. If you’re adding a filling, now’s the time to gently spoon it over the batter. Then, carefully ladle the remaining batter over the filling, covering it completely. If you want that beautiful marbled effect, you can take a toothpick or a skewer and gently swirl it through the batter a couple of times. Don’t overdo it, or you’ll lose the definition. You’re just looking for lovely patterns. Close the lid and let it work its magic!
Step 7: Bake
This is the exciting part where you get to watch your homemade waffle come to life! Cook the waffle according to your waffle iron’s instructions, usually for about 3-5 minutes. You’ll know it’s done when the steam coming from the iron starts to lessen, and the waffle is beautifully golden brown. A good indicator is when it just slides out easily. Resist the urge to peek too early, as this can cause the waffle to break apart. I’ve learned this the hard way! If you’re making a big batch, you can keep the finished waffles warm in a single layer on a baking sheet in a low oven (around 200°F or 95°C) while you cook the rest. This keeps them nice and crisp.
Step 8: Cool & Glaze
Once your homemade waffle is cooked to perfection, gently lift it out of the waffle iron and place it on a wire rack to cool for a minute or two. This step is crucial for maintaining that lovely crispiness. If you place it directly onto a plate or stack them immediately, the steam can make them a bit soft. If you’re adding a glaze, now’s the time to drizzle it over while the waffle is still warm but not piping hot. The warmth helps the glaze spread nicely without melting away completely. Make sure your glaze has a consistency that’s thick enough to cling but thin enough to drizzle. I’ll share some glaze ideas later!
Step 9: Slice & Serve
And there you have it – your perfect homemade waffle! I like to slice them into halves or quarters, especially for little hands. Serve them immediately while they’re warm and at their absolute best. The simple act of slicing them makes them easier to share and enjoy. The beauty of these waffles is how they look, so a nice, clean cut is always appreciated. You can serve them with your favorite toppings and watch them disappear in minutes!
What to Serve It With
The beauty of these homemade waffles is their incredible versatility. They truly are a blank canvas for your culinary creativity! For a classic Breakfast, you absolutely can’t go wrong with a generous pat of butter and pure maple syrup. It’s simple, elegant, and always hits the spot. A strong cup of coffee is the perfect companion, helping you ease into the day. For a more elaborate Brunch spread, I love serving them with a side of fresh berries – think raspberries, blueberries, and strawberries – and a dollop of lightly sweetened whipped cream or Greek yogurt. A scattering of toasted nuts adds a lovely crunch. If you’re feeling really decadent, a sprinkle of powdered sugar is always a lovely touch. And for a truly special occasion, consider a side of crispy bacon or savory sausage. As a delightful Dessert, these waffles transform into something magical. Imagine them topped with a scoop of vanilla bean Ice Cream, a drizzle of warm chocolate ganache, and perhaps some toasted pecans. It’s a crowd-pleaser for sure! Or, for a lighter sweet treat, a simple dusting of powdered sugar and a side of fresh fruit is heavenly. And for those moments when you just need a comforting, Cozy Snack, a warm waffle with a smear of jam or a spoonful of your favorite fruit preserves is pure bliss. My family also loves them with a drizzle of honey and a sprinkle of cinnamon. It’s all about what brings you joy and comfort. These waffles are truly meant to be enjoyed in whatever way makes you happiest!
Top Tips for Perfecting Your Homemade Waffle
I’ve made this homemade waffle recipe more times than I can count, and over the years, I’ve picked up a few tricks that I think make all the difference. If you want to elevate your waffle game from good to absolutely spectacular, listen up! First, about the Zucchini Prep, if you decide to add it (it’s a secret ingredient I sometimes use for moisture and a hint of sweetness, though not in this base recipe!), the key is to really squeeze out as much moisture as possible. Grate your zucchini, put it in a clean kitchen towel or cheesecloth, and wring it out like you mean it! This prevents your waffles from becoming soggy. Freshness is key, so use zucchini that isn’t old and watery.
When it comes to Mixing Advice, I cannot stress enough the importance of *not* overmixing. Seriously, once the wet and dry ingredients just come together, stop. A few lumps are your friend! Overmixing develops gluten, which results in tough, chewy waffles, and nobody wants that. You want light and fluffy. If you’re struggling to get the right consistency, it’s usually because of the flour. Weighing your flour is the most accurate way, but if you’re using cups, gently spoon it into the measuring cup and level it off with a straight edge. Don’t scoop directly from the bag, as this compacts the flour.
For Swirl Customization, if you’re adding things like fruit compotes or chocolate chips into the batter, go easy. You don’t want to overload the waffle iron, or it will spill over and make a mess. For visual appeal, a gentle swirl with a toothpick can create beautiful patterns, but don’t overdo it. You’re aiming for subtle marbling, not a mixed-up mess.
When it comes to Ingredient Swaps, I’ve experimented quite a bit. For milk, as I mentioned, whole milk is ideal for richness, but 2% works fine. For a dairy-free option, almond milk or oat milk are good substitutes, though they might make the waffles slightly less rich. I’ve also successfully used a flax egg (1 tablespoon flaxseed meal mixed with 3 tablespoons water, let sit for 5 minutes) instead of chicken eggs, though the texture might be a tiny bit denser. For the butter, a neutral-flavored oil like vegetable or canola oil can be used in a 1:1 ratio, but you’ll lose some of that buttery flavor.
And finally, Baking Tips are crucial. Ensure your waffle iron is properly preheated. A too-cool iron will result in a pale, sad waffle. If your iron tends to cook unevenly, rotate it halfway through the cooking process if possible. Trust your senses: the smell of toasting batter and the cessation of steam are your best indicators that a waffle is done, not just the timer. For Glaze Variations, remember that consistency is key. A glaze that’s too thin will run off; too thick will be difficult to spread. Aim for a thick but pourable consistency. You can always adjust it by adding a tiny bit more liquid (milk, water, lemon juice) if it’s too thick, or a bit more powdered sugar if it’s too thin. Don’t be afraid to experiment!
Storing and Reheating Tips
One of the best things about this homemade waffle recipe is that they store and reheat beautifully, meaning you can enjoy them even when you don’t have time to make them fresh. For Room Temperature storage, I generally wouldn’t recommend keeping them out for more than a few hours, especially if the weather is warm. They tend to lose their crispness pretty quickly when exposed to air. If you absolutely must, cover them loosely with a clean kitchen towel to allow some air circulation, but this isn’t ideal for long-term freshness.
For Refrigerator Storage, this is where they hold up much better. Once the waffles have cooled completely (this is crucial!), I like to stack them in an airtight container, or wrap them tightly in plastic wrap or foil. They’ll stay good in the fridge for about 2-3 days. The key here is airtightness to prevent them from drying out or picking up any fridge odors. When reheating, you might lose a little crispness, but it’s still quite good.
My favorite method is Freezer Instructions. For the best quality, I recommend freezing them in a single layer on a baking sheet first until they are firm. This prevents them from sticking together in a big clump. Once frozen solid, I transfer them into a freezer-safe bag or an airtight container. They can last for up to 2-3 months in the freezer. When you’re ready to enjoy them, you can either toast them directly from frozen in a toaster (they might take a little longer than thawed) or let them thaw slightly on the counter before reheating.
Regarding Glaze Timing Advice, if you plan to store your waffles, I strongly recommend applying the glaze *after* reheating. If you glaze them before storing, the glaze can become sticky, gummy, or even moldy during refrigeration or freezing. It’s best to reheat the plain waffle and then drizzle with glaze or your favorite toppings right before serving. This way, you get the best of both worlds – the convenience of pre-made waffles and that fresh, delicious topping!
Frequently Asked Questions
Final Thoughts
Honestly, this homemade waffle recipe is more than just a recipe to me; it’s a little piece of joy. It’s about those moments when you can create something truly delicious and satisfying from scratch, transforming ordinary ingredients into something magical. The combination of crisp exterior and fluffy interior is just divine, and the aroma that fills your kitchen as they cook? Pure bliss. It’s the kind of recipe that makes you feel proud and accomplished, even if you’re just making breakfast. It’s also incredibly adaptable, as you’ve seen, so you can make it your own. If you love this waffle recipe and are looking for other simple yet incredibly rewarding bakes, I highly recommend checking out my easy banana bread recipe or my foolproof chocolate chip cookie recipe. They’re all about bringing that homemade comfort and deliciousness to your table. I truly hope you give this homemade waffle recipe a try. I can’t wait to hear how yours turns out and what delicious toppings you discover! Happy baking, and enjoy every single bite!
Homemade Waffle Recipe
Ingredients
Main Ingredients
- 2 cups all-purpose flour
- 2 tablespoons granulated sugar
- 2 teaspoons baking powder
- 0.5 teaspoons salt
- 2 large eggs separated
- 1.75 cups milk
- 0.5 cups butter melted
- 1 teaspoon vanilla extract
Instructions
Preparation Steps
- In a large bowl, whisk together the flour, sugar, baking powder, and salt.
- In a separate bowl, whisk together the egg yolks, milk, melted butter, and vanilla extract.
- Pour the wet ingredients into the dry ingredients and mix until just combined. Do not overmix.
- In a clean bowl, beat the egg whites until stiff peaks form. Gently fold the egg whites into the batter.
- Preheat your waffle iron according to the manufacturer's instructions.
- Ladle the batter onto the preheated waffle iron and cook until golden brown and cooked through, about 3-5 minutes per waffle.
- Serve hot with your favorite toppings such as syrup, fresh fruit, or whipped cream.