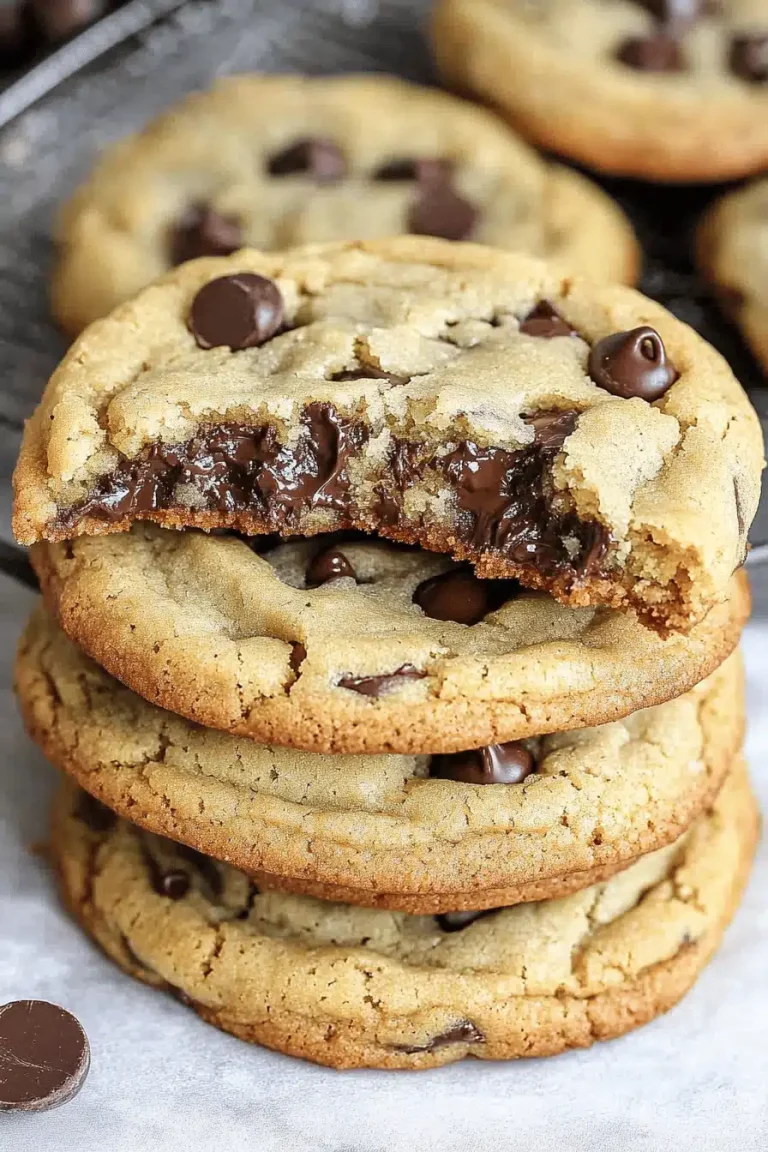
Okay, picture this: it’s October, leaves are crunching underfoot, the air smells like cinnamon and woodsmoke, and my kitchen is a glorious mess of flour, sprinkles, and half-eaten chocolate chips. This isn’t just any baking session; it’s Halloween Spider Cookies time! These aren’t your average sugar cookies, folks. Think of them as a sophisticated, spookier cousin to the classic Chocolate Chip Cookie, but with adorable, edible spiders crawling all over them. Seriously, if you’re looking for a show-stopping treat that’s surprisingly easy to make, you’ve found it. Everyone always asks for these, and trust me, they disappear faster than candy on Halloween night! You can’t go wrong with these Halloween Spider Cookies.
What are spider cookies?
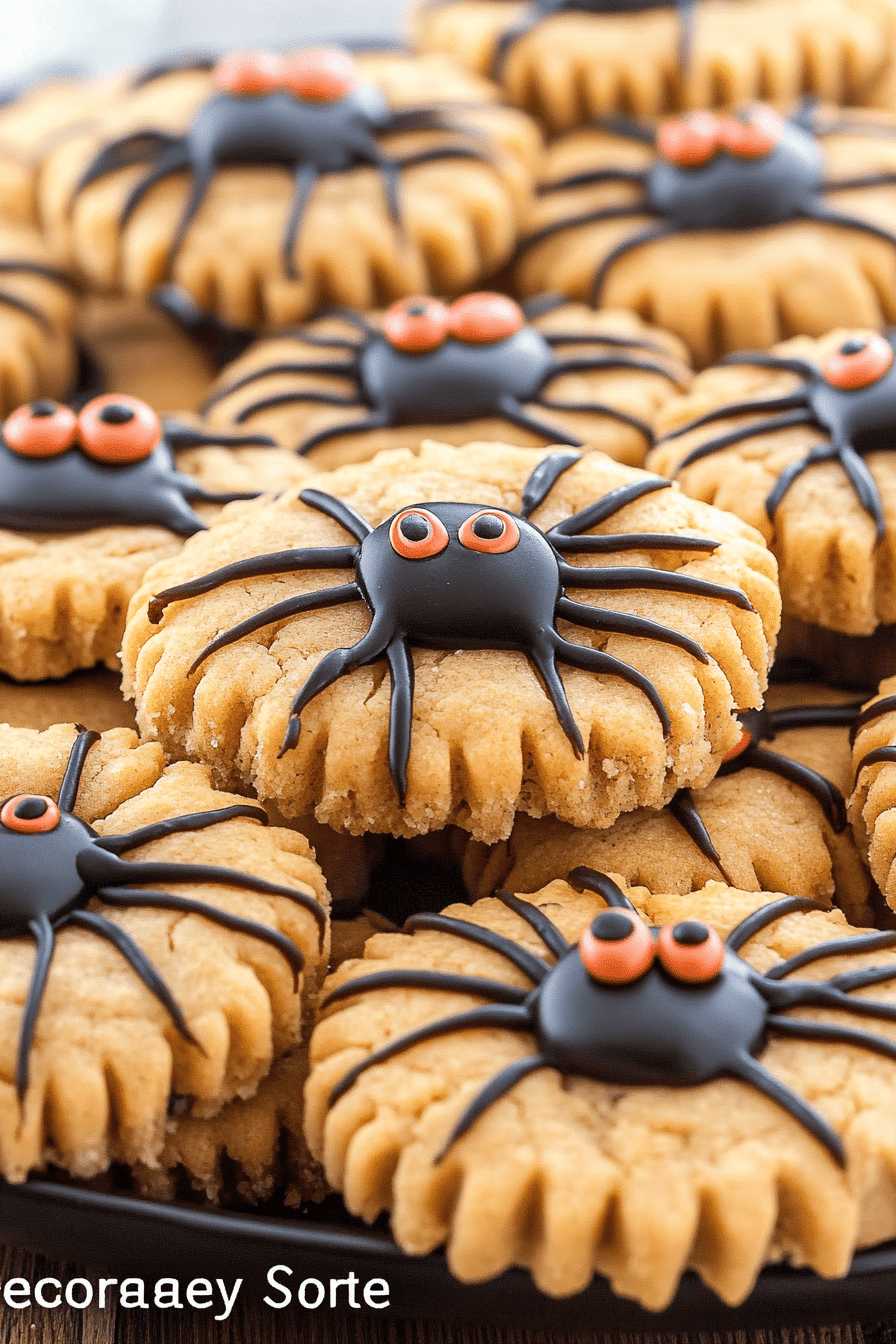
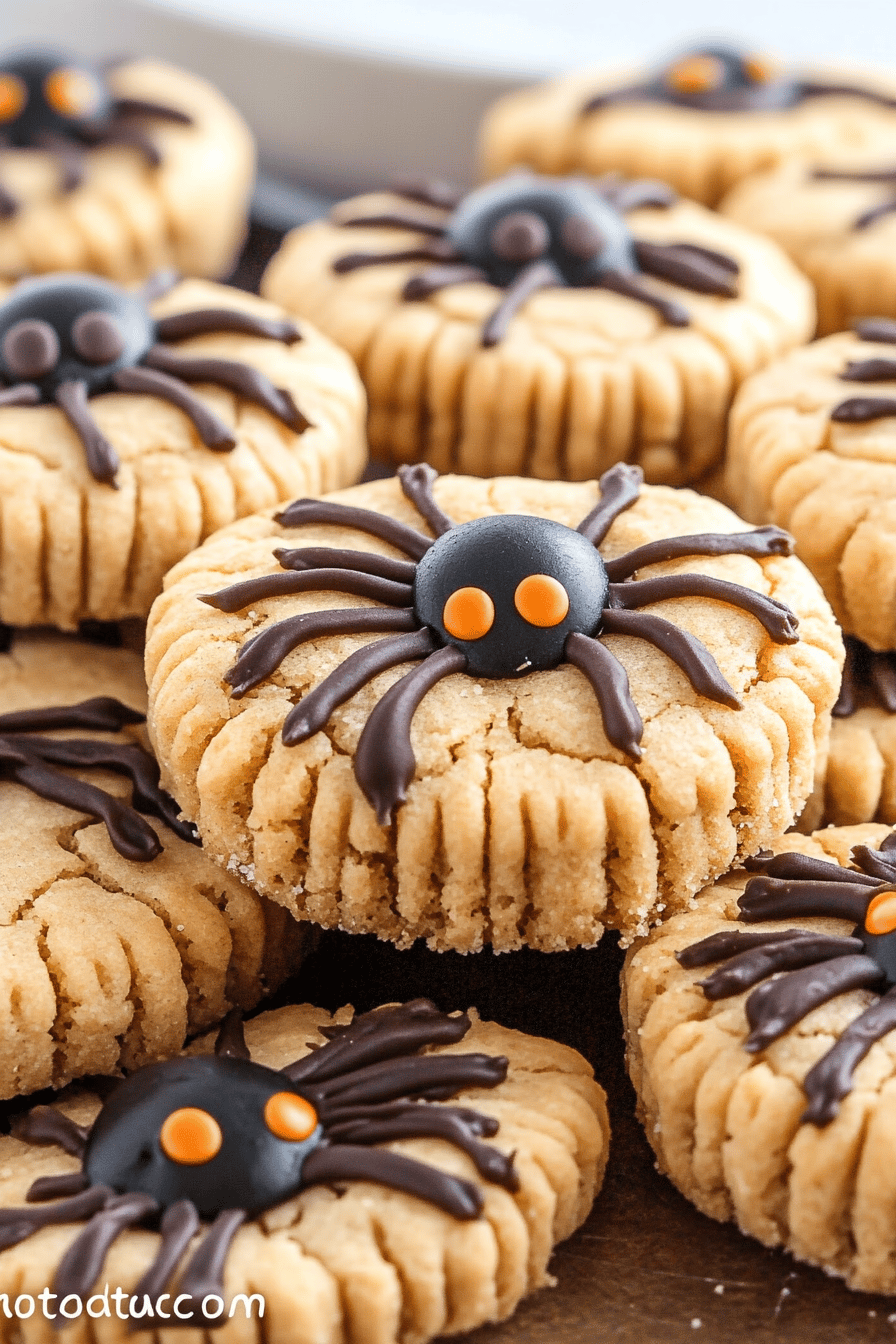
Alright, let’s break it down. Halloween Spider Cookies are essentially delicious, soft chocolate cookies decorated to look like spiders! We’re talking rich, chocolatey goodness made even more festive with cute little spider bodies made from chocolate candies and legs crafted from pretzel sticks or piped chocolate. It’s the perfect balance of spooky and sweet, and the best part? They’re SO easy to customize. Think of them as your blank canvas for edible Halloween art. The name came about because, well, they look like spiders! And what’s Halloween without a few creepy-crawlies… the edible kind, of course!
Why you’ll love this recipe?
Okay, where do I even start? These Halloween Spider Cookies are not only adorable, but they’re incredibly delicious. Here’s why you absolutely *need* to make them:
- Flavor:Imagine a rich, dark chocolate cookie, perfectly chewy and slightly fudgy. Add a touch of sea salt and vanilla to balance the sweetness. What’s the flavor profile we’re talking about? What are chocolate spiders on top of?
- Simplicity:Don’t be intimidated by the spider decoration. The cookie dough comes together in a few minutes, and the spider assembly is surprisingly therapeutic (and delicious). What is a good activity for little hands? I always do this when I need to relax a bit in the kitchen.
- Cost-You probably already have most of the ingredients in your pantry! What are some of the best last minute Halloween treats?
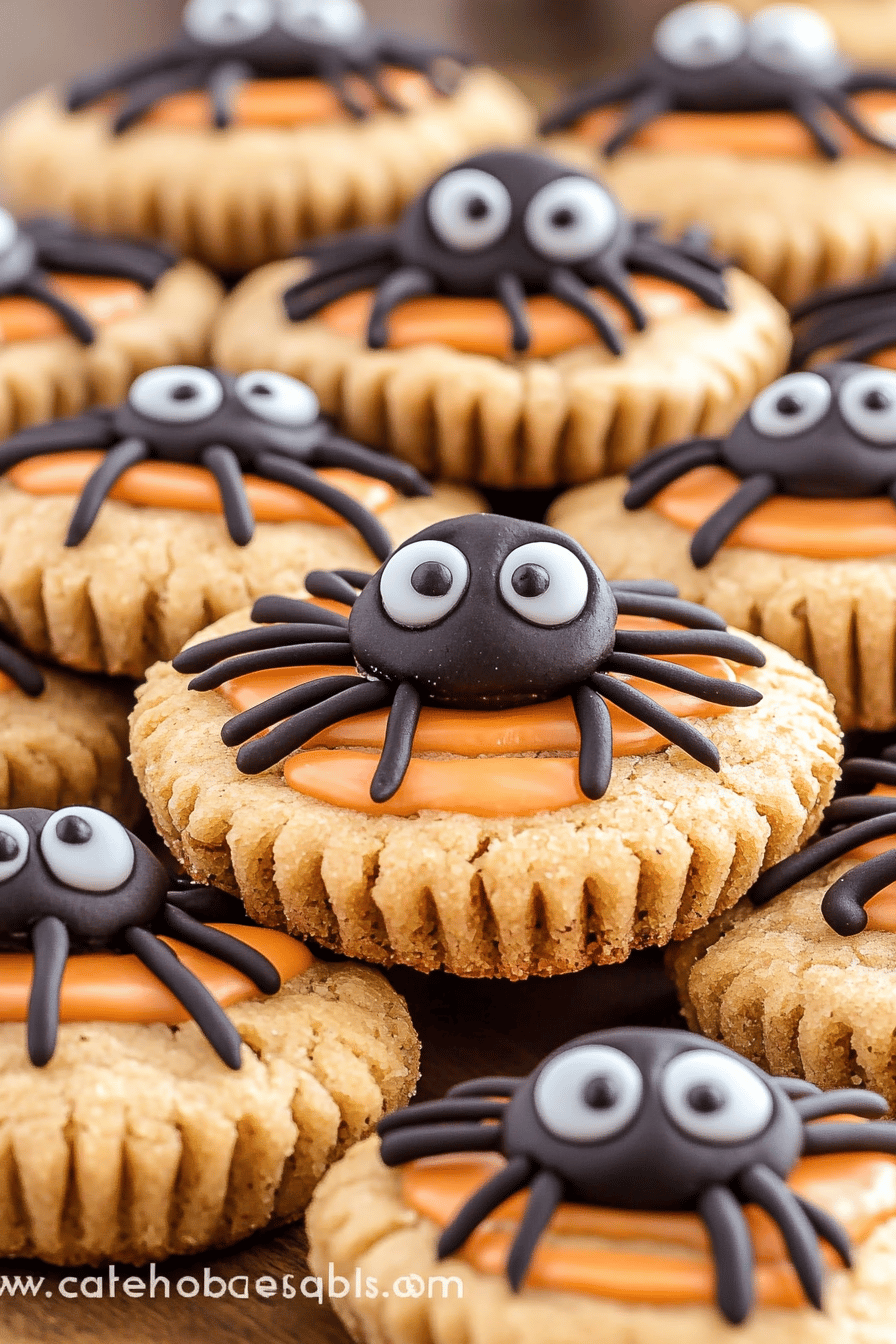
- Versatility: While I love the classic chocolate spider look, you can totally get creative with the decorations! Use different colored candies for the bodies, experiment with various pretzel shapes for the legs, or even add edible glitter for extra sparkle.
What I love most about this is the reaction I get when I bring them out! They’re always a hit at parties and potlucks, and my kids practically inhale them. They’re even better than some of the fancier Halloween desserts I’ve tried! And who doesn’t love a good chocolate cookie?
How do I make spider cookies for Halloween?
Quick Overview
Making these Halloween Spider Cookies is easier than you think! First, you’ll whip up a simple chocolate cookie dough. Then, you bake them until they’re perfectly soft and chewy. The real magic happens when you add the spider decorations: a chocolate candy body and pretzel or chocolate legs. It’s fun, festive, and the whole process is surprisingly simple, so don’t be intimidated!
Ingredients
For the Cookies: For cookies:
- 1 cup (2 sticks) unsalted butter, softened: Make sure it’s *softened*, not melted! Trust me, it makes a huge difference in the texture.
- 3/4 cup granulated sugar: Adds sweetness and helps create that perfect chewy texture.
- 3/4 cup packed light brown sugar: For a deeper, molasses-y flavor and extra moisture.
- 2 large eggs: Binds everything together and adds richness.
- 1 teaspoon vanilla extract: A must-have for that classic cookie flavor.
- 2 cups all-purpose flour: I’ve tried this with gluten-free flour and it works well too, just be sure to use a good quality blend.
- 3/4 cup unsweetened cocoa powder: Use a good quality chocolate for the best flavor.
- What is the best way to use baking soda to make cookies?
- 1 teaspoon salt: Balances sweetness and enhances the other flavors.
For the Spider Decorations:
- Chocolate candies (such as chocolate M&Ms or Whoppers): For the spider bodies. Get creative with colors!
- Pretzel sticks or melted chocolate: For the spider legs. I like using pretzel sticks for a salty-sweet contrast.

What are the step-
Step 1: Preheat & Prep Pan
Preheat your oven to 350°F (175°C). Line a baking sheet with parchment paper. How do I clean cookies? I always do this before I start anything else, so the oven is ready when I am.
Step 2: Cream Butter & Sugars
In a large bowl, cream together the softened butter, granulated sugar, and brown sugar until light. Set aside. What is a stand mixer? The mixture should be pale and creamy.
Step 3: Add Eggs & Vanilla
Beat the eggs one at a time, then stir in the vanilla extract. Make sure each egg is fully incorporated before adding the next. How do I make a smooth batter?
Step 4: Combine Dry Ingredients
In a separate bowl, whisk together the flour, cocoa powder, baking soda, and salt. This ensures that the dry ingredients are evenly distributed throughout the dough.
Step 5: Gradually Add dry ingredients to wet ingredients.
Gradually add the dry ingredients to the wet ingredients, mixing until just combined. How do you make a hard cookie? I usually stop mixing when I still see a few streaks of flour and then finish mixing by hand.
Step 6: Scoop & Bake
Drop by rounded tablespoons onto the prepared baking sheet, leaving some space between each cookie. Bake for 8-10 minutes, or until the edges are set and the centers are still slightly soft. I find that 9 minutes is the sweet spot in my oven.
Step 7: Cool & Decorate
Let the cookies cool on the baking sheet for a few minutes before transferring them to the wire rack. To cool completely. Once the cookies are cool, it’s time to decorate them! If you’re using melted chocolate for the legs, melt it according to package directions. Attach a chocolate candy to the center of each cookie with melted chocolate. Then, attach pretzel sticks or piped chocolate around the candy to create the spider legs. Let the chocolate set completely before serving. I put them in the fridge for a bit to speed up the process.
What is the best way to serve it?
What are some great Halloween Spider Cookies?
- What is the best Halloween party theme? Arrange them on a platter with other spooky treats like cupcakes, candy corn, and caramel apples.
- With a Glass of Milk: What is it like?What is a classic combination that never fails. I always serve them with cold milk.
- As a Dessert:What’s better, serve them with a scoop of vanilla ice cream or chocolate sauce for an extra decadent treat.
- As a Snack: Pack them in lunchboxes or enjoy them as an afternoon snack with a cup of coffee or tea.
In my family, we always have these with hot apple cider during our Halloween movie night. It’s become a tradition, and it’s something we all look forward to every year!
Top Tips for Perfecting Your Halloween Spider Cookies
Here are some of my top tips for making the best Halloween Spider Cookies:
- Use Softened Butter: As I mentioned before, using softened butter is crucial for achieving the right texture. If the butter is too cold, it won’t cream properly with the sugar. If it’s too melted, the cookies will spread too much.
- Don’t Overmix the Dough: Overmixing can lead to tough cookies. Mix until just combined, and then finish mixing by hand if needed.
- Chill the Dough: If you have time, chilling the dough for 30 minutes before baking can help prevent the cookies from spreading too much.
- Use Parchment Paper: Parchment paper is your best friend when it comes to baking cookies. It prevents sticking and makes cleanup a breeze.
- Get Creative with Decorations: Don’t be afraid to experiment with different colors and types of candies for the spider bodies. You can also use different types of pretzels for the legs.
- Let the Cookies Cool Completely Before Decorating: If the cookies are still warm, the chocolate will melt and the decorations won’t stick properly.
I learned the hard way that chilling the dough is important if you want perfectly round cookies. One year, I skipped that step, and they came out flat and spread all over the baking sheet. Still tasted great, but they weren’t as pretty!
Storing and Reheating Tips
Here’s how to store and keep your Halloween Spider Cookies fresh:
- Room Temperature: Store the cookies in an airtight container at room temperature for up to 3 days.
- Refrigerator: For longer storage, you can store the cookies in an airtight container in the refrigerator for up to a week. Let them come to room temperature before serving.
- Freezer: The cookies can also be frozen for up to 2 months. Wrap them individually in plastic wrap and then place them in a freezer-safe bag or container. Thaw at room temperature before serving.
I usually freeze a batch of these every year, so I can have a spooky treat on hand whenever I want. They thaw really well, and they taste just as good as fresh-baked!
Frequently Asked Questions
Final Thoughts
So there you have it: my go-to recipe for Halloween Spider Cookies! They’re fun, festive, and incredibly delicious, and they’re always a hit with kids and adults alike. I hope you’ll give them a try this Halloween season. If you do, be sure to let me know how they turn out! I’d love to hear about your variations and decorating ideas. And if you’re looking for more spooky treats, be sure to check out my other Halloween recipes. Happy baking, and have a spooky Halloween!

Halloween Spider Cookies
Ingredients
Main Ingredients
- 1 cup butter, softened
- 0.5 cup granulated sugar
- 1 large egg
- 2 cups all-purpose flour
- 0.5 tsp baking soda
- 1 tsp vanilla extract
- 1 cup chocolate chips
Instructions
Preparation Steps
- Preheat oven to 375°F (190°C).
- Cream together butter and sugar until light and fluffy.
- Beat in egg and vanilla.
- Gradually add flour and baking soda, mixing until just combined.
- Stir in chocolate chips.
- Drop by rounded tablespoons onto ungreased baking sheets.
- Bake for 10-12 minutes, or until edges are golden brown.
- Let cool on baking sheets for a few minutes before transferring to a wire rack to cool completely.