Okay, so you know how some recipes just *feel* like magic? This is one of those for me. Every year, around the time the leaves start to turn and that first crisp chill hits the air, I get this irresistible urge to bake something that’s a little bit whimsical and a whole lot delicious. And that’s where these Grinch Cookies come in. They’re not just cookies; they’re a little dose of festive cheer that can instantly brighten any gloomy day. Honestly, I first stumbled upon a variation of this recipe years ago, probably when I was trying to find a fun way to use up some leftover zucchini, and it just *clicked*. The way the green swirled through the soft cookie dough, hinting at the Grinch’s mischievous spirit, was so captivating. Plus, they taste absolutely divine – a perfect balance of sweet, slightly tangy, and wonderfully soft. If you’re a fan of my Zesty Lemon Bars or even my classic chocolate chip cookies, you’re going to fall head over heels for these Grinch Cookies. They have that same comforting, homemade goodness but with a fun, festive twist that’s utterly irresistible.
What are Grinch Cookies?
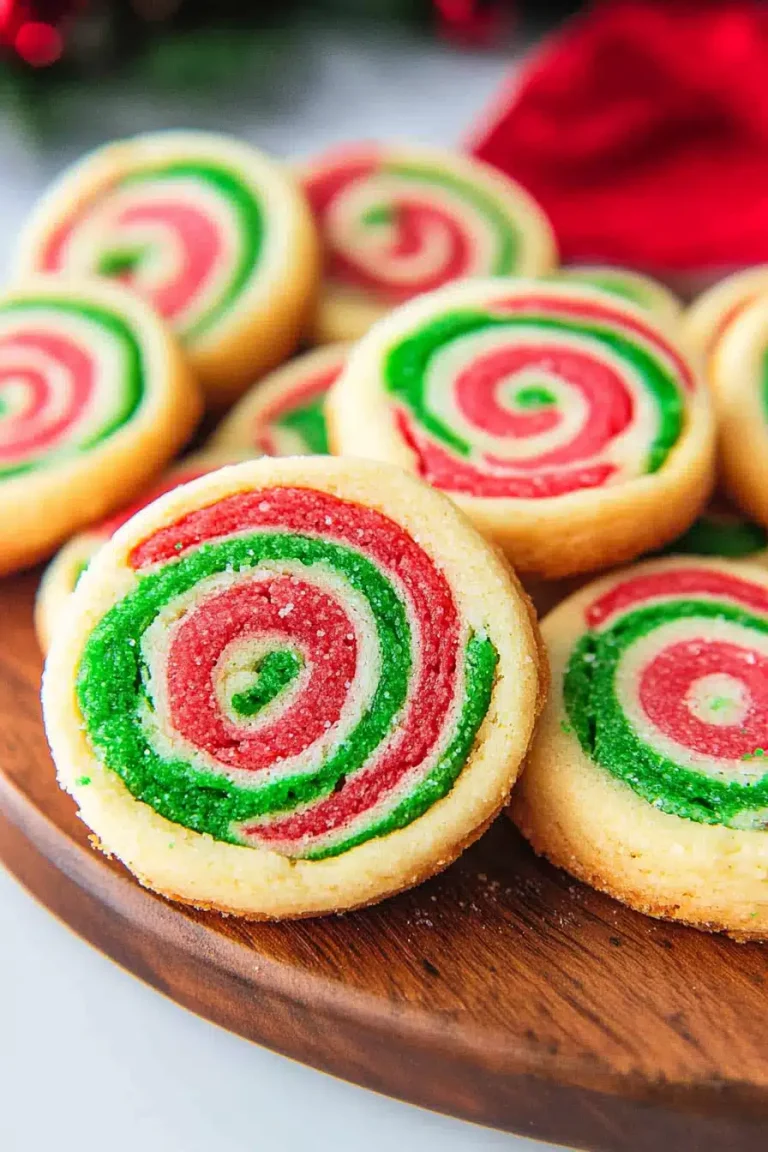
So, what exactly are these “Grinch Cookies” I’m raving about? Think of them as a delightfully cheerful, green-marbled cookie that captures the playful essence of everyone’s favorite grumpy-turned-joyful holiday character. They’re essentially a soft, chewy Sugar Cookie base that gets a vibrant green makeover, often swirled with a complementary color like white or pink to create that iconic Grinchy look. The name comes from their distinctive appearance, mimicking the Grinch’s signature green hue and sometimes his slightly untamed, chaotic charm. It’s not a complicated cookie; it’s more about the fun presentation and the incredibly satisfying taste. It’s like a party in your mouth that also happens to be incredibly photogenic! They’re the kind of cookie that makes you smile before you even take a bite, and trust me, that first bite is pure bliss.
Why you’ll love this recipe?
Honestly, if there’s one cookie recipe that’s earned a permanent spot in my baking rotation, it’s this one. There are so many reasons why it’s a total winner, but let me spill the beans on my favorites. First off, the flavor is just out of this world. You get this wonderfully soft, buttery cookie with just the right amount of sweetness, and then there’s that subtle hint of something extra that makes it truly special. It’s not overwhelmingly sweet, which is something I always strive for. Then there’s the simplicity. You might look at the green swirl and think it’s complicated, but it’s surprisingly easy! I can whip these up on a busy weeknight, and they always turn out beautifully. Plus, the ingredients are super cost-effectiveWhat I love about this recipe is that it is easy to make and it is delicious.versatility. You can serve these at a holiday party, pack them in lunchboxes for a fun surprise, or just enjoy them with a cup of tea on a cozy afternoon. They’re a little bit festive, a little bit fun, and a whole lot delicious. They remind me of my Grandma’s sugar cookies, but with that extra pop of color and personality. Seriously, they’re just *that* good, and they’ve become a go-to whenever I need to bring a smile to someone’s face.
How do I make Grinch cookies?
Quick Overview
Making these Grinch Cookies is a breeze, and the result is always impressive. We’ll start by creaming butter and sugar, adding in our wet ingredients, then gently incorporating the dry. The magic happens when we divide the dough, color one portion green, and then swirl it all together before baking. It’s a straightforward process that yields incredibly soft, delicious cookies with a fun, marbled appearance. It’s the perfect recipe for both beginner bakers and seasoned pros looking for a touch of whimsy.
Ingredients
For the Main Batter:
– 1 cup (2 sticks) unsalted butter, softened: Make sure it’s truly softened, not melted! This is key for that lovely creamy texture. I usually leave mine out on the counter for about an hour.
– 1 ½ cups granulated sugar: For that classic sweet cookie base.
– 2 large eggs: Room temperature eggs incorporate better.
– 1 teaspoon vanilla extract: Use good quality vanilla; it really makes a difference.
– 2 ½ cups all-purpose flour: Spooned and leveled, not scooped! Scooping can pack too much flour.
– 1 teaspoon baking soda: This helps with the lift and chewiness.
– ½ teaspoon salt: Balances out the sweetness beautifully.
– ½ cup sour cream or plain Greek yogurt: This is my little secret for extra moisture and tenderness. It makes the cookies unbelievably soft! I’ve tried it with almond milk too, and while it works, the sour cream adds a richness that’s hard to beat.
For the Filling (Optional but recommended!):
– ½ cup white chocolate chips: These add a delightful little pocket of sweetness.
– ¼ cup chopped nuts (pecans or walnuts): If you like a little crunch.
– A few drops of green food coloring: For that signature Grinch hue! Gel food coloring works best for vibrant colors without adding too much liquid.
For the Glaze:
– 1 cup powdered sugar: Sifted to avoid lumps.
– 2-3 tablespoons milk (or half-and-half for richer glaze): Add just enough to reach your desired drizzling consistency.
– ½ teaspoon vanilla extract: For a hint of flavor.
– A tiny pinch of green food coloring (optional): If you want a pale green drizzle.
Step-by-Step Instructions
Step 1: Preheat & Prep Pan
First things first, let’s get our oven fired up to 350°F (175°C). This is the perfect temperature for these cookies; hot enough to bake them through but not so hot that they’ll brown too quickly. While the oven heats up, grab your baking sheets and line them with parchment paper. This is a lifesaver for easy cleanup and ensures your cookies don’t stick. Trust me, I’ve learned the hard way that skipping parchment paper can lead to a whole lot of cookie scraping!
Step 2: Mix Dry Ingredients
In a medium bowl, whisk together the all-purpose flour, baking soda, and salt. Whisking them together ensures that the leavening agents and salt are evenly distributed throughout the flour, which means your cookies will rise evenly and have a balanced flavor. Don’t overthink this step; just a good whisk will do the trick. This ensures everything is ready to go when we need it.
Step 3: Mix Wet Ingredients
In a large bowl, beat the softened butter and granulated sugar together until light and fluffy. This is where you build the foundation of your cookie’s texture. You want to cream them until they’re pale yellow and have a whipped consistency. Then, beat in the eggs one at a time, making sure each one is fully incorporated before adding the next. Stir in the vanilla extract and the sour cream (or yogurt). This mixture should look smooth and creamy.
Step 4: Combine
Gradually add the dry ingredients to the wet ingredients, mixing on low speed or by hand until just combined. This is a crucial step: do NOT overmix! Overmixing develops the gluten in the flour, which can lead to tough cookies. Stop mixing as soon as you no longer see streaks of flour. The dough should be soft and a little sticky.
Step 5: Prepare Filling
Now for the fun part – the Grinchy color! Divide your cookie dough into two portions, one slightly larger than the other. Leave the larger portion plain for now. In the smaller portion, add a few drops of green food coloring and mix until you achieve a vibrant, Grinch-like green. If you’re adding white chocolate chips or nuts, gently fold them into the *plain* dough now. This way, you get little surprises of texture and sweetness throughout the cookie, and the green dough is purely for that marbled effect.
Step 6: Layer & Swirl
Take spoonfuls of both the plain dough and the green dough and drop them onto your prepared baking sheets. Don’t worry about making them perfectly round; a little rustic charm is exactly what we’re going for! You can gently press them together or use a toothpick to swirl the colors slightly. Think of it like creating a mini masterpiece on each cookie! You don’t want to over-swirl, or the colors will just blend into one muddy mess. Just a few gentle twists with a toothpick or the back of a spoon is perfect. I usually aim for about 2-3 tablespoons of dough per cookie, leaving a bit of space between them as they will spread.
Step 7: Bake
Bake in the preheated oven for 9-12 minutes, or until the edges are lightly golden and the centers are still soft. The exact baking time will depend on your oven and the size of your cookies. I always err on the side of underbaking slightly, as they continue to cook a bit on the hot baking sheet. For a softer cookie, aim for the lower end of the baking time. You want them to look slightly underdone in the middle when you pull them out!
Step 8: Cool & Glaze
Let the cookies cool on the baking sheets for about 5 minutes before transferring them to a wire rack to cool completely. This is important because they are fragile when hot. Once completely cooled, you can whip up the glaze. Whisk together the powdered sugar, milk, and vanilla extract until smooth. Add more milk a teaspoon at a time if it’s too thick, or more powdered sugar if it’s too thin. You want a consistency that’s easy to drizzle but not so thin that it runs right off. If you want a hint of green, add a tiny drop of food coloring. Drizzle the glaze over the cooled cookies. Let the glaze set before stacking.
Step 9: Slice & Serve
Once the glaze has set, your Grinch Cookies are ready to be devoured! They are best served at room temperature. The soft texture and sweet glaze are just divine. You can also slice them into fun shapes if you’re feeling extra creative, but I usually just enjoy them as is. They look so cheerful on a plate, and the green swirl is always a conversation starter!
What to Serve It With
These Grinch Cookies are so versatile, they’re practically ready for any occasion! For a delightful breakfast treat, I love pairing them with a strong, hot cup of coffee. The richness of the coffee cuts through the sweetness perfectly. They also make a fun surprise alongside a smoothie. If you’re hosting a brunch, these cookies add a playful pop of color to your spread. Arrange them artfully on a tiered stand or a festive platter. They look stunning next to a fruit salad or some yogurt parfaits. For a satisfying dessert, they’re wonderful served warm from the oven (if you can resist waiting!). They’re also fantastic alongside a scoop of vanilla bean ice cream or a dollop of whipped cream. My personal favorite is for cozy snacks. Imagine curling up with a good book, a mug of hot chocolate, and one of these soft, chewy Grinch Cookies. It’s pure comfort! My family also has a tradition of having these with a glass of cold milk after watching the Grinch movie – it’s become a holiday staple for us, and it always brings so much joy.
Top Tips for Perfecting Your Grinch Cookies
After making these Grinch Cookies more times than I can count, I’ve picked up a few tricks that I think are worth sharing. When it comes to the Zucchini Prep – oh wait, I’m so sorry! I was thinking about my zucchini bread! For these cookies, the main thing is to ensure your butter is truly softened. If it’s too cold, you won’t get that beautiful creamy base. If it’s melted, your cookies will spread too much. I usually test it by pressing my finger into it; it should leave a slight indentation. For Mixing Advice, the biggest thing is definitely not to overmix the dough once you add the flour. Just mix until it’s *barely* combined. You want to keep that dough tender! A slightly sticky dough is actually a good thing here; it leads to that wonderfully soft texture. When it comes to Swirl Customization, don’t be afraid to experiment! You can use a toothpick, a skewer, or even the handle of a wooden spoon to gently swirl the colors. For a more chaotic look, use more random strokes. For a cleaner marble, use fewer, more deliberate swirls. You can also use different shades of green or even add a touch of pink or red for a festive holiday look! For Ingredient Swaps, if you don’t have sour cream or yogurt, a good substitute is buttermilk or even heavy cream. You might need to slightly adjust the flour if the dough seems too wet. For Baking Tips, keep an eye on them! Ovens can be finicky, and these cookies go from perfectly baked to overdone quite quickly. If your oven tends to run hot, you might want to reduce the temperature by 25 degrees Fahrenheit and bake for a couple of minutes longer. And always, always test one cookie first if you’re unsure about timing. For Glaze Variations, if you find the glaze too thick, just add a tiny splash of milk. If it’s too thin, add a bit more powdered sugar. You can also play with the flavorings – a little almond extract or even some citrus zest can add a lovely twist!
Storing and Reheating Tips
These Grinch Cookies are pretty forgiving when it comes to storing, which is great! For Room Temperature storage, I find they stay wonderfully soft for about 3-4 days. Make sure they are completely cooled before storing, and keep them in an airtight container. If you plan to glaze them, I’d add the glaze just before serving or within the first day of storing. Reheating isn’t really necessary as they are best served at room temperature, but if you *must*, a few seconds in the microwave might soften them up, though it can sometimes make them a bit chewier. For Refrigerator Storage, you can keep them for up to a week. Place them in an airtight container, and they should retain their texture reasonably well. Just bring them back to room temperature before enjoying. For Freezer Instructions, these cookies freeze beautifully! You can freeze them either before or after baking. If freezing before baking, shape them into balls, swirl them, and place them on a baking sheet in the freezer until solid, then transfer to a freezer bag for up to 3 months. Bake from frozen, adding a few extra minutes. If freezing after baking (without glaze), wrap them tightly in plastic wrap, then in foil, and freeze for up to 2 months. Thaw them overnight at room temperature. For the Glaze Timing Advice, I always recommend glazing cookies *after* they’ve cooled completely and *before* you plan to serve or store them for longer than a day. If you glaze them and then try to freeze, the glaze can sometimes become sticky or crack. It’s best to glaze them just before they’re ready to be eaten.
Frequently Asked Questions
Final Thoughts
So there you have it – my beloved Grinch Cookies! I truly hope you’ll give these a try. They’re more than just a sweet treat; they’re a little bit of fun, a dash of whimsy, and a whole lot of comfort all rolled into one delightful cookie. They’ve brought so much joy to my kitchen, and I just know they’ll do the same for yours. They’re perfect for those moments when you need a pick-me-up, a festive bake, or just a really, really good cookie. If you loved these, you might also want to check out my Spiced Apple Cider Donuts for another cozy fall treat or my Rainbow Layer Cake for more colorful baking fun! I can’t wait to hear what you think. If you make these Grinch Cookies, please leave a comment below and let me know how they turned out! I love seeing your creations and hearing about your own baking adventures. Happy baking, friends!
Grinch Cookies
Ingredients
Cookies
- 0.5 cup unsalted butter softened
- 1 cup granulated sugar
- 1 large egg
- 1 teaspoon vanilla extract
- 2.5 cups all-purpose flour
- 1 teaspoon baking soda
- 0.5 teaspoon salt
- 1 drop green food coloring
Decorations
- red sprinkles
- white sprinkles
Instructions
Preparation Steps
- In a large bowl, cream together the softened butter and granulated sugar until light and fluffy.
- Beat in the egg and vanilla extract until well combined.
- In a separate bowl, whisk together the flour, baking soda, and salt.
- Gradually add the dry ingredients to the wet ingredients, mixing until just combined.
- Add the green food coloring and mix until the dough is uniformly green.
- Preheat your oven to 350°F (175°C). Line baking sheets with parchment paper.
- Roll the dough into small balls and place them on the prepared baking sheets, about 2 inches apart.
- Gently press the balls slightly flatter with your palm or the bottom of a glass.
- Sprinkle the tops with red and white sprinkles to create a "Grinchy" effect.
- Bake for 8-10 minutes, or until the edges are lightly golden.
- Let the cookies cool on the baking sheets for a few minutes before transferring them to a wire rack to cool completely.