You know those summer evenings? The ones where the air is just right, the kids are still buzzing from playing outside, and you’re looking for something that’s both incredibly satisfying and super easy to throw together? Yeah, me too. And this grilled corn recipe? It’s my absolute go-to. Seriously, it’s become a staple in our house. My husband always says it tastes like summer in a bite, and honestly, he’s not wrong. We’ve tried so many ways to make corn, from boiling to roasting, but there’s just something magical that happens when you grill corn. It caramelizes, it gets those gorgeous smoky char marks, and the flavor is just out of this world. It’s a million miles away from that mushy, bland corn you sometimes get. If you’re a fan of my famous zucchini bread, you’re going to adore this because it’s got that same comforting, wholesome vibe, but with a bright, fresh summer twist.
What is Grilled Corn?
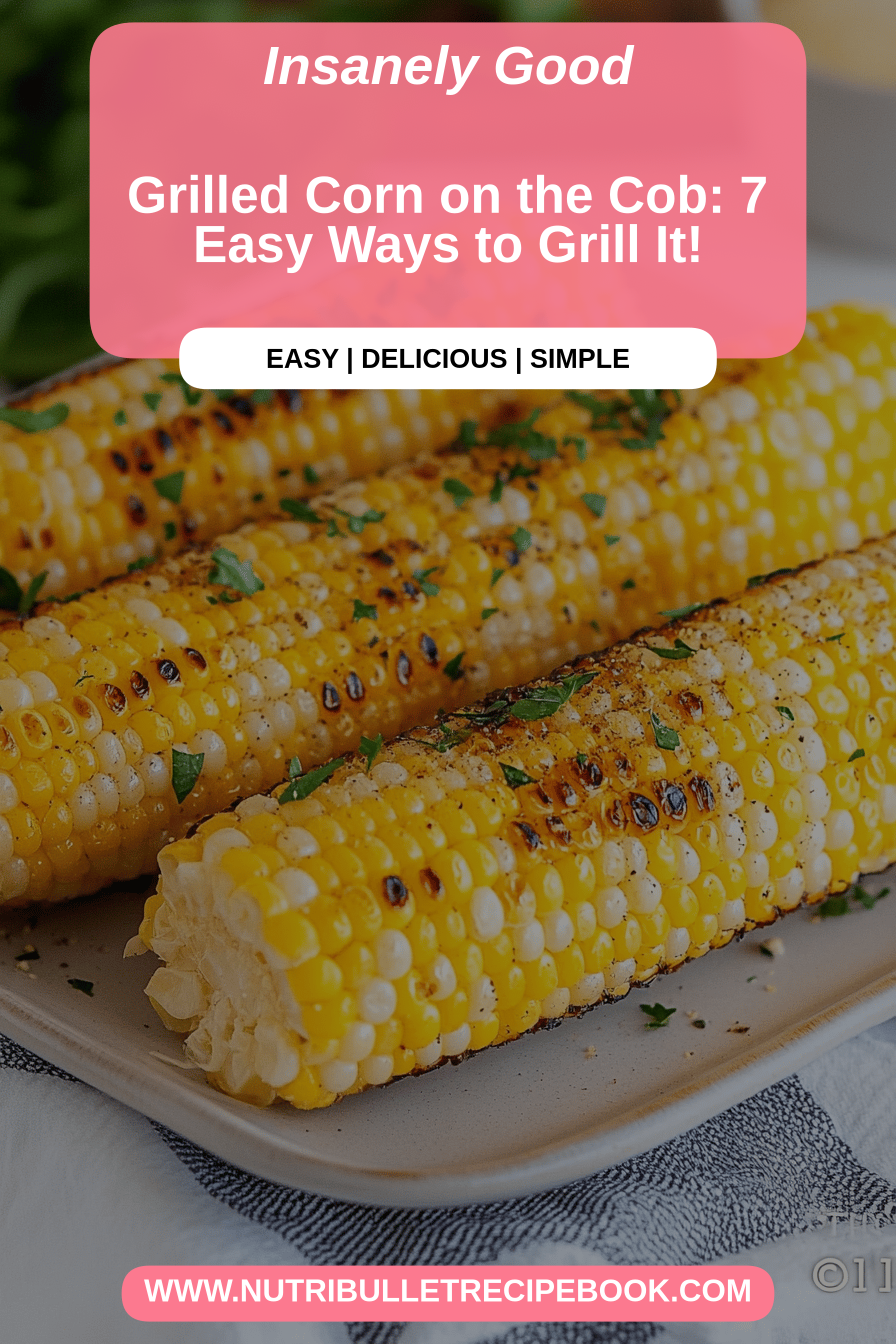
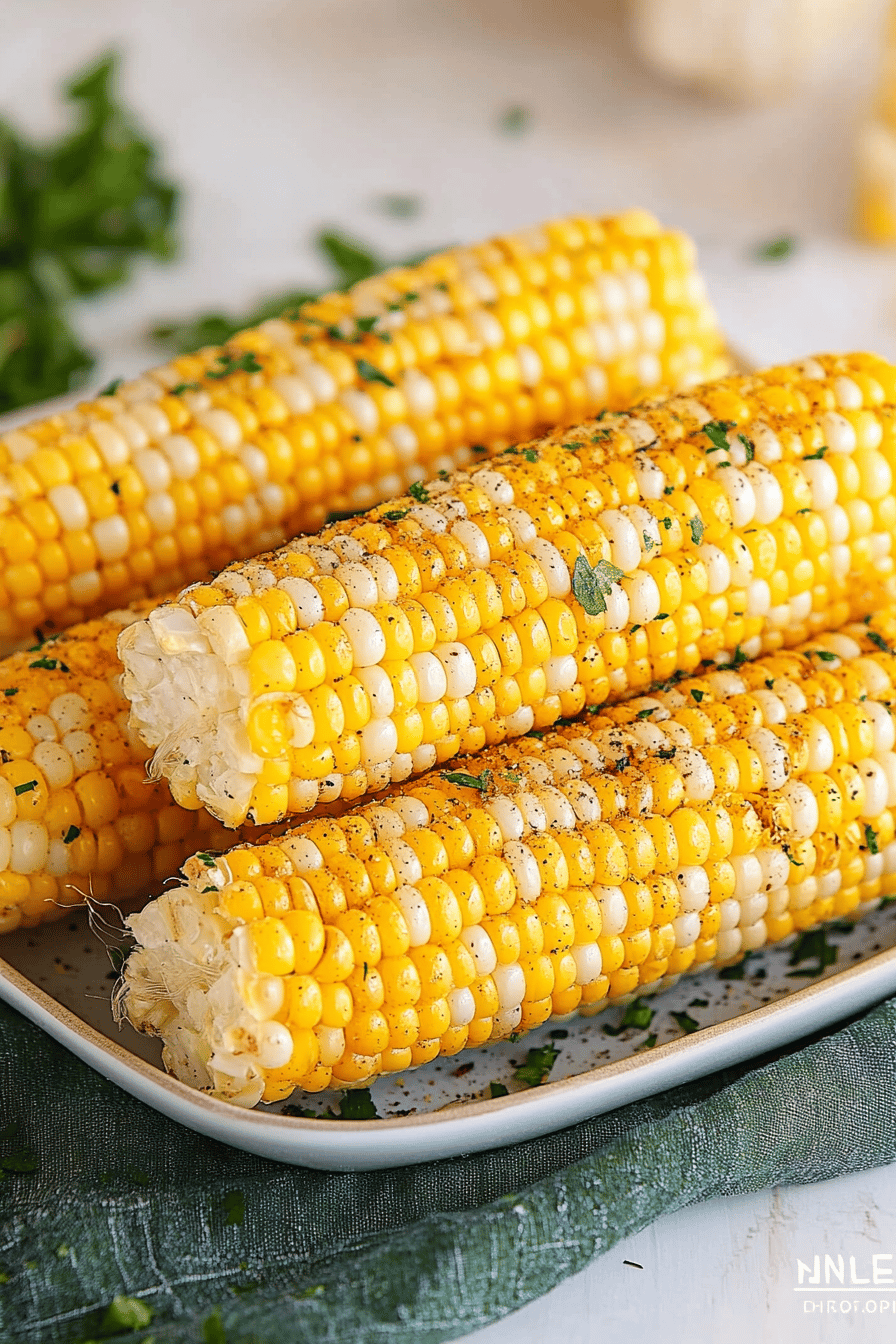
So, what exactly is this grilled corn we’re talking about? Think of it as the superstar of summer barbecues and backyard cookouts. It’s essentially fresh corn on the cob, husked or unhusked depending on your preference, that’s been cooked directly on a grill. The heat from the grill does wonders, transforming the kernels into sweet, tender bites with this amazing smoky char. We’re not talking about just plain grilled corn here, though. This version is elevated with a simple, yet incredibly flavorful, butter-herb mixture that melts into every crevice. It’s a dish that’s universally loved, from picky eaters to seasoned foodies, because it’s so simple yet so incredibly delicious. It’s the kind of food that makes you close your eyes and just savor the moment. It’s the essence of summer, captured on a cob.
Why you’ll love this recipe?
There are so many reasons why this grilled corn recipe has earned its permanent spot in my recipe binder, and I just know you’ll feel the same way. First off, the flavor is absolutely phenomenal. That smoky char from the grill, combined with the sweet corn and the savory, herby butter? It’s a taste explosion! It’s perfectly balanced – not too sweet, not too salty, just pure corn goodness with an extra layer of complexity. Secondly, the simplicity of this recipe is a lifesaver, especially on those busy summer weeknights when you don’t want to spend ages in the kitchen. You can prep the butter mixture ahead of time, and then it’s just a matter of a few minutes on the grill. It’s way easier than you might think! Plus, it’s incredibly budget-friendly. Corn on the cob is usually quite affordable, especially when it’s in season, making this a fantastic way to feed a crowd without breaking the bank. What I love most, though, is its versatility. You can serve it as a side dish at a BBQ, a simple accompaniment to tacos, or even just enjoy it as a snack. It’s a crowd-pleaser that always disappears quickly. It truly shines when compared to other corn preparations because the grilling process caramelizes the natural sugars in the corn, creating a depth of flavor that boiling or steaming just can’t match. It’s a game-changer, trust me.
How do I make Grilled Corn?
Quick Overview
How do I make grilled corn? How do you prepare herb butter? If you grill corn in butter, you’ll brush it with butter and grill it until it’s tender and has those perfect crispy edges. The whole process takes minimal effort but delivers maximum flavor. What are some of the best side dishes to serve with a steak? I love that it uses minimal ingredients and cookware, making cleanup easy too.
Ingredients
For the Corn:
6 ears of fresh corn, husks on or off (I usually leave them on for protection, but you can hull them). I prefer direct char!
1/2 cup unsalted butter, softened (Using good quality butter really makes a difference here!
2 cloves garlic, minced (Or more if you’re a garlic fiend like me)
2 tablespoons fresh parsley, finely chopped (dill or chives are also great here!)
1 tablespoon fresh chives, finely chopped (Adds a nice mild oniony kick)
1/2 teaspoon salt, or to taste.
1/4 teaspoon black pepper, freshly ground.
What are the steps that
Step 1: Preheat & Prep Pan
How do I get my grill to heat up? If you’re using a gas grill, that’s usually around 400-450°F (200-230°C). If you’re using a charcoal grill, you want the coals to be glowing nicely with light dusting of charcoal. If you’re planning to grill the corn directly on the grates without husks, make sure your Grates are oiled properly. Clean and well-oiled to prevent sticking. I usually give them a good scrub and then brush on some high heat oil like canola. What is avocado oil?
Step 2: Mix Dry Ingredients
This step is more about gathering and prepping than mixing dry ingredients in the traditional sense. How do I make herb butter? I usually do this while the grill is preheating. Is it necessary to have everything ready to go? What are the best seasonings to have measured out too, so you can grab and go?
Step 3: Mix Wet Ingredients
In a medium bowl, combine the softened butter, minced garlic, chopped chives, salt and pepper. Set aside. What are some good ways to use freshly ground black pepper? Use a fork or spatula to mix everything together. Make sure the butter is soft enough that it mixes easily without being completely melted – you want to make sure it is not too hard to melt. Is it spreadable, not liquid? If your butter is too cold, the garlic and herbs won’t distribute evenly, and if you have a very cold oven, ice cold butter will not spread evenly. When corn is too melted, it drips off the corn.
Step 4: Combine
What’s the fun part about combining everything? If you’ve left the husks on, pull them back gently without detaching them completely. Remove the silk from the corn. If you husked corn completely, you’ll just be working with the kernels. Generously slather that delicious herb butter all over the corn kernels, making sure to get it into your corn. All the nooks and crannies. If you left the husks on, you can pull them back up around the buttered kernels to help keep them from sticking together. How do you keep your grilling surfaces moist and protected? If you’ve completely husked them, you can brush on the butter directly.
Step 5: Prepare Filling
This step is already handled in step 3 where we made our amazing herb butter. This is your “filling” for the corn, so to speak. It’s where all the flavor magic happens. The beauty of this herb butter is its simplicity, but don’t underestimate its power to transform plain corn into something extraordinary. You can totally customize it too – maybe add a pinch of chili flakes for some heat, or a squeeze of lime juice for a citrusy zing. I’ve even experimented with adding a bit of grated Parmesan cheese to the butter, and it was a huge hit!
Step 6: Layer & Swirl
How do I apply herb butter evenly? If you have pulled back the husks, spread the butter directly onto the kernels. Ensure you get a good coating on all sides. If you’ve completely removed the husks, just spread it directly onto bare cob. The goal is to have that rich, flavorful butter coating every kernel, ready to melt and meld with. What happens to corn when it is cooked? It’s not really a layering or swirling process here, but more of an even application to maximize the results.
Step 7: Bake
Place the corn directly on the preheated grill grates. If you have the husks on, you can lay them down. If you remove the husks, be sure to oil the grates well to prevent sticking. If you grill corn, turn it occasionally, for about 10-15 minutes, or until the kernels are tender. If not, suck it up and serve. Have nice char marks. How long will it take for a grill to heat up depending on how hot it is and if you grilled it with husks on or off? How do I keep an eye on burnt corn? I usually rotate them every few minutes to get an even cook and char on all sides.
Step 8: Cool & Glaze
Once the corn is perfectly grilled and tender, carefully remove it from the grill. Let it rest for just a minute or two – it will be hot! If you left the husks on, you can pull them back completely now to reveal the beautifully buttered, charred corn. If you want to add a little extra something, you could brush on a tiny bit more of the herb butter while it’s still warm, but honestly, it’s usually perfect as is. The butter will have melted and seeped into all those lovely crevices.
Step 9: Slice & Serve
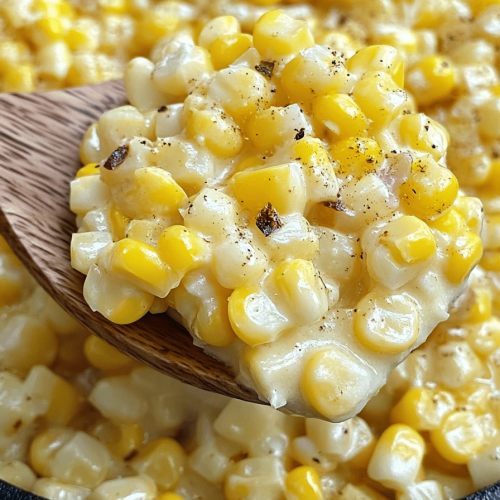
Can you serve grilled corn directly on the cob? If you prefer, you can carefully cut the kernels off the cob once it has cooled. What makes it easier to serve as a side dish or to add to salads or other dishes? I love to sprinkle fresh parsley or chives on top just before serving for a pop of color. Color and freshness. How do I make it look as good as it tastes?
What should I serve it with?
This grilled corn is so incredibly versatile, it practically goes with everything! For a lovely breakfast or brunch, I love to serve it alongside some scrambled eggs and crispy bacon. The sweet, smoky corn is a delightful contrast to the savory breakfast staples. For a more substantial brunch, it pairs beautifully with Pulled Pork or a light chicken salad. As a dessert, while not a traditional dessert, I’ve found that a smaller portion, perhaps with a sprinkle of chili powder and a squeeze of lime, can be a surprisingly satisfying sweet and savory end to a meal, especially if you’re craving something a little different. For those cozy snack occasions, it’s perfect on its own, maybe with a cool glass of iced tea or lemonade. My family tradition is to serve it with burgers and hot dogs at every summer cookout, but it’s also fantastic with grilled steak, fish, or even just a big green salad. It really adds that touch of summer sunshine to any meal, and everyone always asks for seconds.
Top Tips for Perfecting Your Grilled Corn
Over the years, I’ve picked up a few tricks that make this grilled corn recipe even better, and I’m happy to share them with you! For the corn itself, using the freshest possible corn is key. Look for ears with bright green husks that are tightly wrapped and have silky, brown tassels. If you can, buy it the day you plan to cook it. When it comes to the herb butter, don’t be afraid to experiment! I’ve tried adding different herbs like cilantro or basil, and they all work wonderfully. A little finely grated Parmesan cheese mixed into the butter before grilling is also divine. For mixing, the key is to ensure the butter is softened but not melted. This allows it to spread evenly without running off the cob. If you find your butter is too hard, just microwave it in 5-second bursts until it’s pliable. When it comes to grilling, don’t overcrowd the grill. Give each ear of corn enough space so the heat can circulate evenly. This helps in achieving those perfect char marks. If you’re using charcoal, wait until the flames have died down and you have hot coals. For the grill grates, oiling them well is a non-negotiable step to prevent the corn from sticking, especially if you’ve removed the husks. Trust me on this one – sticky corn is the worst! I’ve learned that baking soda paste can be a great way to clean stubborn residue off your grill grates if needed. If your corn is cooking too quickly on one side, rotate it more frequently. And a little tip for perfectly tender corn: if you’ve pulled back the husks, you can even wrap the corn in foil *after* buttering and grilling it for a few minutes, then open the foil for the last few minutes to get the char. It’s an extra step, but it guarantees tenderness.
What are some Storing and Reheating Tips?
One of the best things about this grilled corn is how well it holds up. If you have any leftovers (which is rare in my house!), you can store them at room temperature for up to 2 hours, but after that, it’s best to get them into the refrigerator. For refrigerator storage, I usually place the cooled corn in an airtight container or wrap it tightly in aluminum foil. It should stay fresh and delicious in the fridge for about 3-4 days. The herb butter helps preserve its moisture, so it doesn’t dry out too quickly. I haven’t really tried freezing it because it’s best enjoyed fresh off the grill, but if you absolutely had to, I’d recommend cutting the kernels off the cob, tossing them with a little extra butter, and then freezing them in freezer bags. To reheat, the best method is to pop it back on the grill for a few minutes, just to warm it through and bring back some of that char. Alternatively, you can warm it in a skillet over medium heat with a little extra butter, or even microwave it for about 30-60 seconds, though this won’t give you that nice grilled texture. I usually find that adding the glaze (if you were to use one, though this recipe doesn’t call for a separate glaze) before refrigerating can sometimes make it a bit soggy upon reheating, so I tend to wait until serving.
What are some frequently asked questions?
Final Thoughts
There you have it – my absolute favorite way to enjoy grilled corn! It’s simple, incredibly flavorful, and just screams summer. I really hope you give this a try. It’s one of those recipes that’s so satisfying to make and even more satisfying to eat. It’s a perfect side for pretty much any summer meal, and it’s so easy that you’ll be making it all season long. If you love this, you might also enjoy my recipes for [link to another corn or summer vegetable recipe] or my famous [link to another grill recipe]. They capture that same summery, fresh-from-the-garden vibe. I can’t wait to hear how yours turns out! Please leave a comment below and let me know your favorite way to jazz up grilled corn, or share your own family traditions. Happy grilling!
Grilled Corn
Ingredients
Main Ingredients
- 4 ears Corn on the cob Shucked
- 2 tablespoons Olive oil
- 0.5 teaspoons Salt
- 0.25 teaspoons Black pepper
Instructions
Preparation Steps
- Preheat your grill to medium-high heat.
- Brush the corn on the cob with olive oil and season with salt and pepper.4 ears Corn on the cob
- Place the corn on the preheated grill. Grill for about 10-15 minutes, turning occasionally, until tender and lightly charred.
- Remove from grill and serve hot.