There’s something unmistakably comforting about the taste of peanut butter and cookies rolled into one luscious bite. I still remember the first time I whipped up this Peanut Butter Cookie Dip for a casual weekend get-together. The scent of warm peanut butter, brown sugar, and vanilla swirling together filled the room instantly, and within minutes everyone was digging in, spoons (and fingers) flying. It reminded me a bit of that irresistible childhood favorite—peanut butter cookies—only without all the fuss of baking. If you love that classic, nostalgic cookie flavor but want something quicker and a little different, this dip is absolutely where you want to be. It’s creamy, sweet, and just a tiny bit salty—all the good stuff packed into an easy-to-share bowl. Plus, small digressions into the dip meant my kids couldn’t get enough; they’ve been asking for it on repeat ever since.
What is peanut butter cookie dip?
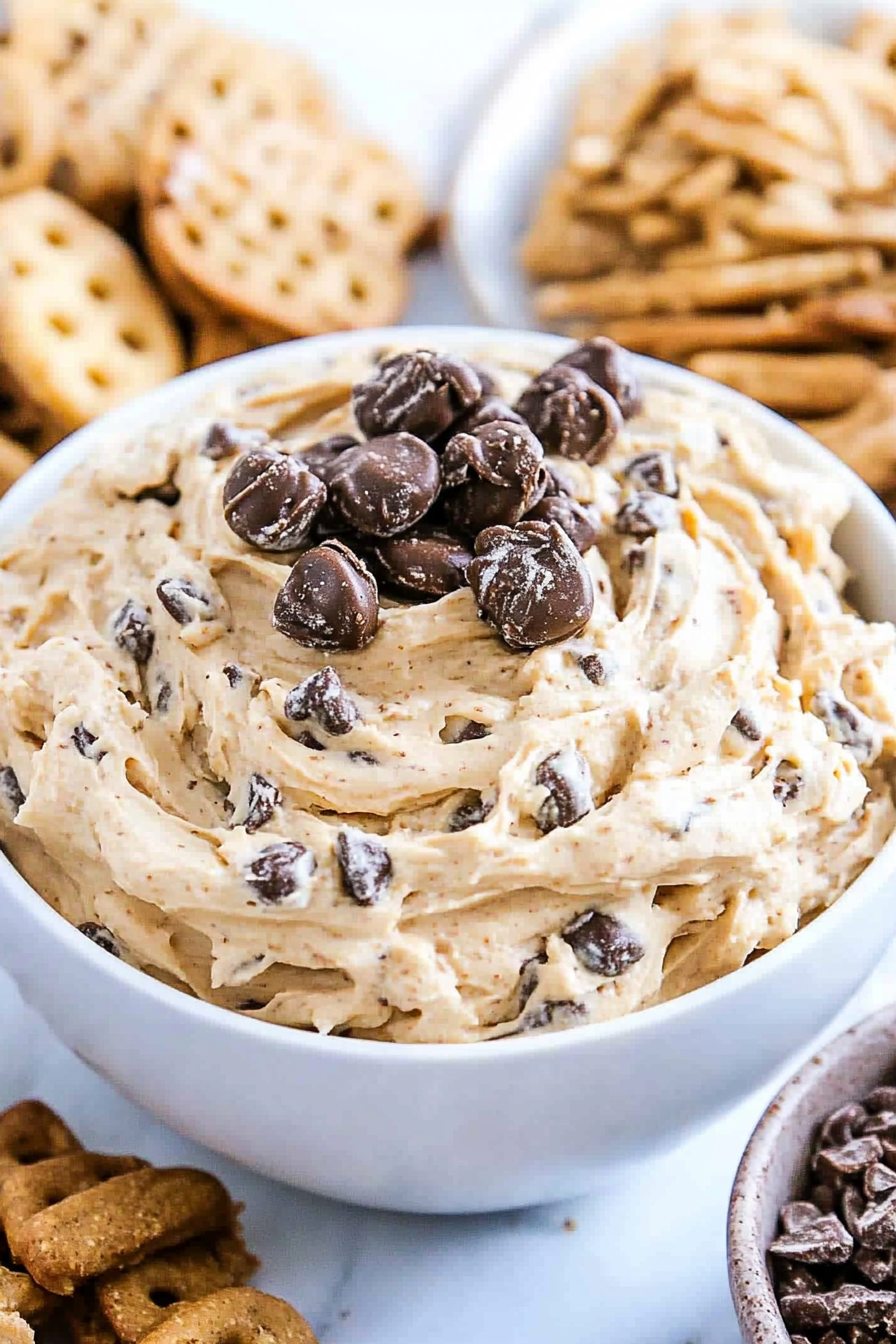
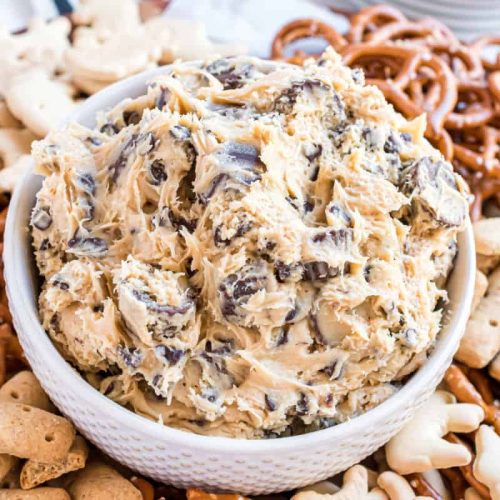
Think of Peanut Butter Cookie Dip as the cookie dough of peanut butter cookies, but in a creamy, scoopable form. It’s essentially a blend of peanut butter, cream cheese, and a few sweet ingredients, whipped up to a silky, crave-worthy consistency that’s begging to be dunked into with graham crackers, apple slices, or even a sturdy pretzel rod. The name comes from its flavor profile—it tastes just like the cookie you loved growing up, but with a soft, spreadable texture instead of the traditional crisp bite. It’s approachable for anyone who’s a little kitchen-shy but still wants to dangle their toes in homemade treats. No rolling or baking necessary, so it’s just about mixing and enjoying, making it perfect for last-minute entertaining or snacks that feel indulgent without any stress.
Why you’ll love this recipe?
It’s hard to describe just how much joy I get from this Peanut Butter Cookie Dip. First off, the flavor—oh, the flavor! It’s the perfect marriage of peanut butter’s creamy richness with a gentle sweetness that’s balanced by hints of vanilla and a touch of salt. Every spoonful tastes like a mini celebration of your favorite dessert but in a way that’s soft and dreamy. Now, what truly gets me is how ridiculously simple it is to make: five minutes, a mixing bowl, and a couple of basic ingredients. I honestly never believed something that easy could be that delicious. On busy nights when I’m scrambling to get dinner on the table, I just toss this together and it’s ready before the pans are washed.
It’s also a big win for the wallet. No pricey ingredients here—just a jar of good peanut butter, some cream cheese, powdered sugar, and a few pantry staples. Versatility really seals the deal for me: I love serving it up with fruit, crackers, or even straight off the spoon (don’t judge me!). Sometimes I even swirl in a bit of chocolate hazelnut spread for a fun twist. If you’re into dips, you might also want to check out my recipe for Salted Caramel Pretzel Dip—it’s a nice companion to this peanut butter goodness. What I love most about this dip is how it manages to feel both nostalgic and fresh, a unique spot on the dessert playground where everyone wants a turn.
How do you make peanut butter cookie dip?
Quick Overview
Mixing up this Peanut Butter Cookie Dip is about as straightforward as it gets. You’ll start with a base of creamy peanut butter and cream cheese, then add in powdered sugar and vanilla to hit that sweet spot. Whipping it until smooth is key—it’s the magic move that turns a handful of ingredients into something truly decadent. No baking, no chilling (unless you want it extra firm), just easy assembly. It’s perfect when you want something sweet at 10pm but don’t want to start a whole cake or cookies. The whole thing comes together like a breeze, and the texture will have you going back for more even before your favorite dippers appear.
Ingredients
For the Main Batter:
- 1 cup creamy peanut butter – I always opt for natural or no-stir varieties to keep it smooth and rich.
- 8 oz cream cheese, softened – Room temperature is key here to avoid lumps, and full-fat does the trick for richness.
- 1 cup powdered sugar – Sifted to keep the texture silky.
- 1 teaspoon vanilla extract – Fresh vanilla makes a huge difference, so don’t skimp!
- Pinch of sea salt – Elevates the flavors beautifully.
For the Filling:
- If you want to jazz it up, stir in 1/4 cup mini chocolate chips or finely chopped peanuts for some crunch.
- Optional: A swirl of chocolate hazelnut spread or honey can turn it into something special.
For the Glaze:
- 2 tablespoons melted butter – Adds a glossy touch.
- 1/4 cup powdered sugar – For balanced sweetness.
- 1 tablespoon milk or cream – Adjust to get a pourable glaze consistency.
- A dash of vanilla or a sprinkle of cinnamon can add a fun twist.
Step-by-Step Instructions
Step 1: Preheat & Prep Pan
This dip is no-bake, so no oven prepping here. But if you’re planning to chill it later for a firmer texture, line a small serving bowl with parchment – it helps with easy cleanup and presentation. If you’re serving it immediately, just have your dipping vessels ready: think sturdy pretzels or crisp apple wedges.
Step 2: Mix Dry Ingredients
Since powdered sugar is the main dry component, it’s super important to sift it first. This keeps everything luxuriously smooth and prevents any grainy moments. I learned this the hard way after tastings with clumpy sugar turned off my guests for a bit!
Step 3: Mix Wet Ingredients
In a large bowl, beat the cream cheese until it’s soft and creamy. Then add your peanut butter and vanilla extract. I usually do this by hand with a sturdy spoon or with a mixer on low speed—it helps keep the texture from getting too airy or runny. The cream cheese and peanut butter should form a velvety base before the sugar goes in.
Step 4: Combine
Slowly add the sifted powdered sugar into the wet mixture, folding gently to avoid overmixing. The texture should turn from thick to a luscious cream that holds its shape but is easy to scoop. If it feels too stiff, a splash of milk tames it back to dip-ability.
Step 5: Prepare Filling
If you’re adding mini chocolate chips or nuts, now’s the time. Folding them in gently keeps the dip soft but introduces delightful little surprises with every bite. I usually reserve a tablespoon of chocolate chips to sprinkle on top for a pretty finish.
Step 6: Layer & Swirl
If you love a bit of visual flair, spoon half of your dip into the bowl, add swirls of chocolate hazelnut spread or honey, then top with the rest of the dip. Use a knife or skewer to gently swirl so you get that pretty marbled effect. It’s simple but makes the dip look gourmet, trust me on this one.
Step 7: Bake
No baking here! Just pop it straight into the fridge if you want it chilled, or serve it fresh at room temperature. My family prefers it cool, especially on warmer days.
Step 8: Cool & Glaze
For a little extra something, drizzle the glaze over the top just before serving. Mix the melted butter, powdered sugar, milk, and vanilla until smooth. Pour it slowly for a delicate gloss without letting it pool too thickly. If chilling, wait until the dip is cold before glazing for a nice firm finish.
Step 9: Slice & Serve
This one’s all about dipping, but if you’re feeling fancy, scoop it onto little portioned plates alongside fruit or crackers. Serve with a big smile and plenty of napkins – it’s really finger-licking good.
What to Serve It With
For Breakfast: Oh, this dip pairs surprisingly well with your morning routine. A dollop on toasted English muffins or spread on warm bagels with sliced bananas is a game-changer. And yes, coffee is an absolute must here—hot, strong, and slightly bitter to cut through the peanut butter richness.
For Brunch: Bring it out with an assortment of fresh fruit like apple slices, strawberries, and pear wedges. Add some crunchy biscotti or graham crackers, and you’ve got a spread that feels elegant but very easygoing. I like pairing it with sparkling lemonade or a light herbal tea to balance the sweetness.
As Dessert: Spoil yourself by serving this dip with chocolate-covered pretzels, shortbread cookies, or even alongside a scoop of vanilla ice cream. It’s an effortless way to end a meal on a note that reminds everyone of childhood but tastes downright grown-up.
For Cozy Snacks: When the evening slows down and you want something warm and comforting, this Peanut Butter Cookie Dip is a lifesaver. Grab a bag of kettle-cooked chips or some cinnamon pita chips, and you’re set. I often warm it just slightly in the microwave for a few seconds—it softens it up and makes the whole kitchen smell divine.
One family tradition we started involves squeezing apple slices into the dip during Sunday movie nights—it’s become our ritual favorite combo. Trust me, it becomes addictive fast!
Top Tips for Perfecting Your Peanut Butter Cookie Dip
Peanut Butter Selection: Always choose a creamy, natural peanut butter without too many additives. The flavor and texture make or break the dip, and I’ve found that the oilier the peanut butter, the creamier the dip turns out.
Mixing Advice: Be gentle but thorough when combining the cream cheese and peanut butter. Overmixing can incorporate too much air, making the dip fluffy rather than smooth and dense. I gently fold in the powdered sugar, watching for a silky, thick consistency.
Swirl Customization: Don’t be shy about adding a swirl of hazelnut spread or a drizzle of honey. Using a knife to create tight swirls gives the dip a lovely marble design, but going slow is key—you want pretty patterns, not a mess!
Ingredient Swaps: If dairy’s a no-go, I’ve tried substituting cream cheese for vegan-friendly versions or mascarpone, with a bit of almond milk to thin. It changes the texture slightly but keeps the rich flavor. Also, if you prefer a less sweet treat, reduce powdered sugar by 1/4 cup and add a splash of maple syrup for natural sweetness.
Serving Temperature: This dip tastes great chilled but also room temp. I’ve learned that chilling it for at least an hour helps flavors meld, but if you’re in a rush, it’s still delicious right after mixing.
Glaze Variations: Tried cinnamon-sugar dusting as a glaze alternative, and it adds a warm twist. Lemon glaze is surprising but lovely, cutting the richness in a refreshing way. Just tweak sweetness levels if you pick those flavors!
One time I messed up by not softening the cream cheese enough, and the dip ended up lumpy. Lesson learned: patience with softening is everything. Also, I’ve found that letting the dip sit for at least 30 minutes before serving lets the flavors settle and tastes even better.
Storing and Reheating Tips
Room Temperature: You can keep this dip out for a couple of hours if it’s a room temperature meal or party spread. Just cover it with plastic wrap or a loose lid to prevent drying out. I usually advise no more than 4 hours to keep it fresh and creamy.
Refrigerator Storage: Store leftovers in an airtight container in the fridge for up to 5 days. The dip firms up beautifully, and you might need to stir it gently before serving again. I find that letting it come to room temperature for 15 minutes before serving brings back that smooth peek flavor.
Freezer Instructions: Freezing works if you want to prep in advance! Spoon into a freezer-safe container and cover tightly with plastic wrap before closing the lid. Freeze for up to 2 months. Thaw overnight in the fridge and give it a good stir before serving—it won’t be exactly the same, but still plenty delicious.
Glaze Timing Advice: If you’re storing the dip for later, I recommend glazing it right before serving to keep the glaze texture fresh and prevent it from becoming sticky or hard in the fridge.
Frequently Asked Questions
Final Thoughts
There’s something truly magical about Peanut Butter Cookie Dip—how it manages to feel like a secret indulgence you can whip up in minutes, yet tastes like it took all day to make. It’s the kind of recipe that makes you smile, whether you’re sharing it with family or sneaking spoons straight from the bowl. Seeing my kids’ faces light up when they get a scoop after school is honestly one of my favorite parts of the day. If you end up loving this, don’t forget to check out some of my other easy-to-love dips and desserts that make life’s busy moments feel a little sweeter. I can’t wait to hear what unique spins you bring to this recipe. Happy dipping and even happier sharing!
Peanut Butter Cookie Dip
Ingredients
Main Ingredients
- 0.5 cup unsalted butter
- 0.5 cup light brown sugar packed
- 0.25 cup creamy peanut butter
- 8 oz cream cheese softened
- 0.75 cup powdered sugar
- 0.5 cup mini semi-sweet chocolate chips
- 8 oz Reese's peanut butter cup Minis or about 1.5 cups chopped Reese's cups
Instructions
Preparation Steps
- In a small saucepan over medium heat, melt butter and whisk in brown sugar and peanut butter. Heat until sugar dissolves (about one minute). Remove from heat immediately and allow to cool to room temperature (very important).
- In a large mixing bowl, beat cream cheese with powdered sugar until creamy (about 3-4 minutes). On low speed, add in the cooled brown sugar mixture and mix until combined.
- Fold in mini chocolate chips and mini Reese's peanut butter cups. Serve immediately or store in the refrigerator until ready to serve. Enjoy with pretzels, animal crackers, or graham crackers.