You know those mornings? The ones where you wake up with a serious craving for something sweet, something comforting, something that just screams “weekend”? My go-to, especially when I want to feel like I’ve pulled off a culinary magic trick without actually spending hours in the kitchen, is French toast roll-ups. Honestly, these little beauties are so much fun to make and even more fun to eat. They’re like the sophisticated, rolled-up cousin of classic French toast, but with a delightful surprise tucked inside. I first stumbled upon the idea years ago when I was trying to find a way to use up some slightly stale bread and came across a mention of “rolled” French toast. My mind immediately went to *how* to make them extra special. This version? It’s a crowd-pleaser, a kid-pleaser, and a total life-saver on those mornings when everyone’s hovering, waiting for breakfast. If you’ve ever loved the idea of cinnamon rolls but don’t have the time (or the patience for all that yeast proofing), then these French toast roll-ups are about to become your new best friend.
What is French Toast Roll-Up?
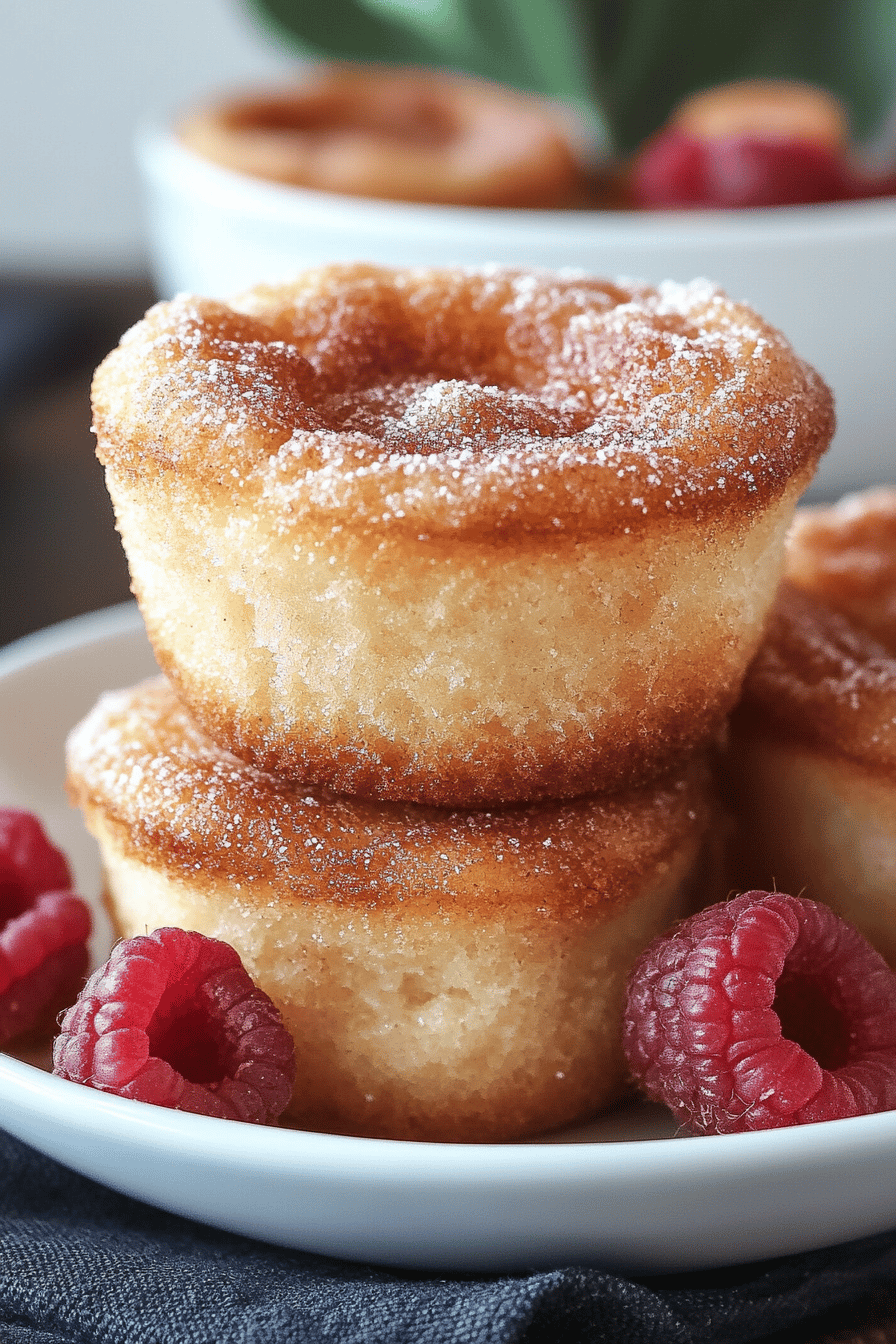
So, what exactly are these magical little treats? Think of them as the delightful love child of French toast and a jelly roll. Instead of just dipping and frying a whole slice of bread, we’re taking that bread, flattening it out a bit, and then rolling it up with a sweet, creamy filling inside. It’s essentially a perfectly portioned, individually wrapped bite of deliciousness. The bread gets that signature golden-brown, crispy-on-the-outside, soft-on-the-inside texture we all adore from French toast, but the rolled shape means you get a lovely, even distribution of that custardy batter all the way through. Plus, the way the edges get just a tiny bit caramelized? Perfection. It’s not a complicated dessert or breakfast; it’s just a smart, fun way to elevate a classic. The name itself, French toast roll-ups, perfectly captures what they are: familiar, comforting French toast, but with a playful, rolled twist.
Why you’ll love this recipe?
Why do I love French toast roll-ups?flavor is just out of this world. You get that warm, comforting hug of cinnamon and vanilla from the batter, and then the creamy filling adds another layer of pure bliss. If you choose a fruit jam, you get a little tanginess that cuts through the sweetness beautifully. It’s balanced, it’s satisfying, and it’s frankly irresistible. Then there’s the simplicity. Seriously, this is one of those recipes that looks way more impressive than it actually is. You don’t need fancy techniques or a culinary degree. If you can spread jam and roll something up, you’re already halfway there. It’s a fantastic way to use up bread that’s a day or two old, too – no more stale bread sadness! And speaking of budget, this recipe is incredibly cost-efficient. Bread, eggs, milk, a little sugar, some cinnamon, and your favorite jam – these are pantry staples for most of us. It feels indulgent but costs pennies on the dollar compared to buying a fancy breakfast pastry. What I truly adore, though, is the versatility. You can customize the filling endlessly! Cream cheese, Nutella, peanut butter, different fruit jams, even a sprinkle of chocolate chips before you roll. And for serving? Oh, the possibilities are endless, which I’ll get into more later! Compared to making a whole batch of cinnamon rolls or a giant French toast casserole, these individual rolls are so much easier to manage, especially for smaller households or when you want a special treat without a huge commitment. It’s a recipe that genuinely brings joy to my kitchen, and I’m so excited for you to experience that same joy.
How do I make French Toast Roll-Ups?
Quick Overview
The process is surprisingly straightforward: you’ll flatten slices of bread, spread them with a delicious filling, roll them up tightly, dip them into a classic French toast batter, and then cook them until golden brown and delicious. It’s a method that ensures every bite is coated in that dreamy custard and offers a delightful textural contrast between the slightly crisp exterior and the soft, warm interior. This quick and easy approach makes it perfect for busy weekends when you want something special without the fuss.
Ingredients
For the Main Batter:
You’ll need about 10-12 slices of bread. I find that sandwich bread, like a good quality white or whole wheat, works best because it’s soft and pliable. Avoid super dense or artisanal loaves; they can be tough to roll. Make sure it’s not *too* fresh, a day-old loaf is actually ideal as it holds its shape better. You’ll also need 3 large eggs, 1/2 cup of milk (whole milk gives the creamiest results, but 2% or even almond milk works like a charm!), 1 teaspoon of granulated sugar, 1 teaspoon of ground cinnamon, and 1/2 teaspoon of vanilla extract. A pinch of salt is crucial to balance the sweetness. This simple batter is the heart of that classic French toast flavor.
For the Filling:
This is where you can really let your creativity shine! My absolute favorite is a good quality raspberry jam or strawberry preserves – the slight tartness is a wonderful counterpoint to the sweet bread. You’ll need about 1/4 to 1/3 cup for spreading. Another fantastic option is a swirl of Nutella, or even a mix of cream cheese and a little powdered sugar for a cheesecake-like experience. If you’re feeling adventurous, a thin layer of peanut butter or even some thinly sliced bananas can be lovely too. Just make sure whatever you choose is spreadable and won’t ooze out *too* much during cooking.
For Cooking and Serving:
You’ll need about 2-3 tablespoons of butter, or a mix of butter and a neutral oil like vegetable or canola oil, for frying. This helps prevent the butter from burning too quickly. For serving, a dusting of powdered sugar is classic, but a drizzle of maple syrup, some fresh berries, or a dollop of whipped cream takes these French toast roll-ups to a whole new level of deliciousness.
Step-by-Step Instructions
Step 1: Preheat & Prep Pan
First things first, let’s get our cooking surface ready. You’ll want to use a large non-stick skillet or a griddle. Heat it over medium heat. While the pan is heating, let’s prep the bread. Take your bread slices and, using a rolling pin or a sturdy glass bottle, gently flatten each slice. You want to get it nice and thin, almost like a rectangle, but be careful not to tear it. This makes it much easier to roll up tightly. Trim off the crusts if you prefer, though I personally don’t mind them! They add a little extra texture.
Step 2: Mix Dry Ingredients
In a shallow bowl or pie plate (something wide enough to dip the rolled bread into), whisk together your eggs, milk, granulated sugar, cinnamon, vanilla extract, and that pinch of salt. Whisk until everything is well combined and there are no streaks of egg yolk or white. You want a smooth, uniform batter. This is essentially your classic French toast dip! Make sure it’s not too thick, or it won’t coat the bread properly, and not too thin, or it will just run off. The ratio I’ve listed usually hits that sweet spot.
Step 3: Mix Wet Ingredients
This step is actually combined with Step 2! You’re whisking together the eggs, milk, sugar, cinnamon, vanilla, and salt all in the same bowl. The visual cue you’re looking for here is a homogenous, slightly frothy liquid. No separated egg whites or yolks! A good whisking ensures that every inch of your bread will get that beautiful, evenly flavored batter coating.
Step 4: Combine
This step refers to combining the wet and dry ingredients for the batter, which we’ve already done in Step 2. The key here is to whisk them together thoroughly. I always give it a good 30 seconds of vigorous whisking to make sure everything is fully incorporated. The consistency should be like a thin pancake batter. If it seems too thick after mixing, you can add another tablespoon or two of milk to thin it out slightly.
Step 5: Prepare Filling
Now for the fun part – the filling! Take your flattened bread slices and spread your chosen filling evenly over one side, leaving about a 1/2-inch border around the edges. Don’t go too heavy on the filling, or it’ll just squish out when you roll. A thin, even layer is key. For jam, a good tablespoon per slice is usually plenty. If using Nutella or cream cheese, a slightly thinner layer might be better. Smooth it out as much as you can with the back of a spoon or a small offset spatula.
Step 6: Layer & Swirl
This is the actual rolling part! Starting from one of the longer edges of the flattened bread, carefully and tightly roll up the bread with the filling inside. Try to keep it as snug as possible. The flattened bread should hold its shape. Once you have your little log, you’re going to dip it into the prepared egg mixture. Submerge each roll, letting it soak for about 10-15 seconds on each side, ensuring it’s fully coated. Don’t let it sit too long, or the bread will get too soggy and fall apart. Gently lift it out, letting any excess batter drip back into the bowl.
Step 7: Bake
Now, melt about 1-2 tablespoons of butter (or butter/oil mixture) in your preheated skillet over medium heat. Once the butter is shimmering and starting to foam, carefully place your batter-dipped bread rolls seam-side down into the pan. You might need to do this in batches to avoid overcrowding the pan, which can lower the temperature and result in less-than-crispy rolls. Cook for about 2-3 minutes per side, until they are beautifully golden brown and toasted all around. You’re looking for that lovely caramelization on all surfaces.
Step 8: Cool & Glaze
Once they’re golden and cooked through, remove the French toast roll-ups from the pan and place them on a plate lined with paper towels for just a moment to absorb any excess grease. While they’re still warm (but not piping hot!), you can dust them with powdered sugar. If you’re using a glaze, mix up your favorite (a simple mix of powdered sugar and a tiny bit of milk or lemon juice works wonders!) and drizzle it over the top. For a syrup glaze, just a warm drizzle of maple syrup is heavenly. The warmth of the roll-ups helps the glaze set slightly.
Step 9: Slice & Serve
These are best served warm, immediately after glazing. You can serve them as is, or if you like, you can slice them in half diagonally for a really pretty presentation, almost like little logs. I often serve them upright in a small dish or arranged artfully on a plate. They are fantastic on their own, but pairing them with some fresh fruit like berries, or a side of crispy bacon, makes for a complete and utterly satisfying meal. Enjoy every single bite!
What to Serve It With
The beauty of French toast roll-ups is their incredible versatility. They can truly fit into any meal or snack occasion! For a classic Breakfast, a simple dusting of powdered sugar and a good cup of coffee is all you really need to start your day off right. The coffee’s warmth and slight bitterness perfectly complement the sweet, cinnamony roll-ups. If you want to make it a bit more substantial, a side of crispy bacon or some scrambled eggs makes it a hearty morning feast. For a relaxed Brunch gathering, I love to elevate the presentation. Arrange them in a circle on a platter, perhaps with a small bowl of extra jam or a dollop of Greek yogurt in the center. Fresh berries scattered around add a beautiful pop of color and freshness. A mimosa or a sparkling cider makes for a perfect brunch beverage pairing. When I’m craving something sweet after dinner, these are my go-to Dessert. Serve them warm with a scoop of vanilla bean ice cream, a drizzle of chocolate sauce, or a warm berry compote. It feels incredibly decadent but is so much easier than baking a whole cake! And for those spontaneous Cozy Snacks, when you just need a little comfort, these are perfect. Serve them with a glass of cold milk for the kids (or for me!), or a warm mug of hot chocolate. They’re the ultimate comfort food, easy to share or hoard for yourself, depending on your mood!
Top Tips for Perfecting Your French Toast Roll-Ups
I’ve made these French toast roll-ups more times than I can count, and over the years, I’ve picked up a few little tricks that make them even better. For starters, when you’re flattening the bread, be gentle but firm. You want to compress the bread, not tear it. If you use a rolling pin, just a few good passes should do it. If you’re in a pinch, the rim of a sturdy glass works surprisingly well too. My biggest tip regarding the Mixing Advice is to not over-whisk the batter once you’ve combined the wet and dry ingredients. A few good stirs to incorporate are fine, but you don’t want to beat too much air into it, as that can make the coating too thick or airy. The texture you’re aiming for is smooth and just slightly thickened. Now, for the Swirl Customization, it’s all about moderation. Don’t overload the bread with filling; a thin, even layer is best. This prevents leakage and ensures the roll holds its shape. If you’re feeling artistic, you can even do a light swirl of two different fillings, like jam and cream cheese, for a marbled effect! When it comes to Ingredient Swaps, I’ve experimented a lot. For the milk in the batter, I’ve used everything from whole milk to almond milk to oat milk, and they all work, though whole milk will give you the richest result. If you’re out of cinnamon, nutmeg or even a touch of cardamom can be lovely additions. For the bread, while white or whole wheat sandwich bread is ideal, you *can* use brioche or challah, but be mindful they are richer and might require a slightly shorter dip time to avoid becoming too saturated. My absolute favorite Baking Tips involve controlling the heat. Medium heat is crucial. Too high, and the outside burns before the inside cooks, leaving you with raw batter in the middle. Too low, and they won’t get that beautiful golden-brown crispiness. Keep an eye on them and adjust your stove as needed. If your skillet is uneven, rotating the pan every so often can help ensure even browning. Lastly, the Glaze Variations are endless. If you don’t want a sweet glaze, a simple lemon juice and powdered sugar mix adds a lovely tang. A maple glaze is always a winner, or for something richer, try a chocolate ganache or a caramel drizzle. Remember to let the roll-ups cool just slightly before glazing; you want them warm enough to melt the glaze slightly but not so hot that it all slides off.
Storing and Reheating Tips
This is the part I get asked about a lot, especially because these French toast roll-ups are so tempting to make a double batch of! If you happen to have any leftovers (which is rare in my house!), they store pretty well. For Room Temperature storage, I wouldn’t leave them out for more than a couple of hours, as they are an egg-based dish. If you plan to eat them within a few hours and they’re completely cooled, an airtight container should suffice. However, for longer storage, the Refrigerator Storage is your best bet. Once they’ve cooled completely, place them in an airtight container or wrap them tightly in plastic wrap. They should stay fresh in the fridge for about 2-3 days. The texture might soften a bit, but they’ll still be delicious. If you want to keep them for even longer, Freezer Instructions are your friend. Let them cool completely, then wrap them individually in plastic wrap, followed by a layer of aluminum foil or place them in a freezer-safe bag. They can last in the freezer for up to 2-3 months. When you’re ready to enjoy them, the best way to reheat is often in a toaster oven or a regular oven at around 300°F (150°C) for about 5-10 minutes, or until warmed through and slightly crisped up again. Microwaving can sometimes make them a bit soft or rubbery, but it’s the quickest option if you’re in a hurry. For Glaze Timing Advice, it’s always best to apply any glazes or drizzles *after* reheating, right before serving. If you freeze them with glaze on, it can sometimes affect the texture or appearance when thawed.
Frequently Asked Questions
Final Thoughts
Honestly, I could talk about these French toast roll-ups all day! They’re such a simple yet incredibly satisfying treat that brings so much joy to my table. The combination of that familiar, comforting French toast flavor with the fun, rolled-up shape and the surprise filling makes them truly special. Whether you’re looking for a way to make your weekend mornings a little brighter, a fun project to do with the kids, or a surprisingly easy dessert that feels utterly gourmet, these roll-ups are a winner. I truly believe that food should be about connection and comfort, and this recipe embodies that perfectly. If you love the idea of these, you might also enjoy my recipes for Fluffy Blueberry Pancakes or my Easy Cinnamon Swirl Coffee Cake, as they share that same heartwarming, homemade goodness. I can’t wait for you to try these French toast roll-ups and see how much your family loves them. Please, let me know in the comments below how yours turned out, what fillings you chose, and any delicious variations you discovered! Your feedback is always the sweetest ingredient. Happy cooking!

French toast roll-ups
Ingredients
Main Ingredients
- 8 slice Texas toast bread
- 4 ounce cream cheese softened
- 8 ounce strawberries diced
- 2 large eggs
- 1 tablespoon milk
- 1 teaspoon pure vanilla extract
- 3 tablespoon salted butter
- 0.33 cup granulated cane sugar
- 0.5 teaspoon ground cinnamon
- optional powdered sugar
Instructions
Preparation Steps
- Roll each slice of bread with a rolling pin and trim off the crust with a knife.
- Spread 0.5 tablespoon cream cheese on each slice of prepared bread.
- Add 1 rounded teaspoon diced strawberries on top of the cream cheese, taking care not to overfill.
- Gently roll the bread up.
- Whisk eggs, milk, and vanilla together in a bowl and set aside.
- Combine sugar and cinnamon in a separate bowl and set aside.
- Dredge prepared bread rolls through the egg mixture, taking care not to saturate the bread.
- Melt butter over medium heat in a pan.
- Add rolls to the pan, seam side down, and cook until golden brown, about 2 minutes per side, turning with tongs.
- Once fully cooked, roll the French toast rolls through the sugar and cinnamon mixture until well coated.
- Serve hot with an optional dusting of powdered sugar.