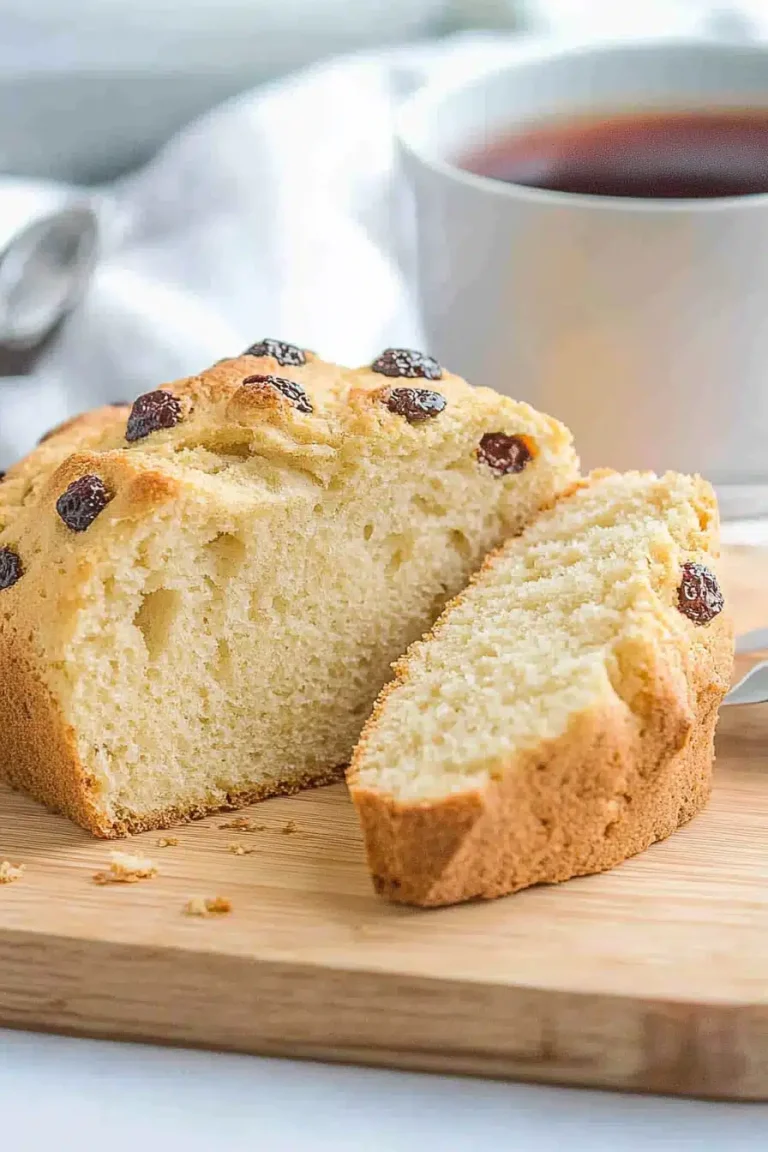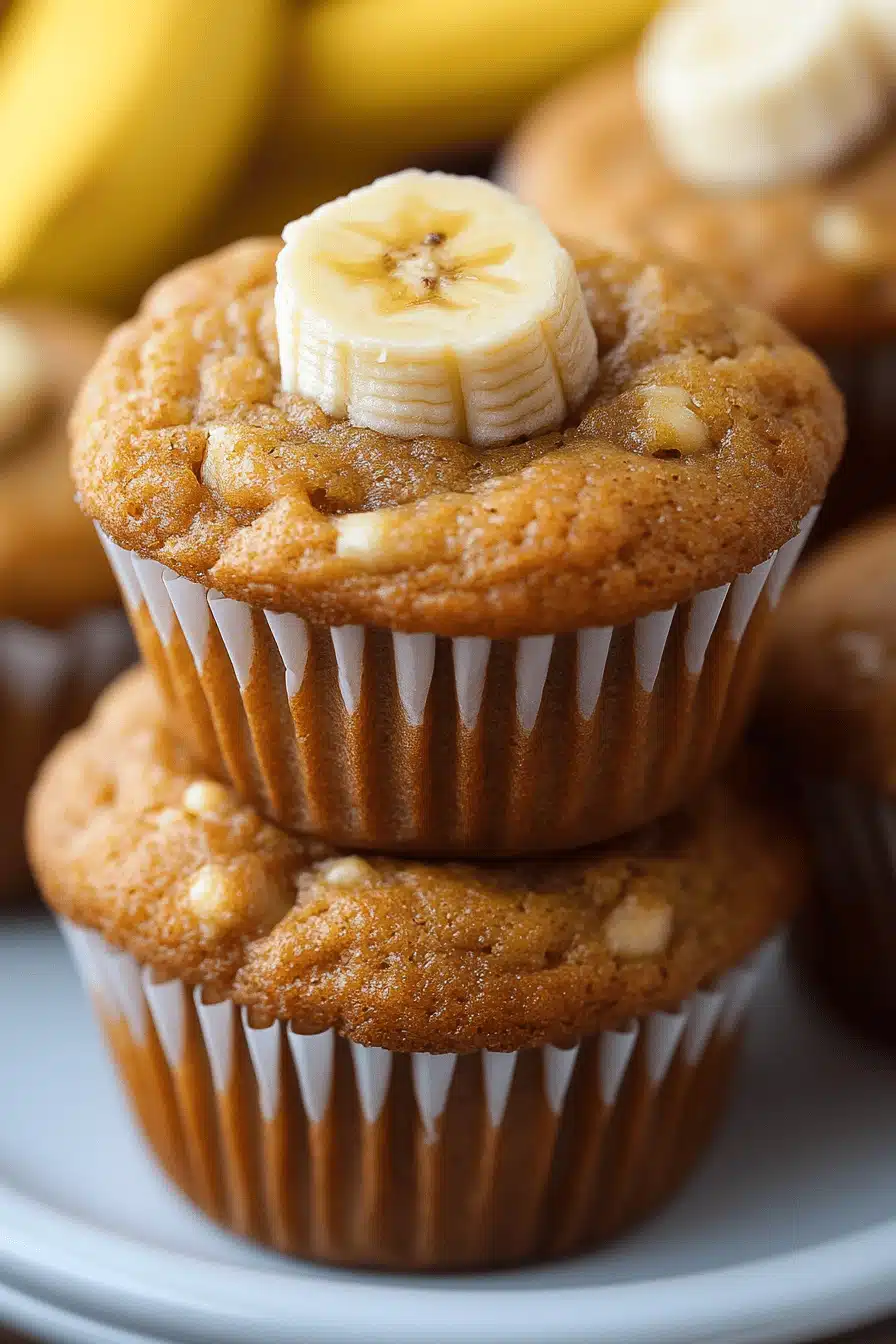
Some mornings, nothing hits the spot like the cozy, sweet smell of banana muffins baking—warm, tender, and just a little bit gooey in the middle. I still remember the first time I made these, way back when ripe bananas were piled high on my counter and I didn’t want to waste them. A few floury spills later, I had a batch of muffins that disappeared faster than I could say “breakfast!” These banana muffins have become such a staple in our home that my kids always ask for “the ones with the swirls” and it’s rare to find any leftovers beyond the day they’re made. Compared to banana bread, these muffins are quicker, perfectly portioned, and just as comforting — a true lifesaver on rushed school mornings or lazy weekend brunches.
What is banana muffin?
Think of banana muffins as the smaller, more snack-friendly cousin of banana bread. It’s essentially a sweet bread big enough to hold in your hands, packed with mashed ripe bananas that ensure they’re bursting with flavor and moisture. The muffin format makes them super versatile—easy to grab on the go or enjoy warm right out of the oven with a pat of butter. Their name simply comes from the star ingredient, bananas, which bring natural sweetness and a tender crumb to the party. And if you’ve ever been intimidated by baking, these muffins are a great intro since they’re incredibly forgiving and come together quickly. They feel like a little morning hug in baked form.
Why you’ll love this recipe?
What I love most about this banana muffins recipe is how genuinely flavorful and moist they turn out every single time. The bananas aren’t just an ingredient—they’re the heart and soul, giving the muffins a sweet, fruity punch without needing tons of sugar. Speaking of sugar, this recipe hits the perfect balance—just enough sweetness to make you close your eyes and smile, but not so much that it feels like a sugar bomb.
On top of that, this recipe couldn’t be simpler. Honestly, I keep these ingredients on hand all the time, and when I want a quick-yet-satisfying treat, I whip them up without breaking a sweat. You don’t have to run to the store for anything fancy, which keeps the cost down—a definite plus for those who like baking, but hate complicated shopping lists.
Versatility is another big reason why I keep coming back to these banana muffins. I often toss in chocolate chips or swirl in a bit of peanut butter, depending on what the kids are craving, and it’s always a hit. They’re equally fantastic toasted with butter for breakfast, or as an afternoon snack with a mug of chai. If you’re ever in the mood for banana bread but want something a bit more portable and snack-sized, these muffins fit that bill perfectly.
How do you make banana muffins?
Quick Overview
These banana muffins come together in a snap—from mixing up mashed bananas with basic pantry ingredients to baking them just long enough for a golden top and tender center. What’s great is that you don’t need any special equipment or baking skills. Just mix, swirl, and pop in the oven. The method is as forgiving as it is fast — no fancy folding or exact measurements that’ll stress you out. And those warm, fruity smells that fill the kitchen? Pure magic.
Ingredients
For the Main Batter:
- 3 ripe bananas (the riper, the better—brown spots mean natural sweetness!)
- 1/3 cup melted butter (unsalted, for control over saltiness)
- 3/4 cup granulated sugar (adjust to taste or try brown sugar for a richer flavor)
- 1 large egg (room temperature for better mixing)
- 1 teaspoon vanilla extract (always adds that classic warmth)
- 1 teaspoon baking soda (helps with rise and fluffiness)
- Pinch of salt (balances the sweetness)
- 1 1/2 cups all-purpose flour (for the light, tender crumb)
For the Filling:
- 1/2 cup cream cheese, softened (optional, for a tangy swirl)
- 2 tablespoons sugar (to lightly sweeten the cream cheese)
- 1 teaspoon lemon zest (brightens the cream cheese flavor)
For the Glaze:
- 1/2 cup powdered sugar
- 2-3 teaspoons milk or fresh lemon juice (adjust for desired drizzle consistency)
- Vanilla extract or a pinch of cinnamon (optional flavor twists)
Step-by-Step Instructions
Step 1: Preheat & Prep Pan
Start by preheating your oven to 350°F (175°C). I usually line a muffin tin with paper liners, but if you’re like me and hate the peeling off part, just grease the cups thoroughly with butter or oil. It’s a tiny step, but it makes a big difference in keeping the muffins from sticking and keeps cleanup easy.
Step 2: Mix Dry Ingredients
In a medium bowl, whisk together the flour, baking soda, and salt. This is a simple step but really important for even rising. I like to sift them just quickly to avoid any lumps and make the muffins super tender, but it’s not required.
Step 3: Mix Wet Ingredients
In a larger bowl, mash those bananas well until mostly smooth. Add melted butter and stir immediately so the bananas don’t oxidize too much. Then, beat in the sugar, egg, and vanilla extract until you get a golden, glossy mixture. It should smell like sweet bananas and vanilla hugging each other.
Step 4: Combine
Now fold the dry mixture into the wet, gently but thoroughly. This is one of those “less is more” moments — when you overmix, the muffins turn dense and tough, so stop as soon as no flour streaks remain. Trust me, your muffins will be moist and fluffy if you don’t push this too much.
Step 5: Prepare Filling
If you’re going for the cream cheese swirl (which I highly recommend!), mix the softened cream cheese with sugar and lemon zest until smooth and creamy. The tang contrasts the sweetness beautifully and makes these muffins feel a bit more special.
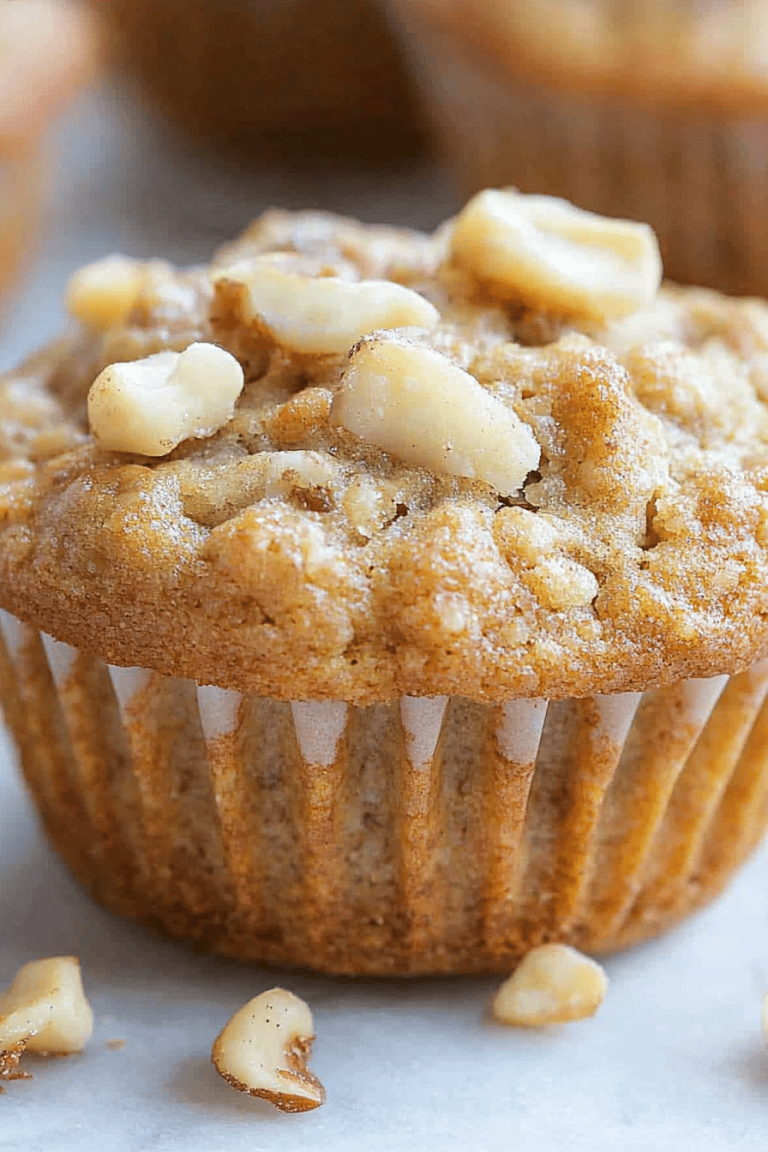
Step 6: Layer & Swirl
Spoon half the banana batter into each muffin cup, then add a dollop of cream cheese mixture, and top with the remaining batter. Use a skewer or a small knife to gently swirl and marble the two together. This gives each muffin a gorgeous, rustic look and a little flavor surprise in every bite.
Step 7: Bake
Bake the muffins for about 18-22 minutes. Ovens vary, so start checking at 18 minutes by inserting a toothpick in the center—it should come out with a few moist crumbs but not raw batter. The muffins will be golden on top and smell like a little slice of morning heaven.
Step 8: Cool & Glaze
Allow the muffins to cool in the pan for 5 minutes before transferring to a wire rack—that way they firm up nicely while staying soft inside. Once cool but still slightly warm, drizzle the powdered sugar glaze over the tops. The quick glaze adds a hint of sweetness and a slightly crisp finish. It’s worth the extra minute!
Step 9: Slice & Serve
These muffins are best served warm, right out of the oven or toasted lightly later on. Use a serrated knife to slice neatly if you want to share or cut them in halves for lunchboxes. I like to pair mine with a steaming cup of coffee or even a splash of cold milk—total comfort food vibes.
What to Serve It With
For Breakfast: Nothing beats eating these banana muffins alongside a fresh brewed cup of coffee or your favorite latte. The rich banana flavor pairs beautifully with nutty espresso notes. Add some sliced fresh fruit or yogurt to round out a quick and happy morning meal.
For Brunch: If you’re hosting a cozy brunch, plate these muffins on a pretty platter with some whipped ricotta and fresh berries on the side. A sparkling mimosa or a chilled herbal tea really lifts the experience without overpowering the gentle banana flavors.
As Dessert: These muffins can easily double as a simple dessert—especially when warmed and topped with a scoop of vanilla ice cream or drizzled with caramel sauce. Kids love this twist, and adults often sneak seconds when they think no one’s watching.
For Cozy Snacks: When I’m craving a little something sweet in the afternoon with no fuss, these banana muffins are my go-to. Wrapped in parchment or in a lunch tote with a handful of nuts, they’re like a tiny celebration anytime. Honestly, the smell alone brings everyone into the kitchen.
Our family has this little tradition of enjoying banana muffins while sharing weekend plans or reading books aloud. They’re as much about the moments as the food — a warm reminder that simple ingredients can bring so much joy.
Top Tips for Perfecting Your Banana Muffins
Banana Prep: The riper, the better. Those brown-spotted bananas bring the richest sweetness and moisture, and mashing them well prevents clumpy spots. I learned the hard way that underripe bananas make the muffins dry and dull, so wait it out!
Mixing Advice: Fold from the edges to center gently, and stop mixing as soon as the flour disappears. The batter should be lumpy—the lumps turn into delightful little pockets of banana texture once baked. Overmixing? It’ll rob you of that tender crumb you’re looking for.
Swirl Customization: For the cream cheese swirl, don’t overdo it or the filling will sink. I prefer a pretty wave of filling in the middle, just enough to taste the tang in every bite without overwhelming the banana flavor. You can also experiment with swirls of peanut butter or Nutella if that’s your jam!
Ingredient Swaps: I’ve tried swapping half the all-purpose flour with whole wheat or oat flour for a nuttier flavor and heartier texture — it works well but results in a denser muffin. Also, swapping butter for coconut oil makes them a bit lighter and adds a subtle tropical hint, which was a fun twist!
Baking Tips: Oven temps vary wildly, so always check early. My first muffins were burned on the edges because I skipped this step. I bake mine in the center rack and avoid putting more than two trays in simultaneously — air circulation matters for even cooking.
Glaze Variations: Powdered sugar mixed with lemon juice is my default, but sometimes cinnamon or orange zest gets thrown in to change it up. If you want a drizzle with a bit more bite, a thin layer of honey or maple syrup brushed on warm muffins is divine too.
Storing and Reheating Tips
Room Temperature: Banana muffins hold up beautifully at room temperature when kept in an airtight container for up to 2 days. I usually store mine in a cake carrier or a tightly sealed plastic container to keep that lovely moist crumb intact.
Refrigerator Storage: If you want them to last longer, pop the muffins into a sealed container in the fridge. They’ll keep for up to 5 days, but I advise bringing them back to room temp or warming briefly to recapture their softness. The fridge sometimes dulls that fresh-baked aroma.
Freezer Instructions: For longer storage, wrap individual muffins tightly in plastic wrap, then place them in a freezer bag or container. These freeze well for up to 3 months. When ready, thaw overnight in the fridge and warm in the microwave or oven for that fresh-baked feel.
Glaze Timing Advice: If storing for later, I recommend glazing just before serving to keep the muffins from getting sticky or soggy in storage. If you glaze right after baking and then freeze, the glaze can crack or get dull, so fresh drizzle is definitely best.
Frequently Asked Questions
Final Thoughts
These banana muffins have truly earned a permanent spot in my recipe collection—they’re easy enough to whip up on a busy morning, yet special enough to serve guests without a second thought. I love that one recipe can feel so homey and versatile, working for breakfast, snacks, or even dessert. Whether you keep them simple or jazz them up with swirls, chips, or glazes, they always bring smiles around our table. I’m kind of obsessed with how they fill the kitchen with that irresistible banana scent—it’s like a little dose of happy in batter form.
If you give these a try, I’d love to hear how you customize them or any happy accidents you stumble upon. There’s something wonderful about sharing small kitchen successes — so don’t be shy, leave a comment or a rating! Happy baking and may your mornings be as sweet and cozy as a fresh batch of these banana muffins.
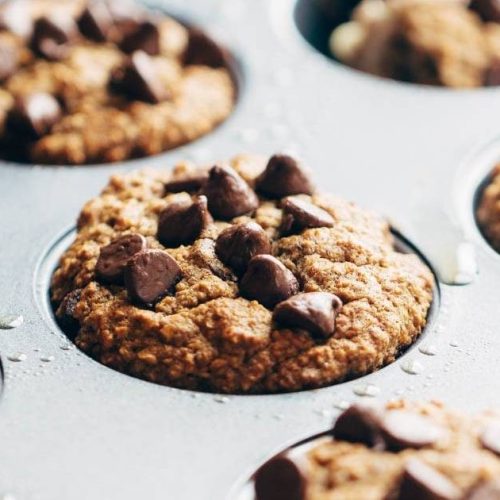
banana muffins
Ingredients
Main Ingredients
- 2 cups rolled oats
- 3 medium ripe bananas mashed
- 2 large eggs
- 0.75 cup pitted Medjool dates softened
- 1 teaspoon baking soda
- 0.25 teaspoon salt optional
- 0.5 teaspoon ground cinnamon optional
- chocolate chips optional to top muffins
Instructions
Preparation Steps
- Preheat oven to 350 degrees Fahrenheit.
- Grease or line a muffin tin with paper liners.
- In a blender or food processor, combine oats, bananas, eggs, dates, baking soda, salt, and cinnamon. Blend until smooth.
- Pour the batter evenly into the muffin tin cups. Sprinkle chocolate chips on top if desired.
- Bake for 15 to 20 minutes or until a toothpick inserted in the center comes out clean. Cool before serving.