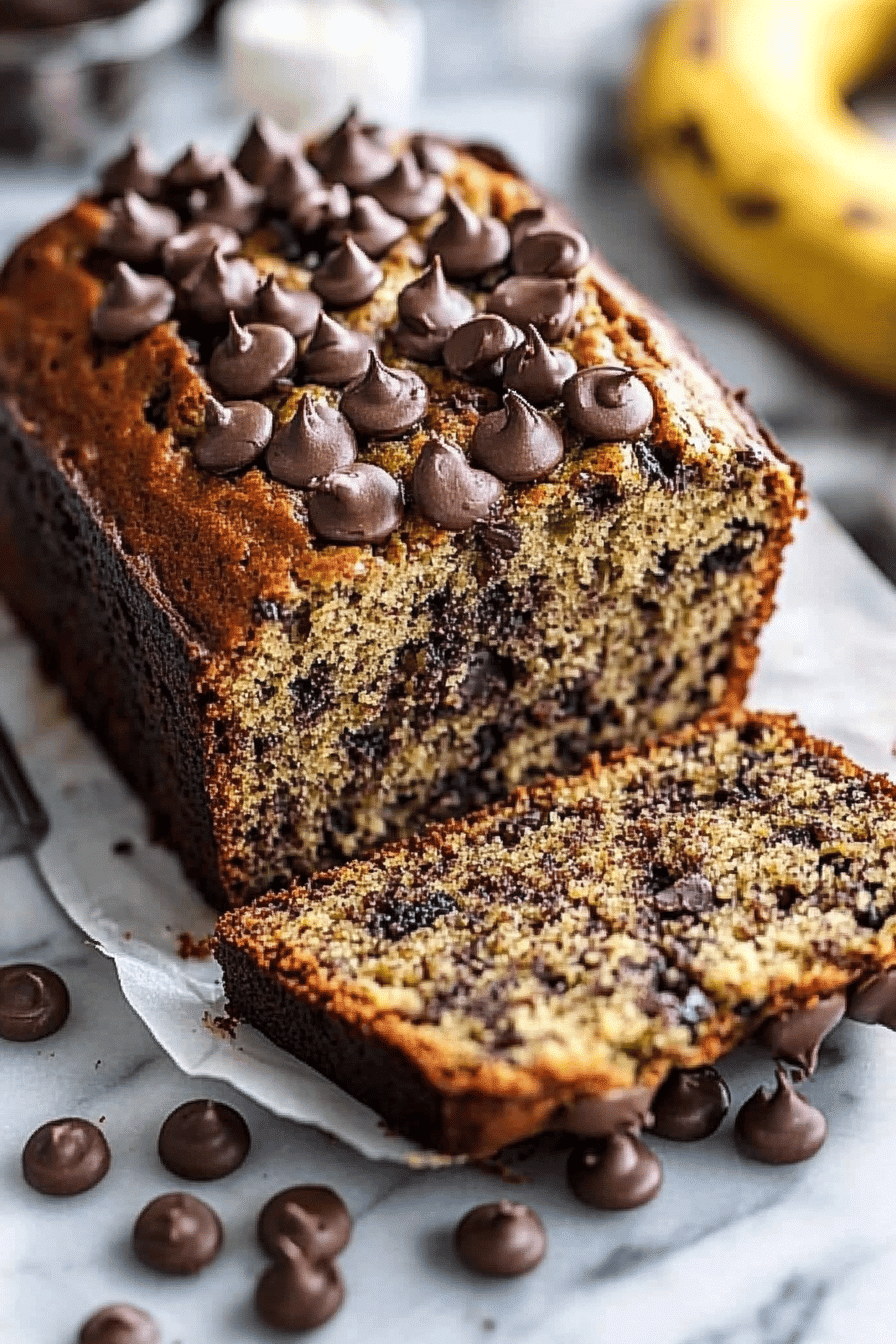
There’s something magical about the smell of ripe bananas turning into warm banana bread in the oven—that moment when the whole house starts to feel like a hug. I remember weekends growing up where my grandma would pull a golden loaf from the oven, and somehow, that simple banana bread was better than any fancy dessert. Soft and tender with just the right amount of sweetness, this banana bread became a staple in our home, especially when the kids were clamoring for something cozy after school. It’s funny how a humble loaf of banana bread can beat even the richest chocolate cake for comfort food status. And honestly, it’s not just dessert—I’ve found it’s a lifesaver for breakfast or an afternoon pick-me-up. If you’re someone who loves that perfect combo of easy, sweet, and a little nostalgic, this banana bread recipe is about to become your new best friend in the kitchen.
What is banana bread?
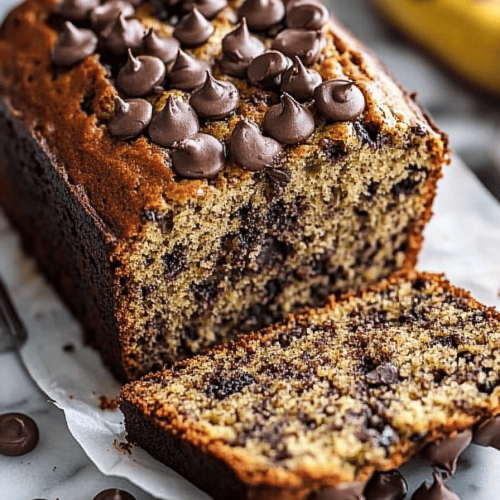
Think of banana bread as a sweet, moist loaf that makes brand new life out of those bananas getting a little too brown on your countertop. It’s essentially a simple quick bread, meaning it doesn’t require yeast or complicated rising times—just straightforward mixing, baking, and slicing. Banana bread’s origins trace back to early 20th-century America when home cooks started making use of overripe bananas in a way that transformed them into something irresistibly delicious. It’s less a cake and more a bread, but since it’s packed with sugar and has that tender crumb, it’s a little bit of both. What I love is how easy it is to personalize—whether you want to stir in nuts, chocolate chips, or a swirl of cinnamon, there’s room to make it yours. This recipe feels like Sunday mornings cozy at home, inviting everyone to dig in and enjoy a slice with a hot coffee or tea.
Why you’ll love this recipe?
What I love most about this banana bread is that it’s the kind of recipe that has never let me down, no matter the crowd or the occasion. First off, the flavor—it’s got that amazing balance of sweet bananas with a hint of vanilla and cinnamon that just makes you want to take another bite. The crust has this wonderful slight crunch from a quick sprinkle of sugar on top before baking, which adds a little extra texture contrast to the moist, tender crumb inside. And here’s the real gem: it’s absurdly simple. Just a handful of pantry staples, no special equipment, and it comes together in under ten minutes. This isn’t one of those recipes that requires a million steps or 3 hours standing over the oven—perfect when you’re short on time or just craving something sweet but don’t want to fuss.
Budget-wise, it can’t be beat. Bananas, flour, eggs, a little sugar—ingredients you probably already have kicking around. No need for pricey extras. Plus, it’s incredibly versatile. My kids adore it plain, but I sometimes add walnuts or chopped dates for a nutty twist. I’ve played around with swapping half the sugar for maple syrup, and trust me, that brings a whole new depth. This banana bread is there for you at breakfast with butter melting on top, as a quick snack with a cup of coffee, or even lightly toasted with cream cheese for a brunch spread. It reminds me a bit of my favorite zucchini bread, but the banana lends it this creamy, comforting richness that you just don’t get with other quick breads. It’s a recipe I find myself returning to again and again, especially when the house feels a little empty and I want to bring everyone back together with something sweet and homey.
How do you make banana bread?
Quick Overview
Making banana bread is honestly as soothing as it sounds—mash, mix, bake, and enjoy. The beauty of this method is you don’t have to fuss with eggs and flour separately for ages or meticulously sift everything together. Instead, you’ll mix the dry ingredients, whisk the wet, then gently fold them together so you keep the loaf tender and light. The secret? Not overmixing. Plus, I’ve added a smooth cream cheese filling that swirls right through the loaf for that extra special touch—it looks impressive but takes almost no extra effort. You’ll get that perfect golden crust with a tender inside every single time, no matter your skill level. Trust me, this one’s foolproof and the kind of recipe you’ll want to tell your friends about.
Ingredients
For the Main Batter:
- 3 ripe bananas, mashed (the browner, the better—this is your flavor powerhouse!)
- 1/3 cup melted unsalted butter (adds that richness you won’t want to skip)
- 1 teaspoon vanilla extract (this deepens the sweetness beautifully)
- 3/4 cup granulated sugar (keep it simple or swap half for brown sugar for extra warmth)
- 1 large egg, beaten at room temperature (for that perfect binding without toughness)
- 1 1/2 cups all-purpose flour (unbleached if you can find it, gives a nicer crumb)
- 1 teaspoon baking soda (makes sure your loaf rises beautifully)
- 1/2 teaspoon salt (just a pinch to balance sweetness)
- 1 teaspoon ground cinnamon (optional but highly recommended—warm and cozy vibes!)
For the Filling:
- 4 oz cream cheese, softened (trust me, this swirl adds moistness and tang that feels like a hug)
- 2 tablespoons powdered sugar (to gently sweeten the filling)
- 1/2 teaspoon vanilla extract (to keep that flavor thread running through)
For the Glaze:
- 1/2 cup powdered sugar
- 1-2 tablespoons milk or cream (adjust for that perfect drizzle consistency)
- Optional: a drop of vanilla or a squeeze of lemon juice for zing
Step-by-Step Instructions
Step 1: Preheat & Prep Pan
Start by heating your oven to 350°F (175°C). Line a 9×5 inch loaf pan with parchment paper or grease it well with butter—this prevents sticky situations later and helps create those golden edges we all love. I sometimes like to grease and dust with a little flour for extra insurance. Make sure your oven rack is in the middle, so your bread bakes evenly without getting too brown on top.
Step 2: Mix Dry Ingredients
In a medium bowl, whisk together the flour, baking soda, salt, and cinnamon until evenly combined. This step is subtle but makes a big difference, especially with the baking soda—it ensures your bread rises evenly. I seasoned to the cinnamon because it gently complements the banana without overpowering it.
Step 3: Mix Wet Ingredients
In another large bowl, mash those bananas with a fork until nice and smooth, leaving just a few small lumps for texture. Stir in the melted butter, beaten egg, vanilla extract, and sugar. If you’re someone who likes a little more sweetness or a hint of caramel, swapping half the sugar for brown sugar here is worth trying. The mixture will look glossy and mellow, and you want to mix just enough so everything is blended but still soft.
Step 4: Combine
Now, pour the dry ingredients into the wet. Stir gently with a spatula or wooden spoon, folding until just combined—no more than a dozen strokes. Overmixing will develop gluten and make that loaf tough, not the soft, buttery texture we crave. It’ll look a little lumpy, and that’s perfectly okay.
Step 5: Prepare Filling
Whip the softened cream cheese, powdered sugar, and vanilla together until silky smooth. If you find lumps, just give it a quick beat with a hand mixer or a fork to get the look right. If you want to experiment, adding a teaspoon of lemon zest or a pinch of cinnamon here brings a little extra oomph to the swirl.
Step 6: Layer & Swirl
Pour half the banana batter into your prepared pan, smooth it out gently. Dollop the cream cheese filling evenly over the batter, then pour the remaining banana bread batter on top. Use a skewer, butter knife, or chopstick to swirl the layers by making gentle figure-eights or zig-zags—don’t overdo it, just enough to mix the filling and batter in pretty veins across the top. This step feels fancy but is totally doable.
Step 7: Bake
Place in the oven for 55-65 minutes, checking around 50 minutes with a toothpick inserted in the center. It should come out mostly clean with a few moist crumbs, but no wet batter. Every oven’s a little different, so if the top seems to brown too fast, tent it lightly with foil. The smell by this point? Honestly, it’s pure comfort.
Step 8: Cool & Glaze
Once out of the oven, let your banana bread cool in the pan for about 15 minutes, then carefully transfer it to a wire rack. While still slightly warm, mix up your glaze and drizzle it over the loaf. The glaze melts into little pockets of sugary goodness and gives a nice shiny finish. If you’re storing the bread, you might want to save glazing for right before serving to keep it fresh and not sticky.
Step 9: Slice & Serve
Use a serrated knife for the cleanest slices—this bread is tender but firm enough not to crumble when cut right. Serve it warm or at room temperature. It’s delightful on its own or with a smear of butter or cream cheese. I like to serve it with a favorite cup of coffee for that perfect cozy treat that feels like a little celebration every day.
What to Serve It With
For Breakfast: Pair your banana bread with a rich latte or freshly brewed coffee. Add a side of Greek yogurt topped with honey and a handful of fresh berries, and you’ve got a breakfast that feels indulgent but still doable on a busy morning.
For Brunch: Elevate your banana bread slices by lightly toasting them and serving with a dollop of mascarpone or ricotta cheese sprinkled with toasted nuts and a drizzle of local honey. It pairs beautifully with a mimosa or a mild herbal tea like chamomile or mint.
As Dessert: Serve warm banana bread with a scoop of vanilla ice cream or a drizzle of caramel sauce. I’ve even topped it with roasted pecans and a sprinkle of flaky sea salt for a salty-sweet balance that’s a crowd-pleaser. This transforms the humble loaf into something special enough for guests.
For Cozy Snacks: This banana bread is absolute perfection with a cup of hot chai tea or hot chocolate when you need a little pick-me-up during a lazy afternoon. My kids ask for this combo every time the skies turn gray.
In my family, banana bread goes beyond the kitchen—it’s our go-to for when someone needs a little comfort or when we want to make a simple moment feel extra. Whether it’s wrapped in parchment for a picnic or sliced and packed for school lunches, it’s always a hit. I encourage you to play with flavors or toppings, but don’t skip the basics—the warmth and simplicity are what make it truly magical.
Top Tips for Perfecting Your Banana Bread
Banana Prep: I always use bananas that are overly ripe with ample brown spots or even larger brown areas—that’s your flavor jackpot. If you buy green bananas, just let them sit in a paper bag for a couple of days. Mashing them well but leaving some texture helps maintain moisture without a slavish puree. Never freeze bananas without mashing first, unless you plan to thaw and mash separately.
Mixing Advice: Resist the urge to over-stir. Fold the batter gently until the flour disappears. A few flour streaks are better than a dense, rubbery loaf. This makes such a difference in softness. Also, using room-temperature eggs helps the batter blend more smoothly and evenly.
Swirl Customization: When swirling in fillings or even cinnamon sugar, use a skinny tool like a chopstick to create tighter, more intricate patterns. A wider spoon gives a looser swirl. I’ve even done chocolate ganache swirls for a decadent twist—just warm it slightly first.
Ingredient Swaps: If you want gluten-free, swap the flour for a cup-for-cup blend designed for baking, but add a teaspoon xanthan gum if it’s not already included. Using almond or oat milk instead of dairy in the glaze makes it extra creamy, and I love the subtle nuttiness almond milk brings when used in the batter.
Baking Tips: Every oven is different, so watch closely the first time you bake. If you don’t have a timer that works with your oven noise, use the smell—the sweet, toasty aroma should fill your kitchen by the 40-minute mark. I place my loaf pan in the center rack and sometimes rotate halfway for even browning. If your loaf looks done early but seems gummy inside, cover and bake an additional 5-10 minutes.
Glaze Variations: I sometimes add a pinch of cinnamon or cocoa powder to the glaze, or swap milk for fresh orange juice for a zingy glaze that brightens the flavors. If you want an ultra-glossy finish, add a teaspoon of corn syrup. Drizzle over just cooled bread—too hot and it’ll run right off, too cold and it won’t soak in.
One lesson I’ve learned over countless bakes is that patience in cooling is key: slicing too early means a gummy, crumbly mess. Let the bread rest well, or it’ll just fall apart. Also, keeping your bananas as ripe as possible and your spreading even makes the biggest visual impact.
Storing and Reheating Tips
Room Temperature: Wrap your banana bread tightly in plastic wrap or keep it in an airtight container on the counter for up to 3 days. This bread stays moist but doesn’t get soggy if it’s well wrapped. If you live somewhere dry, a kitchen towel over the loaf pan works temporarily, but plastic wrap is safer for freshness.
Refrigerator Storage: In warmer climates, I store banana bread in a sealed container in the fridge for up to a week. It might firm up a bit but warms right back to softness when sliced and heated for 10-15 seconds in the microwave. Keep glaze separate if possible to avoid it melting into sticky puddles.
Freezer Instructions: Banana bread freezes beautifully. Wrap it tightly in plastic wrap and then foil or a freezer safe bag for up to 3 months. When ready to enjoy, thaw overnight in the fridge or at room temperature for a couple hours before serving. You can refresh it in a toaster oven for a few minutes to regain that freshly baked feeling.
Glaze Timing Advice: If you plan to freeze or refrigerate, skip glazing until right before slicing to prevent any glaze condensation or stickiness from dulling the loaf’s texture. For room temp eating within 1-2 days, go ahead and glaze immediately—it’s just so charming to look at and eat!
Frequently Asked Questions
Final Thoughts
This banana bread holds a special place in my kitchen because it’s more than just a recipe—it’s a ritual, a way to pause and fill your space with warmth and love. I love that it’s straightforward enough to make on a whim but special enough to impress without stress. Every time I bake it, I’m reminded that good food doesn’t have to be complicated; it just has to be shared. If you try this recipe, I’d love to hear how you make it yours—whether you toss in nuts, try the muffin version, or keep it classic with that sweet, tangy cream cheese swirl. Don’t forget to leave a comment, rate it, or share your twists! There’s nothing better than a kitchen filled with the smells and tastes of home. Happy baking!
Banana Nut Bread
Ingredients
Main Ingredients
- 7 medium ripe bananas mashed chunky, about 22 oz or 2 2/3 cups
- 0.5 cup unsweetened applesauce 4 oz
- 2.5 cups unbleached all-purpose flour about 13.5 ounces
- 1.5 tsp baking soda
- 0.5 tsp salt
- 4 tbsp butter softened, about 2 oz
- 1 cup light brown sugar about 6.5 oz
- 4 large egg whites
- 1 tsp vanilla extract
- 3 oz walnuts chopped, about 3/4 cup
Instructions
Preparation Steps
- Preheat oven to 350°F. Grease two 8x5 inch loaf pans with baking spray.
- In a medium bowl, combine flour, baking soda, and salt with a whisk. Set aside.
- In a large bowl, cream butter and sugar with an electric mixer until light and fluffy. Add egg whites, applesauce, and vanilla extract, and beat at medium speed until thick. Scrape down sides of the bowl.
- Add one-third of the dry ingredients and blend at low speed until combined. Repeat with second one-third. Add the remaining flour mixture and mashed bananas, blending at low speed until just combined. Stir in the walnuts. Do not overmix.
- Pour batter evenly into prepared loaf pans and bake on the center rack for 50 to 52 minutes, or until a toothpick inserted comes out clean.
- Let the loaves cool in pans for at least 20 minutes. Remove and allow to cool to room temperature before slicing.