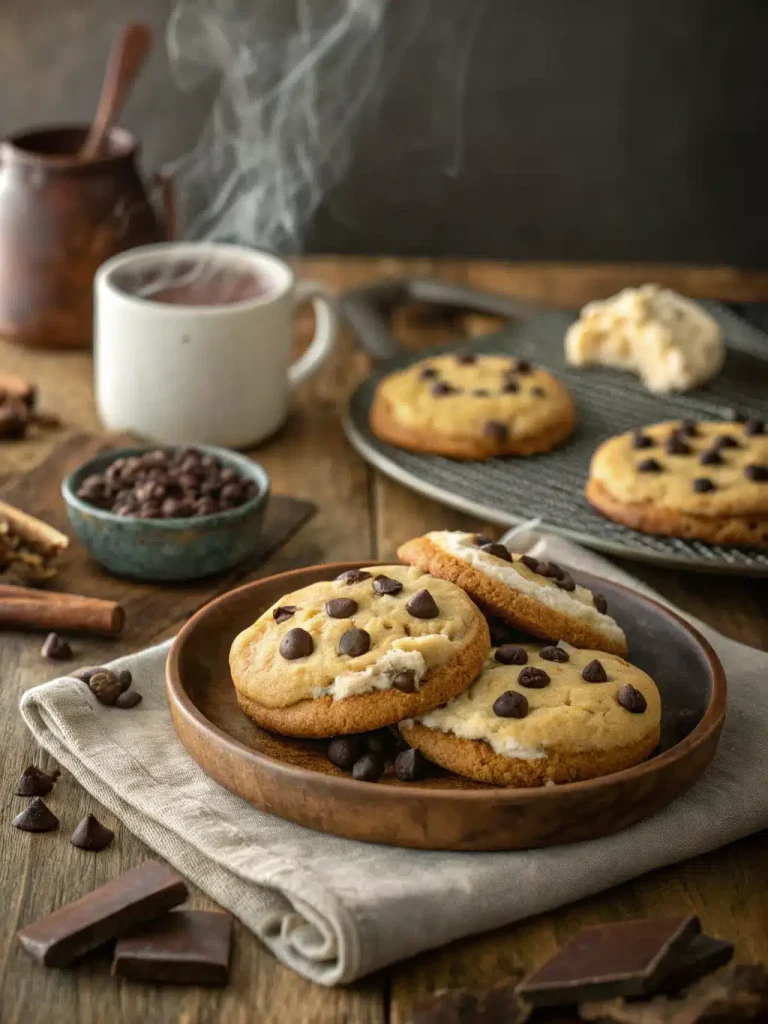
Oh, these What are some of the best crumble chocolate chip cookies?! Honestly, if you’ve ever scrolled through social media and seen those impossibly thick, gooey, decadent cookies that look like they belong in a bakery window, you know the ones I’m talking about. For the longest time, I used to just drool and think, “There’s no way I can make that at home.” But let me tell you, after countless attempts and a few kitchen mishaps (more on those later!), I’ve finally cracked the code. These aren’t just *any* chocolate chip cookies; they’re the kind that make your whole house smell like heaven, the kind that disappear in minutes, and the kind that your friends and family will beg you for the recipe for. They’re inspired by that famous cookie shop, but with a little bit of my own kitchen magic sprinkled in, making them perfectly achievable for you, right in your own home. Get ready to impress yourself, because these are seriously good.
What is Crumbl Chocolate Chip Cookie?
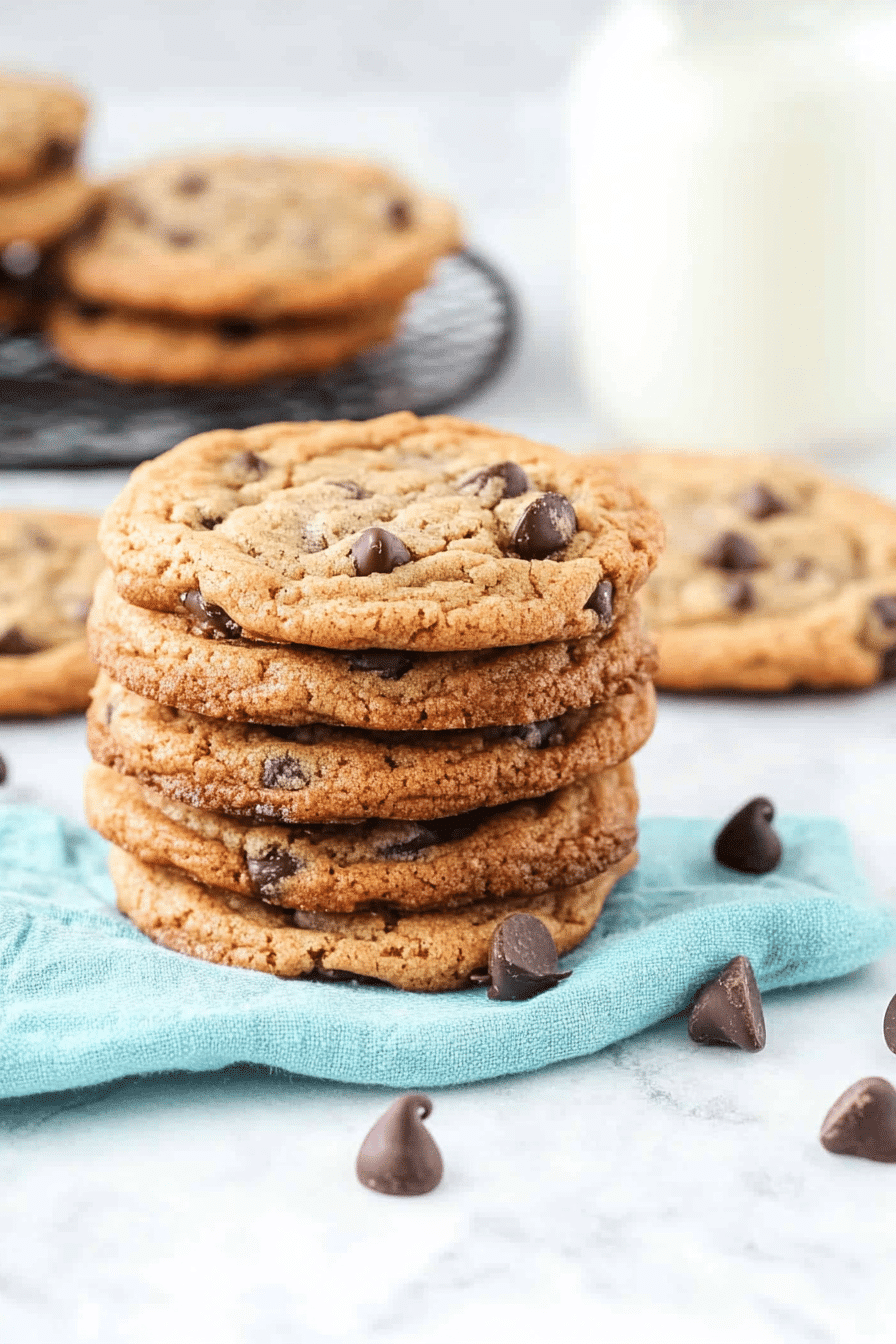
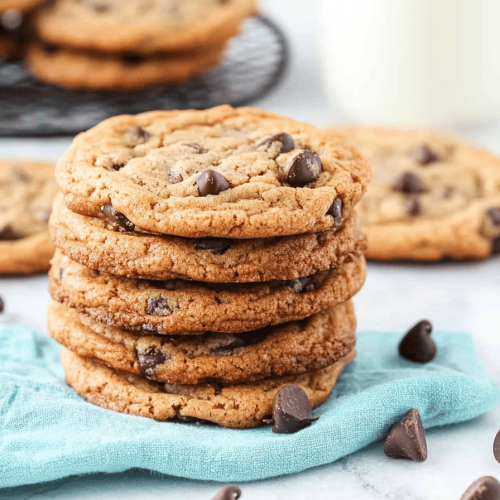
So, what exactly *is* a Crumbl Chocolate Chip Cookie? Think of it as the ultimate indulgence in cookie form. It’s not your average, thin, crispy cookie. Nope! These are gloriously thick, soft, and chewy in the center, with just a hint of crispness around the edges. They’re usually quite large, almost like a mini cake in cookie shape. The “Crumbl” style typically means a rich, buttery dough packed with generous amounts of chocolate chips, baked just until they’re set but still wonderfully moist. The magic is in that incredible texture – that perfect balance between soft and substantial. It’s the kind of cookie that makes you pause, savor every bite, and maybe even reach for a second one (I won’t tell!). It’s essentially comfort food elevated to an art form, a treat that feels special and celebratory, even if you’re just having it with a cup of tea on a Tuesday afternoon.
Why you’ll love this recipe?
Okay, let me tell you why this recipe has become my absolute go-to. First and foremost, the flavor is just out of this world. We’re talking rich, buttery dough with that classic brown sugar and vanilla aroma that just screams “cookies!” The chocolate chips melt into pools of pure bliss, and when you get a warm cookie fresh from the oven? Forget about it. It’s pure happiness. But what I *really* love is how surprisingly simple this recipe is, despite how fancy it looks. I’ve made this on crazy busy weeknights, and even my teenage son can help out with some of the steps. The ingredients are all pretty standard pantry staples, nothing too exotic or hard to find, which is a huge win in my book. Plus, these cookies are incredibly budget-friendly compared to buying those bakery versions. You get so many cookies from one batch, and they feel like such a treat without breaking the bank. And the versatility! While I’m sharing my classic Chocolate Chip version today, you can easily add nuts, different kinds of chocolate chunks, or even a swirl of caramel. This recipe is also a lifesaver when you’re craving something sweet but don’t want the fuss of a whole cake. What makes these stand out for me, though, is that perfect texture – that melt-in-your-mouth softness that I just can’t get enough of. It’s the kind of cookie that brings a smile to everyone’s face.
How do I make Crumbl Chocolate Chip Cookies?
Quick Overview
Making these incredible cookies is a straightforward process that mostly involves mixing, chilling, and baking. The key is patience with the chilling step, which is crucial for developing that thick, signature texture and preventing the cookies from spreading too much. We’ll mix our wet and dry ingredients separately, then combine them gently. After a short chill time to firm up the dough, we’ll form generous balls, bake them until they’re golden brown with soft centers, and then let them cool slightly before diving in. It’s truly a simple sequence that yields spectacular results, and honestly, the hardest part is waiting for them to bake!
Ingredients
For the Main Batter:
You’ll want good quality unsalted butter, softened but not melted. This is important for the texture! I always use unsalted so I can control the salt content myself. For sugar, we’re using a mix of granulated sugar for structure and brown sugar (light or dark, your preference!) for that lovely chewy texture and caramel notes. Don’t skimp on the vanilla extract – a good splash makes all the difference. Eggs provide binding and richness, so use large ones at room temperature. And for the flour, all-purpose is perfect. It’s also really important to measure your flour correctly! I always tell people to spoon it into the measuring cup and level it off, rather than scooping directly from the bag, which can lead to dense cookies.
For the Chocolate Chips:
This is where you can really have fun! I love a mix of semi-sweet chocolate chips and some dark chocolate chunks. The different sizes and melt points give you pockets of gooey chocolate and satisfying little bites. You can use milk chocolate if that’s your favorite, or even white chocolate chips for a different vibe. Just make sure you’re using good quality chocolate; it really does make a difference in the flavor. A whole bag, or even a little more, is never too much when it comes to chocolate chips in these cookies!
Step-by-Step Instructions
Step 1: Preheat & Prep Pan
First things first, let’s get our oven ready. Preheat your oven to 350°F (175°C). While that’s warming up, line a couple of baking sheets with parchment paper. This is a little trick I learned ages ago – parchment paper makes cleanup a breeze and prevents your cookies from sticking. If you don’t have parchment, you can lightly grease your baking sheets, but parchment is definitely the way to go for even baking and easy removal.
Step 2: Mix Dry Ingredients
In a medium bowl, whisk together your all-purpose flour, baking soda, and salt. A good whisking helps to evenly distribute the leavening agent and salt throughout the flour, which is key for consistent cookies. You don’t want one cookie to be too salty or not rise properly. Just give it a good stir until everything looks well combined. Set this bowl aside for now.
Step 3: Mix Wet Ingredients
In a large bowl, cream together your softened unsalted butter with the granulated sugar and brown sugar. You can use an electric mixer for this, or if you’re feeling ambitious (and want a bit of a workout!), you can do it by hand. Beat them together until the mixture is light and fluffy – this usually takes a few minutes. Then, beat in the eggs one at a time, mixing well after each addition. Finally, stir in the vanilla extract. It should smell absolutely divine at this point!
Step 4: Combine
Now, it’s time to bring the wet and dry ingredients together. Gradually add the dry ingredients to the wet ingredients, mixing on low speed (or by hand) until *just* combined. Be careful not to overmix here! Overmixing develops the gluten in the flour, which can lead to tough cookies. We’re aiming for a soft, slightly sticky dough. Once it’s just mixed, gently fold in your chocolate chips. Make sure they’re evenly distributed throughout the dough.
Step 5: Chill the Dough
This is a crucial step for achieving that signature thick, bakery-style cookie. Cover the bowl with plastic wrap and refrigerate the dough for at least 30 minutes, or up to 2 days. The longer it chills, the more the flavors develop and the thicker your cookies will be. I often make the dough the night before, and it’s ready to go first thing in the morning when that cookie craving hits!
Step 6: Form the Cookies
Once the dough is chilled and firm, scoop out generous portions. I like to use a large cookie scoop (about 1/4 cup) for really substantial cookies, similar to what you see at Crumbl. Roll each portion into a ball. For an extra-indulgent touch, you can press a few extra chocolate chips onto the tops of the balls before placing them on your prepared baking sheets. Leave plenty of space between them, as they will spread a bit.
Step 7: Bake
Bake in your preheated oven for 10-14 minutes. The exact time will depend on your oven and how big you made the cookies. You’re looking for the edges to be lightly golden brown, and the centers to still look slightly soft and underdone. They will continue to cook a bit on the hot baking sheet after you take them out of the oven. Trust me on this – pulling them out when they still look a little gooey is the secret to that perfect chewy texture!
Step 8: Cool
Let the cookies cool on the baking sheets for about 5-10 minutes. This allows them to set up properly. Then, carefully transfer them to a wire rack to cool completely. If you can wait that long! These are absolutely divine when they’re still warm, though.
Step 9: Serve and Enjoy!
Once they’re cooled (or just warm enough to handle!), these crumbl chocolate chip cookies are ready to be devoured. Serve them as is, or with a tall glass of milk. They are truly spectacular fresh from the oven, but they hold up well for a day or two.
What to Serve It With
These incredible crumbl chocolate chip cookies are pretty much a star on their own, but they pair beautifully with a variety of things depending on the occasion. For a simple, comforting breakfast treat (because who says cookies are only for dessert?), I love a warm cookie with a strong cup of black coffee. The bitterness of the coffee really cuts through the sweetness of the cookie, making it a perfect start to the day. For a more elegant brunch setting, I’ll often arrange a few cookies on a pretty platter alongside some fresh fruit and maybe a yogurt parfait. They add a touch of indulgence without being too heavy. As a dessert, they’re a dream! I like to serve them slightly warm, perhaps with a scoop of good quality vanilla bean ice cream or a dollop of whipped cream. The contrast in temperature and texture is heavenly. And for those cozy, late-night snacks when you just need a little pick-me-up? There’s nothing better than a cookie and a glass of cold milk. It’s a simple pleasure, but one that never fails to hit the spot. My family also loves them crumbled over a bowl of vanilla ice cream as an impromptu sundae!
Top Tips for Perfecting Your Crumbl Chocolate Chip Cookies
I’ve made these so many times, and I’ve picked up a few tricks along the way that I think really make a difference. First, about the butter: make sure it’s truly softened, not melted. You want it pliable enough to cream with the sugar, but still solid. If it’s too melty, your cookies will spread too much. When you’re creaming the butter and sugars, don’t rush it. Getting that mixture light and fluffy incorporates air, which helps with the cookie’s texture and rise. I’ve learned that overmixing the dough once you add the flour is a big no-no. Mix only until the streaks of flour disappear. Overmixing develops gluten, leading to tough, dense cookies, and we want soft and chewy! Chilling the dough is non-negotiable for me. It solidifies the fat, preventing excessive spread, and allows the flavors to meld beautifully. I’ve found that at least 30 minutes is good, but overnight is even better if you can swing it. When forming the cookie balls, be generous! These are meant to be thick. Use a good-sized cookie scoop – about 1/4 cup is perfect. And don’t flatten them before baking; let them bake into their glorious, puffy selves. Baking time is key; you want them golden brown on the edges but still soft and slightly underbaked in the center. They’ll continue to cook on the hot baking sheet after you remove them. I always err on the side of underbaking slightly! For ingredient swaps, if you can’t find one type of chocolate chip, don’t sweat it. A mix of good quality chips and chopped chocolate bars works wonderfully. For a nuttier flavor, toasting your chocolate chips briefly before adding them can also amp up the flavor. I’ve experimented with different vanilla extracts, and a good pure vanilla extract truly makes a difference over imitation. Finally, don’t be afraid to embrace imperfection. A slightly lopsided cookie is still going to taste amazing!
Storing and Reheating Tips
These cookies are so good, they rarely last long enough to worry about storing, but when they do, I’ve got you covered. For room temperature storage, I usually keep them in an airtight container or a cookie tin. They’ll stay fresh and delicious for about 3-4 days this way. If you’re planning to eat them within a day or two, simply stacking them on a plate and covering loosely with plastic wrap works too, but an airtight container is best for maximum freshness. If you need them to last longer, the refrigerator is your friend. Pop them into an airtight container and they should be good for up to a week. They might firm up a bit in the fridge, but you can easily warm them up. For freezing, these cookies are fantastic! You can either freeze the baked cookies or the unbaked dough balls. For baked cookies, wrap them individually in plastic wrap, then place them in a freezer-safe bag or container. They’ll keep well for up to 3 months. To thaw, just let them sit at room temperature for a bit. If you want to freeze the unbaked dough balls, place them on a parchment-lined tray in the freezer until firm, then transfer them to a freezer bag. You can bake them directly from frozen, adding a couple of extra minutes to the baking time. If you’ve made a glaze for these, it’s best to add it just before serving to keep it fresh and prevent it from making the cookies soggy during storage, especially if you plan to store them at room temperature or in the fridge.
Frequently Asked Questions
Final Thoughts
So there you have it – my go-to recipe for what I think are the best crumbl chocolate chip cookies you can make at home. They’re thick, chewy, bursting with chocolatey goodness, and surprisingly achievable. I hope this recipe brings as much joy to your kitchen as it does to mine. It’s one of those recipes that makes you feel like a baking pro, even if you’re just starting out. If you loved this recipe, you might also enjoy my recipe for chewy oatmeal raisin cookies or my incredibly fudgy brownie recipe! Give these a try, and I promise, you won’t regret it. I can’t wait to hear how yours turn out! Let me know in the comments below if you tried them and what you thought, or if you made any fun variations. Happy baking, everyone!
Crumbl Chocolate Chip Cookies
Ingredients
Main Ingredients
- 1 cup butter, room temperature
- 1.25 cups light brown sugar
- 0.5 cup granulated sugar
- 2 large eggs, room temperature
- 2 teaspoon vanilla extract
- 1 teaspoon baking soda
- 1 teaspoon kosher salt
- 1 tablespoon cornstarch
- 3 cups all purpose flour
- 2.25 cups milk chocolate chips, plus more to press into the top of the dough after baking
Instructions
Preparation Steps
- Preheat your oven to 375°F. Line a large baking sheet with parchment paper and set aside.
- In the bowl of your stand mixer fitted with the paddle attachment mix together the butter, light brown sugar, and granulated sugar on medium speed for 3 minutes.
- Add in the eggs, vanilla, baking soda, salt, and cornstarch and mix for 1 minute, scraping the sides of the bowl as necessary.
- Turn the mixer to low and mix in the flour until just combined. Stir in the chocolate chips.
- Portion out a rounded 1/3 cup of cookie dough (4.2 ounces) and roll into a ball. Break the cookie dough ball in half, turn the dough so the jagged broken edge facing up and then press back together to create a craggily top. Place the cookie dough onto the prepared baking sheet 3 inches apart. Bake 5 cookies at a time.
- Bake for 10 – 11 minutes, until the edges and top are slightly golden. Don’t over-bake.
- Press additional chocolate chips on top of the baked cookies for a bakery-style appearance. Allow to cool on the cookie sheet for 5 minutes and then transfer to a wire rack to cool completely.