You know those dishes that just feel like home? The ones you crave when you need a little comfort, or when you’re hosting a last-minute gathering and want to serve something that screams “I love you”? For me, that dish is this creamy Pasta Salad. It’s not fancy, it’s not complicated, but it’s pure magic. I remember my mom making a version of this when I was a kid, and the smell of the simmering dressing would fill our house, instantly making everything feel brighter. It’s funny, because most people think of pasta salad as a summer picnic staple, right? Like, piled high on a checkered blanket with potato salad and watermelon. And yes, it’s fantastic for that! But honestly, this creamy pasta salad is my secret weapon for *so* many occasions. It’s what I whip up on those frantic weeknights when dinner needs to be on the table in under 30 minutes, or when I’m invited to a potluck and want to bring something everyone will rave about. Forget those stiff, mayo-heavy versions you sometimes get; this one is light, tangy, and packed with just the right amount of savory goodness. It’s the kind of thing that disappears from the serving dish at lightning speed, and people will be asking you for the recipe before they even finish their first bite. Trust me, this isn’t just another pasta salad; it’s a hug in a bowl, and I can’t wait to share it with you.
What is Creamy Pasta Salad?
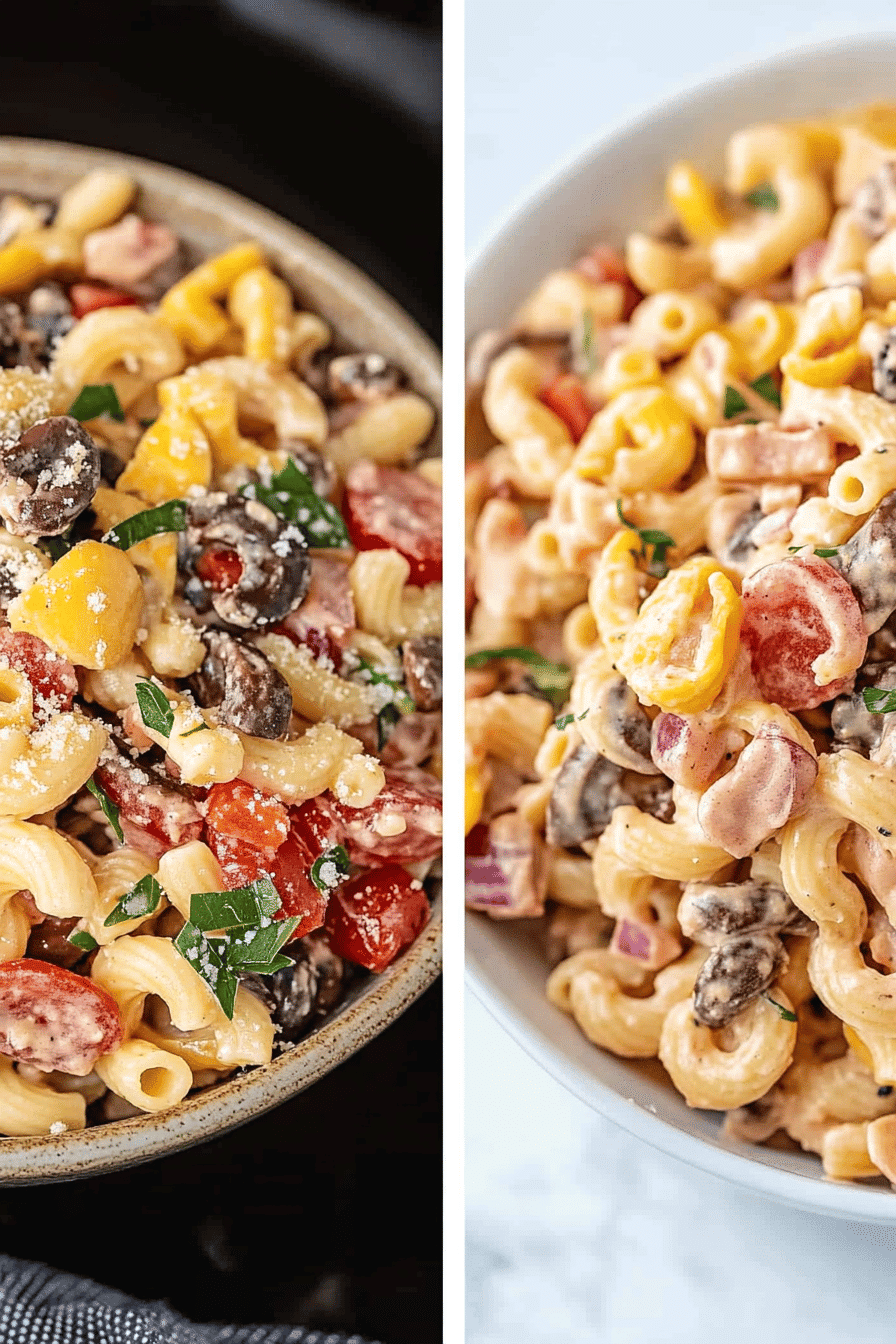
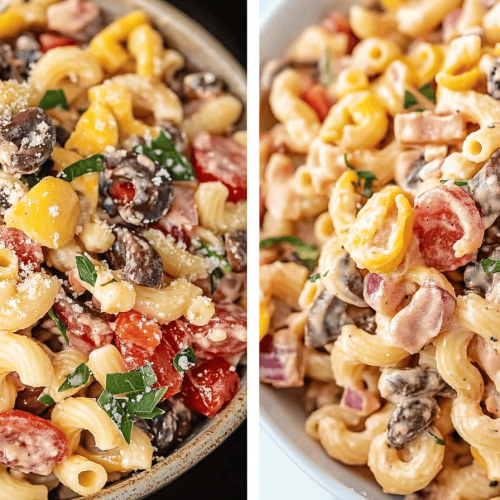
So, what exactly makes this *my* creamy Pasta Salad? Well, think of it as a huggable, adaptable best friend in your refrigerator. At its heart, it’s a pasta salad, which means pasta (duh!), and a delicious dressing coating everything. But where it really shines is in that dressing. Instead of being just heavy mayonnaise, this one has a creamy, tangy base that’s unbelievably satisfying without weighing you down. It’s essentially cooked pasta, tossed with a medley of fresh vegetables and sometimes some fun additions like cheese or protein, all enrobed in a dressing that’s both rich and bright. The “creamy” part comes from a clever combination of ingredients that emulsify beautifully, creating a luscious coating that clings to every piece of pasta and vegetable. It’s the kind of dish that’s greater than the sum of its parts, a perfect balance of textures and flavors that makes you keep coming back for another forkful. It’s the ultimate crowd-pleaser, and even picky eaters usually give this one a thumbs-up.
Why you’ll love this recipe?
What are some good reasons to eat Pasta Salad?flavor! It’s this incredible symphony of creamy, tangy, and fresh. The dressing has a slight sweetness from a touch of sugar, a zing from vinegar, and a richness that just coats everything perfectly. Then you’ve got the tender pasta, crisp veggies, and whatever other goodies you decide to toss in – it’s a party in your mouth, seriously. What I love most about this is how incredibly simple it is to make. You really don’t need to be a gourmet chef for this one. The steps are straightforward, and you can even prep a lot of it ahead of time, which is a lifesaver on busy days. And speaking of busy days, this recipe is so cost-efficient! Most of the ingredients are pantry staples or readily available at your local grocery store without breaking the bank. It’s the perfect way to stretch a meal or make a little go a long way. But the real kicker is its versatility. Need a side for grilled chicken? Done. A light lunch? Perfect. A potluck dish that will disappear? Absolutely. You can easily swap out vegetables based on what’s in season or what you have on hand. My kids actually love it when I add some diced ham or shredded chicken to make it a more substantial meal for them. It’s also a fantastic base for other pasta dishes; I’ve even tossed leftover pasta salad into a warm pan with some extra sauce for a quick, lazy dinner. Unlike some other pasta salads that can feel a bit heavy or one-note, this one always feels fresh and exciting. It’s the kind of recipe that becomes a staple, the one you can always count on to be a hit.
How do I make a creamy pasta salad?
Quick Overview
Making this creamy pasta salad is surprisingly simple and can be broken down into a few easy steps. First, you’ll cook your pasta until it’s just right, then let it cool slightly. While that’s happening, you’ll whip up the amazing creamy dressing. Then, it’s all about tossing everything together – the pasta, your favorite chopped veggies, and that glorious dressing – until every piece is coated. The magic happens when it all melds together in the fridge for a bit. It’s a hands-off process for the most part, making it ideal for meal prep or weeknight dinners. What makes this method special is the balance in the dressing and how well everything holds up, meaning no sad, watery pasta salad here!
Ingredients
For the Pasta Base:
1 pound short pasta (like rotini, fusilli, or penne) – I find that shapes with nooks and crannies hold the dressing best!
1 tablespoon olive oil (to prevent sticking while it cools)
Salt for boiling water – don’t be shy with this!
For the Creamy Dressing:
1 cup mayonnaise – I prefer full-fat for the best creamy texture, but light works too!
1/2 cup sour cream – this adds a lovely tang and creaminess that mayo alone doesn’t quite achieve.
1/4 cup apple cider vinegar – for that essential zesty kick.
2 tablespoons Dijon mustard – it adds depth and a little bite.
1 tablespoon granulated sugar – just a touch to balance the acidity.
1 teaspoon garlic powder – because garlic makes everything better.
1/2 teaspoon onion powder – for that savory undertone.
Salt and freshly ground black pepper to taste – always taste and adjust!
For the Mix-Ins:
1 cup finely chopped celery – for a satisfying crunch.
1/2 cup finely chopped red onion – I like the color and mild bite, but sweet onion is great too.
1 cup halved cherry tomatoes – or quartered if they’re large.
1 cup frozen peas, thawed – a classic for a reason, they add sweetness and color.
Optional additions: 1/2 cup shredded cheddar cheese, 1/2 cup diced cooked ham or chicken, 1/4 cup chopped fresh parsley for garnish.
Step-by-Step Instructions
Step 1: Cook the Pasta
Get a big pot of salted water boiling. Once it’s at a rolling boil, add your pasta. Cook it according to the package directions, but aim for al dente – meaning it’s cooked through but still has a slight bite. You don’t want mushy pasta! Once it’s done, drain it well and immediately toss it with the tablespoon of olive oil. This stops the pasta from clumping together as it cools. Spread the pasta out on a baking sheet or in a shallow dish to cool down faster. I usually let it cool for at least 15-20 minutes while I prep the other ingredients.
Step 2: Mix the Dry Dressing Ingredients
In a small bowl, whisk together the garlic powder and onion powder. You can skip this step if you’re adding them straight to the wet ingredients, but sometimes whisking them first helps distribute them more evenly, especially if you’re using fresh herbs later. It’s a small thing, but it makes a difference in avoiding little pockets of spice.
Step 3: Mix the Wet Dressing Ingredients
Grab a medium-sized bowl. Add the mayonnaise, sour cream, apple cider vinegar, Dijon mustard, and sugar. Whisk everything together until it’s smooth and well combined. This is where the magic starts to happen! You want a nice, emulsified dressing that’s creamy and has that lovely tangy aroma. Give it a taste here – this is your chance to adjust the salt, pepper, or even add a tiny bit more vinegar or sugar if your taste buds are telling you to.
Step 4: Combine Pasta and Dressing
Once the pasta has cooled down to at least lukewarm, add it to a large mixing bowl. Pour about two-thirds of the dressing over the pasta. Gently toss everything together, making sure each piece of pasta is coated. You can always add more dressing if you like it saucier, but it’s easier to add than to take away! If you’re adding optional cheese or protein at this stage, you can toss them in now too.
Step 5: Prepare Your Mix-Ins
While the pasta is cooling, take this time to chop all your vegetables. You want them to be a similar size so you get a little bit of everything in each bite. Rinse and drain your thawed peas. If you’re using fresh parsley, give it a good chop – it adds such a lovely freshness at the end.
Step 6: Fold in the Mix-Ins
Add the chopped celery, red onion, cherry tomatoes, and thawed peas to the pasta and dressing mixture. Gently fold them in. Be careful not to overmix, as you don’t want to mash the tomatoes or break up the pasta too much. You want everything to look fresh and vibrant. If you’re using any herbs like parsley, you can add most of it in now and save a little for garnish.
Step 7: Chill and Let Flavors Meld
Cover the bowl tightly with plastic wrap or a lid and refrigerate for at least 30 minutes, or ideally 1-2 hours. This chilling time is crucial! It allows all those wonderful flavors to meld together and the dressing to really coat the pasta and vegetables beautifully. Plus, nobody likes warm pasta salad, right?
Step 8: Taste and Adjust
Before serving, give the pasta salad another gentle stir. Taste it again and see if it needs any more salt, pepper, or even a splash more vinegar. Sometimes, the pasta absorbs some of the dressing, so you might want to add a little more of the reserved dressing if you have it. This is the last chance to make it absolutely perfect for your liking.
Step 9: Serve and Garnish
Spoon the creamy pasta salad into a serving dish. Garnish with a sprinkle of fresh parsley (if using) or a few extra cherry tomatoes. This dish is fantastic served chilled or at room temperature, making it super flexible for any occasion.
What to Serve It With
This creamy pasta salad is so versatile, it practically goes with everything! For breakfast, I know it sounds a bit unconventional, but a small scoop alongside some scrambled eggs and crispy bacon is surprisingly delicious – it’s like a more interesting take on a side salad. For brunch, it’s an absolute star. Serve it in a pretty bowl with some mini quiches, fresh fruit, and maybe a mimosa. It’s elegant enough for guests but still totally relaxed. As a dessert… okay, maybe not as a sweet dessert! But as a light, satisfying accompaniment to a main course that might be a bit richer, it’s perfect. Think of it as balancing out a heavy roast or a rich stew. And for those cozy snacks or casual get-togethers, this is your go-to. It’s wonderful alongside grilled burgers, hot dogs, or just a big platter of crudités and dip. We often have this at family BBQs, and it’s always the first thing gone! My personal tradition is to make a big batch on Sunday, and then we have easy lunches throughout the week. Sometimes, if I have leftover rotisserie chicken, I’ll shred it and toss it in, making it a complete meal. It’s also amazing with some baked beans or corn on the cob. Honestly, if you’re looking for something that’s a guaranteed hit and can adapt to any meal, this is it.
Top Tips for Perfecting Your Creamy Pasta Salad
I’ve made this creamy pasta salad more times than I can count, and over the years, I’ve picked up a few tricks that really make a difference. For the pasta prep, make sure you cook your pasta just to al dente. Seriously, that little bit of chew is crucial. If it’s overcooked, it will turn to mush in the salad, especially after chilling. And don’t skip the olive oil toss after draining; it’s a simple step that prevents a clumpy mess. When it comes to mixing advice, be gentle! You’re not making a meringue here. Fold everything together so you don’t break up the tomatoes or mash the pasta. The goal is vibrant, distinct ingredients, not a homogenous blob. For swirl customization, this is where you can get creative! If you want to add extra flavor or color, you could swirl in a bit of pesto or even a touch of sriracha into a portion of the dressing before mixing it all together. This gives you pockets of different flavors. My favorite ingredient swap is using different vegetables – sometimes I’ll add finely diced bell peppers for extra crunch and color, or even some chopped pickles for a dill-y kick. Broccoli florets, lightly blanched, are also a great addition. For baking tips, well, this isn’t a baked dish, but the chilling time is your equivalent! Give it that crucial period in the fridge to let the flavors meld. It’s worth the wait, I promise. Don’t rush it! And for glaze variations – again, not a glaze here, but if you wanted to add a finishing touch, a sprinkle of fresh herbs or even some toasted sunflower seeds or slivered almonds for texture can be fantastic. The key is to let the dressing and the fresh ingredients shine. I learned the hard way early on that using too much mayo made it heavy, so balancing it with sour cream and vinegar is my secret weapon for that perfect creamy-yet-bright flavor. Trust me on this one!
Storing and Reheating Tips
This creamy pasta salad is fantastic for making ahead, which is why it’s such a lifesaver! For room temperature storage, it’s best to keep it in the fridge until just before serving. While it can sit out for a couple of hours, especially if it’s not too hot out, it’s always safest to keep it chilled, particularly with the mayonnaise-based dressing. For refrigerator storage, I find it keeps wonderfully for about 3-4 days. Make sure it’s in an airtight container; a good quality glass or plastic container with a tight-fitting lid is ideal. This helps prevent it from absorbing other odors in the fridge and keeps it fresh. When you’re ready to serve it again, just give it a good stir. Sometimes, the dressing can separate slightly, so a good mix is all you need. If it seems a little dry after a few days, you can always add a tiny splash more mayonnaise or a bit of milk or water to loosen it up. For freezer instructions, I generally don’t recommend freezing pasta salad. The texture of the pasta and the vegetables can change dramatically once thawed, and the creamy dressing might separate or become watery. It’s really best enjoyed fresh or within its refrigerated lifespan. If you absolutely had to freeze it, I would suggest freezing the cooked and cooled pasta separately from the dressing and vegetables, then combining them when thawed, but honestly, it’s so quick to make, it’s not worth the potential texture issues. Always ensure your container is suitable for the freezer if you decide to risk it, and thaw it completely in the refrigerator before consuming. For glaze timing advice, since this salad doesn’t have a glaze in the traditional sense, the best “timing advice” is to add any fresh herbs like parsley just before serving to keep them bright and vibrant. They lose their punch if they sit in the dressing for too long.
Frequently Asked Questions
Final Thoughts
So there you have it – my absolute favorite creamy pasta salad recipe! It’s truly a dish that brings me so much joy, and I hope it brings you lots of delicious moments too. It’s proof that simple ingredients, when combined with a little love and a few smart techniques, can create something truly memorable. The balance of flavors, the satisfying textures, and the sheer ease of making it all come together make it a winner in my book, every single time. It’s the kind of recipe that makes people feel good, whether you’re the one cooking it or the one getting to enjoy a big scoop. If you love this, you might also enjoy my Creamy Coleslaw Recipe for another potluck favorite, or my Simple Deviled Eggs that are always a hit. Don’t hesitate to tweak this pasta salad to your heart’s content – add your favorite veggies, a little extra spice, or some protein to make it your own. I can’t wait to hear how yours turns out and what your family thinks of it! Happy cooking (and eating)!
Creamy Pasta Salad
Ingredients
Main Ingredients
- 8 ounces salad macaroni or ditalini pasta
- 1 cup tiny broccoli florets
- 0.5 cup diced cucumber
- 0.5 cup finely diced red pepper
- 0.5 cup sliced black olives
- 0.25 cup very thinly sliced green onion
Dressing
- 0.5 cup mayonnaise
- 2 teaspoons white wine vinegar
- 0.5 teaspoon kosher salt adjust to taste
- 0.5 teaspoon freshly ground black pepper
- 0.5 teaspoon sugar
Instructions
Preparation Steps
- Cook the pasta according to package directions, adding a generous tablespoon of kosher salt to the water. Just before the noodles are done, add the broccoli to the pot. Boil for about 30 seconds, then drain everything into a large colander. Rinse well with cold water.
- In a large mixing bowl, stir together the mayonnaise, vinegar, salt, pepper, and sugar. Add the cooked pasta and broccoli and stir well to coat.
- Add the cucumber, red pepper, olives, and green onion and stir again. Taste and adjust seasonings if needed. Cover and refrigerate until ready to serve. Stir again just before serving.