Oh, this chocolate granola! It feels like a little bit of magic in a bowl, and honestly, it’s one of those recipes I’ve made so many times I could probably whip it up in my sleep. It started years ago when I was trying to find a breakfast that my kids would actually eat without a fuss, something that felt like a treat but was still good for them. Forget those bland, cardboard-like cereals! This chocolate granola changed everything. It’s got this perfect balance of crunchy oats, sweet clusters, and rich chocolate that just makes my morning. It reminds me a bit of those fancy granola bars you see in health food stores, but way, way better, and you know exactly what’s going into it. If you’ve ever struggled to get a wholesome breakfast on the table, especially on those frantic school mornings, then trust me, this is going to be your new best friend.

What is my go-to chocolate granola?
What is chocolate granola? What is a good breakfast cereal? Is it a glorious mix of rolled oats, nuts, seeds, cocoa powder, and sour cream, all baked? Is there any way to make these crunchy clusters? What happens when you put chocolate in the mix? What are some of the best bursts of melted chocolate Is it hearty enough to keep you full all morning? What is breakfast and dessert rolled into one? What is the best thing you can buy in a box? What is the first thing I reach for when I want something? What are some of the best foods that are nourishing without a lot of fuss?
Why you’ll love this recipe?
I really don’t say this lightly, but there are so many reasons why I think you’ll absolutely adore this chocolate granola recipe. First off, the flavor is just out of this world. It’s got that deep, satisfying cocoa flavor that isn’t too sweet, and when you get a good cluster, it’s pure heaven. It’s got a wonderful texture, too – perfectly crispy oats with just the right amount of chewiness, and those little pockets of melted chocolate are just divine. What I love most about this recipe is how ridiculously simple it is. Even if you’re not a baker, you can totally nail this. It’s also incredibly cost-effective compared to store-bought granola, which can get pricey fast. Plus, it’s so versatile! You can eat it with milk, sprinkle it on yogurt, use it as a topping for smoothie bowls, or even just grab a handful as a snack. I’ve tried so many granola recipes over the years, and this one just hits all the right notes for me. It’s the one that keeps coming back, the one I share with everyone, because it’s just that good.
How do I make my go-to chocolate granola?
Quick Overview
How do you make chocolate granola? What is the best way to combine dry ingredients, mix in wet ingredients and bake it until it’s golden brown. Is it possible to make crunchy clusters? What is the beauty of baking time? What is the aroma of toasted oats and chocolate? Is homemade granola a foolproof method? How do I become a pro after this?
Ingredients
For the Main Batter:
Let’s talk about what goes into this deliciousness. For the base, you’ll need about 3 cups of rolled oats. Make sure they’re rolled oats, not instant, for the best texture. I usually grab a big canister of them from the bulk bins or just a regular bag from the grocery store. I also add about a cup of mixed nuts and seeds – think almonds, walnuts, pecans, sunflower seeds, pumpkin seeds – whatever you have on hand or love! For the cocoa goodness, we’re using 1/2 cup of unsweetened cocoa powder. Make sure it’s good quality, as it really makes a difference. A touch of salt, about 1 teaspoon, is crucial to balance the sweetness. Then, for the binder and sweetener, we have 1/2 cup of maple syrup (or honey, if you prefer) and 1/3 cup of a neutral oil like coconut oil or avocado oil, melted. A splash of vanilla extract, about 1 teaspoon, really rounds out the flavor.
For the Filling:
Where does the chocolatey magic happen? We’re adding about 1/2 cup of your favorite chocolate chips or chunks. I often use semi-sweet or dark chocolate chips, but milk chocolate works too if that’s your jam. If you like, you can toss in some dried fruit like cranberries or raisins after baking. a little chewiness and tartness.
For the Glaze:
What are some ways to add decadence to your outfit? What is a drizzle of melted chocolate? How much coconut oil should I use? This gives it a beautiful finish and an extra chocolate boost.
What are the steps to
Step 1: Preheat & Prep Pan
First things first, let’s get our oven ready. Preheat it to 300°F (150°C). This lower temperature is key to getting that perfect toasty, crunchy granola without burning the chocolate. Then, grab a large baking sheet and line it with parchment paper. This is super important! It prevents the granola from sticking, making cleanup a breeze, and ensures even baking. Don’t skip the parchment paper, seriously.
Step 2: Mix Dry Ingredients
In a really large bowl – and I mean *large*, because you’ll be stirring everything together -, mix all ingredients together. Combine your rolled oats, nuts, seeds, cocoa powder, and salt. Give it all a good whisk or stir until everything is evenly distributed. You want that cocoa powder and salt to be mixed thoroughly through the oats and nuts, so every bite of your bite will be smooth. How do you get that chocolatey goodness?
Step 3: Mix Wet Ingredients
In a separate, smaller bowl or liquid measuring cup, whisk together the melted oil, maple syrup, and salt. Set aside. What is the difference between honey and vanilla extract? Make sure the oil isn’t too hot, just melted. This mixture is going to coat all the dry ingredients and help create those delicious clusters as it is.
Step 4: Combine
In a big bowl, pour the dry ingredients over the wet ingredients. Mix well. Where do you want to be gentle? I used a spatula to fold everything together until all the oats and nuts are evenly distributed. I do not have any spoon. I don’t want to overmix or mash it; just gently combine until there are no dry spots left. The mixture should look moist and slightly clumpy already.
Step 5: Prepare Filling
If you’re adding chocolate chips or chunks to the granola itself (before baking), you can stir them. At this stage, in gently. I find it best to stir them in right before it goes into the oven, or even sprinkle them on top, so they don’t stick to the pan. Is it possible to melt a cookie while baking? Sometimes, I like to save most of them to stir in after baking, once the granola has cooled a bit. How do you get a little pockets of gooey chocolate?
Step 6: Layer & Swirl
Spread the granola mixture evenly onto your prepared baking sheet. Don’t pile it up too high; a relatively thin, even layer will bake best. Use your spatula to press it down gently into an even layer. If you want really big clusters, try not to stir it too much while it’s baking. Just let it be!
Step 7: Bake
How do you bake a baking sheet in the oven? What’s the key here is to stir it halfway through, around the 15-minute mark. This ensures even toasting. Be careful not to break up all the potential clusters. You’re looking for a fragrant, toasty aroma and the edges to look slightly browned. Is it okay to feel a little soft when it comes out?
Step 8: Cool & Glaze
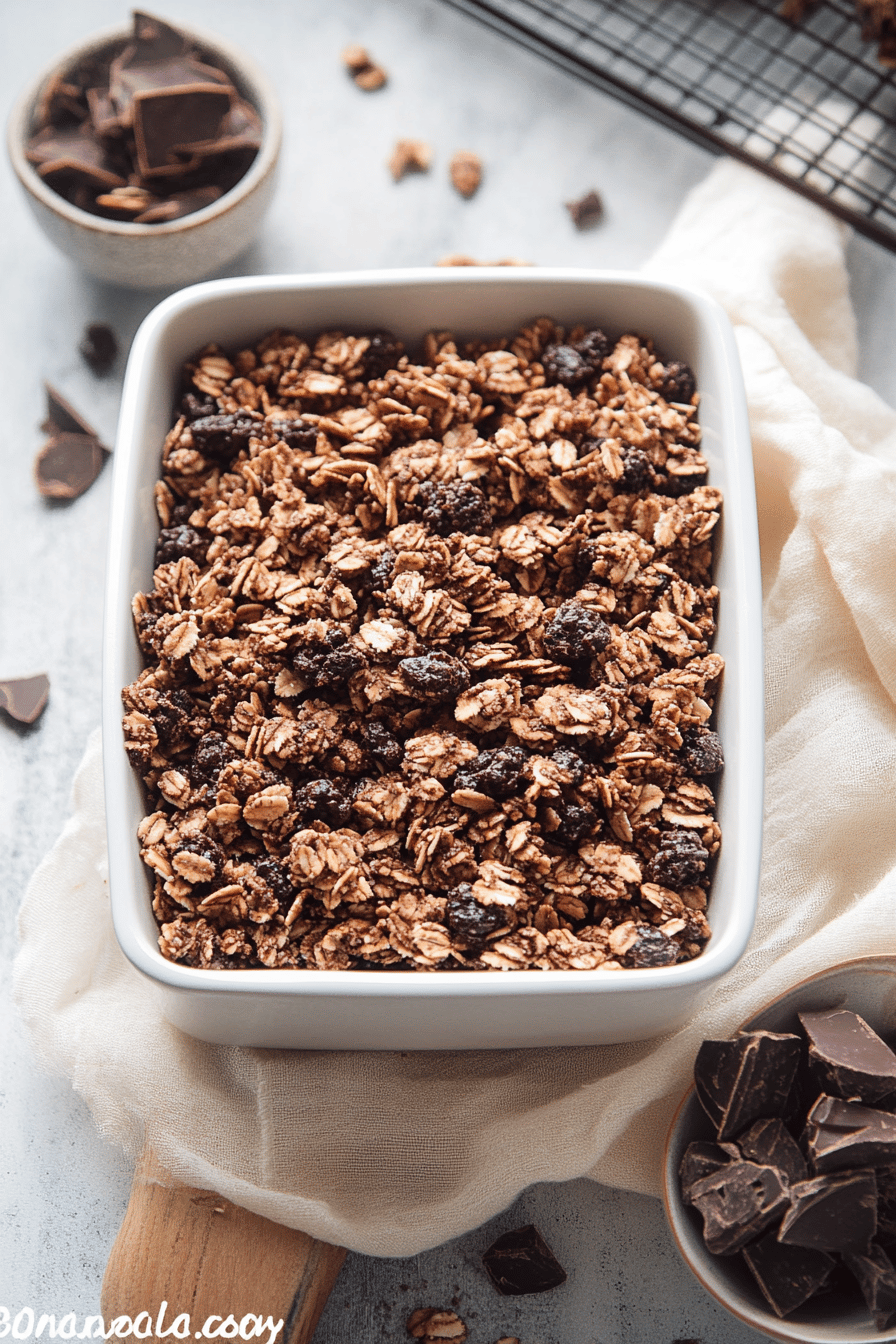
This is the hardest part – waiting! Remove the baking sheet from the oven and let the granola cool completely on the baking sheet. Seriously, resist the urge to touch it while it’s hot. As it cools, it will harden and form those glorious clusters. Once it’s completely cool, you can gently break it apart into your desired cluster size. If you’re adding the chocolate drizzle, now’s the time. Melt your chocolate chips with the coconut oil in a small bowl in the microwave (in 30-second bursts, stirring in between) or over a double boiler. Drizzle it over the cooled granola and let it set for a bit.
Step 9: Slice & Serve
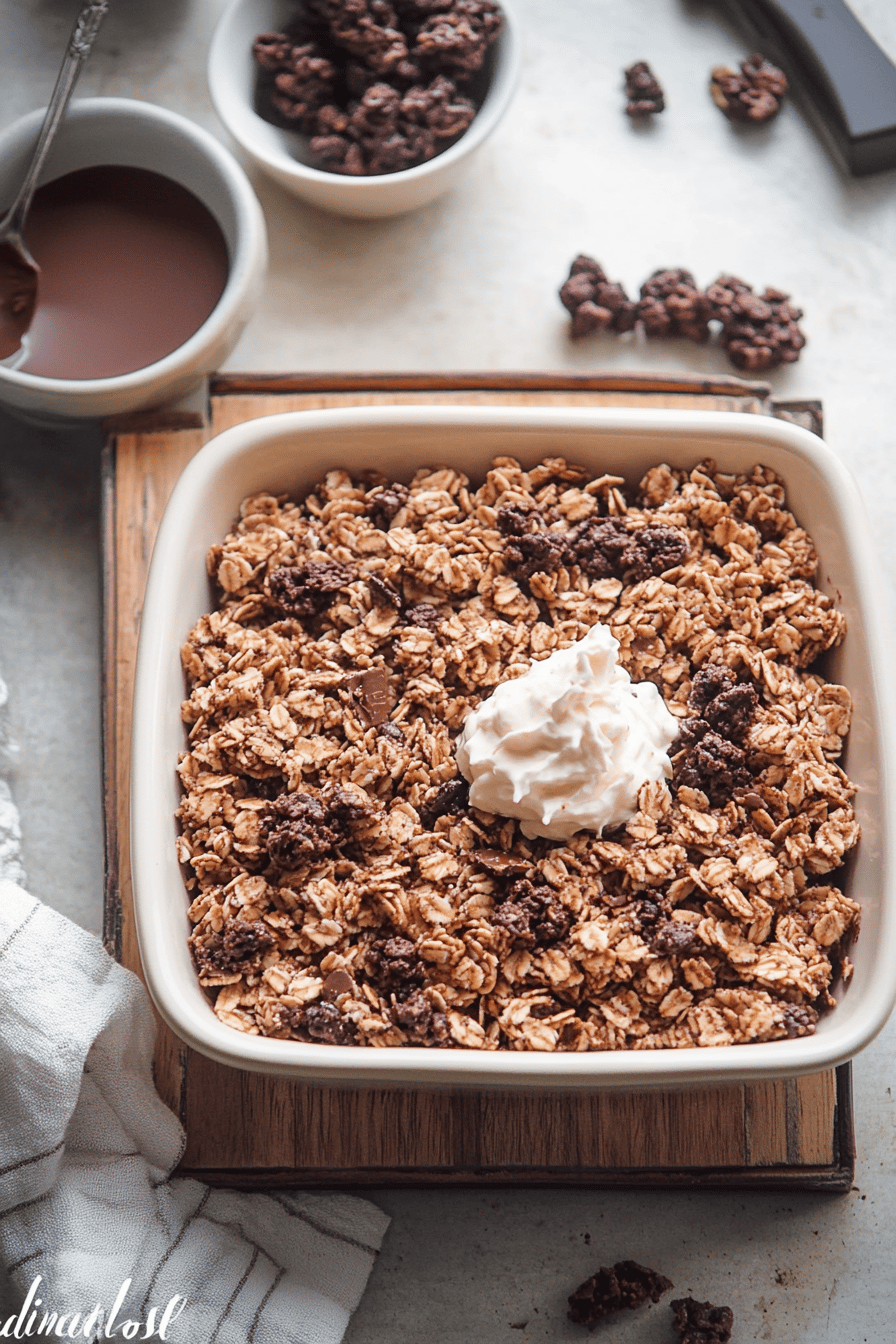
Once the drizzle has set, you can gently break apart any larger chunks if needed. Your delicious homemade chocolate granola is ready to be enjoyed! Store it in an airtight container, and it will stay fresh for about 1-2 weeks. I like to serve it in bowls with milk, over Greek yogurt, or even just by the handful when I need a little pick-me-up.
What should I serve it with?
What are some great uses for chocolate granola? What’s a good breakfast with cold milk? How do you convert dairy to oat milk? I also love stirring it into thick, creamy Greek yogurt. What is the difference between a crunchy granola and cool yogurt? What’s a good smoothie bowl to serve with granola? Is the texture on top amazing? If you’re feeling fancy for brunch, try serving it alongside fresh fruit and maybe some Cottage Cheese. What is the best cheese you have ever eaten?
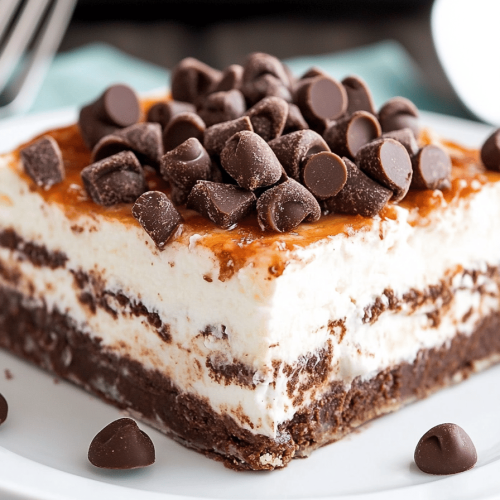
As a dessert, it’s surprisingly satisfying. A small bowl with a dollop of whipped cream or a scoop of vanilla ice cream, sprinkled with this granola, is pure bliss. It’s like a deconstructed Chocolate Chip Cookie but way healthier! And for those moments when you just need a quick, comforting snack that feels like a treat, this granola is a lifesaver. My kids absolutely love grabbing a handful for an afternoon snack, and I feel good knowing they’re getting whole grains and healthy fats. It’s also fantastic sprinkled over baked apples or pears for a warm, cozy dessert on a chilly evening.
How can I make my go-to chocolate granola?
Over the years, I’ve learned a few tricks that really make this chocolate granola sing. One of the most important things is the oats themselves – always use rolled oats, not quick-cooking or instant oats. They hold their shape better and give you that satisfying chewiness and crunch. For the nuts and seeds, I like to keep them roughly chopped so they’re not too big, but not so small that they disappear. If you’re using nuts that are particularly large, like whole walnuts or pecans, a quick chop with a knife is a good idea.
When it comes to mixing, the goal is to coat everything evenly without turning it into a paste. You want to see individual oats and nuts coated in the cocoa mixture. When baking, keep an eye on it! Ovens vary, so the 25-30 minute timeframe is a guideline. You’re looking for that lovely toasty aroma and the edges to look slightly browned. If it’s starting to smell burnt, take it out a few minutes early. As it cools, it will continue to crisp up. Don’t stir too much during baking if you want those big, satisfying clusters. My biggest lesson learned was initially stirring too much and ending up with granola that was more liquid. Patience is the key here!
For variations, I love swapping out some of the nuts for seeds like pepitas or sunflower seeds for extra crunch. You can also add a sprinkle of cinnamon or a pinch of cayenne pepper for a little kick. If you don’t have maple syrup, honey or agave nectar works just fine as a binder and sweetener. Just remember that different sweeteners can affect the flavor profile slightly. And if you’re not a fan of coconut oil, a neutral-flavored oil like avocado or even light olive oil can work, though coconut oil gives it a nice subtle richness.
What are some Storing and Reheating Tips?
Once your delicious chocolate granola has cooled completely, the best way to store it is in an airtight container. This is super important to maintain its crunchiness. At room temperature, it should stay wonderfully fresh and crispy for about 1 to 2 weeks. I’ve tried storing it in plastic bags, but a glass jar or a sturdy plastic container really keeps the moisture out better. Make sure it’s absolutely, positively cool before you seal the container, otherwise, you’ll end up with condensation and soggy granola – and nobody wants that!
If for some reason you have a huge batch (which happens to me sometimes!) and you don’t think you’ll get through it in two weeks, you can absolutely freeze it. I like to freeze it in freezer-safe bags or containers. It will keep well for up to 3 months. When you want some, just take it out of the freezer and let it thaw at room temperature for a few hours. It usually thaws pretty quickly, and the texture should remain just as good as when you first made it. I haven’t really needed to “reheat” it in the traditional sense, but if it seems a little soft after storage, you can always spread it on a baking sheet and pop it in a low oven (around 250°F or 120°C) for about 5-10 minutes to crisp it back up. Just watch it carefully so it doesn’t burn!
What are the most frequently asked questions on
Final Thoughts
Honestly, I can’t recommend this chocolate granola enough. It’s become such a staple in my kitchen because it’s just so versatile, incredibly satisfying, and makes my home smell absolutely amazing when it’s baking. It’s the perfect way to start the day, a great afternoon pick-me-up, or even a healthy-ish dessert. It’s one of those recipes that makes you feel like you’ve achieved something special, even on a busy day. If you’re someone who loves chocolate but wants to keep things wholesome, this is it. Give it a try, and I have a feeling it’ll become your go-to too!
If you give this chocolate granola a whirl, please let me know how it turns out in the comments below! I absolutely love hearing about your kitchen adventures and seeing your creations. Feel free to share any variations you’ve tried too – I’m always looking for new ideas. And if you enjoyed this, you might also like my Simple Spiced Apple Crumble or my Fluffy Blueberry Pancakes. Happy baking, and I hope you enjoy every crunchy, chocolatey bite!
chocolate granola
Ingredients
Main Ingredients
- 2 cups rolled oats
- 0.5 cup unsweetened cocoa powder
- 0.5 cup maple syrup
- 0.25 cup coconut oil, melted
- 0.5 cup chopped nuts (almonds, pecans, walnuts)
- 0.25 cup chocolate chips optional, add after baking
Instructions
Preparation Steps
- Preheat oven to 300°F (150°C). Line a baking sheet with parchment paper.
- In a large bowl, combine rolled oats and cocoa powder. Whisk together.2 cups rolled oats
- In a separate small bowl, whisk together maple syrup and melted coconut oil.2 cups rolled oats
- Pour the wet ingredients over the dry ingredients and stir until everything is well coated. Stir in the chopped nuts.2 cups rolled oats
- Spread the mixture evenly onto the prepared baking sheet.
- Bake for 20-25 minutes, stirring halfway through, until fragrant and slightly crisp. Be careful not to burn the chocolate.
- Let the granola cool completely on the baking sheet. It will crisp up as it cools.
- Once cooled, stir in chocolate chips if using. Store in an airtight container at room temperature.2 cups rolled oats