There are some dishes that just feel like a warm hug, aren’t there? For me, that dish is this chicken tamale pie. It’s not a traditional tamale, mind you, not in the least. Think of it more as a delightful cross between a savory Corn Casserole and a comforting pot pie, all wrapped up in those gorgeous, earthy flavors we associate with tamales. My Grandma used to make something vaguely similar when I was a kid, a sort of corn pudding, but this chicken tamale pie? It’s my own spin, perfected over years of kitchen experiments, and honestly, it’s become an absolute staple in our house, especially on those chaotic weeknights when dinner needs to be delicious, filling, and, let’s be real, relatively fuss-free. If you love the idea of a hearty, flavorful bake that’s both familiar and exciting, you’re going to adore this chicken tamale pie.
What is chicken tamale pie?
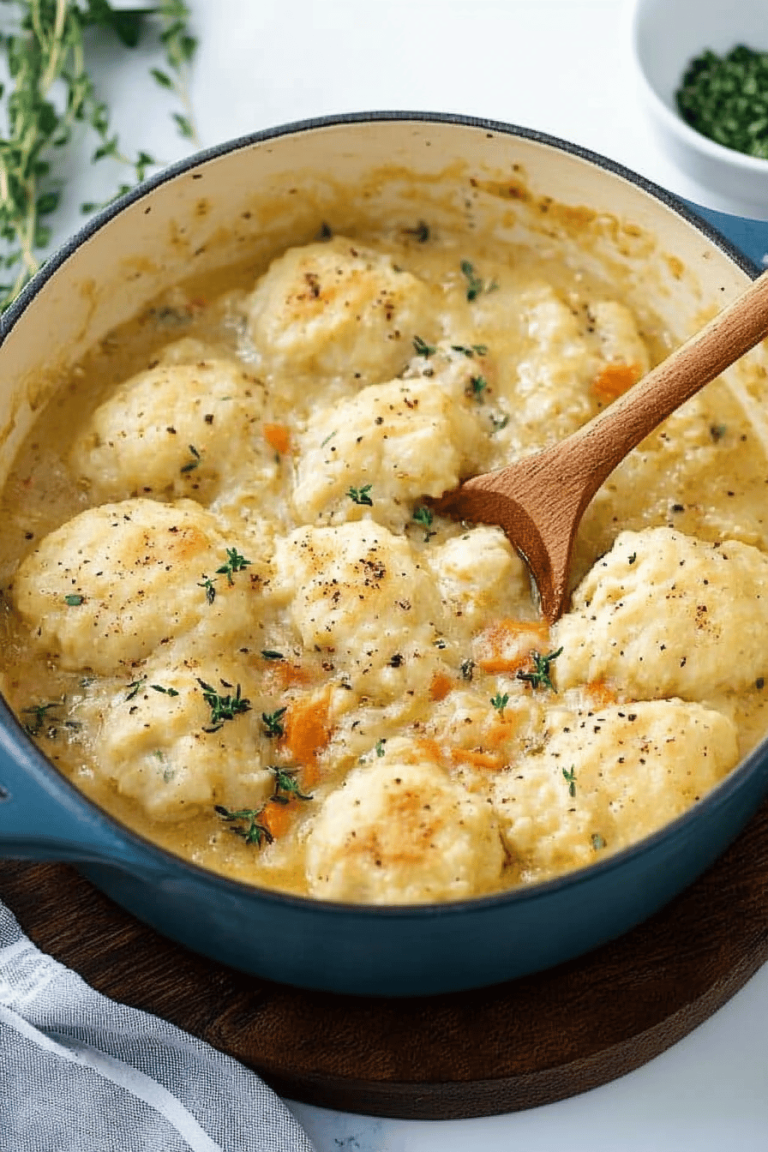
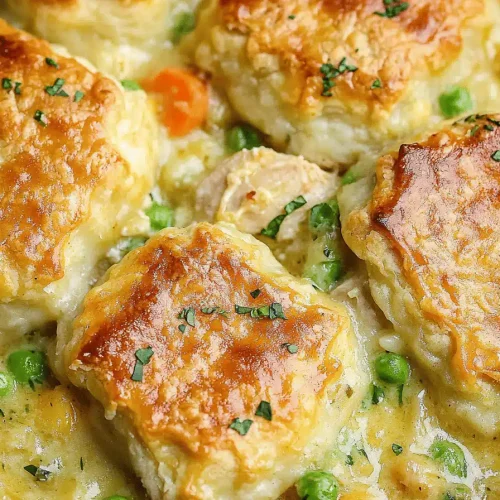
So, what exactly *is* chicken tamale pie? At its heart, it’s a layered casserole where the bottom is a tender, savory chicken filling, and the top is a moist, cornbread-like batter. The “tamale” part comes from the flavors – think cumin, chili powder, a hint of sweetness, and often some corn kernels integrated right into that topping. It’s like taking all the best parts of a classic tamale filling and putting it into an easy-to-bake, sliceable pie form. It’s not folded in masa dough; instead, it’s built in a baking dish, making it incredibly approachable for even beginner cooks. Imagine a rich, slightly spicy chicken mixture nestled beneath a golden, slightly sweet corn crust. It’s the kind of meal that makes your kitchen smell amazing and brings everyone to the table.
Why you’ll love this recipe?
There are so many reasons this chicken tamale pie has earned a permanent spot on my recipe card rotation, and I bet you’ll find yourself feeling the same way. First off, the FLAVOR explosion is just incredible. It’s savory, a little bit spicy (but you can totally control that heat!), with that unmistakable comfort food vibe. The tender chicken filling gets infused with aromatic spices, and then you have that sweet, slightly crumbly cornbread topping – it’s pure magic together. What I really love most about this is its SIMPLICITY. Forget standing over a pot, meticulously steaming tamales. This comes together so much faster, and most of the work is just mixing ingredients. It’s a real lifesaver when you’re short on time but still want something homemade and wholesome. Plus, it’s ridiculously COST-EFFICIENT. You’re using pantry staples and common ingredients, making it a budget-friendly option that doesn’t skimp on taste. And let’s talk VERSATILITY! This chicken tamale pie is fantastic served hot out of the oven, of course, but it’s also pretty darn good at room temperature, making it perfect for potlucks or picnics. You can easily adapt the filling with different veggies or even use leftover cooked chicken or turkey. If you enjoyed my recipe for [Easy Weeknight Chili](link to your Chili Recipe), you’ll definitely appreciate the similar flavor profile and ease of this chicken tamale pie.
How do I make chicken tamale pie?
Quick Overview
Making this chicken tamale pie is a straightforward, two-part process: preparing a flavorful chicken filling and then topping it with a simple, moist cornbread batter. You’ll sauté some aromatics and chicken, season it beautifully, then spread that into your baking dish. Next, you’ll whip up a quick batter, pour it over the filling, and bake until golden and bubbly. It’s the kind of dish that feels impressive but is surprisingly easy to pull off, even on a busy weeknight. The beauty is in its simplicity, and the results are always crowd-pleasing.
Ingredients
For the Main Batter:
- 2 cups all-purpose flour: This gives the topping structure.
- 1 cup yellow cornmeal: For that authentic cornbread flavor and texture. I like a medium grind for a nice bite.
- 1/2 cup granulated sugar: Balances the savory filling and adds a touch of sweetness to the crust. You can adjust this slightly if you prefer it less sweet.
- 2 tablespoons baking powder: Our leavening agent, essential for a light and fluffy topping.
- 1 teaspoon salt: Enhances all the flavors.
- 1 1/2 cups milk: Whole milk makes it richer, but I’ve tested this with 2% and even unsweetened almond milk, and it turned out wonderfully creamy each time!
- 1/2 cup melted unsalted butter: Adds richness and helps create that lovely golden crust.
- 2 large eggs: Bind everything together and add to the tender texture.
For the Filling:
- 2 tablespoons olive oil: For sautéing.
- 1 large onion, chopped: The aromatic base of so many great dishes.
- 2 cloves garlic, minced: Because everything is better with garlic!
- 1 1/2 pounds boneless, skinless chicken thighs or breasts, cut into bite-sized pieces: Thighs tend to stay more tender and moist, but breasts work too.
- 1 (15-ounce) can corn, drained: Adds sweetness and texture.
- 1 (10-ounce) can diced tomatoes with green chilies, undrained: This is a little secret weapon for easy flavor and a touch of heat.
- 1 tablespoon chili powder: The backbone of that tamale flavor.
- 1 teaspoon cumin: Earthy and essential.
- 1/2 teaspoon salt, or to taste
- 1/4 teaspoon black pepper, or to taste
For the Glaze:
- 1/4 cup sour cream or plain Greek yogurt: For tanginess and a creamy finish.
- 1-2 tablespoons milk: To thin the glaze to your desired consistency.
- Pinch of salt
Step-by-Step Instructions
Step 1: Preheat & Prep Pan
First things first, let’s get your oven preheated to 375°F (190°C). Grab a 9×13 inch baking dish. You don’t need to grease it aggressively; a light spray of cooking oil or a thin smear of butter is perfectly fine. This ensures the chicken tamale pie doesn’t stick but also lets those edges get wonderfully golden and slightly crispy.
Step 2: Mix Dry Ingredients
In a large bowl, whisk together the flour, cornmeal, sugar, baking powder, and salt. Give it a good whisk to make sure everything is evenly distributed. This is your base for that delicious cornbread topping. A well-mixed dry ingredient base is key for an even bake.
Step 3: Mix Wet Ingredients
In a separate medium bowl, whisk together the milk, melted butter, and eggs until well combined. The eggs should be fully incorporated, and the mixture should be a uniform color. This is where the magic starts to happen, creating that tender crumb for the topping.
Step 4: Combine
Pour the wet ingredients into the bowl with the dry ingredients. Stir gently with a wooden spoon or spatula until just combined. It’s really important not to overmix here! A few small lumps are perfectly okay. Overmixing develops the gluten in the flour, which can lead to a tough topping. We want it tender and moist!
Step 5: Prepare Filling
Now, let’s get that savory filling going. Heat the olive oil in a large skillet over medium-high heat. Add the chopped onion and cook until it starts to soften, about 5-7 minutes. Toss in the minced garlic and cook for another minute until fragrant, being careful not to burn it. Add the chicken pieces to the skillet. Cook, stirring occasionally, until the chicken is browned on all sides and cooked through. Stir in the drained corn, diced tomatoes with green chilies (juice and all!), chili powder, cumin, salt, and pepper. Let it simmer for about 5 minutes, allowing the flavors to meld together beautifully. Taste and adjust seasoning if needed.
Step 6: Layer & Swirl
Pour the chicken filling evenly into your prepared baking dish. Then, gently spoon the cornbread batter over the top of the filling. You don’t need to spread it perfectly; it will settle and bake evenly. If you want to get fancy, you can use a spatula to smooth it out a bit, but a rustic, slightly swirled look is part of its charm. Make sure the batter covers the filling as much as possible to create that distinct layer.
Step 7: Bake
Place the baking dish in your preheated oven. Bake for 35-45 minutes, or until the topping is golden brown and a toothpick inserted into the center comes out clean. The edges should be set, and you’ll see it bubbling slightly. Ovens can vary, so keep an eye on it, especially towards the end of the baking time.
Step 8: Cool & Glaze
Once it’s out of the oven, let the chicken tamale pie rest for at least 10-15 minutes. This is crucial! It allows the filling to set up and the flavors to meld, making it much easier to slice neatly. While it’s resting, whisk together the sour cream (or Greek yogurt), milk, and a pinch of salt in a small bowl until you have a pourable glaze. You want it to be like a thick but drizzly consistency. Drizzle this over the top of the slightly cooled pie right before serving.
Step 9: Slice & Serve
Now for the best part! Slice the chicken tamale pie into generous squares. The glaze adds a lovely tang that cuts through the richness. Serve it warm and watch it disappear. It’s truly a showstopper!
What to Serve It With
This chicken tamale pie is a meal in itself, but it also plays wonderfully with a few sidekicks, depending on the occasion. For a delightful BREAKFAST or BRUNCH, I love serving it with a dollop of fresh salsa and a side of scrambled eggs. The savory spices are fantastic with a morning meal, and that little bit of tang from the glaze just sings. If you’re serving it for a more elegant brunch, consider a side of avocado slices and a small green salad with a light vinaigrette. As a comforting DESSERT – yes, it can totally work! – I skip the savory spices in the filling and add a touch more sugar to the batter, maybe even some cinnamon. Then, a drizzle of honey or a dollop of whipped cream makes it a sweet treat. For COZY SNACKS or a casual dinner, a simple side of black beans and rice or some corn on the cob is perfect. My kids also love it with a side of their favorite tortilla chips for scooping. It’s just so adaptable!
Top Tips for Perfecting Your Chicken Tamale Pie
I’ve made this chicken tamale pie more times than I can count, and over the years, I’ve picked up a few tricks that I think make all the difference. For the filling, I always make sure the onions are softened nicely before adding the chicken; it builds a better flavor base. And don’t be shy with the spices! Taste your filling before pouring it into the dish and adjust the salt, pepper, chili powder, and cumin to your liking. Sometimes I’ll add a pinch of smoked paprika for an extra layer of smoky depth. For the topping, the key is definitely not to overmix. Seriously, just stir until the dry and wet ingredients are *barely* combined. A few little lumps are a sign of a tender topping, not a sign of a mistake! I learned that lesson the hard way early on. When it comes to the swirl, if you want more defined patterns, you can use a knife to gently swirl the batter into the filling, but I usually just spoon it on and let it be. The ingredient swaps are plentiful here too. If you don’t have diced tomatoes with green chilies, a can of plain diced tomatoes with a tablespoon or two of chopped jalapeños (seeds removed for less heat) works just as well. For the milk, I’ve found that anything from whole milk to even some plant-based milks (like unsweetened oat or soy) work beautifully; they just might slightly alter the richness. And baking? Make sure your oven is properly preheated. A consistent temperature is really important for that golden, cooked-through topping. If your topping seems to be browning too quickly, you can always tent it loosely with foil.
Storing and Reheating Tips
This chicken tamale pie is wonderfully forgiving when it comes to leftovers. If you happen to have any (which is rare in my house!), you can leave it at room temperature for about two hours before it needs to be stored. For refrigerator storage, cover the baking dish tightly with plastic wrap or aluminum foil. It will stay fresh and delicious for up to 3-4 days. The flavors actually tend to meld even more overnight, making the leftovers sometimes taste even better! When you’re ready to reheat, you can gently warm individual slices in the microwave for about 1-2 minutes, or for a crispier crust, you can reheat the entire dish or individual portions in a 350°F (175°C) oven for about 15-20 minutes, until heated through. If you’re reheating a larger portion, you might want to cover it with foil for the first 10 minutes to prevent the top from drying out, then uncover it for the last 5-10 minutes to re-crisp. I don’t usually add the glaze until right before serving, so if you’re storing leftovers, save the glaze for when you reheat and serve. I’ve never frozen it myself because it usually gets eaten too quickly, but I imagine if you did freeze it, it would last for about 2-3 months. Thaw it overnight in the refrigerator before reheating.
Frequently Asked Questions
Final Thoughts
This chicken tamale pie is more than just a recipe to me; it’s a little slice of comfort and joy. It’s the kind of dish that makes everyone in the family happy, and it’s surprisingly easy to pull off, even for a weeknight dinner. The blend of savory, slightly spicy chicken filling with that golden, tender cornbread topping is just pure deliciousness. It’s hearty, satisfying, and always a hit. If you loved this recipe and are looking for other comforting baked dishes, you might also enjoy my [Shepherd’s Pie with Sweet Potato Topping](link to your shepherd’s pie recipe) or my [Easy Baked Ziti](link to your baked ziti recipe). Give this chicken tamale pie a try; I promise you won’t be disappointed! I can’t wait to hear what you think, and I’d absolutely love to see your creations! If you make it, please leave a comment below and share your experience, or even your own little twists. Happy baking!
Chicken Tamale Pie
Ingredients
Cornbread Base
- 0.33 cup fat free milk
- 0.25 cup egg substitute
- 1.5 tablespoon taco seasoning, divided
- 0.25 teaspoon ground red pepper
- 1 can (14.75 oz) cream-style corn
- 1 box (8.5 oz) corn muffin mix such as Jiffy
- 1 can (4 oz) chopped green chiles, drained
Toppings
- 1 can (10 oz) red enchilada sauce Recommend going with an authentic Mexican brand
- 2 cups shredded cooked chicken breast
- 0.75 cup shredded white cheese I used Raclette – random, I know, but it’s what I had on hand, and it ended up being delicious!
- cilantro for topping
- crumbled Cotija cheese for topping
Instructions
Preparation Steps
- Preheat oven to 400°F (200°C). Combine the first 7 ingredients (milk through green chiles), using just 0.5 tablespoon of the taco seasoning, in a large bowl, stirring just until moist. Pour mixture into a round pie plate (mine was glass) coated with cooking spray. Bake for 20-30 minutes.
- While corn is baking, toss the chicken in the remaining 1 tablespoon taco seasoning. When corn is done – it will be just barely set and golden brown – pierce entire surface liberally with a fork (it might stick a little bit to the fork). Pour enchilada sauce over top. Top with chicken; sprinkle with cheese. Bake at 400°F (200°C) for 15 minutes or until cheese melts. Remove from oven; let stand 5 minutes. Cut into 8 pieces; top each serving with cilantro and Cotija cheese.