There are some dishes that just feel like a warm hug, aren’t there? For me, those are the ultimate comfort foods, the ones that taste like childhood and happy memories all rolled into one. And if there’s one dish that absolutely embodies that feeling, it’s a plate of cheesy, saucy, perfectly spiced chicken enchiladas. I’ve made so many enchiladas in my life, from quick weeknight versions to more elaborate weekend projects, but this particular recipe? It’s the one that consistently gets rave reviews, the one my family asks for again and again, and honestly, the one I feel truly proud to share. It’s a little bit like a classic lasagna, in that it has layers of goodness and everyone loves it, but it’s so much simpler and bursting with that distinct, vibrant Mexican-inspired flavor. This isn’t just another recipe; it’s my go-to for those nights when I need something reliably delicious and incredibly satisfying.
What is chicken enchiladas?
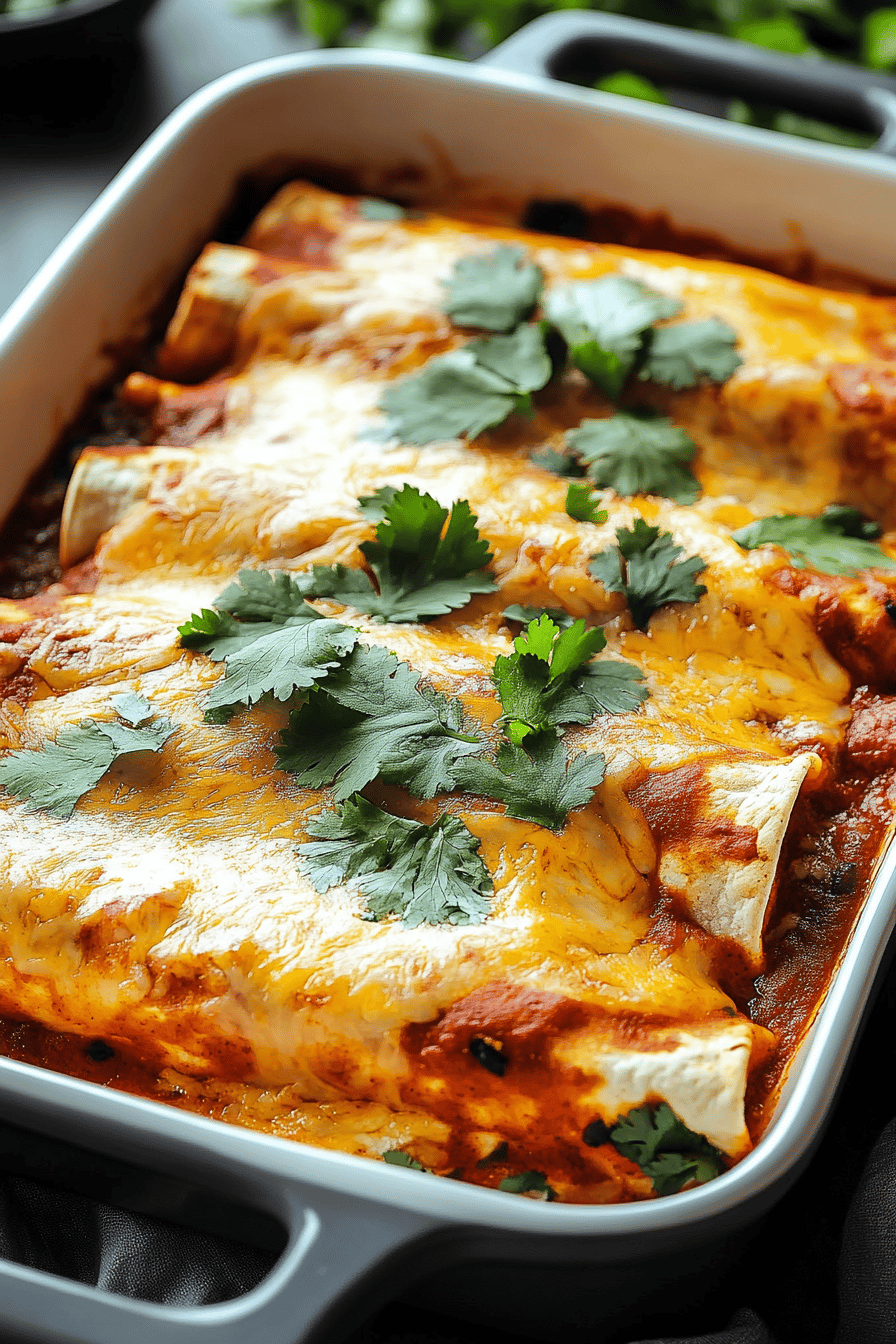
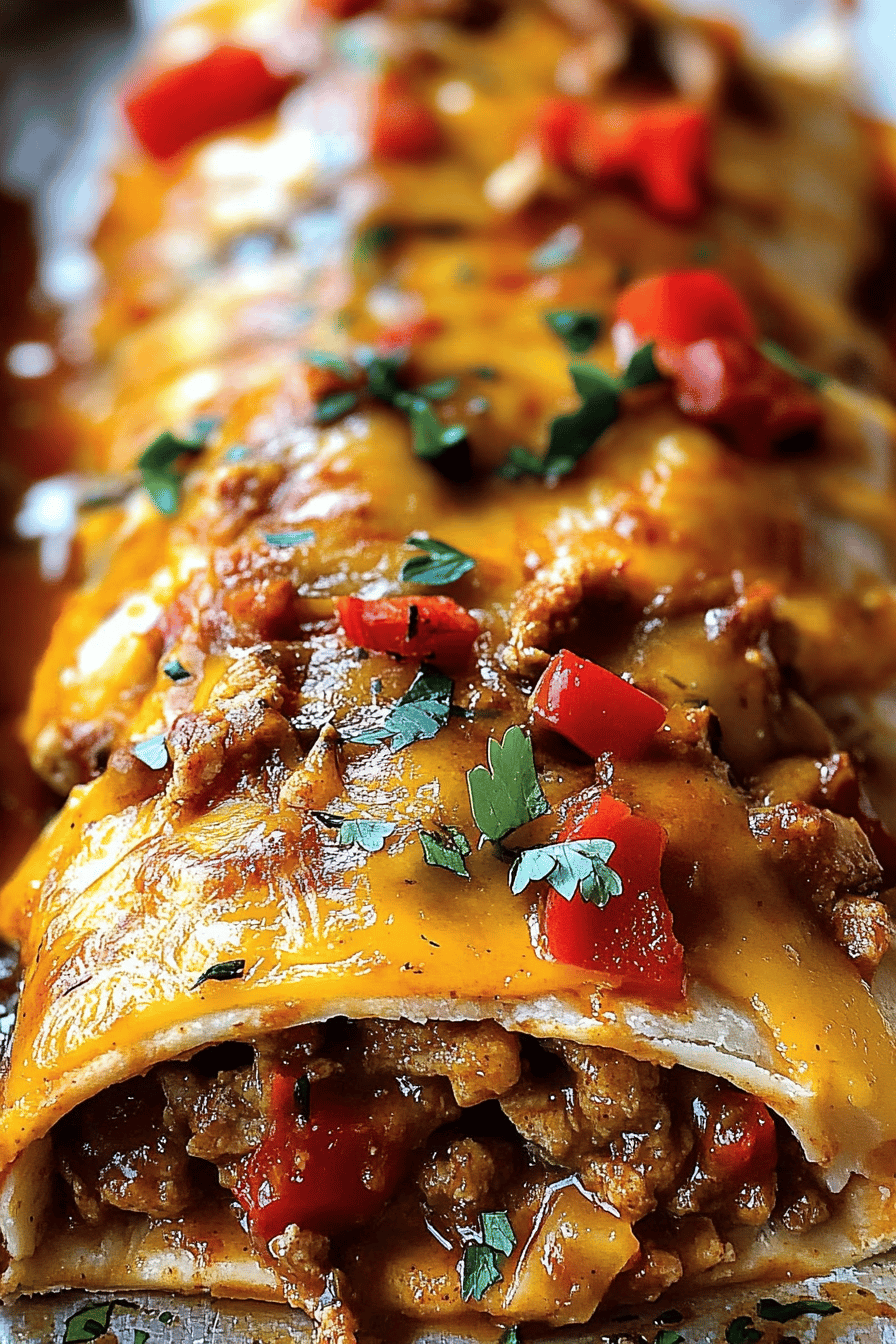
So, what exactly are we talking about when I say chicken enchiladas? Think of them as little bundles of joy, made by wrapping a flavorful chicken filling inside soft corn tortillas, then smothering them in a rich, savory sauce, and finally baking them until they’re bubbly and golden with cheese. It’s essentially a comfort food casserole with a Mexican twist. The name itself, “enchilada,” comes from the Spanish verb “enchilar,” which means “to add chili.” And that’s exactly what we do! We add that wonderful chili flavor through the sauce. It’s a dish that’s incredibly adaptable, but at its heart, it’s about simple, delicious ingredients coming together to create something truly special. It’s not fancy, it doesn’t require a million obscure ingredients, but oh boy, does it deliver on flavor and pure, unadulterated comfort.
Why you’ll love this recipe?
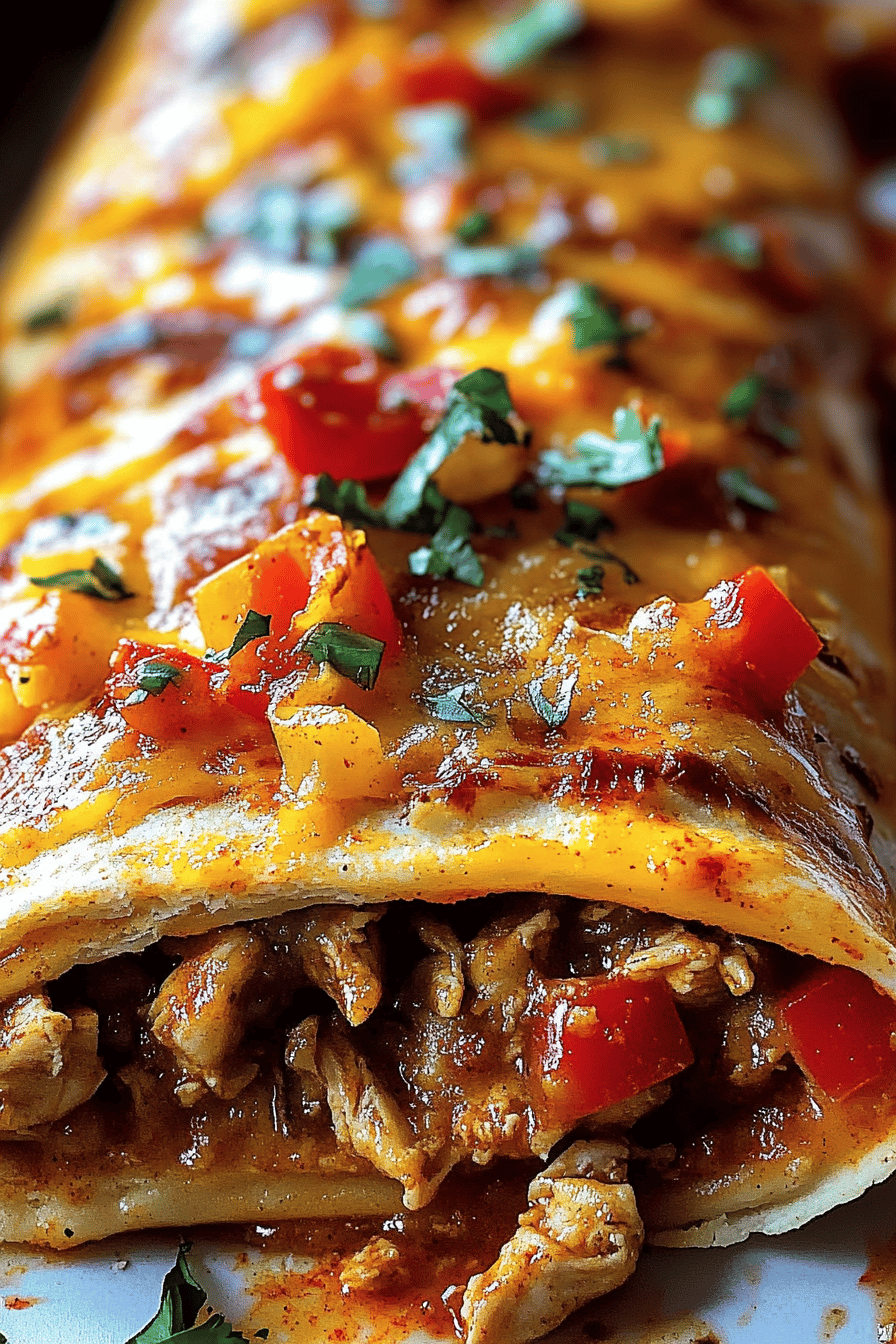
There are so many reasons why this chicken enchilada recipe has become a staple in my kitchen, and I just know you’re going to fall in love with it too! First off, the flavor is just out of this world. We’re talking about tender shredded chicken infused with spices, nestled in soft tortillas, all coated in a sauce that’s both rich and bright. It hits all the right notes – savory, a little spicy (but you can totally control that!), and undeniably delicious. Then there’s the simplicity of it all. While it looks impressive, it’s surprisingly straightforward to make, even on a busy weeknight. I’ve tested this recipe dozens of times, and I’ve found ways to streamline it without sacrificing any of that incredible homemade taste. It’s also wonderfully cost-effective. You’re using everyday ingredients that won’t break the bank, making it perfect for feeding a crowd or just treating your family. What I love most, though, is its versatility. You can easily swap out the chicken for turkey, or even make it vegetarian with beans and veggies. It’s also perfect for leftovers – they’re honestly almost as good the next day, which is a huge win in my book! If you enjoy dishes like my Baked Ziti or my Shepherd’s Pie, you’ll appreciate the comforting, layered nature of these enchiladas.
How do I make chicken enchiladas?
Quick Overview
The beauty of these chicken enchiladas lies in their straightforward assembly. We’ll start by getting our chicken ready, then we’ll whip up a simple, flavor-packed sauce, soften our tortillas just enough, fill them generously, roll them up, and bake them until golden and bubbly. It’s a process that’s incredibly rewarding, and the end result is always worth the little bit of effort. Trust me, this method makes it almost foolproof, even if you’re new to making enchiladas.
Ingredients
For the Main Batter:
Here’s what you’ll need to get started. I always try to use good quality Chicken Breasts for this; they shred so nicely and absorb flavor beautifully. About 2 pounds should do it. I also like to use yellow corn tortillas because they hold up well and have that classic flavor. You’ll need about 12 of them, and I recommend grabbing the ones that are specifically labeled “for enchiladas” if you can find them, as they tend to be a bit softer and more pliable. Don’t worry if yours are a little stiff; we’ll take care of that in the steps!
For the Filling:
For the filling, we’re keeping it classic and delicious. You’ll need about 3 cups of shredded cooked chicken (I often just boil or bake Chicken Breasts ahead of time and shred them – it’s a lifesaver!). Then, we’ll mix in some finely chopped onion (about half a medium one), a couple of cloves of minced garlic, and a generous teaspoon each of chili powder and cumin. A pinch of salt and pepper to taste, of course. Some people like to add a can of drained and rinsed black beans or some corn for extra texture and flavor – feel free to experiment! I’ve tried adding a little bit of cheese right into the filling itself, and it makes them extra gooey and decadent.
For the Glaze:
This is where the magic really happens! For the sauce, you’ll need a 28-ounce can of crushed tomatoes, which gives it a lovely smooth texture. Then, about 4 ounces of chopped green chilies (mild or hot, depending on your preference!), a tablespoon of chili powder, a teaspoon of cumin, a teaspoon of dried oregano, and a pinch of salt and pepper. If you like things a little richer, a tablespoon of olive oil or butter to sauté the onions and garlic for the sauce is a great addition. And of course, we’ll need plenty of shredded cheese! Monterey Jack, cheddar, or a Mexican blend all work wonderfully. About 2 cups should be perfect for topping.
Step-by-Step Instructions
Step 1: Preheat & Prep Pan
First things first, let’s get our oven all warmed up and ready to go. Preheat it to 375°F (190°C). Then, grab a 9×13 inch baking dish – this is the perfect size for this recipe. Lightly grease it with a little bit of oil or cooking spray. This step is super important to prevent our delicious enchiladas from sticking, and nobody wants that! It also helps create that lovely crispy bottom layer that’s just irresistible.
Step 2: Mix Dry Ingredients
In a medium bowl, we’re going to combine the dry ingredients for our filling. This includes the shredded cooked chicken, the finely chopped onion, minced garlic, chili powder, cumin, salt, and pepper. Give it all a good mix with a fork or spoon until everything is evenly distributed. I like to make sure all that chicken is nicely coated with the spices; it really helps the flavors meld together beautifully. This is also the stage where you’d add any optional ingredients like beans or corn if you’re using them.
Step 3: Mix Wet Ingredients
Now for the sauce! In a separate saucepan, combine the crushed tomatoes, chopped green chilies, chili powder, cumin, oregano, salt, and pepper. If you’re adding a tablespoon of oil or butter, this is the time to do it before you heat it up. Stir everything together really well. We want all those wonderful spices to start infusing into the tomatoes.
Step 4: Combine
Heat the sauce mixture over medium heat, stirring occasionally, until it’s simmering. Let it simmer for about 5-7 minutes. This not only cooks it through but also allows the flavors to deepen and meld beautifully. While the sauce is simmering, you can lightly warm your corn tortillas. You can do this in a dry skillet for a few seconds per side, or quickly dip them in warm oil – just enough to make them pliable, not crispy. This prevents them from cracking when you roll them up. Be careful not to overdo it, or they’ll become soggy. Once they’re warm and soft, lay one flat and spoon about 1/4 cup of the chicken filling down the center. Roll it up tightly and place it seam-side down in your prepared baking dish. Repeat with the remaining tortillas and filling, arranging them snugly in the dish.
Step 5: Prepare Filling
I’ve already covered how to prepare the filling in Step 2, but just to recap, it’s a simple mix of shredded chicken, aromatics, and spices. The key here is to make sure your chicken is well-seasoned *before* it goes into the tortillas. That way, every bite is packed with flavor. You can even add a little bit of lime juice to the chicken mixture for a brighter taste.
Step 6: Layer & Swirl
Once all your tortillas are rolled and nestled in the baking dish, it’s time to cover them with that gorgeous sauce. Pour the simmering tomato sauce evenly over the top, making sure to get into all the nooks and crannies between the enchiladas. Then, sprinkle the shredded cheese generously all over the top. I like to make sure there’s a nice, even layer of cheese so it melts into a gooey, cheesy blanket. For a little extra flair, you can swirl the sauce a bit with a spoon before adding the cheese, or even reserve a little of the sauce to drizzle on top artfully. But honestly, just pouring it on works perfectly too!
Step 7: Bake
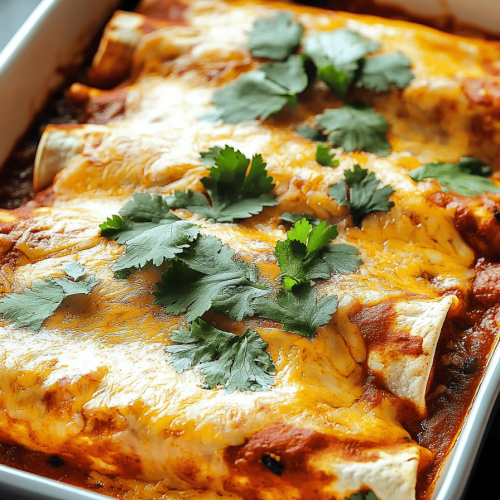
Pop that beautiful pan into your preheated oven. Bake for about 20-25 minutes, or until the sauce is bubbling around the edges and the cheese is completely melted and starting to turn a lovely golden brown. The smell that will fill your kitchen during this time is just incredible – pure comfort food bliss! You want to see those nice bubbly edges; that’s how you know they’re ready to come out.
Step 8: Cool & Glaze
Once they’re out of the oven, let the enchiladas rest for about 5-10 minutes before slicing and serving. This is important! It allows the cheese and sauce to set slightly, making them much easier to serve and preventing them from falling apart. The “glaze” is already on top in the form of the melted cheese and sauce, so no separate glazing step is needed here, which is part of why this recipe is so convenient.
Step 9: Slice & Serve
Use a sharp knife or a spatula to carefully slice the enchiladas into portions. Serve them hot, straight from the baking dish. They look and taste absolutely amazing right out of the oven, with that bubbly cheese and rich sauce. I love serving them with a dollop of sour cream or some fresh cilantro on top, but they’re honestly perfect just as they are. Enjoy every delicious, cheesy bite!
What to Serve It With
One of the things I adore about chicken enchiladas is how versatile they are when it comes to side dishes and accompaniments. They truly are a blank canvas for deliciousness! For a hearty breakfast, I love serving them with a couple of fried eggs on top, maybe a side of sliced avocado, and a strong cup of coffee. The eggs add extra richness, and the cool avocado balances the warmth of the enchiladas perfectly. For brunch, they can be dressed up a bit. I might serve them with a fresh salsa, some Mexican crema, and a side of black beans and rice. A refreshing agua fresca or even a mimosa makes it feel extra special. As a dessert, I know this sounds a little unconventional, but a small portion of these can be surprisingly satisfying after a lighter meal, especially if you’ve made them with a milder sauce. For cozy snacks, they’re fantastic on their own, but a small side salad with a tangy vinaigrette can cut through the richness beautifully. My family also loves having them with tortilla chips and guacamole – it’s like a little fiesta in a bowl!
Top Tips for Perfecting Your Chicken Enchiladas
Over the years, I’ve picked up a few tricks that I think really make a difference in getting these chicken enchiladas just right, every single time. When it comes to the chicken itself, I always find that boiling or poaching the chicken breasts first, then shredding them, results in the most tender and moist filling. If you roast them, make sure not to overcook them, or they can become dry. For the tortillas, the key to avoiding breakage is to soften them properly. You can do this in a dry skillet for about 20-30 seconds per side over medium-high heat, or even a quick dip in a shallow amount of warm oil if you want them a little more supple. Be careful not to fry them! When you’re mixing the filling, don’t be afraid to taste and adjust the seasoning. That little bit of extra cumin or chili powder can really elevate the flavor. For the sauce, I swear by using good quality crushed tomatoes – it makes a noticeable difference in texture and taste. Some people like to add a little bit of chicken broth to the sauce for extra depth, and I’ve tried that, and it’s lovely too! If your sauce seems a bit too thick, a splash of broth or water can thin it out perfectly. When it comes to layering, make sure you’re not overfilling the tortillas, or they’ll be difficult to roll and might burst. And when you bake them, keep an eye on them; ovens can vary, and you want that cheese perfectly melted and bubbly, not burnt. If you find your cheese is browning too quickly, you can always loosely tent the dish with foil. My secret ingredient? Sometimes I add a tiny pinch of sugar to the sauce to balance out the acidity of the tomatoes. It’s subtle, but it rounds out the flavors beautifully. And for serving, don’t skip the resting period! It really does make a difference.
Storing and Reheating Tips
One of the best things about these chicken enchiladas is how well they store and reheat, making them perfect for meal prep or for enjoying leftovers. If you have any that don’t magically disappear (which is rare in my house!), you can store them covered tightly with plastic wrap or in an airtight container at room temperature for no more than two hours. For longer storage, they’re best kept in the refrigerator. Make sure they’re completely cooled before covering them to prevent condensation from making them soggy. They’ll stay delicious in the fridge for about 3 to 4 days. When it comes to reheating, there are a few great ways to do it. My favorite is to pop them back in the oven at around 350°F (175°C) for about 15-20 minutes, or until they’re heated through and the cheese is melty again. This method helps maintain their texture best. If you’re in a real hurry, you can reheat individual portions in the microwave, but be aware that the tortillas might become a bit softer. Just microwave on medium power in 30-second intervals until warm. I generally advise against refreezing them after they’ve been cooked and stored, as the texture can get a bit mushy. However, if you know you’ll want to freeze some, it’s best to assemble them and freeze them *before* baking. Wrap the unbaked enchiladas tightly in plastic wrap and then foil, and they should last in the freezer for up to 2-3 months. When you’re ready to cook them from frozen, just remove the wrapping and bake them at 350°F (175°C) for longer, probably 35-45 minutes, until heated through and bubbly. For storing leftovers, I usually wait to add any fresh toppings like cilantro or sour cream until right before serving.
Frequently Asked Questions
Final Thoughts
There you have it – my tried-and-true recipe for chicken enchiladas that I just know you’re going to adore. It’s the kind of dish that feels like coming home, that brings smiles to faces and makes everyone feel a little bit happier. I love how it transforms simple ingredients into something so incredibly satisfying and flavorful. It’s perfect for a family dinner, a casual get-together with friends, or even when you just need a little bit of culinary comfort. If you enjoy this, you might also love my recipes for Chicken Fajitas or my Easy Taco Casserole, as they share that same vibrant, crowd-pleasing appeal. I genuinely hope you give these chicken enchiladas a try. I can’t wait to hear what you think, and I’d absolutely love to see your creations! Don’t hesitate to leave a comment below with your thoughts or any variations you’ve tried. Happy cooking, and even happier eating!
Chicken Enchiladas
Ingredients
Chicken Filling
- 2 cups cooked shredded chicken
- 1 can diced green chilies 4 oz can, undrained
- 0.5 cup salsa verde
- 0.5 cup sour cream
- 1 teaspoon cumin
- 0.5 teaspoon salt
- 0.25 teaspoon black pepper
Assembly
- 12 tortillas corn tortillas
- 2 cups shredded Monterey Jack cheese
- 1 cup enchilada sauce red or green, as preferred
Optional Toppings
- sour cream
- chopped cilantro
- diced avocado
Instructions
Preparation Steps
- Preheat oven to 375°F (190°C). Lightly grease a 9x13 inch baking dish.
- In a medium bowl, combine the shredded chicken, diced green chilies (undrained), salsa verde, sour cream, cumin, salt, and pepper. Mix well until evenly combined.
- Warm the corn tortillas slightly to make them pliable. You can do this by heating them in a dry skillet for about 30 seconds per side, or by wrapping them in a damp paper towel and microwaving for 30-60 seconds.
- Spoon about 2 tablespoons of the chicken mixture into the center of each tortilla. Sprinkle with a little shredded cheese. Roll up the tortillas tightly and place them seam-side down in the prepared baking dish.
- Pour the enchilada sauce evenly over the rolled tortillas. Sprinkle the remaining shredded cheese on top.
- Bake for 20-25 minutes, or until the cheese is melted and bubbly and the sauce is heated through.
- Let stand for a few minutes before serving. Garnish with your favorite optional toppings like sour cream, cilantro, or avocado.