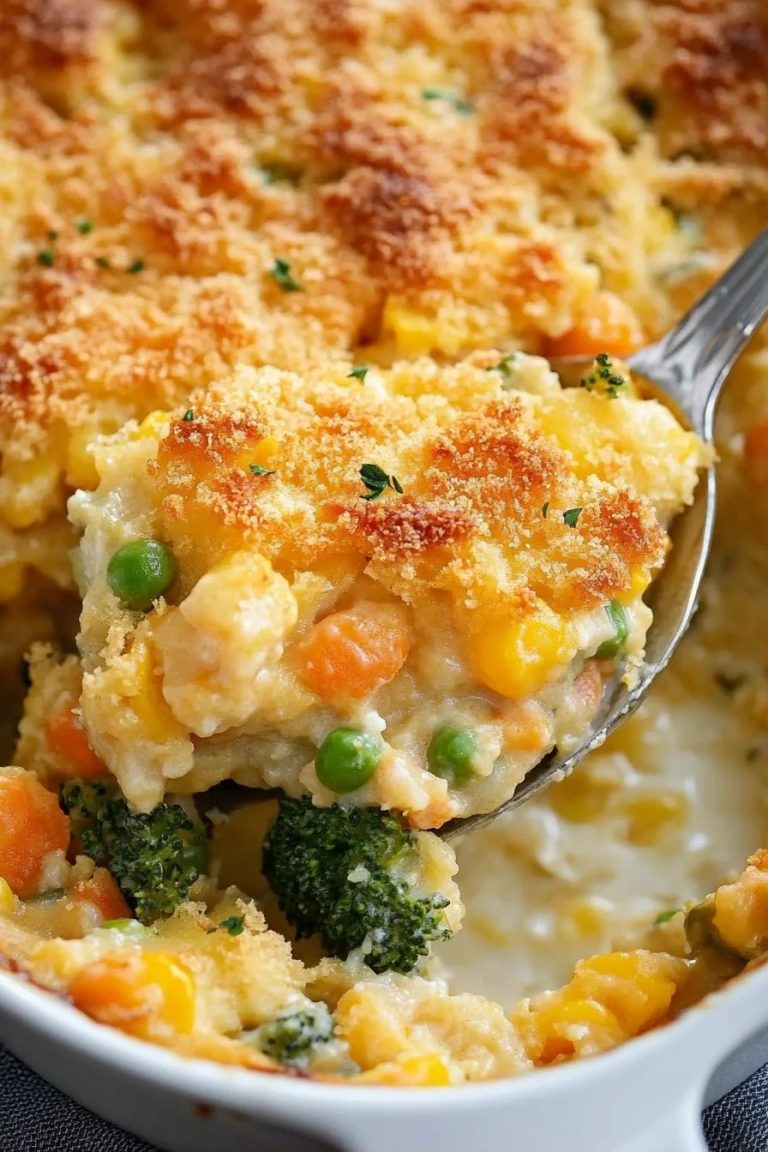
Oh, where do I even begin with this cheesy rice casserole? Honestly, it’s one of those dishes that feels like a warm hug. My Grandma Elsie used to make this for us when I was a kid, especially on those chilly Sunday afternoons when we’d all gather at her house. The moment that oven door opened, the most incredible aroma would fill her tiny kitchen – that mix of melted cheese, perfectly cooked rice, and a hint of something savory. It was always the first thing to disappear from the table, and even now, the smell of it baking takes me right back to those happy times. If you’re anything like me, you probably have a go-to comfort food, and for our family, this cheesy rice casserole is it. It’s like a more sophisticated, infinitely more delicious cousin to those boxed mac and cheese packets, but somehow just as easy to whip up. Seriously, if you’re looking for a crowd-pleaser that doesn’t require a culinary degree or a ton of fancy ingredients, you’ve found your new best friend.
What is a Cheesy
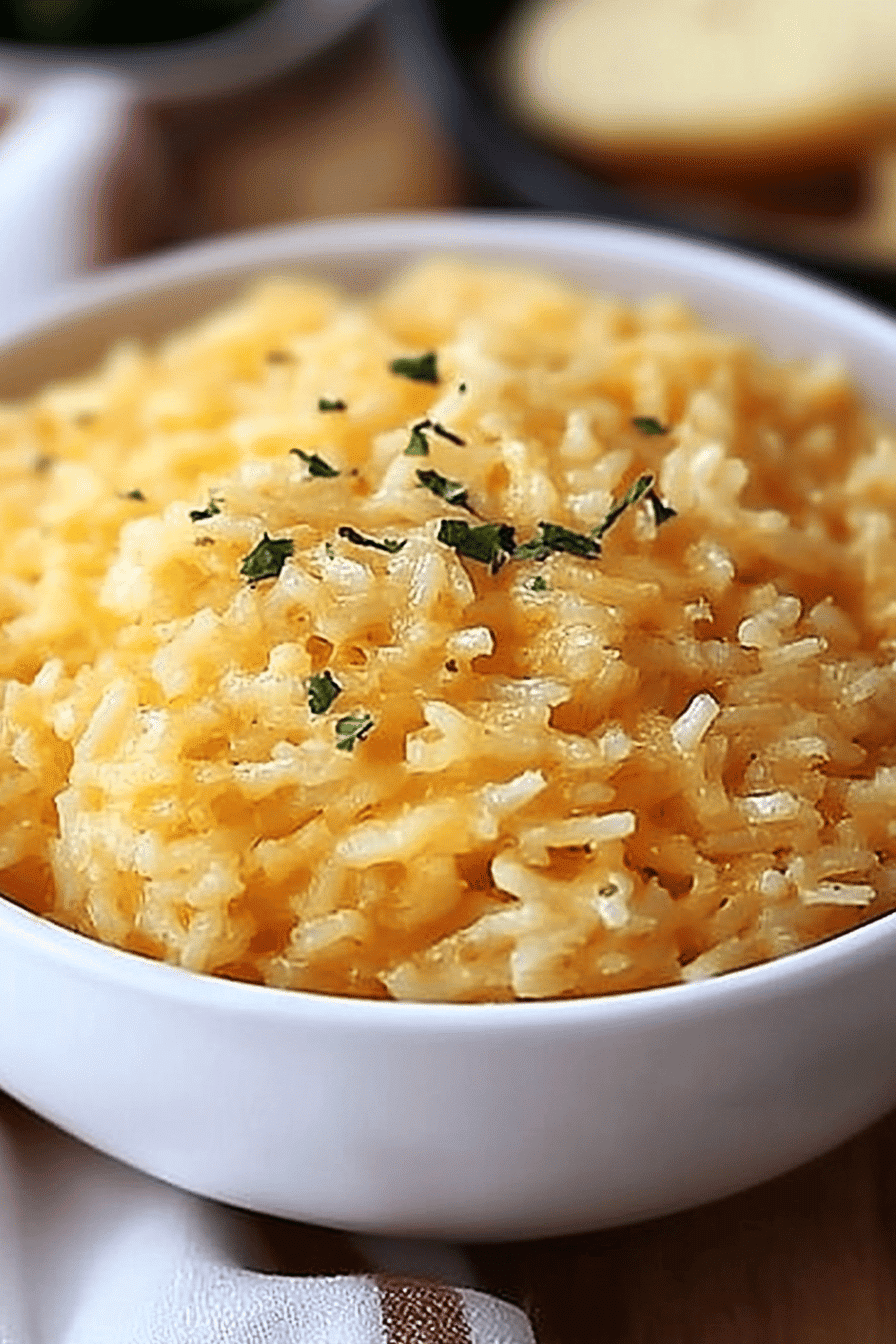
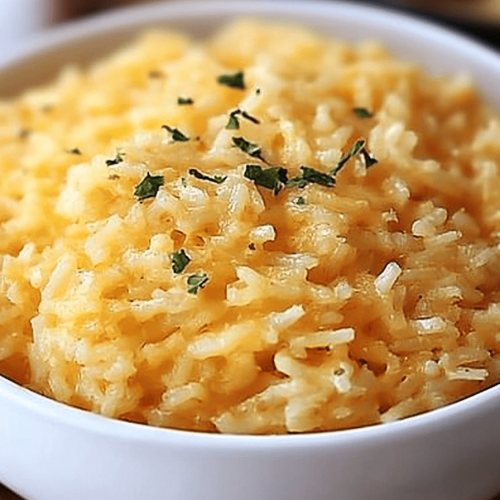
So, what exactly *is* this magical dish we call cheesy rice casserole? At its heart, it’s exactly what it sounds like: rice, bathed in a creamy, cheesy sauce, all baked together until it’s bubbly and golden. Think of it as the ultimate comfort food mashup, combining the satisfying chewiness of perfectly cooked rice with the irresistible gooeyness of melted cheese. It’s not overly complicated; it’s essentially a baked rice dish where the rice absorbs all those wonderful flavors as it bakes. The “casserole” part just means it all comes together in one glorious dish, making cleanup a breeze – a big win in my book! It’s the kind of food that makes you want to curl up on the couch with a good book or gather your favorite people around the dinner table. It’s humble, yet incredibly satisfying, and proves that sometimes, the simplest ingredients can create the most memorable meals.
Why you’ll love this recipe?
There are so many reasons why I just know you’re going to fall head over heels for this cheesy rice casserole. Let’s start with the flavor, shall we? It’s a symphony of creamy, savory, and cheesy goodness. Every bite is like a little party in your mouth. And the texture! You get that tender, slightly chewy rice mixed with pockets of melted cheese that are just pure bliss. What I love most, though, is how incredibly simple this recipe is to make. It’s a lifesaver on busy weeknights when you need something delicious on the table fast, but also feels special enough for a weekend dinner. You probably already have most of the ingredients in your pantry right now, which means no last-minute grocery store dashes! Plus, it’s super budget-friendly. Rice and cheese are staples, and the other additions are just as economical. And let’s talk versatility – this isn’t a one-trick pony. It’s fantastic as a side dish, but honestly, it’s hearty enough to be a main course, especially if you add some veggies or protein. It’s like a blank canvas for deliciousness! Compared to something like a complicated gratin, this cheesy rice casserole is a walk in the park, and the results are just as impressive, if not more so. My family devours it every single time, and I’m betting yours will too!
How do I make cheesy rice
Quick Overview
This cheesy rice casserole comes together in a few simple steps: cook your rice, whip up a quick and creamy cheese sauce, combine everything, and bake until it’s gloriously bubbly and golden brown. The beauty of this method is that it’s so forgiving. Even if your rice isn’t perfectly fluffy, the sauce will help it along. It’s a straightforward process that guarantees delicious results, making it one of my absolute go-to recipes when I need a comforting meal without a lot of fuss.
Ingredients
For the Main Dish:
2 cups uncooked white rice (long-grain like Basmati or Jasmine works beautifully here; avoid minute rice, it gets too mushy!)
4 cups water or low-sodium chicken broth (broth adds an extra layer of flavor, highly recommended!)
1 teaspoon salt
1/2 teaspoon black pepper
4 tablespoons unsalted butter
1 cup milk (whole milk makes it extra creamy, but 2% works too!)
1/2 cup sour cream (this is my secret weapon for that tangy creaminess – don’t skip it!)
2 cups shredded cheddar cheese (sharp cheddar gives the best flavor, but a mix of cheddar and Monterey Jack is also fantastic)
1 cup shredded Gruyere cheese (optional, but it adds such a lovely nutty depth!)
1/4 cup finely chopped fresh parsley (for a pop of freshness and color)
For the Optional Topping:
1/4 cup panko breadcrumbs
1 tablespoon melted butter
Step-by-Step Instructions
Step 1: Cook the Rice
First things first, get that rice going. In a medium saucepan, combine your 2 cups of uncooked rice, 4 cups of water or broth, and that 1 teaspoon of salt. Bring it to a boil over medium-high heat, then reduce the heat to low, cover tightly, and let it simmer for about 15-18 minutes, or until all the liquid is absorbed and the rice is tender. Once it’s cooked, I like to let it sit, covered, off the heat for another 5 minutes. This steams it perfectly and ensures fluffy grains. Then, gently fluff it with a fork.
Step 2: Melt the Butter and Warm the Milk
While the rice is resting, grab a large saucepan or a Dutch oven. Melt the 4 tablespoons of butter over medium heat. Once it’s melted and bubbly, pour in your 1 cup of milk. You just want to warm the milk through; don’t let it boil. This helps create a smooth sauce later.
Step 3: Make the Cheesy Sauce
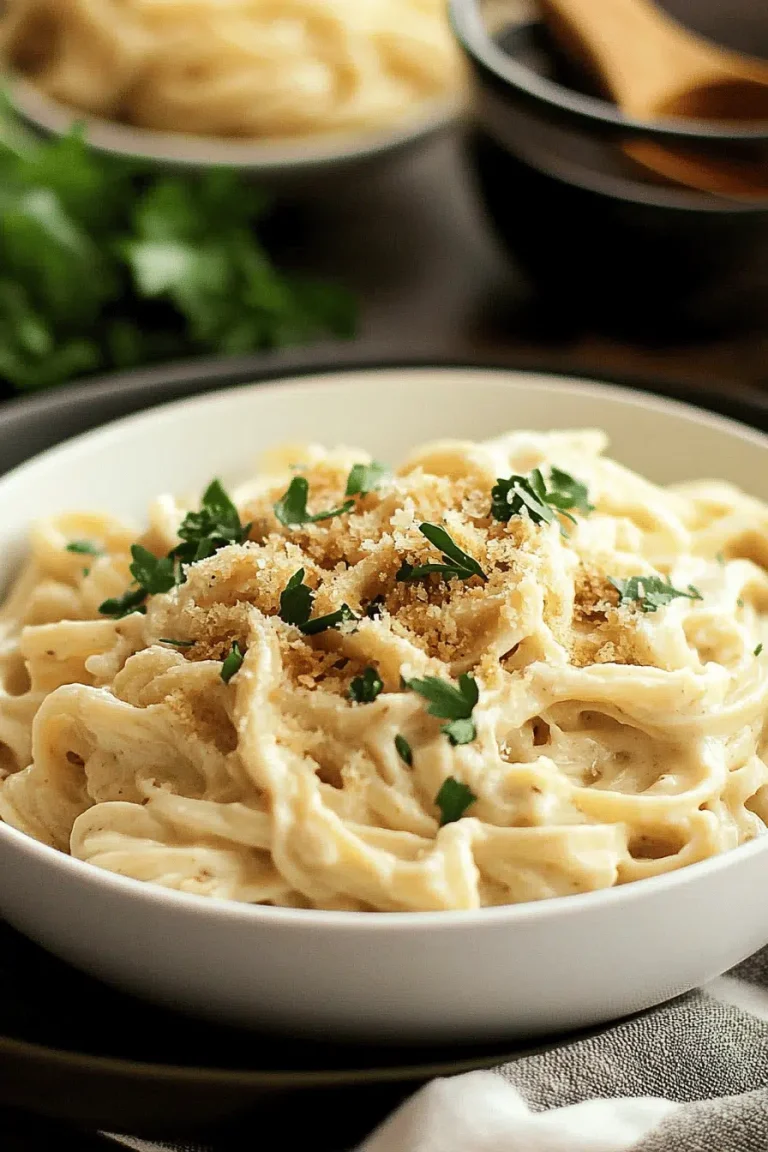
Now for the magic! Reduce the heat under the saucepan to low. Whisk in the 1/2 cup of sour cream until it’s smooth and well combined with the milk and butter. Then, gradually add your shredded cheeses, a handful at a time, stirring constantly until each addition is melted and the sauce is luxuriously smooth and creamy. This is where that cheesy goodness starts to really come alive! You want a nice, thick, velvety sauce. If it seems a bit too thick, you can always whisk in another splash of milk.
Step 4: Combine Everything
Add your fluffed, cooked rice to the pot with the cheese sauce. Gently fold everything together until the rice is completely coated in that glorious cheesy sauce. Stir in the 1/2 teaspoon of black pepper and the fresh parsley. Make sure every grain of rice is touched by that cheesy goodness!
Step 5: Transfer to Baking Dish
Preheat your oven to 375°F (190°C). Lightly grease a 9×13 inch baking dish (or a similar-sized casserole dish). Pour the cheesy rice mixture into the prepared dish and spread it out evenly. I like to give the top a gentle pat down to ensure an even layer.
Step 6: Prepare the Optional Topping (If Using)
If you want that extra little crunch, in a small bowl, combine the 1/4 cup of panko breadcrumbs with the 1 tablespoon of melted butter. Toss them together until the breadcrumbs are evenly coated. Sprinkle this mixture evenly over the top of the cheesy rice.
Step 7: Bake Until Bubbly and Golden
Pop the casserole dish into your preheated oven. Bake for 20-25 minutes, or until the casserole is hot, bubbly around the edges, and the topping (if you used it) is golden brown and crispy. The aroma that wafts from your oven at this stage is just heavenly – seriously, it’s worth the wait!
Step 8: Let it Rest
This is a tough but important step: let the cheesy rice casserole rest for about 5-10 minutes after taking it out of the oven. This allows the sauce to set up just a bit, making it easier to serve and preventing it from being too runny. Plus, it gives you a moment to anticipate that first delicious bite!
Step 9: Serve and Enjoy!
Serve hot, spooned directly from the dish. It’s absolutely divine on its own, but I’ll tell you more about what to serve it with in a bit!
What to Serve It With
This cheesy rice casserole is so versatile, it truly fits into any mealtime. For a simple and comforting breakfast, I love serving a small portion alongside some scrambled eggs and crispy bacon. It’s surprisingly hearty and a lovely change from toast. For a more elegant brunch, it’s fantastic as a side dish. Imagine it next to a beautifully roasted salmon, some fresh Fruit Salad, and maybe some mini quiches. It adds that perfect creamy, savory element to round out the meal. As a dessert? Well, it’s not *exactly* dessert in the sweet sense, but it’s such a satisfying “main event” that it often feels like a treat. I’ve served it as a hearty main course on its own, or alongside a simple green salad with a light vinaigrette to balance out the richness. And for those cozy snack times? This is pure gold. I’ll often just grab a fork and dig in straight from the dish when I need a little pick-me-up. It’s perfect with a side of steamed broccoli or even some roasted chicken if you want to make it a more complete meal. My kids especially love it with simple grilled chicken tenders.
Top Tips for Perfecting Your Cheesy Rice Casserole
Over the years, I’ve tinkered with this recipe quite a bit, and I’ve learned a few tricks that I think really elevate it. For the rice, using chicken broth instead of water makes a HUGE difference in flavor. It’s subtle, but it’s there. Also, don’t overcook the rice initially; you don’t want it to turn into mush before it even hits the oven. When you’re making the cheese sauce, the key is to keep the heat low and add the cheese gradually. If you add it all at once or have the heat too high, you risk it becoming grainy or greasy. Trust me on this one, low and slow is the way to go for that silky smooth texture. I also find that using a good quality sharp cheddar really brings out the cheesy flavor. Sometimes I’ll even mix in a little bit of smoked paprika into the cheese sauce – it adds a wonderful depth without making it spicy. If your sauce seems a bit too thick after adding the cheese, don’t be afraid to whisk in another tablespoon or two of milk until it reaches your desired consistency. For the topping, while panko is my go-to for crunch, you can also use regular breadcrumbs mixed with a little melted butter and maybe even some grated Parmesan cheese for extra savoriness. When it comes to baking, every oven is a little different, so keep an eye on it. You want it to be bubbly and golden, but not dried out. If you notice the topping is browning too quickly, you can always loosely tent the dish with foil for the last 5-10 minutes of baking. And that resting period after baking? It’s crucial. It lets everything meld together perfectly and makes serving so much easier. I learned this the hard way by trying to serve it straight from the oven and ending up with a bit of a soupy mess!
Storing and Reheating Tips
This cheesy rice casserole is so good, you’ll probably want to make extra so you have leftovers! If you have any lingering after dinner, let it cool down at room temperature for about an hour. Then, cover the dish tightly with plastic wrap or foil, or transfer any portions into airtight containers. It will keep beautifully in the refrigerator for about 3-4 days. When you’re ready to reheat, you have a few options. For a single serving, I love to pop it in the microwave for about 60-90 seconds, stirring halfway through, until heated through. If you’re reheating a larger portion, you can place it back in a 350°F (175°C) oven for about 15-20 minutes, or until it’s warmed through and bubbly again. You might want to add a tiny splash of milk or a dollop of sour cream before reheating if it seems a little dry. As for freezing, yes, you absolutely can! Let the casserole cool completely, then cover it very well with plastic wrap and then foil, or transfer to a freezer-safe container. It should be good in the freezer for up to 2-3 months. To thaw, transfer it to the refrigerator overnight and then reheat as directed. If you want that lovely crispy topping, you might want to add fresh panko and butter and bake it uncovered after thawing and reheating.
Frequently Asked Questions
Final Thoughts
So there you have it, my absolute favorite cheesy rice casserole! It’s more than just a recipe for me; it’s a connection to my past, a way to bring my family together, and a reliable source of pure comfort. I truly believe that everyone needs a recipe like this in their repertoire – something that’s incredibly satisfying, surprisingly simple, and always a hit. Whether you’re serving it as a side, a main, or just sneaking a forkful straight from the dish (no judgment here!), I hope it brings as much joy to your table as it does to mine. If you give this cheesy rice casserole a try, please let me know how it turns out in the comments below! I love hearing your stories and seeing your creations. You can also rate the recipe there. And if you’re looking for more comforting dishes, be sure to check out my recipe for creamy tomato soup or my foolproof roasted chicken. Happy cooking!
Cheesy Rice
Ingredients
Main Ingredients
- 2 cups Cooked Rice
- 1 cup Shredded Cheddar Cheese
- 0.5 cup Milk
- 2 tablespoons Butter
- 0.25 teaspoon Salt
- 0.125 teaspoon Black Pepper
Instructions
Preparation Steps
- Preheat your oven to 350°F (175°C).
- In a medium saucepan, melt the butter over medium heat.2 cups Cooked Rice
- Add the cooked rice, milk, salt, and pepper to the saucepan. Stir until well combined.2 cups Cooked Rice
- Gradually stir in the shredded cheddar cheese until melted and the mixture is creamy.2 cups Cooked Rice
- Pour the cheesy rice mixture into a greased baking dish.
- Bake for 15-20 minutes, or until bubbly and heated through.
- Serve hot.