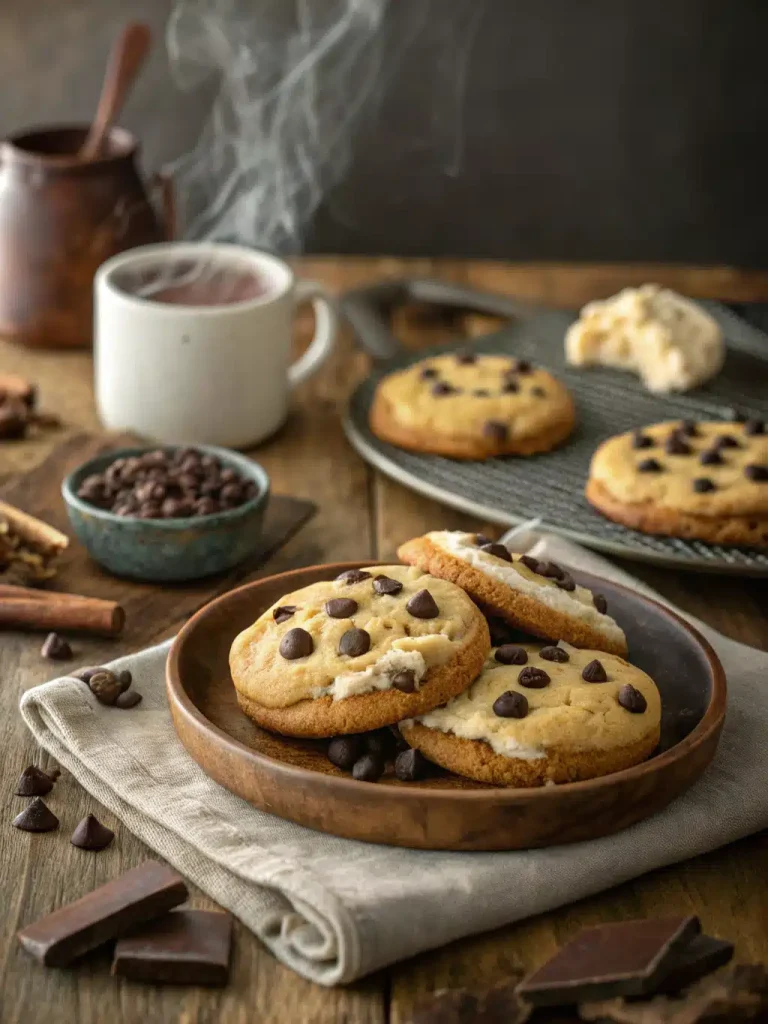
Oh, friends, do I have a treat for you today! You know those places that serve those warm, flaky, cheesy biscuits that disappear faster than free samples at Costco? The ones that make you sigh with pure happiness with every bite? Well, I’ve spent years trying to recreate that magic at home, and I think I’ve finally nailed it. These Cheddar Bay biscuits are just *everything*. They’re fluffy on the inside, slightly crisp on the edges, and bursting with that glorious cheddar flavor we all know and love. My family devours them, my friends beg for the recipe, and honestly, they’re my go-to when I need a little comfort food fix. If you’ve ever loved those famous restaurant biscuits, you’re going to be obsessed with this homemade version. It’s surprisingly easy, and the payoff is just immense. Trust me on this one; your kitchen is about to smell like heaven!
What are Cheddar Bay Biscuits?
So, what exactly are these magical little rounds we call Cheddar Bay biscuits? At their heart, they are a type of savory scone or biscuit, enriched with cheese and often a hint of garlic and herbs, giving them that unmistakable aroma and flavor. The “Bay” in the name is a nod to the way they’re often served, reminiscent of a cozy bay or harbor, but really, it just adds a touch of whimsy to a truly delicious treat. Think of them as the ultimate savory muffin, but with a tenderness and richness that puts them in a league of their own. They’re the perfect accompaniment to pretty much anything, or honestly, they’re so good you can just eat them plain with a smear of butter. It’s that irresistible combination of flaky pastry, melty cheese, and savory goodness that makes them so universally loved. They’re basically little clouds of cheesy happiness.
Why you’ll love this recipe?
There are so many reasons why I keep coming back to this Cheddar Bay biscuit recipe, and I’m convinced you’ll fall in love with it too. First and foremost, the flavor is just out of this world. That sharp cheddar goodness isn’t just sprinkled on top; it’s baked right into the dough, giving you that cheesy punch in every single bite. And the texture! Oh, the texture. They are unbelievably tender and fluffy inside, with just a hint of crispness on the outside that gives way to pure buttery, cheesy bliss. What I love most, though, is how surprisingly simple they are to whip up. You don’t need fancy techniques or a million ingredients. Most of what you’ll need is probably already in your pantry. Plus, they’re incredibly cost-effective; you can make a huge batch for way less than you’d pay at a restaurant. And the versatility! I’ll get into this more later, but these aren’t just for dinner sides. They make a fantastic breakfast treat, a great addition to brunch, or even a satisfying dessert when you’re craving something savory. They’re honestly a lifesaver on busy weeknights when you want something special without a lot of fuss. I’ve tested this recipe dozens of times, tweaking it here and there, and this version is the one that consistently brings smiles to faces. It’s that perfect balance of flavor, ease, and pure comfort that makes it a winner in my kitchen every single time.
How do you make Cheddar Bay Biscuits?
Quick Overview
Making these delightful Cheddar Bay biscuits is a straightforward process that involves mixing a few key ingredients, forming them into rustic mounds, and baking them until golden and puffed. The magic happens in the balance of simple pantry staples, good quality cheddar cheese, and a touch of butter and herbs. It’s a hands-off approach for much of the baking time, allowing you to prep other things or just relax. The resulting aroma alone is worth the effort, and the warm, cheesy biscuits are best served fresh from the oven, though they hold up wonderfully for a day or two. You’ll be amazed at how quickly they come together!
Ingredients
For the Main Batter:
2 cups all-purpose flour. This is our sturdy base. Make sure it’s fresh for the best texture.
2 teaspoons baking powder. This is crucial for getting that beautiful lift and airy interior.
1/2 teaspoon salt. Balances out the flavors.
1/4 teaspoon baking soda. Works with the baking powder to create extra tenderness.
1/2 cup (1 stick) cold unsalted butter, cut into small cubes. Cold butter is key for flaky biscuits; it creates steam pockets as it melts.
1 1/2 cups shredded sharp cheddar cheese. Use the good stuff! Sharp cheddar really shines here. Reserve about 1/4 cup for topping.
3/4 cup milk. Whole milk gives the best richness, but 2% works too. You can even try buttermilk for an extra tang!
For the Garlic Herb Butter Topping:
4 tablespoons (1/2 stick) unsalted butter, melted. This is where so much of that irresistible flavor comes from.
1 clove garlic, minced very fine (or 1/2 teaspoon garlic powder). Fresh is always best if you can manage.
1 tablespoon chopped fresh parsley (or 1 teaspoon dried). Fresh parsley adds a lovely pop of color and freshness.
Step-by-Step Instructions
Step 1: Preheat & Prep Pan
First things first, let’s get our oven ready. Preheat your oven to 400°F (200°C). While the oven heats up, line a baking sheet with parchment paper. This makes cleanup a breeze and prevents any sticking. You can also lightly grease the baking sheet if you don’t have parchment paper.
Step 2: Mix Dry Ingredients
In a large mixing bowl, whisk together the all-purpose flour, baking powder, salt, and baking soda. Give it a good whisk to ensure everything is evenly distributed. This step is important because it ensures your leavening agents are spread out, leading to uniform puffiness in your biscuits.
Step 3: Mix Wet Ingredients
In a separate medium bowl or a large liquid measuring cup, whisk together the milk. I often add my cheese to the dry ingredients, but you could technically add some to the wet if you want to be adventurous! For this recipe, we’re keeping it simple and adding most of the cheese to the dry mixture.
Step 4: Combine Wet and Dry
Now, let’s bring it all together. Add the cold, cubed butter to the dry ingredients. Using a pastry blender, two forks, or even your fingertips, cut the butter into the flour mixture until it resembles coarse crumbs with some pea-sized pieces of butter still visible. Don’t overwork it! Those little butter pieces are crucial for tenderness. Next, pour in the milk. Stir just until the dough comes together. It will be a bit shaggy; that’s exactly what we want. Overmixing here will result in tough biscuits, and nobody wants that!
Step 5: Prepare Filling (Cheese Incorporation)
Now for the star of the show! Gently fold in the 1 1/4 cups of shredded sharp cheddar cheese into the dough. Again, mix just until it’s incorporated. You want to see cheesy pockets, not a uniformly colored dough.
Step 6: Form & Top Biscuits
Drop heaping tablespoons of dough onto your prepared baking sheet. I like to leave them a little rustic, so don’t worry about making them perfectly round. You can use a spoon or an Ice Cream scoop. Space them about 2 inches apart as they will expand a bit. Now, take the reserved 1/4 cup of shredded cheddar and sprinkle it over the tops of the biscuits. This gives you those lovely cheesy bits on the crust.
Step 7: Bake
Pop those beauties into the preheated oven. Bake for 15-20 minutes, or until the biscuits are puffed up, golden brown on top, and a toothpick inserted into the center comes out clean. Keep an eye on them, as ovens can vary!
Step 8: Cool & Glaze
While the biscuits are baking, quickly melt the 4 tablespoons of butter for the topping in a small bowl. Stir in the minced garlic and chopped parsley. Once the biscuits are out of the oven, let them cool on the baking sheet for just a minute or two. Then, generously brush the garlic herb butter mixture all over the tops of the warm biscuits. The heat will make them soak up all that garlicky, herby goodness. They’ll smell absolutely incredible at this stage!
Step 9: Slice & Serve
These Cheddar Bay biscuits are best served warm, straight from the oven. You can serve them whole or slice them in half if you like. They are perfect on their own, but an extra little dab of butter on top never hurt anyone!
What to Serve It With
These Cheddar Bay biscuits are truly the culinary equivalent of a chameleon – they fit in beautifully no matter the meal or occasion! For a simple
For Breakfast:
I love serving these alongside a strong cup of coffee. They’re fantastic with a side of scrambled eggs or even just on their own as a warm, savory start to the day. My kids sometimes sneak one to school in their lunchbox, and it’s always a huge hit.
For Brunch:
They elevate any brunch spread. Imagine them next to a quiche, a platter of fruit, or even a creamy avocado toast. They add a touch of rustic elegance that makes the meal feel extra special. I’ve also made mini versions for a more delicate brunch bite.
As Dessert:
Don’t knock it till you try it! While they’re savory, their rich, buttery, cheesy nature can be surprisingly satisfying as a sweet-ish end to a meal, especially if you’ve had a lighter main course. I sometimes serve them with a dollop of honey butter or a drizzle of agave. They’re particularly good after a hearty stew or chili.
For Cozy Snacks:
This is where they truly shine for me. After a long day, there’s nothing better than a warm Cheddar Bay biscuit with a smear of butter. They are the perfect comfort food companion to a bowl of soup (especially tomato soup or a hearty chowder) or a side dish for a casual weeknight dinner like roasted chicken or a simple pasta dish. My family often requests them when we’re having a movie night or game night; they disappear in minutes!
Top Tips for Perfecting Your Cheddar Bay Biscuits
I’ve made these Cheddar Bay biscuits countless times, and through trial and error, I’ve picked up a few tricks that I think make all the difference. So, let’s dive into how to make them absolutely perfect every single time. First, when it comes to the
Zucchini Prep:
wait, that’s not right! Oh, my goodness, my brain is still stuck on another recipe! For these *biscuits*, the key is really in the cold butter. Make sure your butter is straight from the fridge, and cut it into small cubes. When you’re cutting the butter into the flour, aim for pieces that are about pea-sized. These pockets of butter will melt during baking, creating steam that makes the biscuits light and flaky. If you overwork the dough or the butter gets too warm, you’ll end up with dense, heavy biscuits, and that’s a tragedy we want to avoid!
Mixing Advice:
Speaking of overmixing, this is probably the most critical tip for tender biscuits. Mix the wet and dry ingredients *just* until they come together. A shaggy dough is your friend! If you see streaks of flour, that’s okay. Overmixing develops the gluten in the flour, which leads to toughness. It’s better to have a slightly under-mixed dough than an over-mixed one. Gently fold in the cheese; you don’t want to mash it into the dough.
Swirl Customization:
While this recipe doesn’t involve swirling, if you wanted to add a little pizzazz, you could do a simple sprinkle of paprika or chili flakes on top with the cheese for a bit of color and subtle heat. Or, try a sprinkle of dried chives!
Ingredient Swaps:
I’ve experimented quite a bit here! For the milk, I’ve found that whole milk yields the richest flavor, but 2% works perfectly fine. If you happen to have buttermilk, that’s an excellent substitute and adds a lovely tang. For the cheese, while sharp cheddar is my absolute favorite for its bold flavor, you can certainly use a medium cheddar, a blend of cheddar and Monterey Jack, or even some Gruyère for a more complex nutty flavor. Just make sure it’s good quality cheese that melts well.
Baking Tips:
Ensure your oven is fully preheated. A hot oven is crucial for biscuits to puff up properly and get that nice golden crust. Placing them on parchment paper not only helps with cleanup but also ensures a nice even bake on the bottom. If you notice the tops browning too quickly before the insides are cooked, you can always loosely tent a piece of foil over them for the last few minutes of baking.
Glaze Variations:
The garlic herb butter is divine, but you can totally switch it up! For a spicier kick, add a pinch of cayenne pepper to the melted butter. For a hint of sweetness, a tiny drizzle of honey can be lovely. You can also use a garlic-infused olive oil if you prefer. And if you’re not a fan of garlic, just use plain melted butter with parsley for a cleaner flavor. The key is to brush it on while the biscuits are still warm so they absorb all that deliciousness.
Storing and Reheating Tips
Okay, so you’ve made a batch of these irresistible Cheddar Bay biscuits, and maybe, just *maybe*, you have a few leftovers. Don’t worry, they store beautifully, and you can enjoy them again! For storing at
Room Temperature:
I find they’re best eaten the same day they’re made. However, if you have a couple left, store them in an airtight container or wrap them snugly in plastic wrap at room temperature for up to 2 days. They might lose a little of their initial crispness, but they’ll still be wonderfully soft and flavorful.
Refrigerator Storage:
If you need to keep them longer, the refrigerator is your best bet. Store them in an airtight container or a zip-top bag in the fridge for up to 4-5 days. Make sure to let them cool completely before sealing them up to prevent condensation, which can make them soggy. When reheating, you’ll want to bring them back to life!
Freezer Instructions:
These biscuits freeze incredibly well! Let them cool completely. Then, wrap each biscuit individually and tightly in plastic wrap, followed by a layer of aluminum foil or place them in a freezer-safe zip-top bag. They can stay in the freezer for up to 2-3 months. To thaw, remove them from the freezer and let them come to room temperature, or reheat directly from frozen.
Glaze Timing Advice:
For the best flavor and texture, I always recommend applying the garlic herb butter *after* baking and just before serving. If you are storing them and plan to reheat, I’d skip the initial glaze before storing. Reheat them first, and then brush with fresh garlic herb butter (or just plain melted butter) once they’re warm again. This keeps that fresh, vibrant flavor. To reheat, I usually pop them in a 350°F (175°C) oven for about 5-10 minutes, or until warmed through. Microwaving works in a pinch, but it can sometimes make them a bit chewier, so a quick oven reheat is preferred for that just-baked texture.
Frequently Asked Questions
Final Thoughts
So there you have it, my friends! These Cheddar Bay biscuits are more than just a recipe; they’re a little piece of comfort and joy that you can whip up right in your own kitchen. I truly believe that simple, honest ingredients can create the most magical results, and this recipe is a perfect testament to that. The way they smell while baking, the sheer delight on everyone’s faces when they take that first warm, cheesy bite – it’s just unbeatable. I hope you love making them as much as I do, and I can’t wait to hear how they turn out for you! If you try them, please leave a comment below and let me know your favorite way to enjoy them. Or, if you have any special variations you discover, share those too – I’m always looking for new ways to play in the kitchen! Happy baking, and may your home always be filled with the aroma of deliciousness!
Cheddar Bay Biscuits
Ingredients
Biscuit Dough
- 2 cups all-purpose flour
- 2 tablespoons granulated sugar
- 2.5 teaspoons baking powder
- 0.5 teaspoon salt
- 0.5 cup cold unsalted butter, cut into cubes
- 1 cup milk
Topping
- 0.5 cup unsalted butter, melted
- 1.5 teaspoons garlic powder
- 1 cup shredded sharp cheddar cheese
- 0.5 teaspoon salt
- 0.25 teaspoon dried parsley optional
Instructions
Preparation Steps
- Preheat your oven to 400°F (200°C). Line a baking sheet with parchment paper.
- In a large bowl, whisk together the flour, sugar, baking powder, and salt.
- Cut in the cold butter using a pastry blender or your fingertips until the mixture resembles coarse crumbs.
- Pour in the milk and stir until just combined. Do not overmix.
- Drop spoonfuls of dough onto the prepared baking sheet, about 2 inches apart.
- In a small bowl, whisk together the melted butter, garlic powder, salt, and parsley.
- Brush the tops of the biscuits generously with the garlic butter mixture.
- Sprinkle the shredded cheddar cheese over the buttered tops of the biscuits.
- Bake for 10-12 minutes, or until golden brown and cooked through.
- Serve warm.