There’s something about summer fruit desserts that feels like a warm hug, isn’t there? I’ll never forget the first time I tasted blackberry cobbler—the knife-sharp tang of the berries meeting a soft, buttery topping that puffed up golden and inviting. The kitchen smelled of vanilla and lemon, a little bit of butter sizzling away in the pan, and the first spoonful tasted like sunshine on a sleepy afternoon. This blackberry cobbler isn’t just dessert; it’s a memory you can whip up in under an hour, a pantry-friendly crowd-pleaser, and—best of all—a recipe my family has learned to trust. It’s like comparing a quick crumble to a fancy tart: same fruit, but the cobbler keeps things cozy and homey. I’ve made this countless times, and it never fails to disappear in minutes at my house. My kids actually ask for seconds, which is basically the highest compliment I can get in our kitchen.
What is blackberry Cobbler?
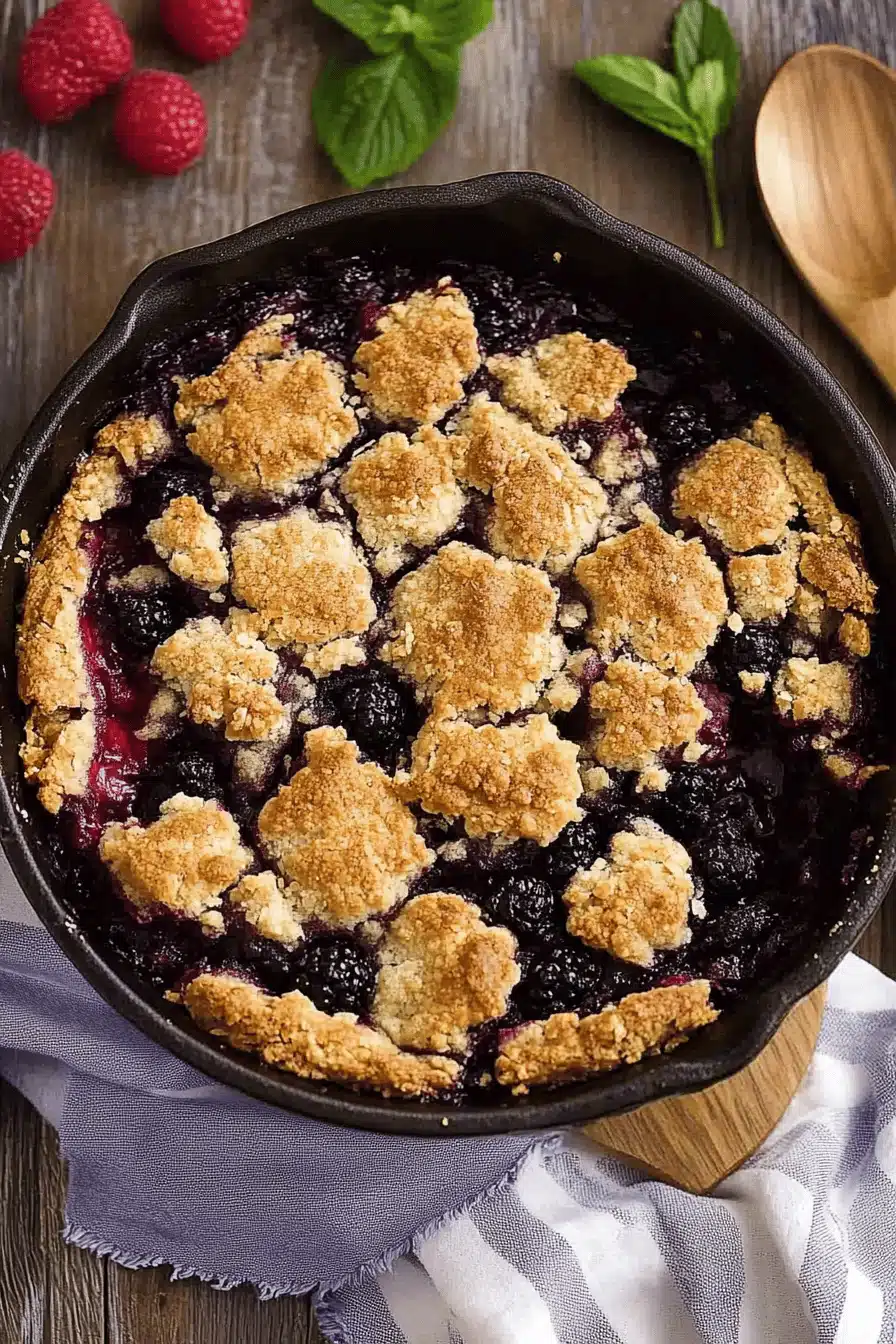
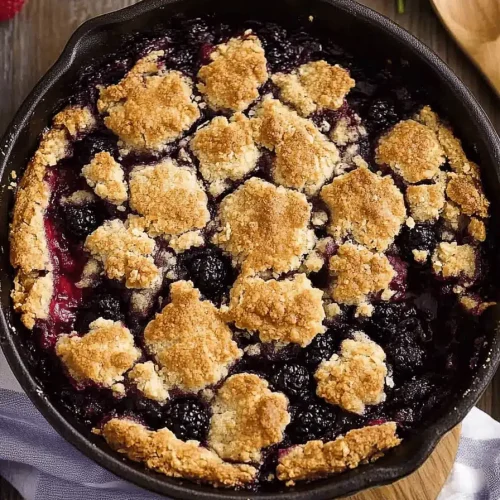
Blackberry cobbler is a humble, honest dessert where juicy blackberries mingle with a soft, biscuit-like batter that bakes up into a warm, saucy crown. Think of it as the best of both worlds: a juicy fruit filling and a tender, slightly crumbly topping that’s perfect for scooping with a spoon. The name “cobbler” comes from the way cooks used to ladle dollops of batter onto fruit, loosely “cobbling” it together rather than pressing a smooth crust. It’s essentially a one-pan dream: you toss berries with a little sugar and cornstarch to thicken, then blanket them with a glossy, buttery batter that rises as it bakes. When it comes out, the edges are caramelized, the center glows with berry juices, and the fragrance is pure comfort. It’s the kind of dish you reach for on busy weeknights or when you’re craving something sweet after the kids are tucked in—no fuss, just flavor.
Why you’ll love this recipe?
What I love most about this blackberry cobbler is how forgiving it is while still feeling special. The flavor is bright and berry-forward, with a gentle vanilla warmth and a hint of lemon that highlights the fruit without turning sharp. The batter is effortlessly simple—no pie weights, no fuss—yet it somehow achieves that just-right balance between biscuit-y and spoonable. It’s a lifesaver on busy nights because you can assemble and bake in one pan, and the clean, friendly ingredient list means you’re not chasing down a dozen weird pantry items. Budget-wise, blackberries are a relative steal when they’re in season, and the filling uses pantry staples like sugar, lemon juice, and a touch of cornstarch for that luscious, glossy finish. Versatility is a big win here: switch up the fruit with peaches in season, or add a handful of raspberries for a tart pop. The texture contrast—soft, tender topping with a juicy, jammy center—keeps every bite interesting. This is the kind of dessert that pairs beautifully with vanilla Ice Cream, a dollop of whipped cream, or even a light lemon cream for a brighter finish.
How do you make blackberry Cobbler?
Quick Overview
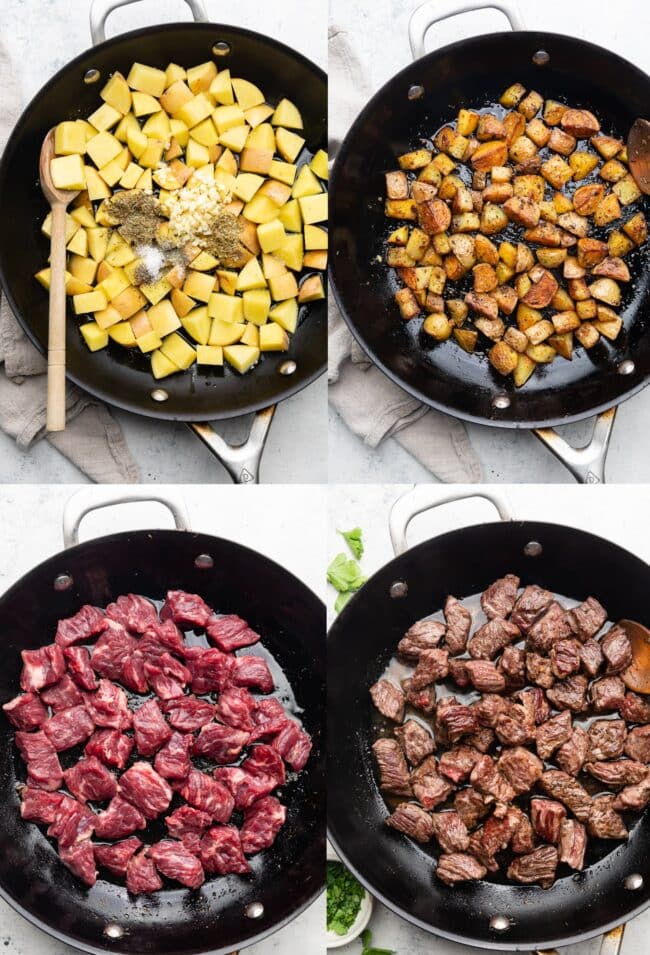
In a single pan, you’ll toss blackberries with a touch of sugar, lemon juice, and cornstarch, then whisk together a simple batter of flour, sugar, baking powder, salt, milk, and melted butter. Pour or dollop the batter over the berry mixture, bake until the top is golden and the filling is bubbling, and finish with a quick lemony glaze if you like. The method is forgiving: the batter doesn’t need to be perfectly smooth, and the berries can be fresh or frozen. The smell alone while it bakes is enough to make neighbors wander over for a taste. You’ll get a warm, cozy crust with a juicy center every time, perfect for serving straight from the oven with a scoop of ice cream on top.
Ingredients
For the Main Batter:
- 1 cup all-purpose flour
- 1/3 cup granulated sugar
- 1 tsp baking powder
- 1/4 tsp baking soda
- 1/4 tsp salt
- 1 cup milk (or buttermilk for extra tenderness)
- 4 tbsp melted butter or light oil
For the Filling:
- 4 cups fresh blackberries (or thawed frozen berries)
- 1/3 cup granulated sugar
- 1 tbsp lemon juice
- 1–2 tsp cornstarch (adjust for juicier or thicker filling)
- Optional: a pinch of orange zest for brightness
For the Glaze (optional):
- 1/2 cup powdered sugar
- 1–2 tbsp lemon juice (or milk for a creamier glaze)
- 1/2 tsp vanilla extract (optional)
Step-by-Step Instructions
Step 1: Preheat & Prep Pan
Heat your oven to 375°F (190°C). Lightly grease a 9×9-inch baking dish or a similar-size casserole dish with butter or oil. A square pan helps the topping cook evenly and gives you that nice, rustic edge. If you’re using a darker pan, you might need a minute less bake time, so keep an eye on it as it nears the end.
Step 2: Mix Dry Ingredients
In a medium bowl, whisk together flour, sugar, baking powder, baking soda, and salt. I’ve learned the hard way that a light whisk here makes the batter more tender, so don’t mash the lumps—just break them up and aerate the mixture a bit.
Step 3: Mix Wet Ingredients
In another bowl, stir together the milk and melted butter until well combined. If you’re using buttermilk, you can skip the extra butter if you want a lighter crust, but I love the extra richness the butter brings. A quick stir with a fork is all you need; you’re not aiming for a glossy batter, just a smooth one with a touch of looseness.
Step 4: Combine
Pour the wet ingredients into the dry ingredients and mix just until combined. A few small lumps are okay—overmixing makes the topping tough. The batter will be slightly thick but pourable; that’s exactly what you want for a rustic cobbler crown.
Step 5: Prepare Filling
In a large bowl, toss the blackberries with the sugar, lemon juice, cornstarch, and optional zest. Let them mingle for about 5–10 minutes; the cornstarch will start to thicken the juices a touch, which is perfect for the bake. If your berries are very juicy, you can add an extra 1/2 teaspoon of cornstarch to keep the filling from being too runny.
Step 6: Layer & Swirl
Spread the blackberry filling evenly in the bottom of your pan. Dollop the batter over the filling in about 6–8 spoonfuls rather than pouring it all at once; this creates a nice marbled effect as it bakes. If you like a more uniform top, you can spread the batter gently with the back of a spoon, but I love the homey swirls that form naturally.
Step 7: Bake
Bake for 35–45 minutes, until the top is golden brown and a bit crisp at the edges, and the filling is bubbling around the sides. If you notice the edges browning too fast, tent the dish with a bit of foil for the last 10 minutes. Ovens vary, so start checking at 30 minutes and go from there. A skewer or knife inserted into the center should come out with only a few moist crumbs clinging to it.
Step 8: Cool & Glaze
Let the cobbler cool for about 15–20 minutes before glazing or serving. The juices will thicken as it rests, making scooping easier. If you’re using glaze, whisk together powdered sugar and lemon juice (and vanilla, if you like) until smooth. Drizzle lightly over the top or serve on the side so everyone can choose their level of sweetness. The glaze is optional, but I adore it for a little extra zing and shine.
Step 9: Slice & Serve
You’ll find the first scoop releasing clouds of steam and the blackberry glow peeking through the topping. Serve warm with a scoop of vanilla ice cream, or a dollop of whipped cream for a lighter finish. A pinch of lemon zest over the top adds a bright finish that delights the palate. This blackberry cobbler is best enjoyed the day it’s baked, but it also reheats beautifully in a low oven covered with foil for gentle warming.
What to Serve It With
There’s no wrong way to enjoy this blackberry cobbler, but I’ve got a few favorites that keep the flavor profile exciting across occasions:
For Breakfast: Serve warmed with a spoonful of yogurt and a sprinkle of toasted almonds; pair with strong coffee and a drizzle of honey for a comforting start to a weekend. The contrast between tangy berries and creamy yogurt is irresistible.
For Brunch: Present in a big, rustic skillet with a couple of scoops of ice cream on the side and a pitcher of cold brew or latte. The appearance alone invites people to gather round and share a story or two.
As Dessert: A classic finish to a weeknight dinner or a weekend dinner party. Offer vanilla ice cream, a dollop of whipped cream, or a bright lemon curd on the side for extra indulgence. If you want an extra touch, add a few fresh blackberries on top for garnish to echo the filling.
For Cozy Snacks: Slice thick and eat with a fork while you trade stories about the day. It’s a comforting, no-fuss treat that still feels special enough to share with neighbors or friends stopping by for a cup of tea.
Family traditions often sneak into this dish, too. I’ve always served blackberry cobbler with a splash of cream after basketball games or a casual Sunday supper. It was the dessert my mom would bring to potlucks—everyone would stand around the kitchen island, sharing warm bites and stories. I’ve kept that spirit alive, and I love hearing that it does the same for your own gatherings. It’s humble, it’s delicious, and it’s a memory-maker in the best possible way.
Top Tips for Perfecting Your Blackberry Cobbler
Here are a few tricks I’ve learned after making this countless times. They’re small adjustments, but they make a big difference.
Berry Prep: If you’re using very juicy berries, add an extra teaspoon of cornstarch to the filling. This keeps the filling from becoming soupy as it bakes. If you’re using frozen berries, don’t thaw completely; allow them to thaw just enough to mix with sugar and cornstarch so you don’t lose too much juice.
Mixing Advice: Don’t overmix the batter. A few lumps are perfectly fine and, in fact, desirable for a tender texture. Overmixing develops gluten and can create a tougher crust. If you want a lighter top, whisk the wet ingredients separately and fold in gently.
Swirl Customization: The marbled look is part of the charm. If you want more defined swirls, spoon larger dollops of batter across the berries and press some of the berry juices into the batter with the spoon as you layer. You’ll see pretty ribbons when it bakes.
Ingredient Swaps: You can use buttermilk for a tangy note that enhances the berries. If you’re avoiding dairy, dairy-free milks work, and a little extra lemon zest helps brighten the fruit. For a gluten-free version, use a cup-for-cup gluten-free baking blend and a bit more milk to loosen the batter if needed.
Baking Tips: Oven temperatures vary, so check at 30 minutes and again at 40 minutes. If your topping browns too quickly, tent with foil. If the middle looks shy of done but the top is gold, you can finish with a quick broil for 1–2 minutes—watch closely to avoid burning.
Glaze Variations: If you prefer a glaze, mix powdered sugar with a little lemon juice and a splash of vanilla. For a richer finish, swap lemon for orange or add a pinch of cardamom to the glaze for a cozy, spiced note.
Lessons Learned: I learned early on not to skip the lemon juice in the filling; it brightens the whole dessert and prevents the berries from tasting dull. I’ve also learned that a slightly smaller pan concentrates the berry juices, giving you that irresistible, saucy center. Don’t be afraid to improvise with the fruit you have—this recipe scales beautifully with peaches, berries, or a mix of summer fruit.
Storing and Reheating Tips
Leftovers happen, and they’re delicious. Here’s how I keep blackberry cobbler tasting great for days.
Room Temperature: If you’ll finish the cobbler within a day, cover lightly with foil or a clean kitchen towel. It’ll stay fresh for about 1 day at room temperature for best texture and flavor.
Refrigerator Storage: Store in an airtight container for up to 3 days. The topping may soften a bit, but it still tastes fantastic, especially with a scoop of cold cream or ice cream.
Freezer Instructions: This cobbler freezes well for up to 2 months. Freeze in a sturdy freezer-safe dish wrapped tightly with plastic wrap and foil. Thaw in the fridge overnight, then reheat in a 325°F (165°C) oven until warmed through. A light bake refreshes the topping beautifully.
Glaze Timing Advice: If you’re planning to freeze, hold off on applying the glaze until you reheat. A fresh drizzle right before serving keeps the topping crisp and vibrant.
Regardless of how you store it, blackberry cobbler is easier to bring back to life than you’d expect. A gentle reheat and a fresh dollop of cream or a quick glaze finish can transform last night’s leftovers into a cozy, comforting treat again.
Frequently Asked Questions
Final Thoughts
There’s something about blackberry cobbler that makes the kitchen feel like a living room—bright, welcoming, and a little imperfect in the best possible way. It’s a dessert you can lean on when you want to feed a hungry crowd without spending all afternoon cooking, but it also carries enough soul to feel like a cherished family recipe. The batter stays tender, the berries stay vibrant, and the whole thing comes together with a few simple moves you’ll remember for years to come. If you try this, please drop a note in the comments with your tweaks—what fruit did you swap in, what glaze did you love most, or how you served it to friends? Happy baking! And as always, thank you for letting me share this with you. I can’t wait to hear how yours turns out!
blackberry cobbler
Ingredients
Main Ingredients
- 2 cups fresh blackberries
- 0.5 cups granulated sugar
- 0.5 cups all-purpose flour
- 0.5 cups whole milk
- 0.25 cups unsalted butter, melted
- 1 teaspoons baking powder
- 0.25 teaspoons salt
Instructions
Preparation Steps
- Preheat the oven to 350 degrees Fahrenheit and grease a 9x13 inch baking dish.
- In a bowl, toss the blackberries with 0.5 cups of granulated sugar and spread evenly in the dish.
- Whisk together the flour, baking powder, and salt in a separate bowl, then stir in the milk and melted butter just until combined.
- Pour the batter over the berries and bake for 25 to 30 minutes until the topping is golden and the filling is bubbling.
- Let cool for 10 minutes before serving with vanilla ice cream if desired.