You know those days? The ones where you’re staring into the pantry, desperately needing a sweet fix, but the thought of baking a whole cake or even a batch of cookies feels like climbing Mount Everest? Yeah, I’ve been there. More times than I can count, actually. And that’s precisely when my mind wanders to this little slice of heaven: banana rice crispy treats. Forget your standard, one-note marshmallow squares. This recipe takes that classic comfort food and elevates it into something truly special. It’s a flavor explosion that still manages to be ridiculously easy to whip up. My kids go absolutely bonkers for these, and honestly, so do I. They’re soft, chewy, packed with that undeniable banana goodness, and have a little surprise tang that just makes them irresistible. If you’ve ever loved a good Banana Bread or a classic rice crispy treat, get ready, because this is where those two worlds collide in the most delicious way possible.
What are Banana Rice Crispy Treats?
So, what exactly are these magical banana rice crispy treats? Think of your favorite childhood treat – the gooey, sticky rice crispy squares that you’d sneak out of the pan before they were even cool. Now, imagine infusing that nostalgic goodness with the warm, comforting flavor of ripe bananas. It’s essentially a classic rice crispy treat recipe, but with a crucial, game-changing addition: mashed ripe bananas. This addition doesn’t just add flavor; it also brings a wonderful moistness and a subtle sweetness that complements the marshmallow and crispy rice perfectly. It’s like giving your beloved old friend a delightful, flavorful makeover. It’s not overly complicated, no fancy ingredients are required, but the result is something that feels a little more sophisticated, a lot more flavorful, and honestly, just plain happier. It’s a simple concept, but oh boy, does it deliver.
Why you’ll love this recipe?
Honestly, where do I even begin with why this banana rice crispy treats recipe is a keeper? Let’s break it down, because there are so many reasons this has earned a permanent spot in my recipe rotation. First and foremost, the flavor. Oh, the flavor! The bananas lend a natural sweetness and a depth that you just don’t get from plain marshmallow. It’s like a hug in edible form. It tastes familiar and comforting, yet excitingly new at the same time. Then there’s the texture. You get that signature chewiness from the marshmallows and that delightful crisp from the rice cereal, but the banana adds this extra layer of soft, moist decadence. It’s not just a chewy treat; it’s a wonderfully nuanced bite.
And simplicity? It’s off the charts. If you can melt marshmallows and stir, you can make these. Seriously. I often whip these up on a weeknight when the sweet craving hits hard and I only have about 15 minutes to spare. It’s a lifesaver! Compared to baking, it’s a walk in the park. No preheating the oven for ages, no worrying about creaming butter and sugar. Just melt, mix, press, and you’re basically there. Cost-effectiveness is another big win here. The ingredients are staples you likely already have in your pantry or can grab without breaking the bank. Bananas, marshmallows, butter, crispy rice cereal – it’s all pretty budget-friendly.
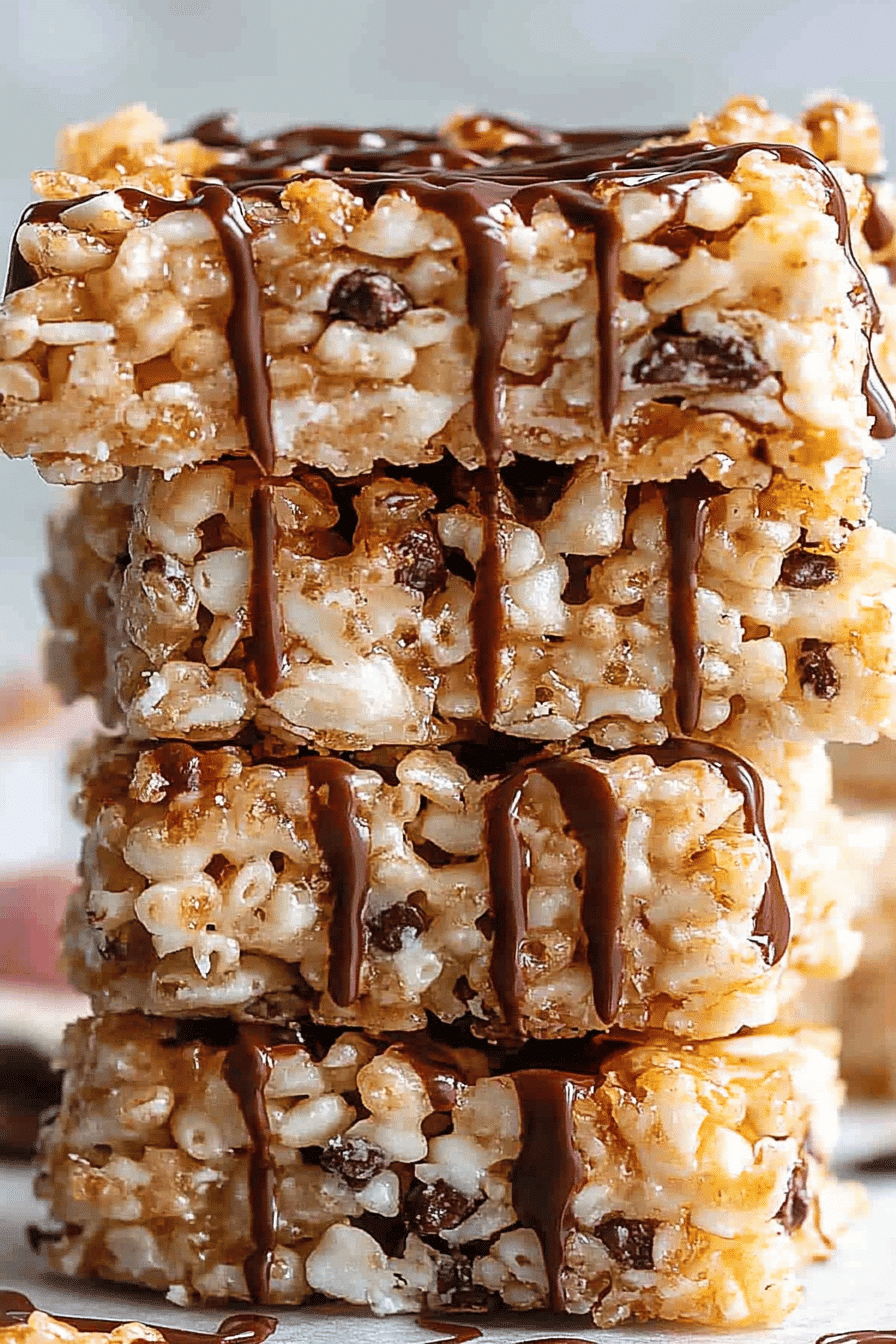
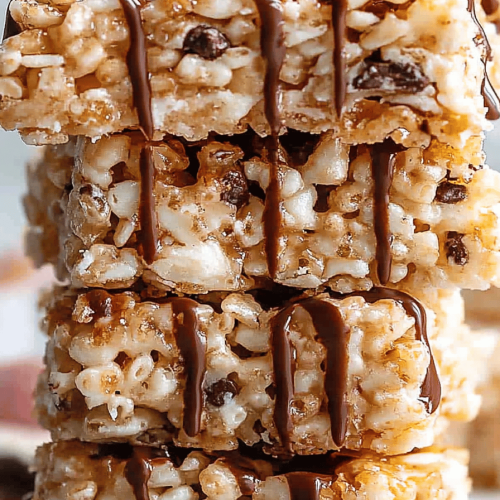
Versatility is also a huge plus. While I adore them just as they are, you can easily customize these. Add a sprinkle of cinnamon to the banana mixture, or swirl in some chocolate chips. Drizzle with a bit of chocolate ganache or a simple powdered sugar glaze. They’re perfect for a quick afternoon snack, an easy addition to a bake sale (they always disappear first!), or even a fun dessert for a casual get-together. What I love most about these banana rice crispy treats, though, is the sheer joy they bring. They’re simple, they’re delicious, and they always put a smile on people’s faces. It’s a recipe that feels like coming home.
How do you make Banana Rice Crispy Treats?
Quick Overview
This recipe is all about combining melted marshmallows and butter with mashed ripe bananas and crispy rice cereal. We’ll then press this mixture into a pan, and sometimes, for an extra special touch, add a simple glaze or swirl. The whole process takes less than 20 minutes from start to finish, and the only “difficult” part is waiting for them to cool slightly before digging in. It’s designed to be foolproof, even for the most beginner of bakers. Just follow the steps, and you’ll have a batch of pure deliciousness ready in no time!
Ingredients
For the Main Batter:
6 cups crispy rice cereal (this is the classic, but you can experiment if you like)
10 ounces mini marshmallows (or about 10 cups if you’re buying from a bulk bin – I usually just grab a couple of standard bags)
1/2 cup unsalted butter (don’t skimp on quality here, it makes a difference!)
2 very ripe bananas, mashed well (look for those brown spots – they mean maximum flavor!)
For the Optional Glaze (highly recommended!):
1 cup powdered sugar (sifted, if you want it super smooth)
2-3 tablespoons milk (or a dairy-free alternative like almond milk)
1/2 teaspoon vanilla extract
Step-by-Step Instructions
Step 1: Preheat & Prep Pan
Grab a 9×13 inch baking pan. I like to lightly grease mine with butter or cooking spray, or even better, line it with parchment paper, leaving some overhang on the sides. This makes lifting the finished treats out so much easier. Set it aside while you get everything else ready. No need to preheat an oven for this one, which is one of the things I love about it!
Step 2: Mix Dry Ingredients
In a really large bowl – and I mean *really* large, you’ll thank me later – pour in your 6 cups of crispy rice cereal. Just dump it all in there. Make sure it’s spread out so it’s ready for the gooey goodness.
Step 3: Mix Wet Ingredients
Now, in a medium saucepan over low heat, melt your 1/2 cup of butter. Once the butter is mostly melted, add in the 10 ounces of mini marshmallows. Stir gently and continuously until the marshmallows are completely melted and smooth. This is where you really have to watch the heat – you don’t want it too high, or you’ll scorch the marshmallows and end up with a weird, rubbery texture. Once smooth, remove the pan from the heat. Immediately stir in your 2 mashed ripe bananas. Mix until everything is well combined and you have a lovely, fragrant banana-marshmallow mixture.
Step 4: Combine
Pour the hot marshmallow-banana mixture over the crispy rice cereal in your large bowl. Now, this is where you need to work relatively quickly but gently. Using a rubber spatula or a large spoon, stir everything together until the cereal is evenly coated. Be gentle so you don’t crush the cereal too much, you want some of that crunch to remain. The mixture will be sticky and smell amazing!
Step 5: Prepare Filling
At this point, you should have your prepared pan ready. Spoon the cereal mixture into the greased or parchment-lined pan. You can use your spatula or the back of a spoon (lightly greased or dampened to prevent sticking) to gently press the mixture evenly into the pan. Don’t press too hard, or your treats will be dense and hard. Just a light, even pressure is perfect. If you’re adding any mix-ins like chocolate chips, now is a good time to sprinkle them over the top and gently press them in a little.
Step 6: Layer & Swirl
This step is optional but highly recommended if you want to elevate your banana rice crispy treats. If you’re adding a glaze, mix the powdered sugar, milk, and vanilla extract in a small bowl until you get a smooth, drizzly consistency. You might need to add a little more or less milk to get it just right. Drizzle this glaze over the top of the pressed treats in the pan. You can use a fork to create a pretty swirl pattern. It looks so professional!
Step 7: Bake
This recipe actually doesn’t require baking! The “setting” happens as it cools. So, you can skip the oven entirely. Just let it sit at room temperature.
Step 8: Cool & Glaze
Now comes the hardest part: waiting! Let the treats cool in the pan for at least 20-30 minutes. If you added the glaze, let it set up a bit during this time. The longer they cool, the firmer they’ll become and the easier they’ll be to cut. I usually aim for about an hour of cooling if I can be patient.
Step 9: Slice & Serve
Once cooled and firm, use the parchment paper overhang to lift the entire block out of the pan. Place it on a cutting board. Using a sharp knife (a serrated knife works well), cut the treats into squares or rectangles. Serve them up and watch them disappear!
What to Serve It With
These banana rice crispy treats are incredibly versatile, and I find myself reaching for them in all sorts of situations. For a simple, comforting breakfast, I love pairing them with a hot cup of coffee. The sweetness of the banana and marshmallow is the perfect complement to a rich brew, and it’s such an easy way to start the day when you’re in a rush. I’ll often cut them into smaller, bite-sized pieces and serve them alongside some fresh fruit for a more balanced breakfast plate.
For brunch, they step up their game a bit. I’ll arrange them on a pretty platter, maybe with a little extra drizzle of chocolate or a dusting of powdered sugar to make them look a bit more elegant. They pair wonderfully with other brunch staples like pancakes or waffles, offering a different texture and flavor profile. A refreshing glass of iced tea or a mimosa feels just right alongside them for a weekend gathering.
As a dessert, these are surprisingly satisfying. They’re not overly heavy, but they hit that sweet spot. I love serving them after a casual dinner. Sometimes, I’ll warm them up *very* slightly in the microwave for about 5-10 seconds to get them extra gooey and pair them with a scoop of vanilla Ice Cream – talk about indulgence! For those cozy, lazy afternoons or evenings when you just need a little something sweet, these are the ultimate comfort snack. They’re perfect for curling up on the couch with a good book or for a movie night. I find they go especially well with a glass of cold milk, just like the old days.
Top Tips for Perfecting Your Banana Rice Crispy Treats
I’ve made countless batches of these banana rice crispy treats over the years, and I’ve picked up a few tricks along the way that I think really make a difference. When it comes to the bananas, ripeness is truly key. Don’t shy away from those dark, spotty bananas! They’re the sweetest and most flavorful, which means you’ll get a more intense banana taste without needing to add extra sugar. Mash them really well with a fork until they’re as smooth as possible. This ensures they’ll distribute evenly throughout the treats and won’t be chunky.
For the mixing, timing and technique are important. Work relatively quickly once you’ve combined the marshmallow mixture with the cereal. The marshmallows will start to set as they cool. However, don’t go overboard with stirring! You want to coat the cereal, but avoid overmixing or mashing it, as this will result in dense, hard treats. A gentle folding motion with a large spatula is best. If the mixture feels too sticky to handle, lightly grease your spatula or dampen your hands with water or butter.
The swirl on top, if you choose to do it, is all about visual appeal. For the glaze, start with less milk than you think you need and add more a teaspoon at a time until you reach a nice, drizzly consistency. You want it thick enough to coat but thin enough to pour and swirl. Don’t overwork the swirl; a few passes with a toothpick or fork is usually enough to create a pretty pattern without mixing the glaze too much into the treats themselves. Remember, the glaze will set as it cools.
Ingredient swaps are where things get fun. If you’re looking for a slightly different flavor profile, try adding a pinch of cinnamon or nutmeg to the mashed bananas. For a bit of texture and richness, you can fold in a handful of chocolate chips, chopped nuts, or even shredded coconut into the cereal mixture before pressing it into the pan. For the liquid in the glaze, while milk is standard, I’ve had great success with almond milk or even a splash of orange juice for a citrusy twist. If you’re not a fan of super-sweet glazes, you can skip it altogether, or just dust the top with a little cocoa powder or powdered sugar for a simpler finish.
Baking tips are easy because there’s no baking! The most crucial part is allowing them to cool and set properly. Resist the urge to cut them too soon. If you cut them while they’re too warm, they’ll likely fall apart. Patience is your best friend here! I usually cut them into 2-inch squares, which is a nice, satisfying size, but you can adjust based on how you plan to serve them.
Storing and Reheating Tips
The great thing about these banana rice crispy treats is that they stay wonderfully soft and chewy for several days, making them perfect for making ahead. When storing them at room temperature, it’s best to keep them in an airtight container. You can line the container with parchment paper to prevent sticking. They’ll usually stay fresh and delicious for about 3 to 4 days this way. I’ve found that if you leave them out uncovered, they can get a bit dry and hard, so always make sure they’re well-sealed!
If you’ve made a big batch and know you won’t get through them in a few days, the refrigerator is a good option. Again, an airtight container is your best bet. Stored in the fridge, they’ll last a bit longer, usually up to a week. Keep in mind that refrigeration can sometimes make treats a little firmer. If you prefer them soft, just let them sit at room temperature for about 20-30 minutes before serving after taking them out of the fridge.
For longer storage, these banana rice crispy treats freeze beautifully! This is a trick I learned when I wanted to have a stash for unexpected guests or just for future cravings. Cut them into individual portions, then wrap each piece tightly in plastic wrap. After they’re individually wrapped, place them all in a freezer-safe bag or an airtight container. They can be stored in the freezer for up to 2 months. To thaw, simply remove them from the freezer and let them come to room temperature on a plate or cooling rack. This usually takes a couple of hours. Don’t reheat them in the microwave if they’re frozen, as it can make them mushy.
Regarding the glaze timing, if you plan to store your treats for more than a day or two, it’s often best to add the glaze just before serving or on the day you plan to consume them. If you glaze them and then store them for a long time, the glaze can sometimes start to get a little sticky or absorb moisture from the treats. However, if they are in an airtight container, it’s usually not a huge issue for a few days.
Frequently Asked Questions
Final Thoughts
So there you have it, my recipe for the most delightful banana rice crispy treats! I genuinely hope you give these a try. They’re a testament to how simple ingredients can come together to create something truly special and comforting. They remind me of lazy afternoons and happy childhood memories, but with a flavor twist that keeps them exciting and new. If you love the classic rice crispy treat, and you adore the taste of banana, these are an absolute must-make. They’re proof that you don’t need to be a gourmet chef to create something that tastes incredible and brings joy to your family and friends.
If you enjoy the combination of banana and cereal goodness, you might also like my recipe for Banana oatmeal cookies or my quick banana bread muffins – both are super simple and always a hit! I can’t wait to hear what you think of these banana rice crispy treats. Have you made them? Did you add any of your own special twists? Please leave a comment below and let me know how yours turned out, or share your favorite tips for making them! And if you share a picture on social media, be sure to tag me – I’d love to see your creations!
Happy baking (or in this case, happy no-baking)!
Banana Rice Krispie Treats
Ingredients
Main Ingredients
- 5 cups Rice Krispies cereal
- 0.25 cup unsalted butter
- 10.5 ounce mini marshmallows
- 1 box banana cream instant pudding mix (3.4 ounce)
Instructions
Preparation Steps
- Butter a 9-inch square baking dish. Set aside.
- In large pot, melt butter on medium heat. Add in marshmallows and stir constantly until completely melted. Remove from heat. Fold in pudding mix until fully combined. Fold in cereal.
- Immediately pour cereal into prepared baking dish. Using buttered fingers, press treats into dish (don't over press or they get hard and dry tasting).
- Allow to set 20 minutes or more before cutting and eating. Enjoy!