There’s something about the smell of peanut butter and chocolate mixing that takes me straight back to my childhood kitchen, where my mom whipped up these no-bake bars in a flash. These no-bake desserts have saved me on more than one hectic afternoon when the oven felt like my enemy. Honestly, they’re like that magic go-to sweet that everyone loves but barely takes any effort. If you’ve ever wished for the decadence of a fudge brownie without the baking fuss and the getting-your-hands-dirty chaos, these bars are your new best friend. Rich, creamy, with just the right touch of sweetness and a little crunch – it’s no surprise my kids ask for seconds (and thirds) every single time.
What is no bake chocolate peanut butter bar?
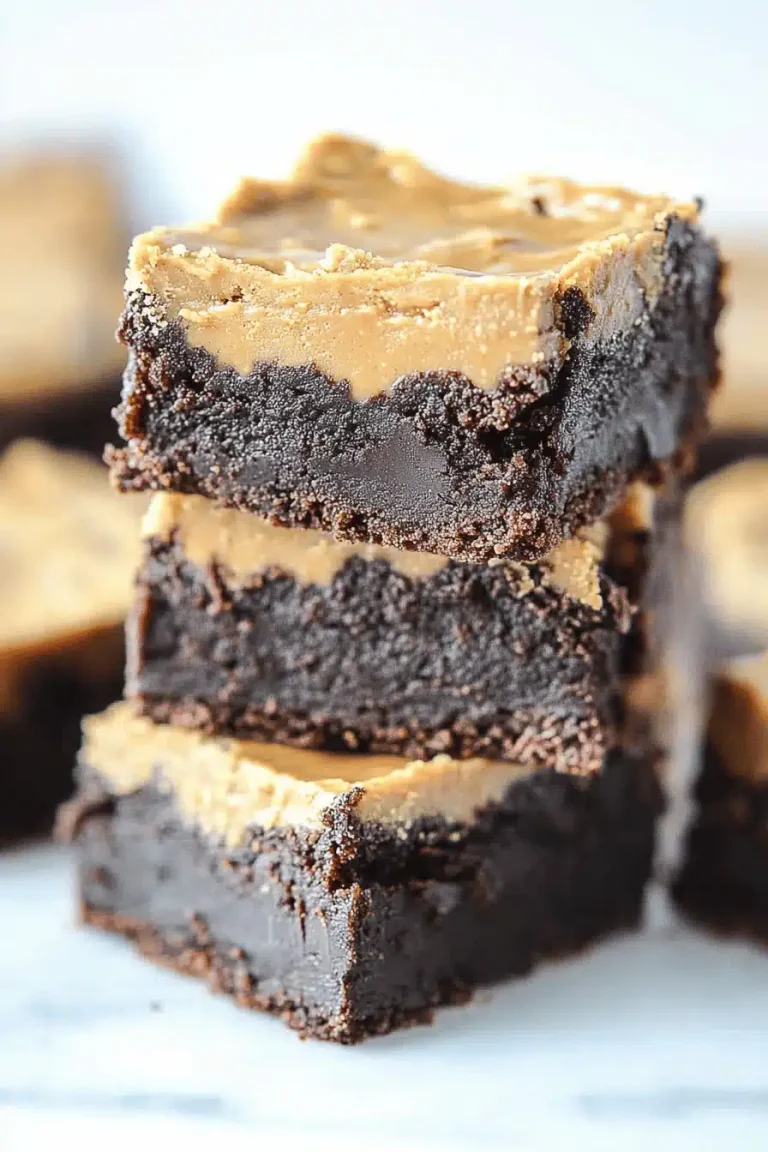
Think of these as the dessert equivalent of a warm hug—comforting, simple, and utterly satisfying. These no-bake chocolate peanut butter bars are essentially layers of creamy peanut butter mixed with a crunchy base, topped with a luscious chocolate glaze. The name comes from the fact you never have to turn on your oven or wait for anything to bake, which honestly feels like a cheat but tastes totally gourmet. It’s like making dessert with the bare minimum effort but getting all the taste perks of a baked bar. No special equipment, no complicated steps, just pure deliciousness you can whip up right on your countertop.
Why you’ll love this recipe?
What I love most about this recipe is how it strikes the perfect balance between indulgence and convenience. The flavor is a knockout—rich peanut butter pairs perfectly with silky chocolate to create a treat that feels like it took hours when really it took minutes. And let’s be honest: the simplicity is a lifesaver. I remember one evening, trying to curb a sweet craving while the oven was broken, and this came through like a champion. Plus, it’s budget-friendly—just a handful of staples, no fancy ingredients that make your grocery bill skyrocket.
These bars are also seriously versatile. I’ve twisted the recipe to fit whatever I had on hand—sometimes swapping peanut butter for almond butter, other times adding a sprinkle of sea salt or crushed pretzels on top to mix things up. It’s a recipe that’s kind of like a blank canvas. You could totally dress it up with a cup of coffee for an afternoon treat or pack it into lunchboxes for a sweet surprise. Plus, if you’re a fan of other no-bake desserts like cheesecake or energy bites, this one fits right in the rotation. It’s always my secret when I want something that feels special but doesn’t demand hours in the kitchen—and trust me, everyone keeps coming back for more.
How do I make no bake chocolate peanut butter bars?
Quick Overview
The whole process is straightforward and perfect for days you don’t want to mess with the oven. You start by blending a crunchy base (think crushed crackers or oats) with peanut butter and a bit of sweetener, press it firmly into a pan, and then dollop a thick, glossy chocolate topping over it. It chills in the fridge for a couple of hours, and voilà—dessert is served! The best part? You get a satisfyingly crisp texture from the base paired with the creamy, dreamy chocolate that sets up just right. Plus, cleanup is a breeze.
Ingredients
For the Main Base:
- 1¾ cups crushed graham crackers or digestive biscuits (I usually crush mine in a zip-top bag with a rolling pin for perfect texture)
- 1 cup creamy peanut butter (fresh and natural is best, but the classic stuff works just as well)
- ½ cup powdered sugar (this keeps the sweetness smooth and blends better than granulated)
- ½ cup unsalted butter, melted (adds richness and helps everything stick together)
For the Chocolate Glaze:
- 1 cup semisweet chocolate chips (feel free to riff with dark or even milk chocolate here)
- 2 tablespoons creamy peanut butter (gives the glaze a silky richness)
- 1 tablespoon unsalted butter (helps make the glaze glossy and smooth)
Step-by-Step Instructions
Step 1: Prep Your Pan
Line an 8×8-inch square baking pan with parchment paper, letting some hang over edges for easy lifting later. No oven required, but you want your pan ready to hold everything together. This step always saves me loads of stress during cleanup.
Step 2: Mix Base Ingredients
In a large bowl, stir together the crushed graham crackers, powdered sugar, peanut butter, and melted butter. The mixture should look crumbly at first but come together when pressed. I usually use a spatula to get everything well combined, scraping the sides to avoid dry pockets.
Step 3: Press Into Pan
Dump the base mixture into your prepared pan and press it firmly down and evenly. I find pressing with the back of a spoon works wonders, though sometimes I wet my fingers a bit to really smooth it out. This helps the bars hold their shape once chilled.
Step 4: Make the Chocolate Glaze
In a microwave-safe bowl, combine chocolate chips, peanut butter, and butter. Heat in 30-second bursts, stirring in between until just melted and smooth. You’re aiming for a shiny, pourable glaze that’s not too thin or too thick.
Step 5: Pour & Spread the Glaze
Carefully pour the chocolate glaze over the pressed base, using a spatula to spread it evenly. This is where those perfect, glossy bars start to take shape. A steady hand helps, but a little swirl with the spatula just adds a nice homemade touch.
Step 6: Chill Until Set
Place the pan in the refrigerator for at least 2 hours, ideally longer. The bars need time to firm up so they slice cleanly without crumbling. I usually make these the night before a treat—they keep beautifully chilled overnight.
Step 7: Slice and Enjoy
Once firm, lift the bars out by the parchment paper and cut them into squares. A sharp knife dipped in hot water between slices cuts through that chocolate glaze like a dream. I like to serve them cold straight from the fridge; that cool, creamy texture is half the magic.
What to Serve It With
For Breakfast: Pair a bar with a strong cup of black coffee or a creamy latte. These bars bring just enough sweetness to give you a little morning boost without being overwhelming.
For Brunch: Serve alongside fresh fruit and a dollop of Greek yogurt. For drinks, a sparkling water with a splash of lemon keeps it light and fresh.
As Dessert: These bars shine served with a scoop of vanilla ice cream or a drizzle of caramel sauce. If you’re feeling fancy, a sprinkle of chopped peanuts or a pinch of sea salt on top takes it over the edge.
For Cozy Snacks: They’re the perfect companion to an afternoon tea or hot chocolate—especially on a chilly day when all you want is comfort in every bite. My kids adore these after school with a glass of cold milk, and I swear they disappear in minutes.
Top Tips for Perfecting Your No-Bake Chocolate Peanut Butter Bars
Peanut Butter Quality: Fresh, natural peanut butter with no added sugars or oils works wonders for flavor. I’ve learned the hard way that the cheap stuff can sometimes separate or be too oily, which messes with the texture.
Mixing the Base: Don’t rush this step. Mix until the base holds together when pressed. If it feels too crumbly, a little more melted butter helps; too wet, add a splash more crushed crackers.
Chocolate Glaze Consistency: Timing here is key. Warm the chocolate mixture gently and stir thoroughly until smooth. If too thick, add a tiny bit of cream or extra butter; if too thin, add a few more chocolate chips and reheat carefully.
Chilling Time: Patience pays off. The longer these bars chill, the better they hold their shape. I’ve made the mistake of cutting too soon, and the bars fell apart—a sad kitchen heartbreak.
Ingredient Swaps: Peanut allergies? No problem. Almond or cashew butter work just as well. Just keep the same ratios, but watch texture changes—they might be a little softer. For gluten-free, crushed gluten-free cookies or oats are fantastic substitutes.
Extra Crunch: Add chopped peanuts or toasted coconut to the base for a twist I adore. It adds a fun surprise with every bite.
Glaze Tweaks: Stir in a bit of instant espresso powder for a mocha flair or diced chili for a subtle heat kick that I’ve grown oddly fond of. Don’t knock it till you try it!
Storing and Reheating Tips
Room Temperature: These bars can sit covered at room temp for up to 2 days. Just keep them in an airtight container away from heat or direct sunlight to avoid the chocolate glaze melting.
Refrigerator Storage: Store bars in an airtight container in the fridge for up to one week. The cooler temp keeps everything firm and fresh but let them come to room temp for a few minutes before serving for best flavor.
Freezer Instructions: Wrap individual bars tightly with plastic wrap and place in a freezer-safe container or bag. They’ll keep for up to 3 months. Thaw overnight in the fridge, then bring to room temp before eating, though I also love them a little frozen for a refreshing change.
Glaze Timing Advice: Always add the glaze after the base is firmly pressed. If storing longer, adding the glaze right before serving keeps it shiny and crack-free. If glazing ahead of time, a little extra chilling time is your friend.
Frequently Asked Questions
Final Thoughts
This recipe for no-bake chocolate peanut butter bars has been my secret weapon for sweet cravings that hit when I’m short on time or energy. The blend of smooth peanut butter and rich chocolate without any oven fuss feels like a small joy every single time. It’s the kind of thing that disappears fast at my house and keeps me coming back because it’s so comforting and reliable. If you enjoy this, try pairing it with other no-bake treats or simple homemade nut butters for a snack spread that’ll wow your family or friends. I’d love to hear how yours turns out or any fun twists you come up with—don’t forget to drop a comment or share your photos. Here’s to many more delicious, stress-free moments in the kitchen. Happy indulging!
no-bake desserts
Ingredients
Main Ingredients
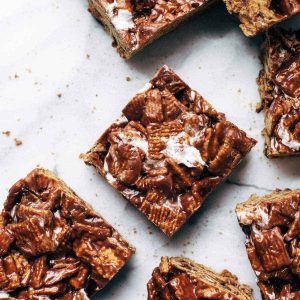
- 3 cups Golden Grahams cereal
- 1 cup mini marshmallows
- 0.25 cup butter unsalted, melted
- 0.5 cup honey
- 1 teaspoon vanilla extract
Instructions
Preparation Steps
- In a large mixing bowl, combine the Golden Grahams cereal and mini marshmallows.
- In a saucepan over low heat, melt the butter and honey together, stirring occasionally until smooth.
- Remove from heat and stir in the vanilla extract.
- Pour the butter and honey mixture over the cereal and marshmallow mixture and gently fold until evenly coated.
- Press the mixture firmly into a greased 8x8 inch baking dish and refrigerate for at least 2 hours before cutting into bars.