There’s something about the smell of warm cookies wafting through the house that takes me right back to my childhood kitchen. This monster cookie cake isn’t just any dessert; it’s like a big, cozy hug after a long day. The way the edges get that perfect golden crust while the center stays soft and gooey—oh, it’s absolute magic. I first made it for a friend’s birthday party, and trust me, it vanished faster than any other cake I’ve brought. If you love a classic chocolate chip cookie but want to level up to something that feeds a crowd and feels like a celebration in every bite, this monster cookie cake is your new best friend. Plus, it’s way easier than dealing with dozens of individual cookies—win-win, right?
What is a monster cookie cake?
Think of monster cookie cake like the big, burly cousin of your favorite cookie. It’s essentially a giant, soft, chewy cookie baked in a cake pan—loaded with all the best cookie mix-ins you love, like chocolate chips, peanut butter, oats, M&Ms, and sometimes even coconut. The name “monster” comes from the epic size and the crazy mix of ingredients that pack in tons of flavor and texture. It’s the kind of dessert that looks homemade and a little rustic but comes together so simply. If regular cookies and brownies had a baby, this would be it. It’s approachable to bake, forgiving if you don’t have every single ingredient, and perfect for anyone who loves a crowd-pleasing treat with a fun twist.
Why you’ll love this recipe?
What I love most about this monster cookie cake is how it nails that sweet spot between nostalgia and convenience. First, the flavor is out of this world—imagine the comforting warmth of a fresh cookie with the ooey-gooey texture that feels so indulgent but not too sweet. It’s the kind of dessert where you instinctively reach for a second slice before realizing it’s way more than just a “cookie.”
Simplicity is a huge win here, too. I keep the ingredients mostly pantry staples, so it’s perfect for those spontaneous baking moments. No fancy gadgets, no long chilling times, just grab, mix, and bake. And since the ingredients are pretty basic, it’s surprisingly budget-friendly without skimping on taste or texture.
Versatility is another gem—this cake works just as well for an after-school snack, a potluck centerpiece, or even a quirky breakfast treat with a cup of coffee (shh, I won’t tell!). Plus, this recipe invites so much creativity. You can swap in your favorite mix-ins or boozy glaze if you want to jazz it up for grown-up gatherings. Compared to some “fancier” desserts I’ve tried, this one feels like a hug from the inside out—comforting, reliable, and downright delicious.
How do I make a monster cookie cake?
Quick Overview
Here’s the gist: you mix a simple batch of cookie batter packed with oats, peanut butter, and all your favorite mix-ins, then spread it into a cake pan. A sweet cream cheese filling gets swirled in for a surprise melt-in-your-mouth center, and a quick glaze on top adds just the right amount of shiny sweetness. Bake, let it cool (if you can wait that long!), and slice up a monster-sized piece of pure joy. It’s straightforward and totally doable, even on busy days.
Ingredients
For the Main Batter:
- 1 cup unsalted butter, softened — use real butter for best flavor, but you can swap half with coconut oil for a subtle twist
- 1 cup peanut butter, creamy or chunky according to preference (I love chunky for texture)
- 1 cup granulated sugar — feel free to reduce slightly if you like it less sweet
- 1 cup brown sugar, packed — adds that lovely caramel warmth
- 2 large eggs — room temperature helps them blend better
- 1 teaspoon vanilla extract — don’t skip this, it’s the flavor anchor!
- 2 cups all-purpose flour — sifted for a lighter texture
- 1 teaspoon baking soda — gives that nice rise without heaviness
- 1/2 teaspoon salt — balances the sweetness
- 2 cups old-fashioned oats — for chewiness and heartiness
- 1 cup chocolate chips — semi-sweet or milk chocolate, your call
- 1/2 cup M&Ms or colorful candies — adds fun pops of color and crunch
- Optional: 1/2 cup shredded coconut or chopped nuts for extra texture
For the Filling:
- 8 oz cream cheese, softened — room temperature means smoother swirls
- 1/3 cup powdered sugar — just enough to sweeten without overpowering
- 1 teaspoon vanilla extract — complements the batter perfectly
- Optional: a splash of heavy cream or milk to loosen if needed
For the Glaze:
- 1 cup powdered sugar — sifted to avoid lumps
- 2-3 tablespoons milk or almond milk — adjust for desired consistency
- 1/2 teaspoon vanilla extract — a must for that extra depth
- Optional: a pinch of cinnamon or espresso powder for a flavor kick
Step-by-Step Instructions
Step 1: Preheat & Prep Pan
Start by preheating your oven to 350°F (175°C). Grease a 9×13-inch baking pan with butter or nonstick spray, then line it with parchment paper if you like easy removal. I always parchment because when the edges get all golden and crispy, the cake lifts out like a dream without breaking apart.
Step 2: Mix Dry Ingredients
In a medium bowl, whisk together the sifted flour, baking soda, salt, and oats until evenly combined. This step helps to make sure your rising agents are evenly distributed and the oats don’t clump up. It might look like a lot of powder, but trust me, it’s going to give you that perfect chewy texture.
Step 3: Mix Wet Ingredients
In your mixer or a big bowl with a hand mixer, beat the softened butter and peanut butter until creamy and smooth—stopping to scrape down the sides once or twice. Add both sugars and keep beating until the mixture is fluffy and looks lighter in color, about 2-3 minutes. Then, add the eggs one at a time, beating well after each, followed by the vanilla extract. I always let the batter mix at a low speed last to avoid over-aerating it—keeps that dense, fudge-like chew.
Step 4: Combine
Gradually add the dry oat mixture into the wet, mixing on low until just combined. Overmixing is one of those rookie mistakes I learned after trying to “make it smooth” and ended up with a tough cake. When the flour disappears but you still see some streaks of batter, stop mixing and fold in your chocolate chips, M&Ms, and any extras gently with a spatula.
Step 5: Prepare Filling
In a small bowl, beat the softened cream cheese until smooth and creamy. Add the powdered sugar and vanilla, continuing to mix until combined and fluffy. If it feels too stiff to spread, add a splash of milk. I like the filling to be thicker than a glaze but soft enough to swirl through the batter easily.
Step 6: Layer & Swirl
Spread about two-thirds of your cookie batter evenly into your prepared pan. Dollop spoonfuls of the cream cheese filling all over the batter, then pour the remaining batter on top in big scoops. Using a butter knife or skewer, swirl the top gently to create pretty marbling without completely mixing the layers. The swirl makes that beautiful, inviting look once it’s baked, and it tastes amazing with the sweet creaminess peeking through.
Step 7: Bake
Pop the pan into the preheated oven for 35-40 minutes. Start checking at 35 minutes by inserting a toothpick into the center—if it comes out with just a few moist crumbs clinging, it’s ready. Don’t overbake; the center should still be soft and slightly gooey for that monster cookie vibe. Oven temps can vary, so keep an eye after 30 minutes.
Step 8: Cool & Glaze
Allow the cake to cool in the pan for at least 15-20 minutes before glazing. You don’t want hot heat melting the glaze completely, but it should still be warm so the glaze swirls down nicely. Mix your powdered sugar, milk, and vanilla glaze until smooth, then drizzle over the top with a spoon or use a piping bag for neat lines. The glaze sets up as it cools, adding just a hint of extra sweetness and shine.
Step 9: Slice & Serve
Use a sharp knife to cut the cake into generous squares (or even rectangles if you want more surface area!). Serve at room temperature or slightly warm with a glass of cold milk or a cup of coffee. It’s rich, so a little goes a long way. You could also cut it into smaller bites for parties or chunkier sizes for snacks. Either way, it’s going to impress.
What to Serve It With
For Breakfast: Grab a cup of your favorite dark roast coffee or even a creamy latte. The slightly salty peanut butter and sweet cookie cake pair beautifully with the bitterness of coffee. Add a side of Greek yogurt with honey for a balanced morning treat.
For Brunch: Plate the monster cookie cake next to fresh fruit like strawberries and banana slices. Add a dollop of whipped cream or mascarpone on the side and pair with a sparkling mimosa or iced chai latte for a laid-back, elegant vibe.
As Dessert: Serve warm with a scoop of vanilla ice cream or drizzle with caramel sauce for a decadent finish. I love sprinkling extra crushed M&Ms on top for a playful crunch that really pops.
For Cozy Snacks: This cake is pure comfort on a cold day. Pair with a mug of hot cocoa topped with marshmallows or a spiced chai tea. My kids actually ask for this as an after-school snack more than cookies now — it’s that good.
In my family, we often make this cake on lazy Sundays or special occasions like bake sales and then pack it up with homemade lemonade for picnics. It’s one of those recipes that feels like a little celebration no matter when you make it.
Top Tips for Perfecting Your Monster Cookie Cake
Peanut Butter Choice: Creamy vs. chunky makes a subtle difference—chunky adds delightful texture, but creamy gives a smoother batter. Make sure it’s fresh (not natural with oil separation, or your batter might be oily).
Mixing Advice: Don’t overmix once the flour and oats go in; the batter should be thick but not dry. Overmixing develops gluten and turns your cake chewy in a tough way—not the good kind.
Swirl Customization: For a more dramatic swirl, dollop the filling and batter in alternating scoops and swirl once or twice. Too much swirling can blend the layers and flatten the texture contrast.
Ingredient Swaps: I’ve tested this with gluten-free all-purpose flour blend 1:1 with success—just add an extra egg for structure. Swap peanut butter for almond butter or sunflower seed butter for allergy-friendly versions; expect a bit different flavor and moisture balance.
Baking Tips: Oven temps differ, so use an oven thermometer if you want precision. Position the rack in the middle for even heat; if the edges brown too fast, cover with foil halfway through baking.
Glaze Variations: Try adding a teaspoon of maple syrup or a dash of espresso powder to the glaze for interesting twists. For a thinner glaze, add milk gradually to avoid making it runny.
One lesson I had to learn the hard way: never skip the parchment lining. Even greasing well, the edges stick and tear off chunks when pulled from the pan. Also, letting the cake cool a bit before glazing prevents a gloopy run-off disaster. Trust me, I speak from experience.
Storing and Reheating Tips
Room Temperature: Cover the cooled cake with plastic wrap or a cake dome. It stays good for 2-3 days, although it gets a little chewier as it sits.
Refrigerator Storage: Store in an airtight container up to 5 days. I like refrigerating if I plan to glaze it in advance—it keeps the glaze neat and glossy without melting or sweating.
Freezer Instructions: Wrap the cooled cake tightly in plastic wrap and aluminum foil, then freeze for up to 3 months. Thaw overnight in the fridge or on the counter for a couple of hours. Refresh with a quick zap in the microwave for 10-15 seconds if you want it warm again.
Glaze Timing Advice: If freezing, glaze after thawing to avoid cracking or sogginess. For same-day serving, glaze when the cake is warm but no hotter than lukewarm for smooth spreading.
Frequently Asked Questions
Final Thoughts
This monster cookie cake has become my go-to for everything from last-minute potlucks to cozy nights in. It’s that rare recipe that feels homemade without all the fuss and has an “oh-wow” factor when people taste it. The best part is the blend of textures and flavors—sweet, salty, chewy, and soft—all in a single slice. If you make it once, I bet you’ll find yourself making it again and again, just like I have. If you’re a fan of big, bold flavors with that everything-but-the-kitchen-sink vibe, you might also want to check out my peanut butter chocolate chip skillet cookie or my oatmeal chocolate chip bars next. Happy baking—and I can’t wait to hear your stories about this one—don’t forget to share your tweaks and favorite mix-ins!
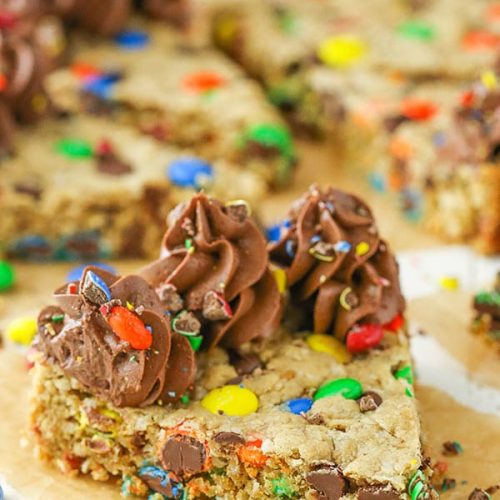
monster cookie cake
Ingredients
Main Ingredients
- 0.25 cup unsalted butter
- 6 tbsp peanut butter
- 0.5 cup brown sugar
- 3 tbsp sugar
- 1 unit egg
- 1 tsp vanilla extract
- 1 cup flour
- 0.75 tsp baking soda
- 0.25 tsp baking powder
- 0.25 tsp salt
- 1.25 cups quick cook oats
- 0.75 cup M&Ms
- 0.5 cup chocolate chips
Frosting Ingredients
- 0.5 cup unsalted butter
- 1.75 cups powdered sugar
- 0.25 cup natural unsweetened cocoa powder
- 0.5 tsp vanilla extract
- 1.5 tbsp water or milk adjust for desired consistency
Instructions
Preparation Steps
- Preheat the oven to 350°F. Line a 9-inch cake pan with parchment paper and grease the sides.
- In a bowl, cream together butter, peanut butter, brown sugar, and sugar until light and fluffy, about 3-4 minutes.
- Add the egg and vanilla extract to the mixture and blend until combined.
- In a separate bowl, whisk together flour, baking soda, baking powder, and salt.
- Gradually add the dry ingredients to the wet ingredients and mix until fully incorporated.
- Stir in the oats, followed by M&Ms and chocolate chips.
- Press the thick cookie dough evenly into the prepared pan, pressing some extra mix-ins into the surface.
- Bake for 16 to 18 minutes or until edges are golden brown. Let cool completely in the pan.
- To make the frosting, beat butter until smooth. Gradually add half the powdered sugar and mix well.
- Add cocoa powder, vanilla extract, 1 tablespoon of water, and remaining powdered sugar; mix until smooth. Add more water as needed.
- Pipe or spread frosting onto the edges of the cooled cookie cake. Store in an airtight container until serving.