There’s something about peanut butter pie that just pulls me back into those cozy Sunday afternoons at my grandma’s kitchen. The smell of rich peanut butter mixing with a sweet creaminess, almost like a peanut butter mousse anchored by a buttery crust — it’s seriously unforgettable. I’ve always thought of it as peanut butter’s dream come true, kind of like the pie version of a peanut butter cookie, but so much lighter and smoother. My kids beg me to make this one, especially on chilly nights when we want something sweet but not too heavy, and it honestly disappears faster than I can slice it. If you love that perfect combo of salty-sweet flavor with a fluffy texture, peanut butter pie might just become your new favorite too.
What is peanut butter pie?
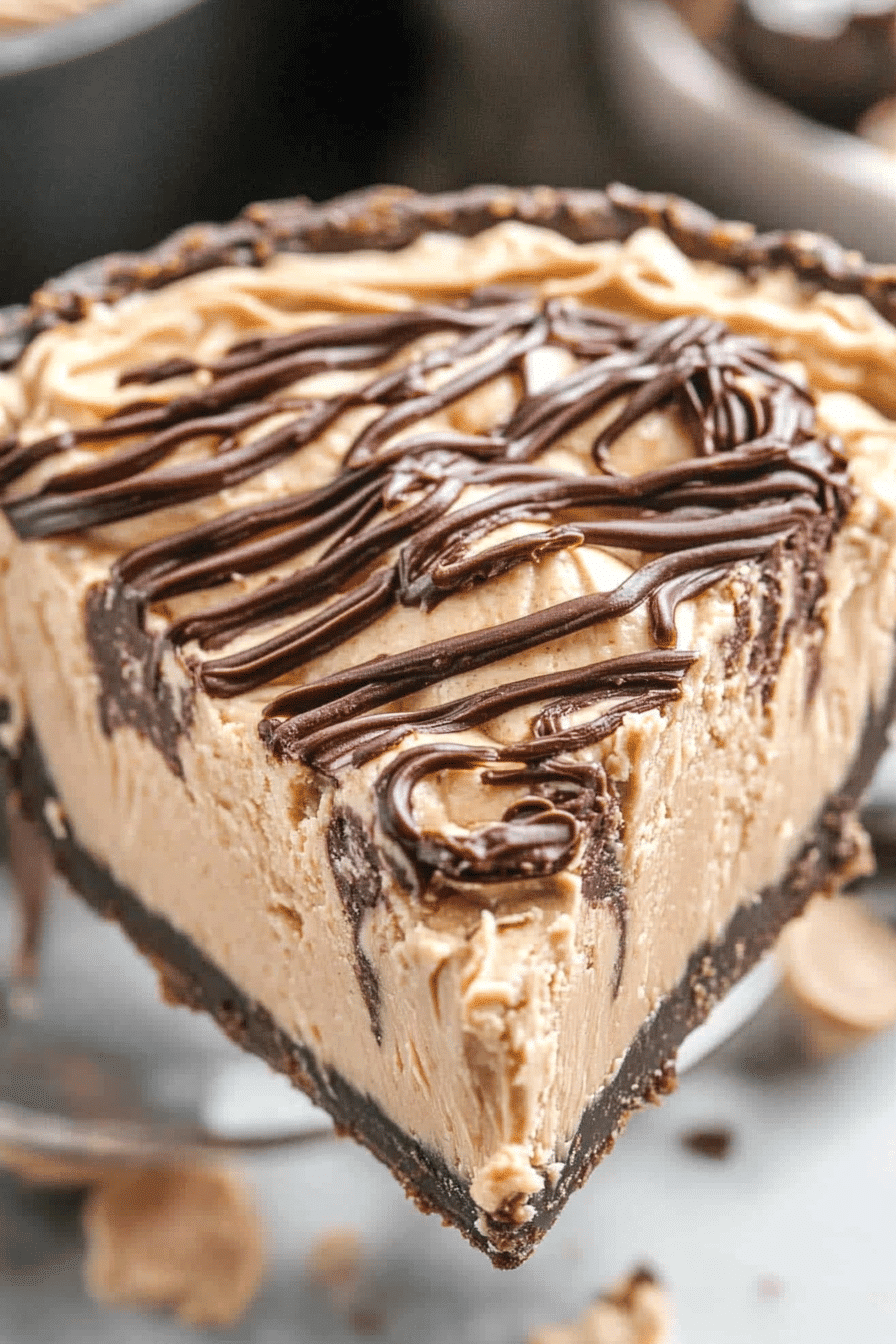
Think of peanut butter pie as a luscious, no-bake dessert that’s like a peanut butter cheesecake’s laid-back cousin. It’s essentially a creamy filling made from peanut butter, cream cheese or whipped cream, and sugar, all nestled in a graham cracker or cookie crust. Sometimes it’s chilled until perfectly set, and sometimes it gets a light, fluffy whip that almost melts in your mouth. The name’s pretty straightforward — it’s a pie with peanut butter at its heart — but it’s far from simple in flavor and texture. It’s the kind of dessert that doesn’t feel intimidating to make, yet brings that wow factor your guests secretly hope for. It’s also incredibly approachable for anyone who’s even remotely a peanut butter fan, which is pretty much everyone, right?
Why you’ll love this recipe?
What I adore most about this peanut butter pie isn’t just how ridiculously tasty it is, though that’s obviously a huge plus. The flavor is this perfect balance of sweet and salty with a depth that peanut butter lovers can’t resist — it’s rich but surprisingly light, not at all cloying. The first time I made it, I was amazed at how simple it was. No baking frenzy, no complicated steps — just a few bowls, a whisk, and some patience while it sets in the fridge. For anyone who’s juggling a busy weekday or looking for a quick dessert fix, this recipe is a lifesaver.
Plus, the ingredients are wallet-friendly — good-quality peanut butter, cream cheese or cool whip, a touch of sugar, and a crust that you can either buy pre-made or whip up yourself in no time. It’s also strangely versatile. I’ve played around with toppings and mix-ins — from adding mini chocolate chips to swirling in some honey or even swapping peanut butter for almond butter (which made it creamier, by the way!).
Compared to my go-to classics like chocolate mousse or lemon bars, this one stands out because it’s kid-tested and adult-approved. Seriously, I’ve made this for birthday parties and casual dinners alike, and it always vanishes. If you want a no-fuss dessert that ignites smiles and requests for seconds, this peanut butter pie formula is it.
How do I make a peanut butter pie?
Quick Overview
Here’s the beautiful truth: peanut butter pie is ridiculously easy to make yet looks and tastes like you spent hours fussing over it. The process involves whipping peanut butter with cream cheese or whipped topping, folding in some powdered sugar for sweetness, and setting it in a prepared crust — usually graham cracker. Chill it until it’s firm enough to slice, then if you want, add a simple glaze or drizzle on some chocolate for that extra wow-factor. No baking, no stress, and every step invites you to savor that peanut-buttery aroma wafting through your kitchen.
Ingredients
For the Crust:
– 1 12 cups graham cracker crumbs (or crushed digestive biscuits if you want a little tang)
– ⅓ cup melted unsalted butter
– 2 tablespoons sugar (optional, depending on your cracker’s sweetness)
> Tip: Crushing your own crackers fresh is worth it — gives the crust a wonderful, fresh snap.
For the Filling:
– 1 cup creamy peanut butter (I always use natural or no-stir for richness)
– 8 oz cream cheese, softened (room temperature works best for smooth mixing)
– 1 cup powdered sugar (adjust a little if you like it sweeter or less sweet)
– 1 teaspoon vanilla extract
– 1 ½ cups whipped topping, homemade or store-bought (Cool Whip’s fine and super convenient)
> Note: For a lighter pie, you can swap half the peanut butter with cream cheese, but I prefer all peanut butter for that punch of flavor!
For the Glaze:
– ½ cup semi-sweet chocolate chips
– 2 tablespoons heavy cream or milk
– Pinch of salt if you want to elevate the chocolate flavor
> Pro tip: Make sure your glaze isn’t too runny so it doesn’t pool on the pie—just silky enough to drizzle like magic.
Step-by-Step Instructions
Step 1: Preheat & Prep Pan
Start by greasing a 9-inch pie pan or using a non-stick spray. If you have a glass or ceramic dish, even better — it holds the chill well. No need to preheat the oven since this is no-bake, which honestly feels like a saving grace on a sticky summer day.
Step 2: Mix Dry Ingredients
Combine your graham cracker crumbs and sugar in a medium bowl. Stir them together well so the sugar is evenly distributed among the crumbs — this ensures every bite has just that hint of sweetness. Then pour in the melted butter and gently mix until the crumbs are fully coated and look like wet sand.
Step 3: Mix Wet Ingredients
In a large bowl, beat the softened cream cheese until it’s smooth and creamy with no lumps. Add the peanut butter next, and keep beating until it’s well blended and silky. Finally, toss in the powdered sugar and vanilla extract and mix on medium speed until the texture feels velvety — this part always brings a smile because the sweetness starts to come alive here.
Step 4: Combine
Gently fold in the whipped topping using a rubber spatula or a wooden spoon. This is crucial — you want to keep all the air in the whipped topping so the filling stays light and fluffy. Overmixing here will make it dense, and believe me, that’s a mistake I made the first few times!
Step 5: Prepare Filling
Your filling should now be thick yet airy, with a smooth peanut butter flavor dancing on your tongue. If you want to jazz it up, this is the time to fold in mini chocolate chips or a swirl of honey. Just enough to surprise with little bursts of flavor and texture.
Step 6: Layer & Swirl
Press your crust mixture firmly into the bottom and slightly up the sides of your pie pan — I like to use the bottom of a flat measuring cup for an even layer. Pour in your peanut butter filling and smooth it out with a spatula. If you’re feeling fancy, drizzle a bit of melted chocolate on the surface and use a toothpick or knife to swirl it lightly — it looks stunning and makes everyone think you went way out of your way.
Step 7: Bake
There’s no baking involved here, but chilling is key. Pop your pie in the fridge for at least 4 hours, or better yet, overnight. This waiting game lets the filling firm up just enough to slice cleanly but stay wonderfully creamy and luscious.
Step 8: Cool & Glaze
Once chilled and set, melt your chocolate chips and combine with cream for that perfect glaze. Drizzle generously over the top, then return to the fridge for another 15-20 minutes so the glaze can set. It adds such a lovely glossy finish and a rich chocolate kick that contrasts perfectly with the peanut butter.
Step 9: Slice & Serve
Slice with a sharp knife warmed slightly under hot water for neat cuts. Serve chilled — the texture and flavor are at their best this way. I love garnishing with chopped peanuts or a sprinkle of flaky sea salt just before serving to give an extra crunchy, salty contrast. It’s the kind of pie that makes each bite feel like a little celebration.
What to Serve It With
For Breakfast: Peanut butter pie isn’t your usual breakfast treat, but if you’re in the mood for a sweet brunch twist, pair it with a strong cup of black coffee or a freshly brewed espresso. A side of fresh berries or a dollop of Greek yogurt gives a tangy balance to the richness.
For Brunch: Serve slices with sparkling water flavored with lemon or a light mimosa for a festive vibe. Plating it on delicate dessert plates with a dusting of cocoa powder or powdered sugar impresses guests without extra work.
As Dessert: After a hearty family meal, I like to keep it simple by pairing the pie with vanilla ice cream or a scoop of whipped cream sprinkled with cocoa nibs. The cold creaminess alongside that velvety peanut butter filling is a game-changer.
For Cozy Snacks: On lazy evenings, a small slice with a warm mug of chai tea or hot chocolate is pure comfort. When my family gathers around the TV, this pie helps turn ordinary nights into special moments — it’s the taste of home and warmth all in one bite.
Top Tips for Perfecting Your Peanut Butter Pie
Crust Prep: Make sure your melted butter isn’t too hot when mixing with the crackers, or it can make the crust greasy. Press the crust down firmly but don’t compact it too much; you want some texture to balance the creamy filling.
Mixing Advice: Don’t rush when combining cream cheese and peanut butter. A few lumps can sneak in if your cream cheese isn’t softened enough, so plan ahead and leave it on the counter for 30 minutes. Folding in the whipped topping gently ensures your pie stays light — I learned this the hard way when I ended up with a heavy brick once!
Swirl Customization: For those who love visual flair, drizzle chocolate or even caramel in ribbons across the surface, then swirl with a knife. Random, gentle patterns often look best — too much precision can seem forced.
Ingredient Swaps: Tried almond butter once and loved how it brought a sweet nuttiness without overpowering the pie. When using natural peanut butter, sometimes I add a touch more powdered sugar to maintain that perfect sweetness. For vegan versions, coconut cream and a plant-based cream cheese work well — just keep chilling times a bit longer.
Baking Tips: Since this is a no-bake pie, fridge time is your oven here. Don’t rush it — less than 4 hours and your pie might be too soft to slice cleanly. Also, keep it chilled until right before serving to maintain that fresh, creamy texture.
Glaze Variations: I’ve experimented with peanut butter glaze too, melting peanut butter slightly with honey for a soft drizzle. Or try mixing cocoa powder with powdered sugar and a little milk for a lighter chocolate option. Whatever you do, apply glaze once the pie is fully chilled — otherwise, it can melt and lose that glossy finish.
Storing and Reheating Tips
Room Temperature: This pie is best kept chilled, but if you’re serving it at a party, you can leave it out for about 2 hours covered with a cake dome or large bowl. Beyond that, it starts to lose its fresh texture and can become too soft.
Refrigerator Storage: Store leftovers in an airtight container or cover the pie tightly with plastic wrap. It keeps perfectly fresh for up to 4 days — though honestly, mine is gone before then every time. If the crust gets soft, a quick chill after serving helps restore that satisfying snap.
Freezer Instructions: Yes, you can freeze peanut butter pie! Wrap the pie tightly in plastic wrap and then in foil to prevent freezer burn. Freeze for up to 2 months. Thaw overnight in the fridge — don’t rush this or it can become watery. Reapply the glaze after thawing for the prettiest presentation.
Glaze Timing Advice: If you plan to freeze the pie, it’s best to add glaze after thawing. For fridge storage, glaze right after baking or chilling, giving it a bit of time to set up in the cold. This makes every slice picture-perfect.
Frequently Asked Questions
Final Thoughts
Looking back on all the times I’ve made this peanut butter pie, it’s clear it’s more than just a dessert — it’s a family ritual, a burst of joy on sticky afternoons or chilly nights, a sweet reminder of simple pleasures. The blend of creamy, nutty goodness with a crispy crust keeps everyone happy from kids to adults, and honestly, it just feels like a warm hug on a plate. If you love digging into rich peanut butter flavors without the weight of a heavy cake, give this recipe a go. And if you’re curious, poke around my other dessert favorites too — there’s loads of easy, crowd-pleasing ideas to keep your kitchen buzzing with happiness. Can’t wait to hear how yours turns out — don’t forget to leave a comment, share your tweaks, or rate it if it becomes your new obsession. Happy baking!
peanut butter pie
Ingredients
Main Ingredients
- 5 oz 1/3 less fat cream cheese softened
- 0.33 cup powdered sugar
- 0.33 cup Better 'n Peanut Butter
- 2.5 cups light whipped topping reduced fat
- 1 pie crust graham cracker pie crust reduced-fat
- 2 tbsp Hershey's chocolate syrup for drizzling
Instructions
Preparation Steps
- Beat cream cheese and powdered sugar together in a medium bowl until smooth.
- Mix in Better 'n Peanut Butter and beat until smooth. Fold in light whipped topping gently.
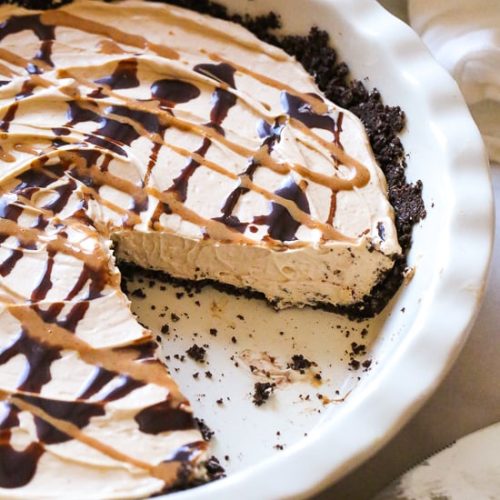
- Spoon the mixture into the graham cracker pie crust; cover and refrigerate for at least 2-3 hours until firm.
- Before serving, drizzle with Hershey's chocolate syrup.