There’s something about a chicken pot pie that instantly takes me back to my grandmother’s kitchen. The smell of buttery crust baking while the savory filling bubbles warmly on the stove was like a cozy hug on a plate. If you’ve ever felt that deep craving for something both hearty and homey but tried to avoid anything too fussy, you’re going to love this chicken pot pie recipe. It’s the kind of dinner that disappears in minutes at my house and comes together faster than you’d expect. Think of it as the ultimate comfort food cousin to shepherd’s pie—with flaky crust, tender chicken, vibrant veggies, and a creamy sauce that feels like a little celebration for your taste buds. I always keep this recipe in my back pocket for those chilly evenings when you need a little something special but don’t want to spend hours in the kitchen.
What is chicken pot pie?
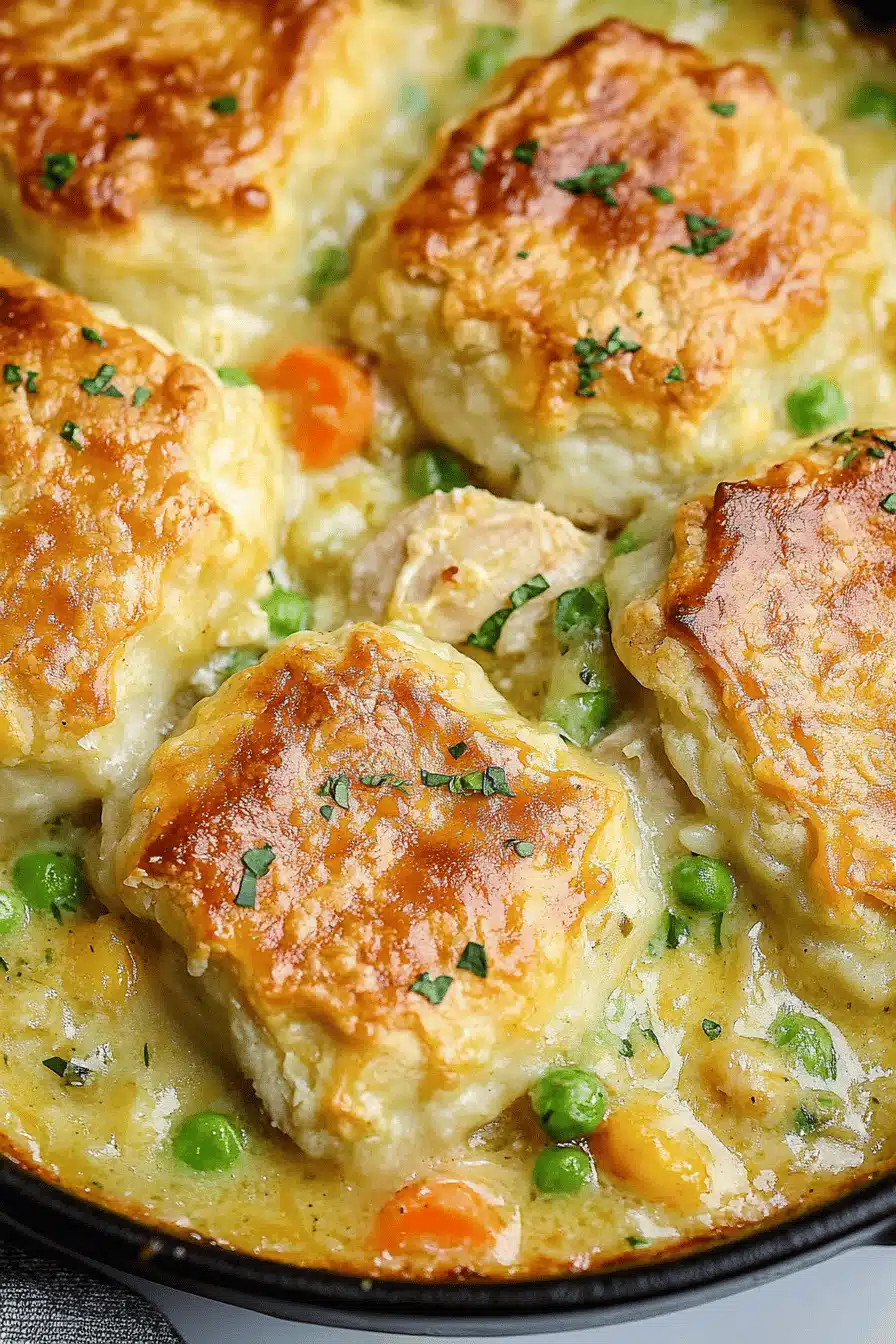
Simply put, chicken pot pie is a savory pie filled with a creamy mixture of chicken, vegetables, and seasonings, all wrapped in a flaky pastry crust. The name dates back centuries, with variations popping up around Europe, but its heart is pure comfort food. Think of it as a hearty stew encased in buttery crust — the perfect balance of savory, creamy, and crispy elements. It’s the kind of dish that feels fancy enough for company but approachable enough for a regular weeknight. Whether you use homemade pie dough or a shortcut like store-bought crust, the magic lies in that luscious filling full of tender chicken and colorful vegetables, all brought together with a rich sauce. It’s basically a hug for your tummy in meal form.
Why you’ll love this recipe?
What I really adore about this chicken pot pie is how it nails the trifecta of flavor, simplicity, and versatility. First off, the flavor profile is just the right blend of luscious creaminess and hearty veggies, with tender bits of chicken that soak up all those delicious herbs. The filling gets so rich and cozy, it’s like a warm blanket on a cool night. Plus, this recipe is easier than it looks — I swear, the key is to keep things straightforward and not overcomplicate it with fancy ingredients. The pie crust can be as simple or as fancy as you like, but the filling comes together in one pan, which is a lifesaver when time is tight. On the budget front, chicken pot pie is an excellent way to stretch ingredients like leftover chicken or frozen veggies without feeling like you’re sacrificing taste or quality. You can customize veggies based on what’s in your fridge, too — carrots, peas, celery, or even mushrooms work wonderfully. What I love most is the versatility; sometimes I bake it in a big dish for family dinner, but other times I make mini pot pies for a fun dinner party twist.
How do I make chicken pot pie?
Quick Overview
The process? Pretty straightforward, really. Start by making your rich, creamy filling on the stove with sauteed veggies and chicken, then mix in a silky roux-based sauce to pull everything together. Pour the filling into a pie crust-lined dish, top with a second crust or puff pastry, seal the edges, and bake until golden and bubbling. The smell alone brings everyone to the kitchen — like clockwork. What makes this recipe a winner is combining classic techniques with a few tips to make it easier, like pre-cooking the filling so there’s no soggy bottom crust. It comes together in about an hour, and that includes baking time — which is totally doable even during a busy weeknight. Plus, the leftovers are just as good, so you get bonus tastiness the next day.
Ingredients
For the Pie Crust: What is the recipe?
– 2 ½ cups all-purpose flour (I use unbleached for better flavor)
– 1 tsp salt
– 1 cup cold unsalted butter, cubed (makes the crust flaky and tender)
– 6-8 tbsp ice water (add gradually; you want the dough to just hold together)
*Tip: Use a pastry cutter or your fingertips to keep butter cold while mixing—warm hands can turn this into a greasy dough.*
For the Filling:
– 2 cups cooked chicken (rotisserie chicken works beautifully)
– 1 cup carrots, diced
– 1 cup frozen peas
– 1/2 cup celery, diced
– 1/2 cup onion, finely chopped
– 3 cloves garlic, minced
– 1/4 cup unsalted butter
– 1/3 cup all-purpose flour
– 2 cups chicken broth (homemade or low-sodium store-bought)
– 1/2 cup whole milk or heavy cream (I tested this with almond milk and it worked surprisingly well—creamier than milk alone!)
– 1 tsp dried thyme
– Salt and pepper to taste
*Feel free to add mushrooms or swap peas for green beans depending on what you have on hand.*
For the Glaze:
– 1 egg yolk beaten with 1 tbsp water (for brushing the top crust)
*This gives that golden, shiny finish without overpowering flavor.*
Step-by-Step Instructions
Step 1: Preheat & Prep Pan
Set your oven to 400°F (200°C). Butter or spray a 9-inch pie dish lightly to prevent sticking. If your dough needs chilling, pull it out now so it’s easy to roll.
Step 2: Mix Dry Ingredients
For the crust, whisk the flour and salt in a large bowl. Toss in the cold butter cubes and use a pastry cutter or your fingers to quickly crumble the butter into pea-sized pieces—this little step is key to getting that flaky texture. Don’t overwork it or the butter will melt into the flour.
Step 3: Mix Wet Ingredients
Add ice water a tablespoon at a time until the dough just starts to clump together. Avoid adding too much water or it’ll get tough. Form the dough into two discs (for top and bottom crust), wrap them in plastic, and toss them in the fridge for 30 minutes while you make the filling.
Step 4: Combine
Once chilled, roll out one crust to about 1/8-inch thickness and lay it in your prepared pie dish. Any cracks can be patched with little dough scraps—don’t panic, it’s all part of the fun.
Step 5: Prepare Filling
In a large skillet, melt butter over medium heat. Add onions, carrots, and celery and saute until slightly softened, about 5 minutes. Stir in garlic and cook another minute. Sprinkle flour over veggies and stir continuously for 1-2 minutes to cook out the raw flour taste. Slowly add chicken broth and milk, whisking as you go to prevent lumps. The sauce will thicken — this step is where that creamy filling magic happens. Stir in chicken, peas, thyme, salt, and pepper. Taste and adjust seasoning.
Step 6: Layer & Swirl
Pour the filling into your pie crust base, smoothing it evenly. Roll out the second pie crust and place it on top. Trim edges, seal by pressing down with a fork or your fingers, and cut a few slits on top to vent steam. Brush the entire top with the egg wash glaze—this is what gives it that golden crust that’s impossible to resist.
Step 7: Bake
Place the pie on a baking sheet (to catch any drips) and bake for about 35–40 minutes or until the crust is golden brown and the filling is bubbly. If the edges brown too quickly, cover them with foil halfway through baking.
Step 8: Cool & Glaze
Once out of the oven, let the pie cool for at least 15 minutes before cutting to ensure the filling sets up and doesn’t spill everywhere. This waiting time always feels hard for me, because the smell is irresistible, but trust me—it’s worth it. If you want extra sheen, a quick second brush of the glaze works once cooled slightly.
Step 9: Slice & Serve
Use a sharp knife and cut into generous wedges. Serve warm, ideally with a simple green salad or roasted veggies. The crust should be crisp, the filling creamy and packed with tender chicken and veggies. This dish looks rustic but tastes restaurant quality every single time.
What to Serve It With
For Breakfast: I know, chicken pot pie isn’t your typical breakfast food, but if you’ve got leftovers, a warm slice paired with a creamy latte or spiced chai makes a surprisingly satisfying morning meal. It’s those cozy flavors that feel just right with a hot cup of coffee.
For Brunch: Serve this pie alongside a bright, crisp arugula salad dressed lightly with lemon vinaigrette. Maybe add a sparkling mimosa or fresh squeezed juice. It’s a comforting yet elevated combo that guests will talk about.
As Dinner: Pair the chicken pot pie with simple roasted Brussels sprouts or steamed green beans tossed with lemon butter. A chilled glass of Chardonnay or a soft Merlot complements the richness without overpowering it.
For Cozy Snacks: Leftover pot pie reheated in smaller portions makes an unbeatable snack for lazy afternoons. I sometimes heat it in the air fryer for a few minutes to recapture that crispy crust. It’s like a warm little pick-me-up.
My family has this tradition where we curl up with the pie and share stories — it’s hands down one of our favorite ways to connect on busy weeknights too.
Top Tips for Perfecting Your Chicken Pot Pie
Crust Care: Keep your butter and water ice cold until mixing, and don’t overwork the dough — overhandling makes it tough instead of flaky. If your kitchen is warm, chill the dough briefly between rolling and assembling.
Filling Balance: Don’t overcrowd the filling with too many veggies. The magic is in the chicken, onions, carrots, peas, and celery in just the right amounts. If your veggies are frozen, add them at the end to avoid mushy textures.
Mixing Advice: When thickening your filling, stir constantly when you add flour to the melted butter, then slowly pour in broth and milk while whisking. This prevents lumps and creates a silky smooth sauce. Trust me, skipping this step is the difference between “meh” and “wow”.
Swirl Customization: I like to decorate the top crust with little leaf shapes cut from extra dough—it adds a personal touch that family and guests appreciate. You can also brush with whole egg for a richer shine.
Ingredient Swaps: Use turkey instead of chicken for Thanksgiving leftovers, or toss in mushrooms or corn for extra heartiness. Almond or oat milk are surprisingly great dairy substitutes, especially if you want a lighter version.
Baking Tips: Place your pie on the middle rack and watch for the crust color. If your oven tends to run hot, lower the temperature slightly and bake a bit longer to avoid burning the crust while ensuring the filling cooks through.
Glaze Variations: Instead of egg wash, you can brush with melted butter or coconut oil for a golden finish. Adding a pinch of smoked paprika or garlic powder to the glaze mix gives a subtle, savory twist that’s really nice.
One lesson I learned? Resist the urge to rush cutting the pie right after baking. Let it rest, or you’ll have a messy plate instead of neat servings. It’s tough, but patience pays off!
Storing and Reheating Tips
Room Temperature: Cover the pie loosely with foil or a clean towel and store at room temp for up to 4 hours if you plan on serving soon. This keeps the crust from wilting but don’t let it sit any longer or it gets soggy.
Refrigerator Storage: Wrap leftovers tightly with plastic wrap or store in an airtight container for up to 3 days. Reheat gently in the oven at 350°F for about 20 minutes, covered loosely with foil to keep the crust from burning.
Freezer Instructions: To freeze fully baked pie, wrap it tightly in plastic wrap and then foil to prevent freezer burn. Freeze for up to 2 months. Thaw overnight in the fridge before reheating in a 350°F oven for 30–40 minutes.
Glaze Timing Advice: If freezing, it’s best to skip glazing before baking. Instead, brush on your glaze after reheating to bring back that beautiful shine and golden color.
These tricks have saved me many a meal rescue—especially when I bake ahead for busy weeks or holiday meals.
Frequently Asked Questions
Final Thoughts
Chicken pot pie has a special way of making any day feel like a celebration of simple pleasures. From its golden crust to that rich, comforting filling, it’s the kind of recipe that folds you up in warmth and nostalgia with every bite. I always come back to it when I want to impress without stress or soothe a weary soul with classic flavors. If you’re someone who loves hearty meals that bring people together—and who doesn’t?—give this recipe a go. Your kitchen will fill with that irresistible baked aroma, your family will gather ’round eager for seconds, and you’ll make memories without fuss. I can’t wait to hear how yours turns out! Don’t forget to drop a comment or share your own twists to keep this cozy tradition alive. Happy baking!

chicken pot pie
Ingredients
Main Ingredients
- 2 tablespoons olive oil
- 1 small yellow onion finely diced
- 1 stalk celery thinly sliced (slivered)
- 2 teaspoons fresh garlic minced
- 2 tablespoons salted butter
- 3 tablespoons all-purpose flour
- 1.5 cups chicken stock or chicken broth
- 0.25 cup heavy cream
- 1.5 teaspoons dried rosemary
- 1.5 teaspoons dried thyme leaves
- 2 teaspoons kosher salt reduce to 1 teaspoon if salt sensitive
- 0.5 teaspoon black pepper
- 3 cups cooked chicken diced or shredded
- 12 oz frozen peas and carrots
- 15 oz canned buttermilk biscuits 2 cans (~7.5 oz each)
- 1 tablespoon butter melted for brushing biscuit tops
Instructions
Preparation Steps
- Preheat oven to 350°F.
- Heat olive oil in a 12-inch ovenproof skillet over medium-high heat.2 tablespoons olive oil
- Add finely diced onion and sliced celery. Sauté until onion is translucent and celery is tender, about 5-7 minutes, stirring continuously.2 tablespoons olive oil
- Reduce heat to medium-low. Add minced garlic and cook while stirring continuously for 1½ to 2 minutes to avoid burning.2 tablespoons olive oil
- Remove the cooked onion, celery, and garlic from the skillet and set aside.
- Return skillet to medium-low heat and add butter.2 tablespoons olive oil
- Once butter melts, whisk in flour and cook for 30 seconds to 1 minute until flour absorbs the butter.2 tablespoons olive oil
- Slowly whisk in chicken stock maintaining medium-low heat until smooth. Add heavy cream and whisk.2 tablespoons olive oil
- Simmer broth mixture 3-5 minutes to thicken.
- Whisk in kosher salt, black pepper, rosemary, and thyme.2 tablespoons olive oil
- Remove skillet from heat, then return cooked onion, celery, and garlic to the mixture and stir well.
- Add frozen peas and carrots along with cooked chicken. Stir until evenly coated.2 tablespoons olive oil
- Open the biscuit cans. Cut each biscuit into quarters.2 tablespoons olive oil
- Arrange biscuit pieces evenly on top of the chicken mixture in the skillet.
- Bake in preheated oven for 30 minutes or until biscuit tops are golden brown.
- After baking, brush melted butter over biscuit tops and serve hot.2 tablespoons olive oil