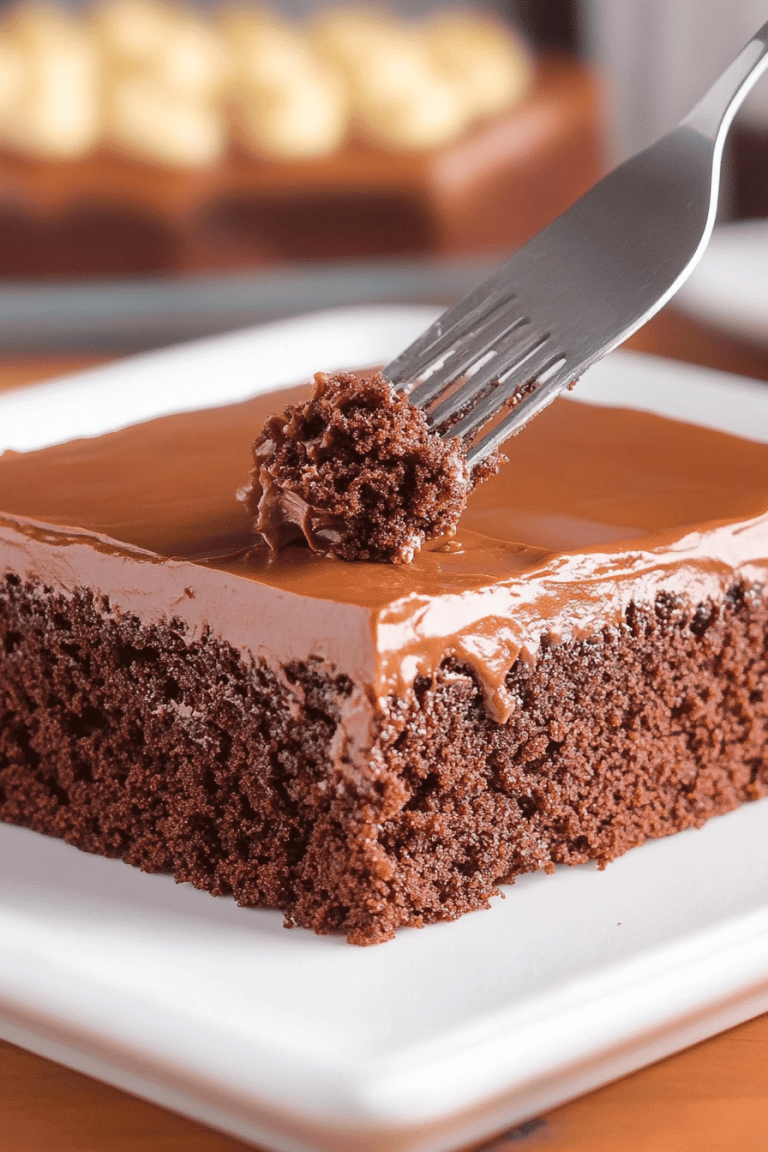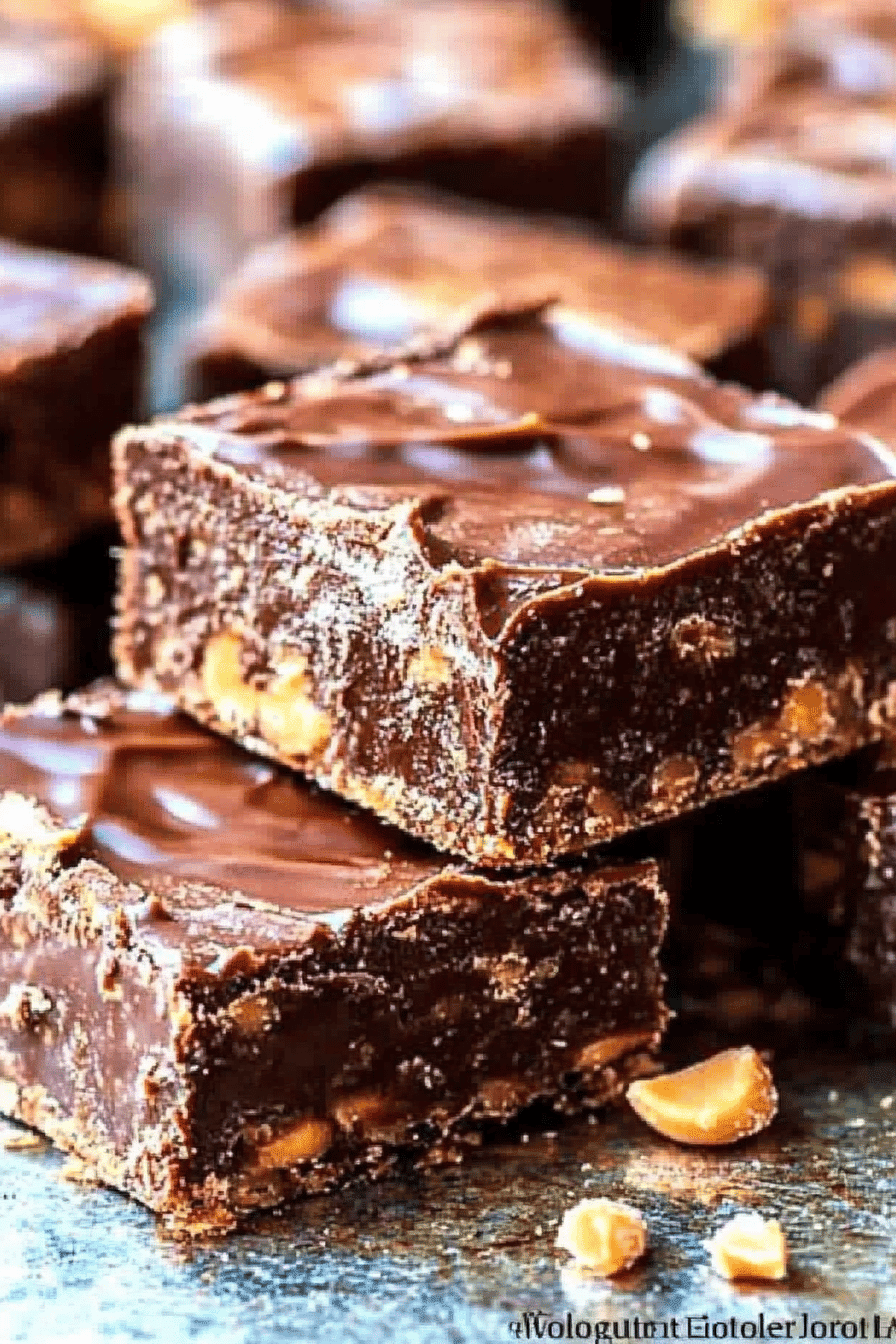
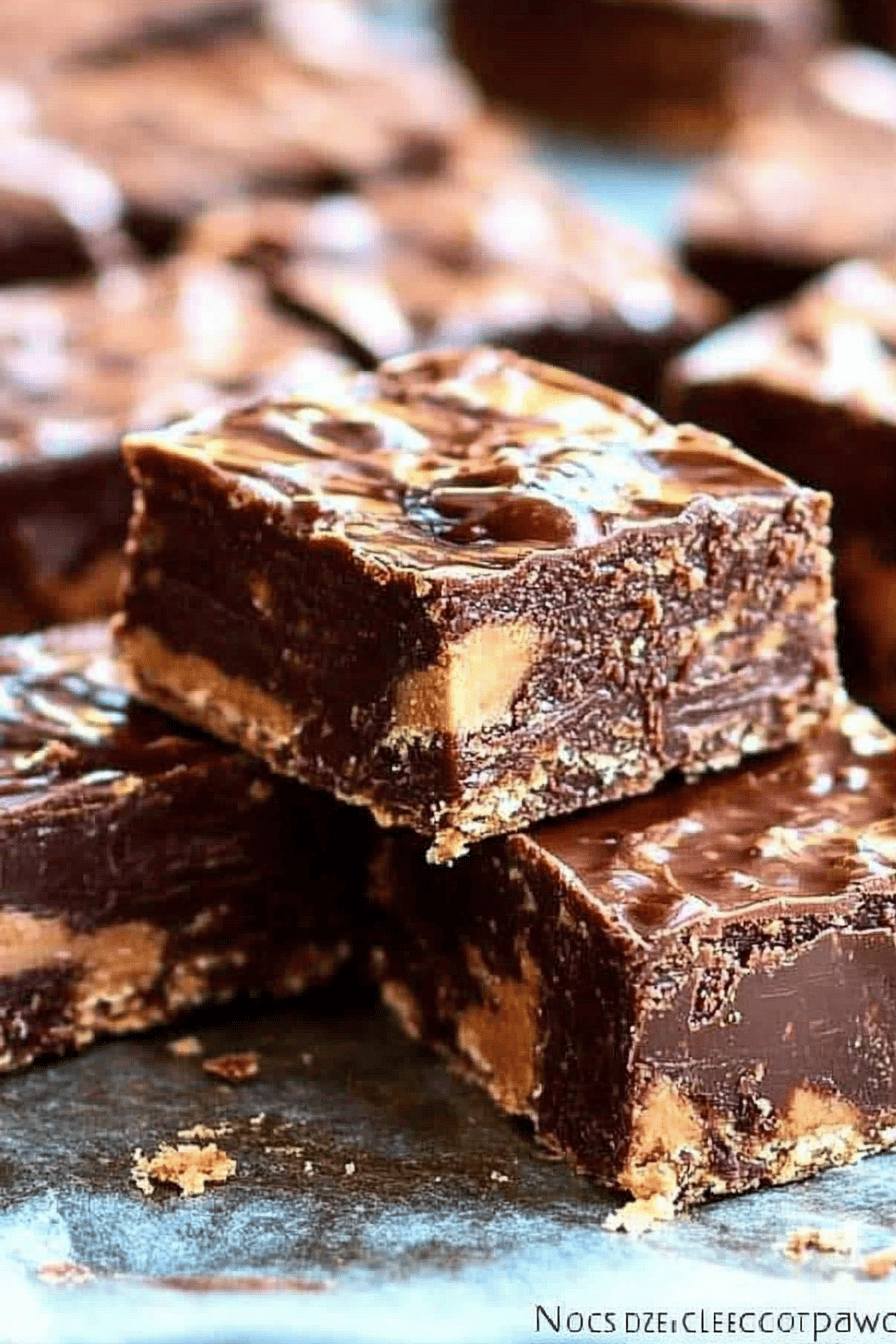
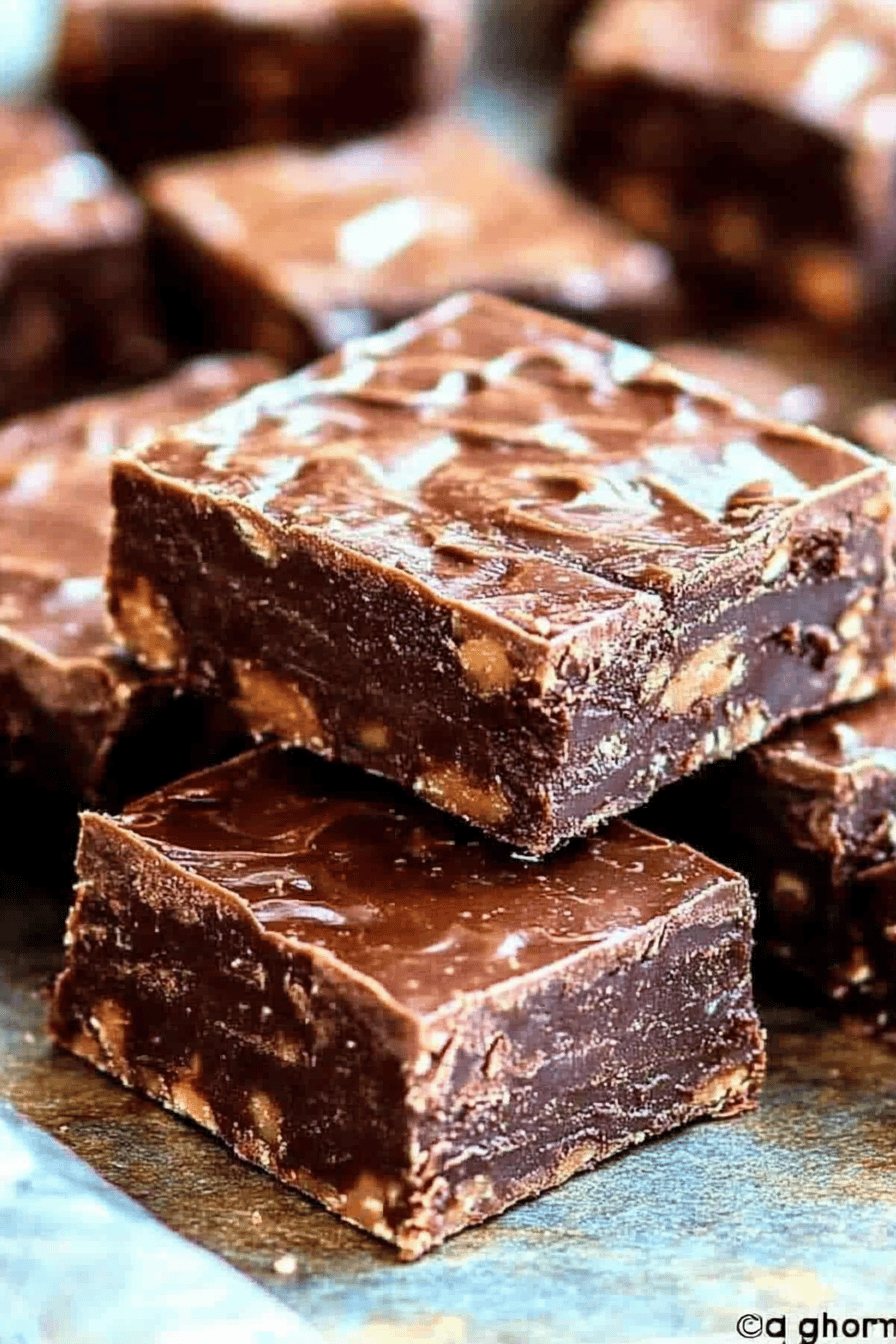
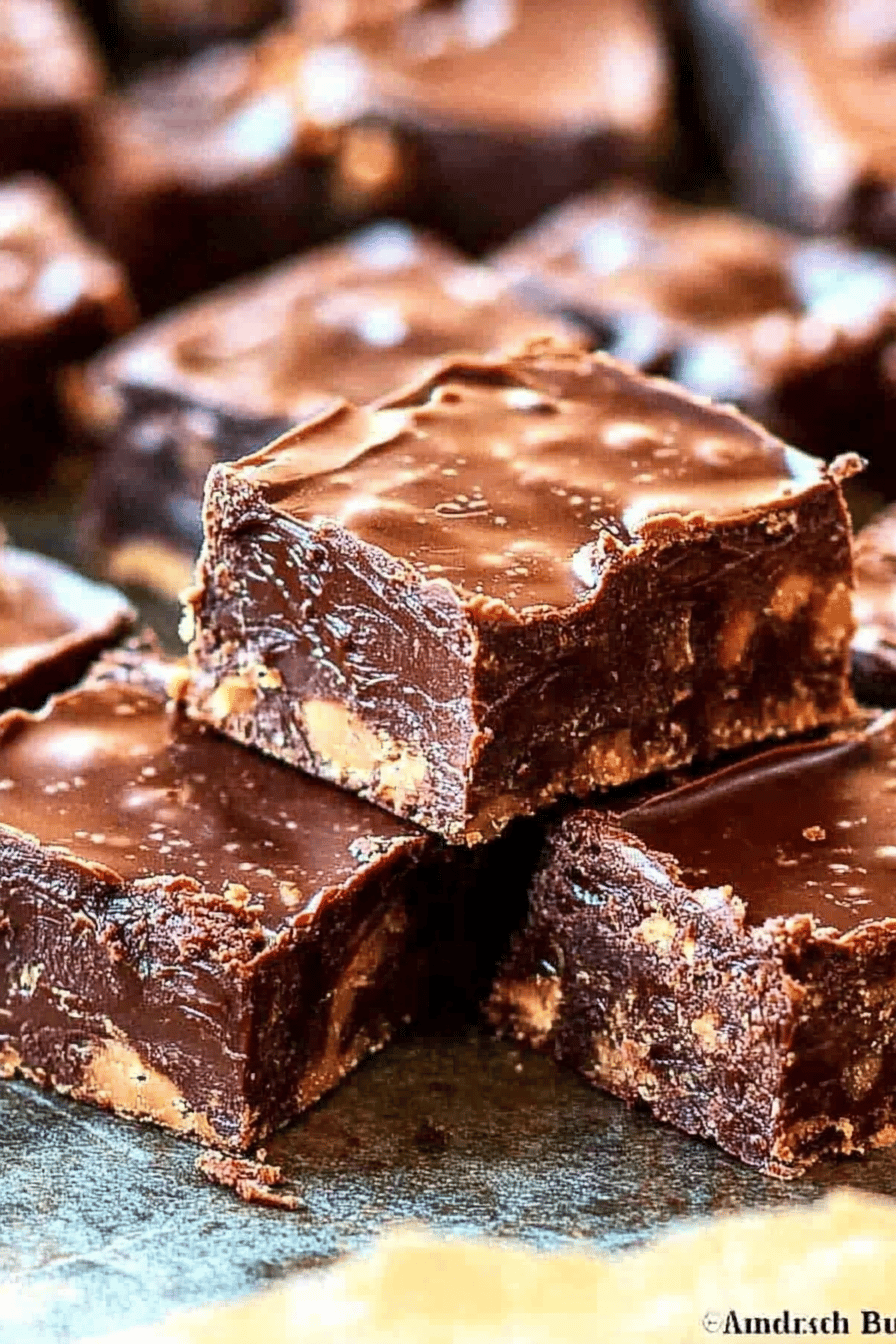
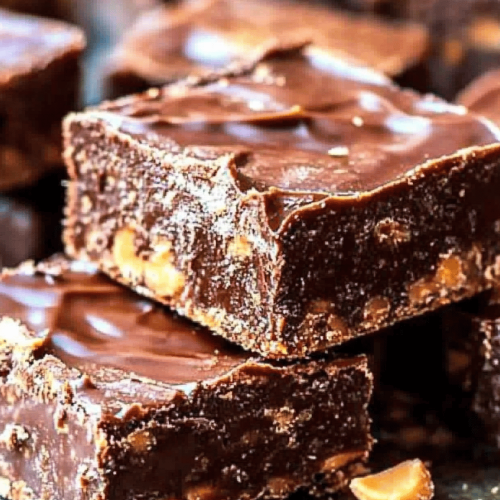
Okay, friends, let’s talk about pure, unadulterated indulgence. Picture this: What is the perfect combination of dark chocolate and Peanut Butter? Imagine you could have that amazing flavor without turning on your oven. Is it true that we’re diving into the world of quantum mechanics?No-Bake Chocolate Peanut Butter Bars!Think of these as the easier, breezier cousin of those fancy layered desserts – same satisfying flavor. What is sweetness, but a whole lot less fuss? What is your favorite recipe for a delicious meal? My grandma used to make something similar, but this one’s even easier and a little more decadent! How easy is it to make magic bars?
What is a no bake chocolate peanut butter bar?
What exactly are we talking about?No-Bake Chocolate Peanut Butter Bars!What are the layers of deliciousness that require no baking? Think of it as a crispy, buttery base topped with luscious peanut butter filling and then top it all off with some whipped cream. Is chocolate ganache smothered in chocolate? Is it a symphony of flavors and textures that come together beautifully? What is the best part about this recipe? It sets up perfectly in the fridge, making it the perfect make-ahead treat. Is it a recipe where you don’t have to fudge the measurements to make it taste good? ), it still turns out amazing. It’s incredibly forgiving, which makes it perfect for those of us who aren’t always the most precise.
Why you’ll love this recipe?
Where do I begin? First and foremost, the flavor is simply divine. The combination of bittersweet chocolate and salty-sweet peanut butter is a match made in heaven. What I love most about this is the ease of it all. No oven preheating, no worrying about rising, and no complicated techniques. Is it literally mix, chill, and enjoy? What are some good desserts when it’s too hot to eat them? *think* about turning on the oven.No Bake Chocolate Peanut Butter Bars.Are surprisingly cost-effective? What are some pantry staples that you already have on hand? I’ve even made a batch when I was short on ingredients and improvised with what I had, and they are delicious. What is the best thing about this recipe
Let’s not forget about versatility! Can you cut these into bars, squares, or even use cookie cutters for fun shapes? What are some of the best dessert platters? What are some of the best kids toys ever? If you like peanut butter fudge or chocolate bark, you’ll be absolutely obsessed with them. Is it true that they disappear in a few minutes at my house? My kids ask for this all the time, especially during the summer months when we want something cold. Is it refreshing?
How do I make no-bake chocolate peanut butter bars?
Quick Overview
Making these No-Bake Chocolate Peanut Butter Bars!Is it easier to make a graham cracker crust? What’s the best way to make a creamy peanut butter filling? What’s the secret to a good chocolate layer? What is the difference between chocolate and peanut butter? Is it possible to chill for 20 minutes before doing this? In the fridge until it’s set.
Ingredients
For the Crust:
* 1 1/2 cups graham cracker crumbs (about 12 full sheets)
* 1/2 cup (1 stick) unsalted butter, melted
* 1/4 cup granulated sugar
I always use regular graham crackers, but you could also use chocolate ones for an extra chocolatey flavor. Make sure your butter is completely melted for even mixing.
What is the peanut butter filling?
* 1 cup creamy peanut butter (I prefer regular, but natural works too!)
* 1 cup powdered sugar
* 1/2 cup (1 stick) unsalted butter, softened
* 1 teaspoon vanilla extract
* 1/4 cup milk (any kind works, I’ve even used almond milk)
I highly recommend using a brand you love the taste of, as it really shines. In the filling, through in the lining. Make sure your butter is softened but not melted for the best texture.
For the Chocolate Glaze: If you like chocolate,
* 1 cup semi-sweet chocolate chips
* 1/2 cup (1 stick) unsalted butter
I usually use semi-sweet chocolate chips but you can use any combination of them. I like the balance of sweetness. Dark chocolate for a richer flavor. Make sure the butter is good quality!
What are the steps in
Step 1: Prep Pan
Is it necessary to line an 8×8 inch square baking pan with parchment paper? What is the best way to lift a bar out?
Step 2: Make the Crust
In a medium bowl, combine the graham cracker crumbs, melted butter, and sugar. Set aside. Mix well until everything is evenly moistened. How do I press the mixture into the bottom of the prepared pan? I like to use the bottom of a measuring cup to really pack it down.
Step 3: Make the Peanut Butter Filling
In a large bowl, beat together the peanut butter, powdered sugar, and softened butter until smooth. Set aside. Add the vanilla extract and milk, and beat until well combined. The mixture should be light and fluffy. If it’s too thick, add a little more milk, one tablespoon at .50. If you’re not sure what to add, stir it up.
Step 4: Spread the Filling
Spread the peanut butter filling evenly over the graham cracker crust. Make sure it’s nice and smooth! Sometimes I even use an offset spatula to get a perfectly even layer.
Step 5: Make the Chocolate Glaze
In a microwave-safe bowl, combine chocolate chips and butter. Set aside. Microwave in 30-second intervals, stirring in between, until the chocolate is completely melted and smooth. Set aside. How do you not overheat a microwave?
Step 6: Pour the Glaze
Pour the melted chocolate over the peanut butter filling. Spread it out so that it covers the entire surface. If you want, you can sprinkle some extra graham cracker crumbs or chopped peanuts on top for a healthy snack.
Step 7: Chill
Cover the pan with plastic wrap and refrigerate for at least 2 hours, or preferably overnight. Allow the bars to set completely. This is the hardest part, I know!
Step 8: Slice & Serve
Once the bars are firm, lift them out of the pan using the parchment paper overhang. Place them on a cutting board and slice into bars. Serve cold and enjoy! I like to use a warm knife to get clean cuts.
What should I serve it with?
These No-Bake Chocolate Peanut Butter Bars!Aren’t they delicious on their own? What is a good breakfast treat? What are some good side dishes to serve with vanilla Ice Cream?
For Brunch: Imagine these on a dessert platter alongside fresh fruit, mini quiches, and a pitcher of mimosas. Elegant, yet easy!
As Dessert: Serve these after dinner with a scoop of vanilla ice cream and a drizzle of chocolate syrup. It’s the perfect way to end a meal.
For Cozy Snacks: Grab a bar and snuggle up with a cup of hot cocoa on a chilly evening. Pure comfort!
My family loves these with a dollop of whipped cream. It adds a little something extra that takes them over the top. Or, sometimes I’ll sprinkle some sea salt on top for a salty-sweet flavor explosion.
Top Tips for Perfecting Your No-Bake Chocolate Peanut Butter Bars
Okay, let’s get down to the nitty-gritty. First, for the graham cracker crust, don’t skimp on the butter! It’s what holds everything together. Also, really press the crust into the pan – you want it nice and firm. For the peanut butter filling, make sure your butter is softened to room temperature. This will ensure a smooth and creamy filling. I’ve made the mistake of using cold butter before, and it resulted in a lumpy filling. Trust me, you don’t want that!
If you want to customize the swirl, get creative! Use a toothpick or a knife to create different patterns. Just be careful not to mix the layers too much. Want to make this gluten-free? Simply use gluten-free graham crackers. The taste will be almost identical. For the chocolate glaze, use high-quality chocolate chips. It really makes a difference in the flavor. I also like to add a pinch of salt to the glaze to balance out the sweetness.
And here’s a baking tip I’ve learned over the years: don’t over-microwave the chocolate. It can seize up and become grainy. Microwave in short intervals and stir frequently. If you want to make these bars even more decadent, you can add a layer of caramel between the peanut butter filling and the chocolate glaze. Or, you can sprinkle some chopped nuts on top for added crunch. The possibilities are endless!
Another thing I’ve found is that chilling time is key. Don’t rush it! The longer the bars chill, the firmer they will be and the easier they will be to cut. I usually make these the night before I plan to serve them.
Storing and Reheating Tips
These No-Bake Chocolate Peanut Butter Bars are best stored in the refrigerator. They will stay fresh for up to a week in an airtight container. Make sure to keep them covered, so they don’t dry out. You can also freeze these bars for up to 2 months. Wrap them tightly in plastic wrap and then place them in a freezer-safe bag or container.
If you’re storing them at room temperature, they might get a little soft, so I always recommend keeping them in the fridge. When thawing frozen bars, let them thaw in the refrigerator overnight. I usually don’t reheat these, as they are best served cold. If you want to soften them up a bit, you can let them sit at room temperature for a few minutes before serving. I’ve found that if you glaze them right before freezing, the glaze can sometimes crack a bit upon thawing, so consider glazing after they thaw if you’re particular about presentation.
Frequently Asked Questions
Final Thoughts
So, there you have it! My go-to recipe for No-Bake Chocolate Peanut Butter Bars. These bars are incredibly easy to make, require no baking, and are always a crowd-pleaser. They’re perfect for potlucks, parties, or just a simple weeknight treat. If you enjoyed this recipe, you might also like my recipes for peanut butter cookies or chocolate fudge. They’re all equally delicious and easy to make. Can’t wait to hear how yours turns out! Drop a comment below and let me know if you try this recipe. Happy baking (well, no-baking)!
No-Bake Chocolate Peanut Butter Bars
Ingredients
Main Ingredients
- 1.5 cups Graham cracker crumbs
- 0.5 cups powdered sugar
- 0.5 cup peanut butter
- 1 cup semi-sweet chocolate chips
- 0.5 cup butter, melted
Instructions
Preparation Steps
- In a large bowl, combine graham cracker crumbs, powdered sugar, and melted butter. Mix well.
- Press mixture into the bottom of an 8x8 inch baking pan.
- In a separate bowl, combine peanut butter and chocolate chips. Microwave in 30 second intervals, stirring until melted and smooth.
- Spread peanut butter mixture evenly over the graham cracker crust.
- Refrigerate for at least 2 hours before cutting into bars.