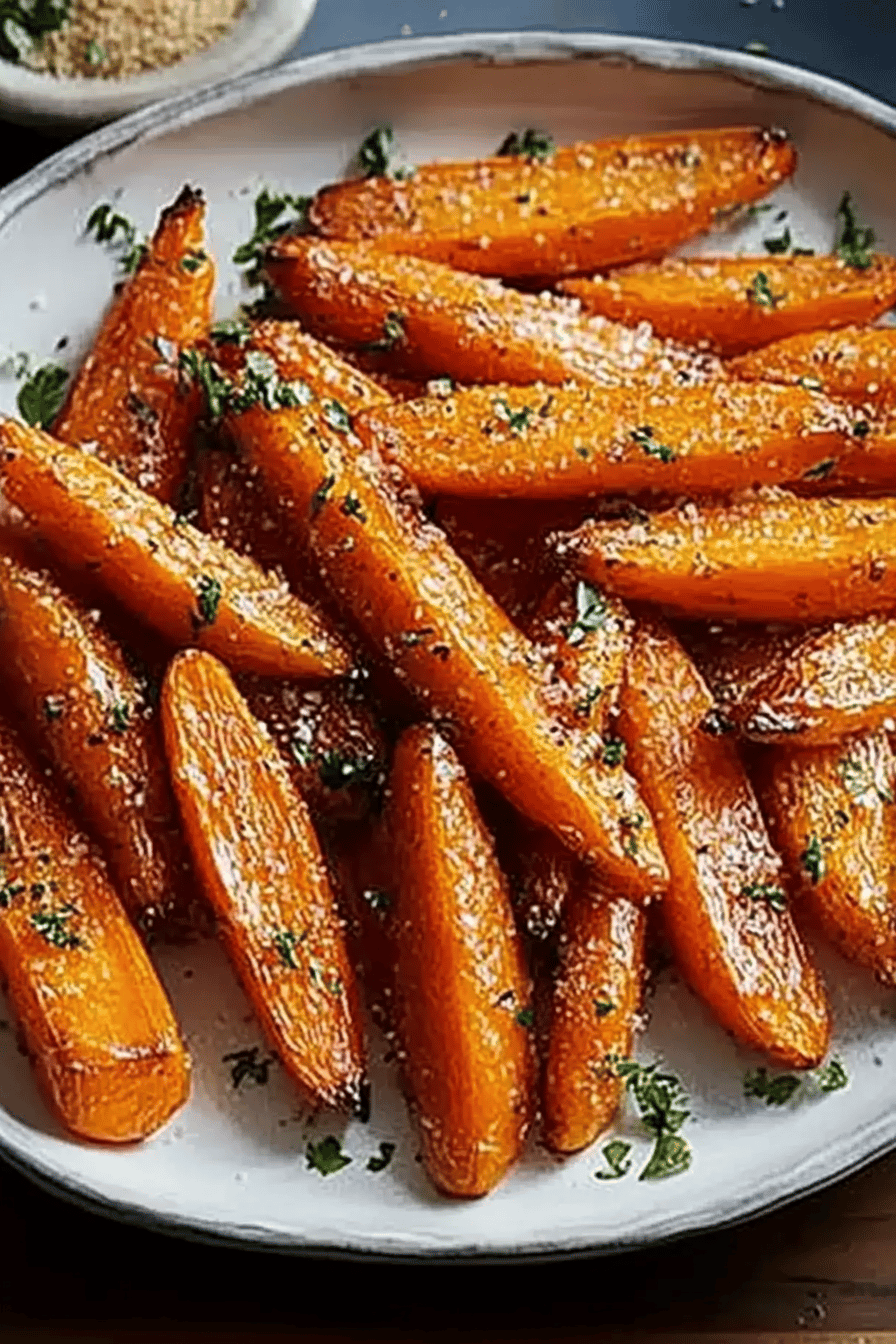
Oh, these roasted carrots! If there’s one side dish that’s a guaranteed winner at my table, it’s this one. Honestly, it’s become my secret weapon. When I’m scrambling for something delicious and healthy to go with dinner, or when the kids are suddenly craving a little something sweet, this is my go-to. It’s so ridiculously easy, yet the flavor is just… wow. It’s like magic happened in the oven! I know, I know, “roasted carrots” sounds pretty basic, right? But trust me, this isn’t just any old roasted carrot recipe. It’s the kind that makes people ask for the recipe, the kind that makes even the pickiest eaters gobble them up. Forget those bland, mushy boiled carrots of childhood; these are caramelized, tender-crisp, and bursting with natural sweetness. They’re a revelation, and I can’t wait for you to try them.
What are some Heavenly Roasted Carrots?
At its heart, this recipe is about taking humble carrots and transforming them into something extraordinary with just a little heat and a few simple additions. Think of it as a flavor-boosted, slightly elevated take on a classic. The name, “Sweetest, Simplest Roasted Carrots,” really says it all. We’re not doing anything complicated here; no fancy marinades or obscure spices. It’s essentially carrots, roasted until they’re fork-tender with beautifully caramelized edges, then tossed with a touch of sweetness and savory goodness. The simplicity is part of its charm, making it incredibly approachable for any home cook, whether you’re a seasoned pro or just starting out. It’s the kind of dish that makes you feel like you’ve achieved something impressive without breaking a sweat.
Why you’ll love this recipe?
There are so many reasons why this roasted carrots recipe has earned a permanent spot in my recipe binder, and I’m betting it’ll quickly become a favorite for you too! First off, the flavor is absolutely phenomenal. Roasting brings out the natural sugars in carrots, creating this deep, rich sweetness that’s almost dessert-like. Then, we add a little something extra that just makes them sing – a hint of warmth, a touch of savory depth. It’s a flavor combination that’s surprisingly complex for how few ingredients are involved.
And the simplicity? It’s a lifesaver. On those nights when you’re running late or just don’t have a lot of energy, this comes together in a flash. Prep takes maybe 10 minutes, and then the oven does all the hard work. It’s also incredibly budget-friendly. Carrots are one of the most affordable vegetables out there, so you can whip up a big batch without breaking the bank. What I love most, though, is its sheer versatility. These aren’t just for holidays or special occasions; they’re perfect any night of the week. They pair beautifully with pretty much anything – a simple grilled chicken breast, a hearty Beef Stew, fish, or even as a side for a cozy vegetarian meal. You can even use them in other dishes, like adding them to a salad for a sweet crunch. It’s a recipe that truly delivers on flavor, ease, and value, making it a winner in my book.
How do I make roasted carrots?
Quick Overview
This recipe is all about letting the oven do the heavy lifting. We’ll toss fresh carrots with a few flavor boosters, spread them on a baking sheet, and roast them until they’re perfectly tender and slightly caramelized. It’s a straightforward process that delivers incredibly satisfying results with minimal effort. You’ll be amazed at how such simple steps can lead to such a delicious outcome. This is truly a stress-free way to get a vibrant, flavorful side dish onto your table.
Ingredients
For the Carrots: What are some examples?
1.5 pounds carrots, scrubbed clean (no need to peel if they’re young and fresh!) – The fresher the carrots, the sweeter they’ll be. If they look a little sad, a quick peel will help. I usually aim for medium-sized carrots, as they cook evenly.
For the Flavor Boost:
3 tablespoons olive oil – Extra virgin is great here for its peppery notes, but any good quality olive oil will work.
1 tablespoon pure maple syrup – This is key for that lovely caramelization. You could also use honey, but maple syrup gives a slightly more complex flavor.
1 teaspoon smoked paprika – This adds a beautiful subtle smokiness that complements the sweetness. If you don’t have smoked paprika, regular paprika is fine, but I highly recommend giving the smoked version a try!
1/2 teaspoon garlic powder – For a hint of savory depth without any actual garlic bits.
1/4 teaspoon salt – Or to taste. Don’t skimp on the salt; it really brings out the flavors.
1/4 teaspoon black pepper – Freshly ground is always best!
Step-by-Step Instructions
Step 1: Preheat & Prep Pan
First things first, get your oven preheating to a nice hot 400°F (200°C). This high heat is what helps caramelize those carrots beautifully. While the oven is warming up, grab a large baking sheet. I like to line mine with parchment paper or foil for super easy cleanup – a total lifesaver on busy nights! This also helps prevent any sticking.
Step 2: Mix Dry Ingredients
In a small bowl, whisk together the smoked paprika, garlic powder, salt, and black pepper. This ensures all the seasonings are evenly distributed before they hit the carrots. You want to make sure every single carrot gets a little taste of this deliciousness!
Step 3: Mix Wet Ingredients
Grab a large bowl – big enough to comfortably toss all your carrots. Pour in the olive oil and the maple syrup. Give them a quick stir to combine.
Step 4: Combine
Add your prepared carrots to the bowl with the olive oil and maple syrup. Sprinkle the dry seasoning mix over the top. Now, get your hands in there (or use a good set of tongs) and toss everything together really well. You want every single carrot to be coated in that glistening mixture. This is where the magic starts to happen, coating them for maximum flavor infusion.
Step 5: Prepare Filling
This step is actually part of Step 4 – combining everything into the bowl to get them coated. There isn’t a separate “filling” in this particular recipe, it’s all about coating the carrots directly!
Step 6: Layer & Swirl
Spread the coated carrots out in a single layer on your prepared baking sheet. This is super important! If they’re piled on top of each other, they’ll steam instead of roast, and you won’t get those lovely crispy, caramelized edges. Give them a little space to breathe.
Step 7: Bake
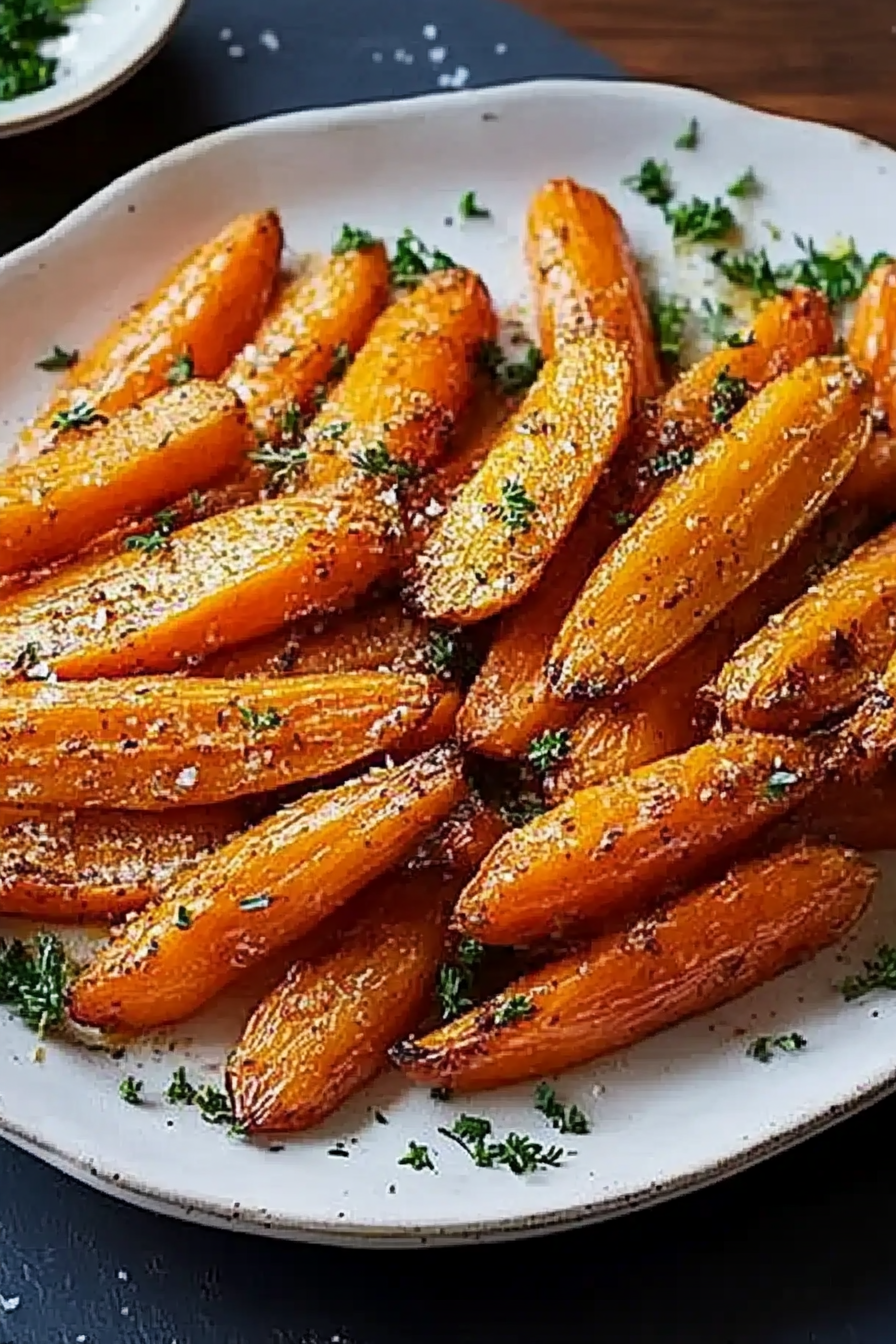
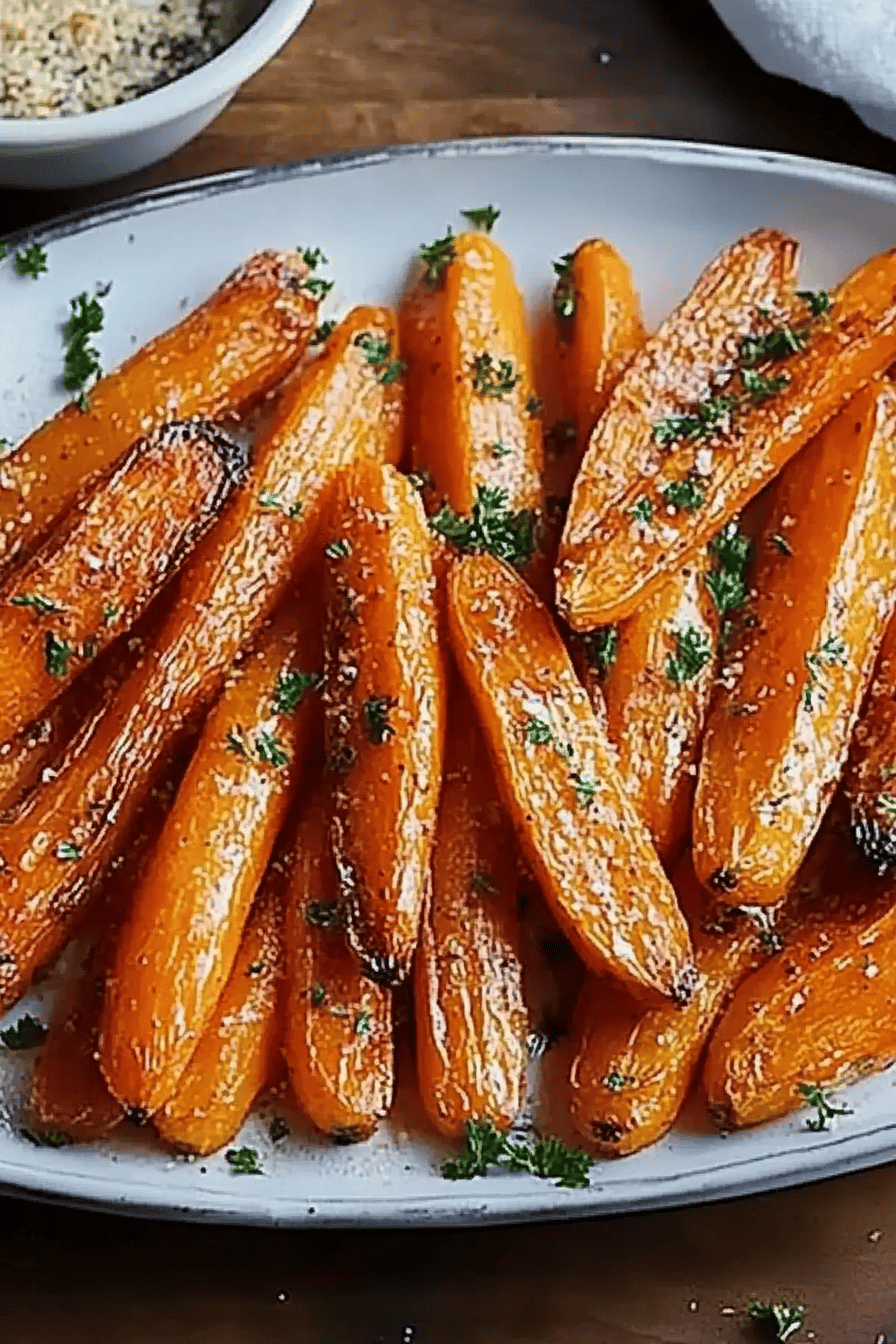
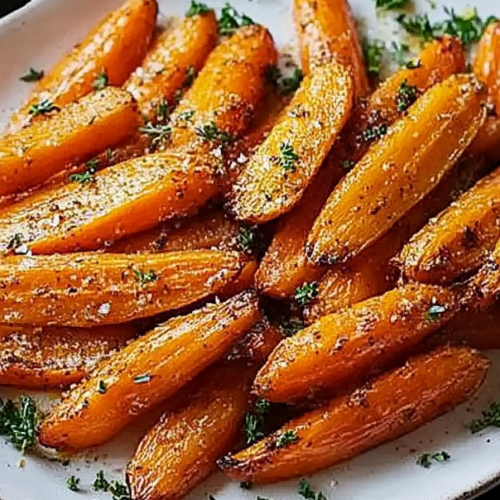
Pop that baking sheet into your preheated oven. Now, here’s where you need to be a little flexible with timing. Roasting usually takes about 20-30 minutes, but it depends on the size of your carrots and how hot your oven runs. About halfway through, give them a good toss or shake the pan to ensure they cook evenly and get browned on all sides. You’re looking for them to be tender when pierced with a fork and have those beautifully browned, slightly crispy edges.
Step 8: Cool & Glaze
Once they’re perfectly roasted, carefully remove the baking sheet from the oven. I like to let them sit for just a minute or two on the pan before serving. The glaze is really integrated into the roasting process itself with the maple syrup, so there’s no separate glaze to add at the end! The natural caramelization is the star here.
Step 9: Slice & Serve
These are best served warm, right out of the oven. They’re absolutely delicious on their own, but they also make a fantastic side dish for almost any meal. Enjoy them immediately for the best texture and flavor!
What to Serve It With
Honestly, these roasted carrots are like the friendliest guest at any meal – they just go with everything! For breakfast or brunch, I love them alongside some scrambled eggs or a frittata. The sweetness adds a lovely contrast to savory morning dishes. Imagine a slice of crusty toast, a perfectly cooked egg, and these vibrant carrots – pure morning bliss.
As a side for dinner, they’re a no-brainer. They pair wonderfully with roasted chicken or turkey, pork chops, or even a simple grilled steak. They also add a much-needed pop of color and sweetness to heartier dishes like shepherd’s pie or Beef Stew. For a more elegant meal, I’ll serve them with pan-seared salmon or a delicate white fish. And for those times when you just want something comforting, they’re perfect alongside a big bowl of pasta or a hearty lentil soup. My kids sometimes ask for them as a “snack” after school, and I’m always happy to oblige because I know they’re getting something nutritious and delicious. It’s a simple addition that really elevates any plate!
Top Tips for Perfecting Your Roasted Carrots
Over the years, I’ve picked up a few little tricks that I think really make a difference when it comes to roasting carrots. So, here are my top tips for making sure yours turn out absolutely perfect every single time:
Carrot Prep: While peeling isn’t strictly necessary if your carrots are young and fresh (give them a good scrub!), it can help if they’re older or have any tough spots. Make sure to cut them into relatively uniform pieces. I usually aim for about 1/2-inch thick rounds or sticks. If they’re all different sizes, some will be perfectly cooked while others are still too hard or have turned to mush. Uniformity is key for even roasting.
Mixing Advice: Don’t be shy with tossing! Really get in there and coat every single piece of carrot. That olive oil and maple syrup mixture is your flavor carrier. If some carrots are left dry, they just won’t taste as good. Use your hands if you need to – it’s the most effective way to ensure an even coating. And remember, a good pinch of salt is essential to bring out the natural sweetness.
Swirl Customization: While this recipe focuses on a simple toss, if you were to get fancy, you could add a sprinkle of fresh herbs like thyme or rosemary towards the end of roasting. Or, for a touch of heat, a pinch of red pepper flakes could be added with the other spices. For a different flavor profile, a whisper of cinnamon or nutmeg can add a warm, autumnal note.
Ingredient Swaps: If you don’t have maple syrup, honey works beautifully as a substitute, though it might caramelize a little differently. brown sugar is another option, but I find it can sometimes make them a bit too sweet. For the olive oil, a good quality vegetable or avocado oil can also be used. If you’re out of smoked paprika, regular paprika will do, but it won’t have that lovely smoky undertone.
Baking Tips: Make sure your oven is truly preheated. A hot oven is crucial for getting those lovely caramelized edges. Don’t overcrowd the pan! This is probably the most important tip. If the carrots are too close together, they steam rather than roast. Use two baking sheets if necessary. Give them a good toss about halfway through the cooking time to ensure even browning on all sides. Keep an eye on them towards the end – they can go from perfectly roasted to slightly overdone quite quickly!
Glaze Variations: As I mentioned, this recipe uses the maple syrup right in the roasting process. If you wanted to add a separate glaze, you could whisk together a tablespoon of maple syrup with a tiny squeeze of lemon juice and drizzle it over the carrots right before serving. Or, a simple sprinkle of finely chopped parsley can add a fresh, bright finish.
Storing and Reheating Tips
These roasted carrots are truly best enjoyed fresh, right out of the oven. That’s when they have the perfect tender-crisp texture and the most vibrant caramelization. However, life happens, and sometimes you end up with leftovers! Here’s how I store and reheat them:
Room Temperature: If you have any leftovers and they’ve cooled down, you can leave them at room temperature for a couple of hours, especially if your kitchen isn’t too warm. However, for food safety and to maintain the best quality, I always recommend refrigerating any leftovers within two hours.
Refrigerator Storage: Once completely cooled, transfer any leftover roasted carrots to an airtight container. They should stay fresh in the refrigerator for about 3-4 days. I’ve found that if you pack them too tightly, they can get a bit soft, so try not to cram them in.
Freezer Instructions: While I don’t typically freeze roasted carrots because their texture can become a bit mushy upon thawing, you absolutely can if you need to. Let them cool completely, then spread them on a baking sheet and freeze until solid. Once frozen, transfer them to a freezer-safe bag or container. They should last for up to 2-3 months.
Glaze Timing Advice: Since the maple syrup is part of the roasting process in this recipe, there isn’t a separate glaze to worry about. If you were to add a fresh herb or lemon drizzle after roasting, it’s best to do that right before serving. For reheating, I always recommend a quick pan-fry or oven reheat to help restore some of that lovely crispness.
Frequently Asked Questions
Final Thoughts
So there you have it – my absolute favorite way to make roasted carrots. It’s proof that sometimes, the simplest things yield the most spectacular results. This recipe is all about coaxing out that incredible natural sweetness and getting those beautiful caramelized edges that just make you weak in the knees. It’s a dish that brings comfort, flavor, and a splash of color to any meal, and I’m so excited for you to experience it yourself. If you love this recipe, you might also enjoy my Honey Glazed Parsnips or my Roasted Sweet Potatoes with Cinnamon for more simple yet delicious roasted vegetable ideas. I truly hope these roasted carrots become a staple in your kitchen, just like they are in mine. I can’t wait to hear how yours turn out, so please leave a comment below and let me know your thoughts, or share your own favorite variations! Happy cooking!
Roasted Carrots
Ingredients
Main Ingredients
- 0.5 kg carrots peeled and cut into 2-inch pieces
- 2 tablespoons olive oil
- 1 tablespoon honey
- 0.5 teaspoon salt
- 0.25 teaspoon black pepper
- 1 teaspoon dried thyme
Instructions
Preparation Steps
- Preheat your oven to 400°F (200°C).
- In a large bowl, toss the prepared carrots with olive oil, honey, salt, black pepper, and dried thyme until evenly coated.
- Spread the carrots in a single layer on a baking sheet.
- Roast for 25-30 minutes, or until the carrots are tender and slightly caramelized, flipping them halfway through.
- Serve hot as a delicious side dish.