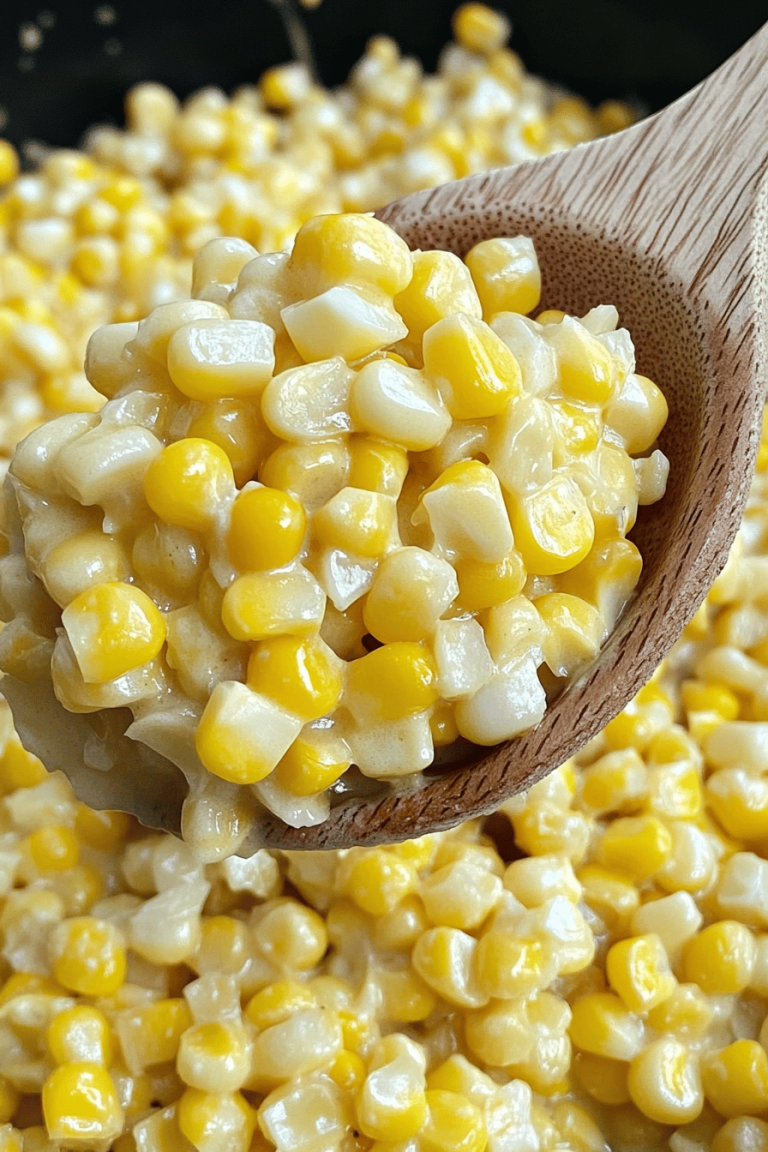
There are certain smells that just transport you. For me, it’s the scent of garlic hitting hot olive oil, mingling with freshly baked bread. It’s the kind of aroma that makes you stop whatever you’re doing, peek into the kitchen with wide, hopeful eyes, and basically beg for whatever’s cooking. That’s precisely the magic that happens when I whip up this garlic knots recipe. It’s not just about the taste, although trust me, the taste is out-of-this-world good. It’s about the anticipation, the shared moment as everyone gathers around, and the sheer joy on people’s faces when they take that first bite. Forget those bland, dry knots you sometimes get at pizzerias; these are pillowy soft on the inside, with a beautifully golden-brown crust that’s just begging to be dipped into marinara. I’ve tried so many versions over the years, but this one? This is the one that gets requested time and time again, the one that makes even my pickiest eaters ask for seconds. It’s my go-to for game nights, casual dinners, or honestly, just because I’m craving something incredibly comforting and delicious. It’s like a warm hug in bread form, and I just can’t wait to share it with you.
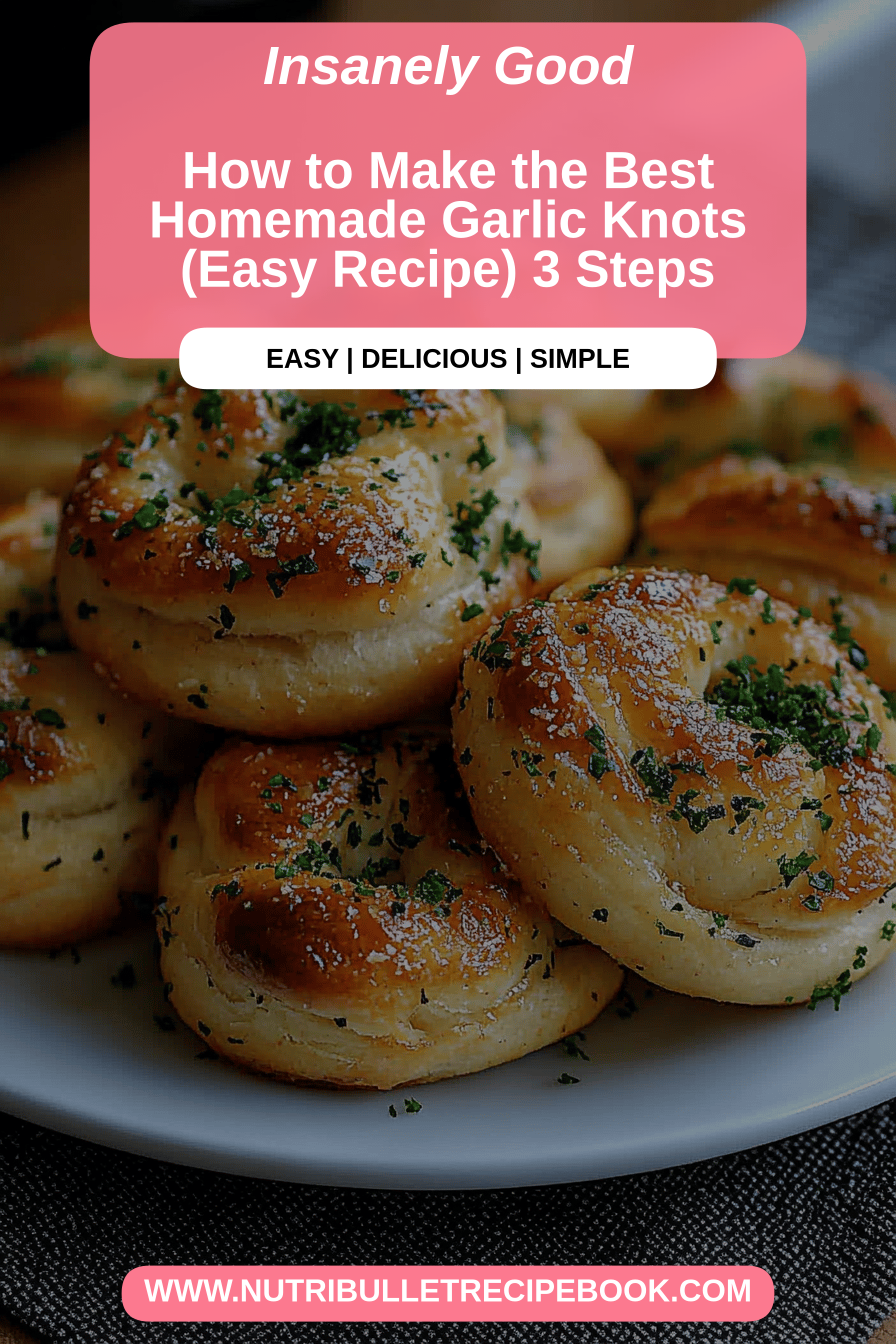
What are garlic knots?
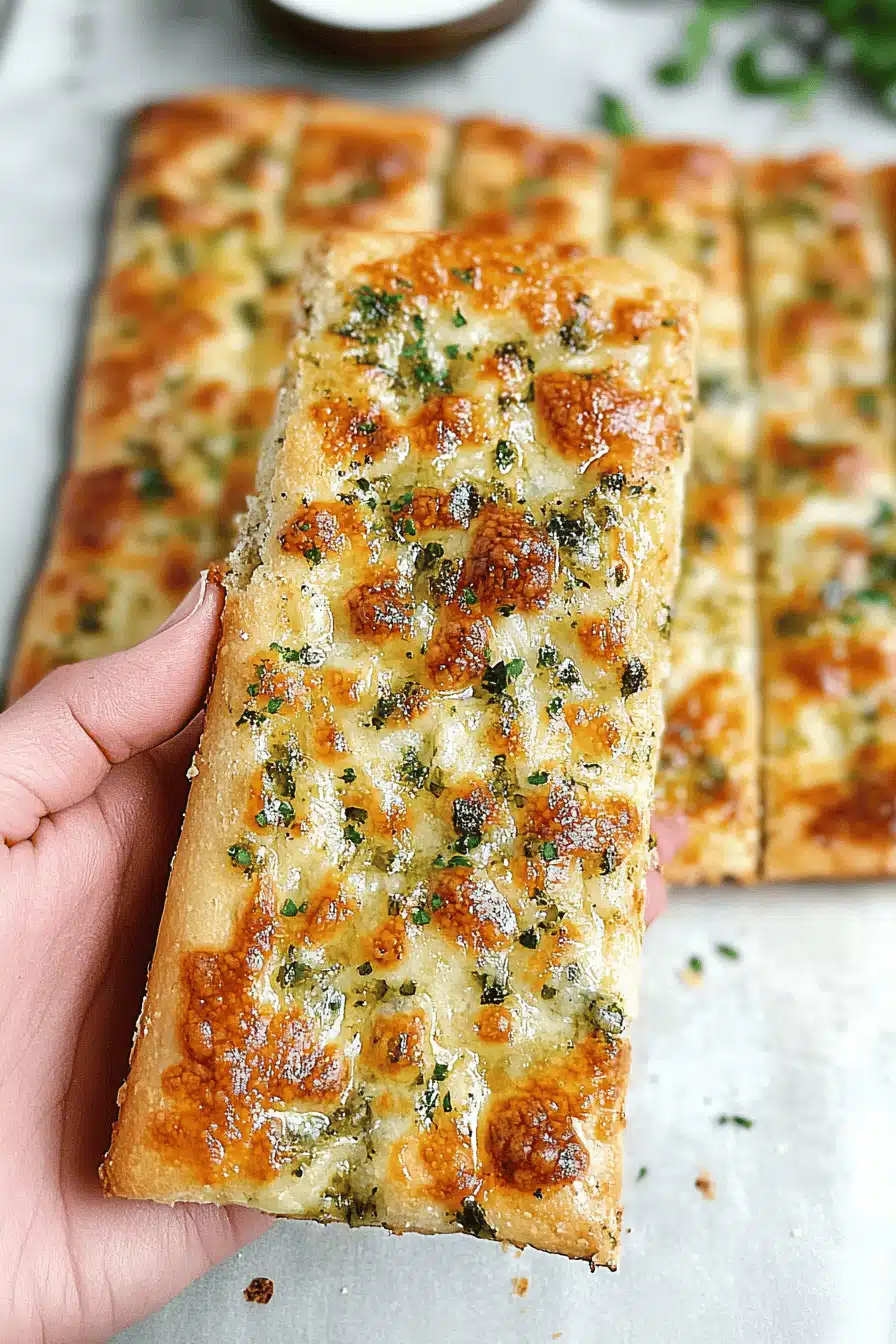
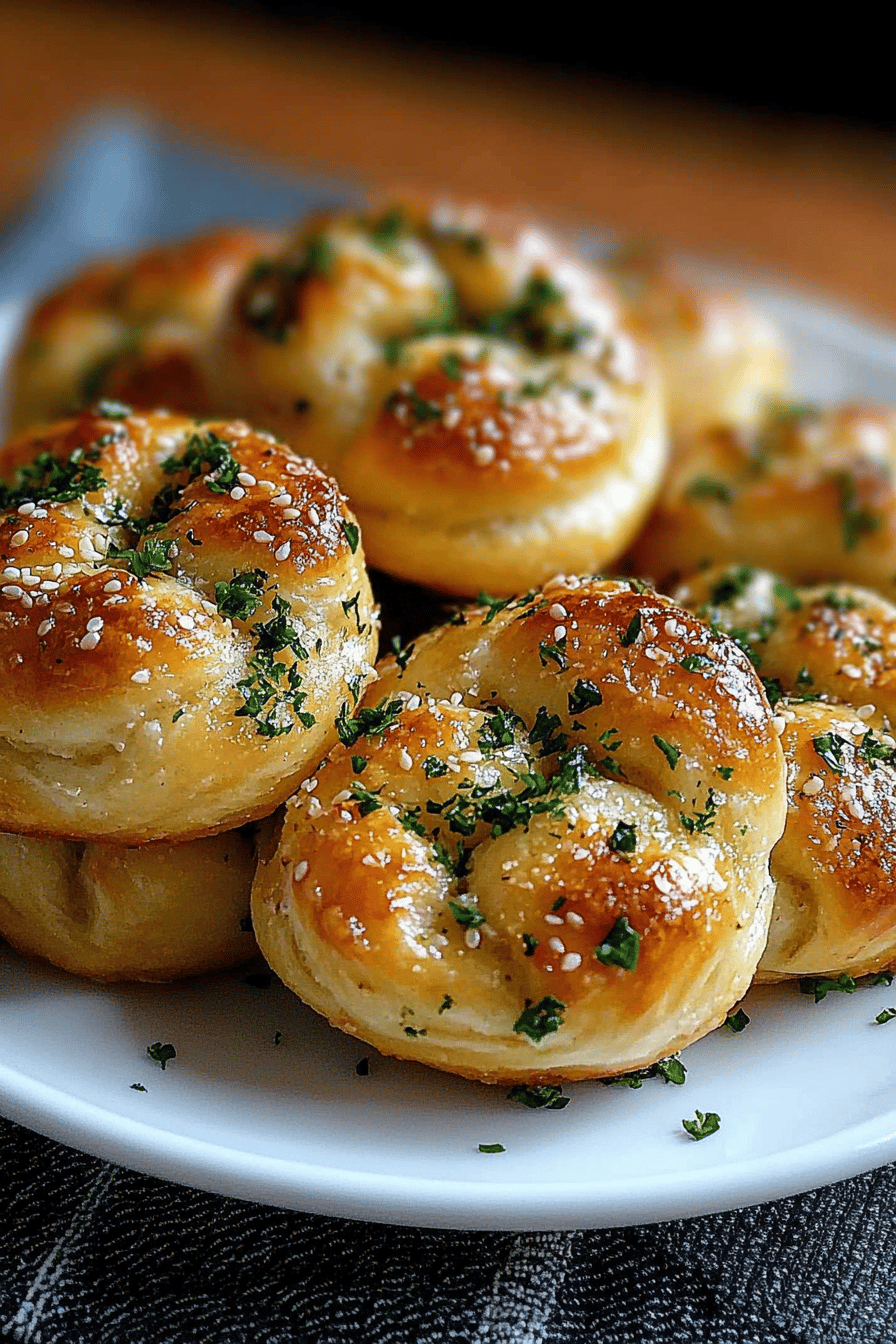
So, what exactly are these magical little bundles of dough? Think of them as the cooler, more approachable cousin of a breadstick. They’re essentially small pieces of pizza dough, tied into a knot, then baked until golden and brushed generously with a garlicky, buttery, herb-infused concoction. The ‘knot’ part isn’t just for show; it creates those lovely nooks and crannies that hold onto all that amazing flavor. They’re a classic accompaniment to Italian meals, especially pasta dishes and pizzas, but honestly, they’re so good, they’re practically a meal in themselves. The beauty of these garlic knots recipe lies in their simplicity; they start with basic dough ingredients you likely already have, and the transformation into something utterly irresistible is surprisingly quick. They are the perfect bite – a little chewy, a little soft, bursting with savory goodness, and always, always a crowd-pleaser.
Why you’ll love this recipe?
There are so many reasons why this garlic knots recipe has earned a permanent spot in my recipe binder, and I’m betting it will do the same for you. First off, let’s talk about the flavor explosion. We’re talking about that irresistible combo of garlic, butter, and herbs, coating a perfectly baked, tender dough. It’s savory, slightly garlicky (but not overpoweringly so – unless you want it to be!), and utterly addictive. My kids call them “super yummy bread,” and when they say that, you know it’s a win! Secondly, and this is a big one for me, the simplicity. Despite how fancy they look and taste, they’re genuinely easy to make. You don’t need any fancy equipment or complicated techniques. I’ve whipped these up on busy weeknights when I needed a quick side dish, and they’ve always been a lifesaver. Plus, the ingredients are super budget-friendly. Flour, yeast, a few pantry staples – you’re basically good to go! And the versatility? Oh my goodness. Serve them with your favorite marinara sauce for dipping, alongside a hearty pasta dish, or even just as a snack while you’re waiting for dinner. They’re just as good warm as they are at room temperature, though let’s be honest, they rarely make it to room temperature in my house! What I love most about this garlic knots recipe is the pure comfort it brings. It’s like a little piece of homemade Italian heaven, and the aroma that fills your kitchen while they bake is just pure joy.
How do I make garlic knots?
Quick Overview
This garlic knots recipe is surprisingly straightforward. We’ll start by making a simple, soft dough, letting it rise just a bit, then shaping it into those signature knots. After a quick bake, we’ll drench them in a glorious garlic-herb butter. The whole process, from start to finish, takes less time than you’d think, and the results are so worth it. It’s the perfect balance of effort and delicious payoff, making it ideal for both beginner bakers and seasoned pros looking for a reliable go-to.
Ingredients
For the Main Batter:
All-Purpose Flour: About 3 cups, plus more for dusting. I always opt for unbleached all-purpose flour; I find it gives the dough a better texture. Make sure it’s fresh!
Active Dry Yeast: 1 packet (or 2 ¼ teaspoons). This is the magic that makes our dough rise. Make sure it’s not expired!
Warm Water: 1 cup. It should feel like a warm bath, around 105-115°F (40-46°C). Too hot and it kills the yeast, too cold and it won’t activate.
Granulated Sugar: 1 tablespoon. This feeds the yeast and gives our dough a little boost.
Salt: 1 teaspoon. Essential for flavor and helps control the yeast activity.
Olive Oil: 2 tablespoons, plus more for greasing. Use a good quality extra virgin olive oil for the best flavor.
For the Garlic-Herb Butter Topping:
Unsalted Butter: ½ cup (1 stick). Softened is key here for easy spreading.
Garlic: 4-6 cloves, minced. I’m a garlic fiend, so I usually go for six! Freshly minced is always best for that punchy flavor.
Fresh Parsley: 2 tablespoons, chopped. Adds a lovely freshness and color.
Dried Oregano: 1 teaspoon. A classic Italian herb that complements the garlic perfectly.
Pinch of Red Pepper Flakes (optional): For a little hint of heat.
Salt and Black Pepper: To taste.
Optional for Serving: Marinara sauce for dipping!

Step-by-Step Instructions
Step 1: Preheat & Prep Pan
First things first, let’s get our oven ready. Preheat it to a nice 400°F (200°C). While that’s warming up, grab a baking sheet and lightly grease it with a little olive oil or line it with parchment paper. This prevents our gorgeous garlic knots from sticking. Easy peasy!
Step 2: Mix Dry Ingredients
In a large mixing bowl, whisk together your 3 cups of flour, 1 teaspoon of salt, and 1 tablespoon of sugar. Make sure they’re all nicely combined. This ensures everything is evenly distributed in the dough.
Step 3: Mix Wet Ingredients
In a separate, smaller bowl or a liquid measuring cup, combine 1 cup of warm water and 1 packet of active dry yeast. Give it a gentle stir and let it sit for about 5-10 minutes. You should see it get foamy and bubbly on top – that’s the yeast waking up and doing its thing! Once it’s foamy, stir in the 2 tablespoons of olive oil.
Step 4: Combine
Pour the wet yeast mixture into the bowl with the dry ingredients. Now, using a wooden spoon or a sturdy spatula, start mixing until a shaggy dough forms. Once it starts coming together, turn it out onto a lightly floured surface. Knead the dough for about 5-7 minutes. You’re looking for a smooth, elastic dough that springs back when you gently poke it. If it feels too sticky, add a little more flour, a tablespoon at a time. The goal is a soft, pliable dough. Place the kneaded dough into a lightly oiled bowl, turning to coat all sides. Cover the bowl with a clean kitchen towel or plastic wrap and let it rest in a warm place for about 30-45 minutes, or until it has doubled in size. This is the dough’s chance to get nice and puffy!
Step 5: Prepare Filling
While the dough is rising, let’s get our flavor bomb ready! In a small bowl, melt the ½ cup of butter. Add your minced garlic, chopped parsley, dried oregano, and optional red pepper flakes. Season with a pinch of salt and freshly ground black pepper. Stir it all together. I like to let this sit for a few minutes to let the flavors meld. The smell alone is incredible!
Step 6: Layer & Swirl
Once the dough has doubled, gently punch it down to release the air. Turn the dough out onto a lightly floured surface. Now, roll the dough out into a rectangle, roughly about 10×12 inches. It doesn’t have to be perfect! Brush about half of your glorious garlic-herb butter mixture evenly over the surface of the dough, leaving a small border along the edges. Now, this is where the magic happens for the ‘knot’ part. Slice the dough lengthwise into about 1-inch wide strips. Take one strip, tie it into a loose knot, tucking the ends underneath if you like. Repeat with all the strips. Arrange the knotted dough pieces on your prepared baking sheet, leaving a little space between them as they’ll puff up.
Step 7: Bake
Place the baking sheet into your preheated 400°F (200°C) oven. Bake for about 12-15 minutes, or until the garlic knots are beautifully golden brown and puffed up. Keep an eye on them as ovens can vary!
Step 8: Cool & Glaze
As soon as the garlic knots come out of the oven, while they’re still hot, brush the remaining garlic-herb butter mixture generously over the tops. This is where they get that extra punch of flavor and shine. The heat from the knots will melt the butter and infuse all those delicious aromatics. Let them cool on the baking sheet for a few minutes before transferring them to a wire rack or serving plate.
Step 9: Slice & Serve
These are best served warm, so dig in as soon as they’re cool enough to handle! If you’re serving them with marinara sauce, warm up the sauce gently. Arrange the beautiful garlic knots on a platter and watch them disappear. Enjoy every single delicious bite!
What to Serve It With
These garlic knots are incredibly versatile and can seriously elevate any meal. For breakfast? I know, it sounds a little indulgent, but a warm garlic knot with a cup of strong coffee can be surprisingly satisfying, especially on a lazy weekend morning. Imagine the savory aroma pairing with your morning brew – it’s divine! For brunch, they’re a fantastic addition to a spread. Serve them alongside some frittatas or quiches, maybe with a light Fruit Salad. The savory bread is a great counterpoint to sweeter brunch items. As a dessert? Okay, hear me out. While not a traditional dessert, a slightly sweeter glaze variation (maybe a touch more sugar in the butter mix) can work beautifully after dinner, especially if you’re a fan of savory-sweet combinations. Think of them as a fun, interactive way to end a meal. But where they truly shine is for cozy snacks or as the perfect sidekick to Italian classics. They are an absolute must-have with any pasta dish, especially anything with a rich tomato sauce like bolognese or lasagna. They’re also fantastic alongside pizza, or even a hearty soup or stew. My family loves them with my homemade chicken parmesan; the knots are perfect for sopping up any extra sauce. They’re also surprisingly good with grilled chicken or a simple salad for a lighter meal. The possibilities are truly endless, and they always add that extra special touch.
Top Tips for Perfecting Your Garlic Knots
Over the years, I’ve learned a few tricks that make my garlic knots recipe consistently amazing, and I want to share them with you! Firstly, when it comes to the dough, don’t be afraid to knead it well. That initial kneading is crucial for developing gluten, which gives you that lovely chewy yet tender texture. If your dough feels sticky, resist the urge to dump in a ton of extra flour – just add it a tablespoon at a time until it’s manageable. A slightly sticky dough often yields a softer result. Secondly, the yeast is your friend, but it needs the right conditions. Make sure your water is warm, not hot. I always test it on my wrist; it should feel comfortably warm. And if your yeast doesn’t get foamy, it’s likely old, so grab a fresh packet – it’s worth it! When it comes to shaping the knots, I find that tying them loosely works best. Tying them too tight can cause them to be dense in the center. Don’t stress about them looking perfectly uniform; the rustic charm is part of their appeal! For the garlic-herb butter, use fresh garlic whenever possible. The flavor is so much brighter and more robust than pre-minced or garlic powder. If you can’t find fresh parsley, a little dried parsley will work in a pinch, but the fresh stuff really makes a difference. Experiment with the herbs too! A little bit of dried rosemary or thyme can add a lovely new dimension. Some people like a lot of garlic, others less, so feel free to adjust the amount of garlic to your personal preference. I’ve also found that the second brush of garlic butter right after they come out of the oven is non-negotiable. That’s what really locks in the flavor and gives them that beautiful sheen. If you’re using a stand mixer, by all means, use the dough hook! It makes kneading a breeze. Just be careful not to overmix once the wet and dry ingredients are combined; you want to mix until *just* combined before you start kneading. Trust me, I’ve learned that lesson the hard way!
Storing and Reheating Tips
These garlic knots are undeniably best fresh out of the oven, but life happens, and sometimes you have leftovers! If you do happen to have any (which is rare in my house!), storing them properly is key to keeping them delicious. At room temperature, they’ll stay good for about 1-2 days, especially if you store them in an airtight container or tightly wrapped in plastic wrap. They might lose a little bit of their initial crispness, but they’ll still be wonderfully soft and flavorful. For longer storage, the refrigerator is your best bet. Pop them into an airtight container or a zip-top bag and they should keep well for about 3-4 days. Just be aware that refrigerating bread can sometimes make it a bit drier, so reheating is usually a good idea. If you plan to freeze them, this is a fantastic option for making ahead! Let the garlic knots cool completely first. Then, wrap them tightly in plastic wrap, followed by a layer of aluminum foil or place them in a heavy-duty freezer bag. They can be stored in the freezer for up to 2-3 months. When you’re ready to enjoy them, there are a few ways to reheat. For room temperature or refrigerated knots, a quick warm-up in a low oven (around 300°F or 150°C) for 5-10 minutes usually does the trick, bringing back some of that fresh-baked texture. You can also pop them in a toaster oven or even carefully in a microwave for about 15-30 seconds, though be cautious with the microwave as it can make bread a bit chewy if overdone. For frozen garlic knots, it’s best to thaw them overnight in the refrigerator first, then reheat as described. If you’re in a hurry, you can reheat them directly from frozen in a 350°F (175°C) oven for about 10-15 minutes, or until heated through. For the glaze, I always apply it right after they come out of the oven. If you’re storing them, the second brushing of butter right when they’re done is crucial. If you plan to freeze them, you can lightly brush them with melted butter or olive oil before freezing, and then add more fresh garlic and herbs when reheating for the best flavor.
Frequently Asked Questions
Final Thoughts
Honestly, this garlic knots recipe is more than just a recipe for me; it’s a little bit of happiness in dough form. It’s the kind of food that brings people together, sparks conversation, and creates delicious memories. The aroma alone is worth the effort, and the taste? Pure perfection. They’re soft, chewy, bursting with savory garlic and herb flavor, and just utterly satisfying. Whether you’re serving them as a side to your favorite Italian dish, or as the star of the show with a side of marinara, I promise they’ll be a hit. If you love this recipe, you might also enjoy my [link to another relevant recipe, e.g., “Homemade Pizza Dough”] or my [link to another relevant recipe, e.g., “Easy Marinara Sauce”], which are perfect pairings. Don’t be afraid to experiment with the herb combinations in the butter – a little rosemary or even some chives can be fantastic! I really hope you give this garlic knots recipe a try. I can’t wait to hear how yours turn out and what your favorite way to enjoy them is. Feel free to leave a comment below with your thoughts, tips, or any delicious variations you come up with! Happy baking!
Garlic Knots Recipe
Ingredients
Dough Ingredients
- 2.25 cup warm water about 105-115°F
- 2.25 teaspoon active dry yeast
- 1 tablespoon granulated sugar
- 5 cup all-purpose flour plus more for dusting
- 2 teaspoon salt
- 0.25 cup olive oil
Garlic Butter Topping
- 0.5 cup unsalted butter melted
- 4 cloves garlic minced
- 2 tablespoon fresh parsley chopped
- 0.5 teaspoon salt
Instructions
Preparation Steps
- In a large bowl, combine warm water, yeast, and sugar. Let sit for 5-10 minutes until foamy.
- Add flour, salt, and olive oil to the yeast mixture. Mix until a shaggy dough forms.
- Turn dough out onto a lightly floured surface and knead for 8-10 minutes until smooth and elastic. Or, use a stand mixer with a dough hook.
- Place dough in a greased bowl, cover, and let rise in a warm place for 1-1.5 hours, or until doubled in size.
- Punch down the dough. Turn it out onto a lightly floured surface and divide into 12 equal pieces.
- Roll each piece into a rope about 8-10 inches long. Tie each rope into a knot.
- Place the knots on a baking sheet lined with parchment paper. Cover and let rest for 15-20 minutes.
- Preheat oven to 400°F (200°C).
- While knots are resting, whisk together melted butter, minced garlic, chopped parsley, and salt for the topping.
- Bake knots for 12-15 minutes, or until golden brown.
- Brush the warm knots generously with the garlic butter topping. Serve immediately.