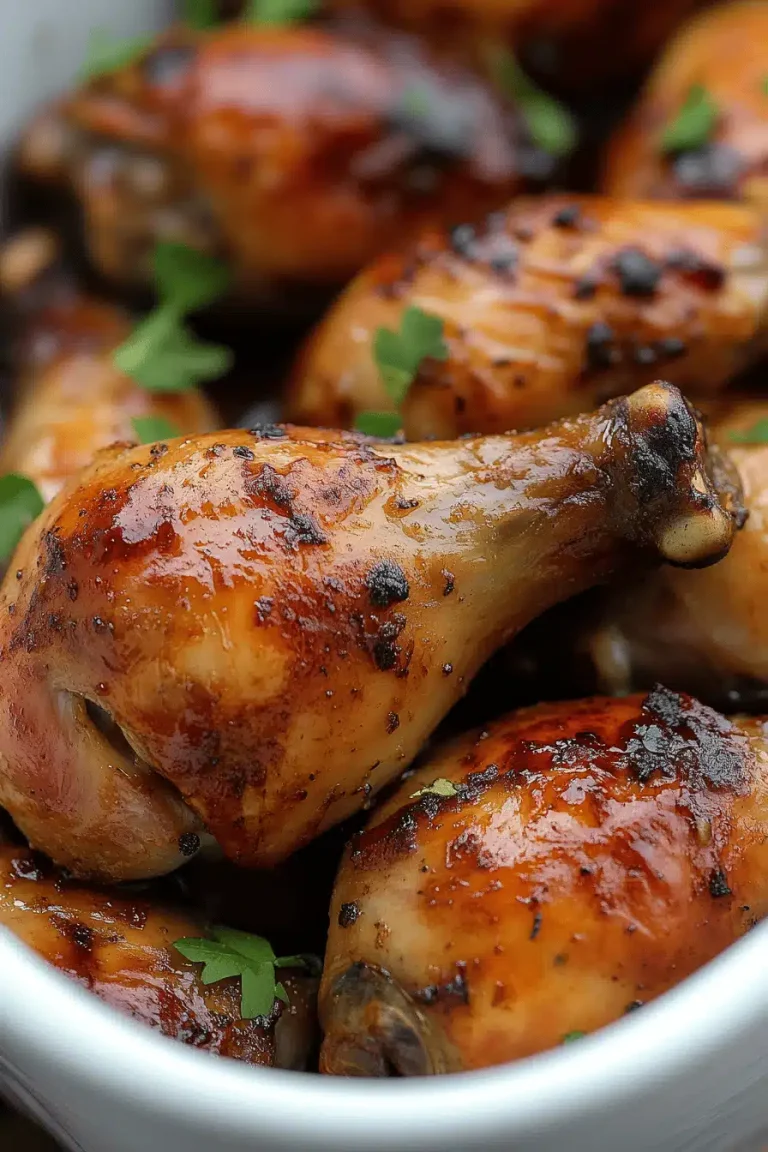
You know those dishes that just make you feel instantly happy, like a warm hug on a chilly evening? This melt in mouth chicken is exactly that for me. It’s the kind of recipe I whip up when I need a little comfort, when unexpected guests drop by, or honestly, just because the craving strikes. I remember the first time I perfected this; my little one, who can be a notoriously picky eater, took one bite and her eyes just lit up. She declared it “magic chicken,” and you know what? She wasn’t wrong. It’s got this incredible tenderness, a savory depth, and a whisper of sweetness that just melts away with every bite. It’s nothing like the usual Fried Chicken you might be used to, which can be a bit greasy or tough. This is elegant, surprisingly simple, and tastes like it came from a fancy restaurant, but I promise you, it’s totally achievable in your own kitchen. It’s become my go-to when I want something truly special without spending hours fussing.

What is Melt-in-Your-Mouth Chicken?
So, what exactly *is* this magical melt in mouth chicken? Think of it as a revelation in chicken preparation. Instead of just a quick pan-fry or bake, we’re talking about chicken that’s been coaxed into absolute tenderness through a unique combination of a delicate batter and a slow, gentle cooking process. It’s not deep-fried, so you don’t get that heavy, oily feeling. Instead, it achieves a sublime, almost custardy texture from the inside out. The name itself perfectly captures the experience: the moment it hits your tongue, it just dissolves, leaving behind a burst of succulent flavor. It’s essentially a masterclass in transforming simple chicken into something truly extraordinary. It’s approachable for beginners but sophisticated enough to impress even the most discerning palates. It’s the kind of dish that makes you pause, close your eyes, and just savor the moment. It’s pure culinary bliss.
Why you’ll love this recipe?
Honestly, where do I even begin with why this melt in mouth chicken is a total game-changer? First off, the flavor is just out of this world. It’s savory, with just a hint of sweetness that makes it incredibly addictive, and the herbs and spices really sing without overpowering the chicken itself. It’s got a beautiful balance that makes you want another bite, and another. Then there’s the simplicity. I know, I know, sometimes “simple” means bland, but not here! The steps are straightforward, and you probably already have most of the ingredients in your pantry. This one’s a lifesaver on busy nights when you want something impressive but don’t have a lot of time. And speaking of budget-friendly, Chicken Thighs are usually pretty affordable, making this a cost-effective way to enjoy a really special meal. It’s also surprisingly versatile. Serve it with a simple side of steamed veggies for a weeknight dinner, or dress it up with some elegant garnishes for a dinner party. It’s fantastic alongside fluffy rice, roasted potatoes, or even a fresh salad. What I love most about this is how it makes everyday chicken feel like a decadent treat. It’s the kind of recipe you’ll find yourself making again and again, simply because it’s so reliably delicious and brings so much joy to the table. It’s that perfect combination of comfort food and refined elegance.
How do you make Melt-in-your-mouth chicken?
Quick Overview
Making this melt in mouth chicken is surprisingly simple! You’ll start by preparing a light, airy batter that coats the chicken pieces beautifully. Then, we’ll gently cook them until they’re perfectly tender, almost impossibly so. The key is not to rush the process; patience is rewarded with incredible texture. It’s a hands-off kind of cooking for the most part, which means you can actually relax a little while dinner is happening. It’s the kind of recipe that makes you feel like a kitchen whiz, even if you’re just starting out. The result is chicken that’s incredibly moist, flavorful, and utterly delightful.
Ingredients
For the Main Batter:
1.5 lbs boneless, skinless Chicken Thighs, cut into bite-sized pieces (I prefer thighs because they stay incredibly moist, but breasts work too if you’re careful not to overcook them!)
1 cup all-purpose flour (or a gluten-free blend for a GF version)
1 teaspoon baking powder (this is crucial for that airy texture!)
1/2 teaspoon salt
1/4 teaspoon black pepper
1/2 cup milk (whole milk gives the best richness, but I’ve tested this with almond milk and it actually made it even creamier! So use what you have.)
For the Filling:
2 tablespoons olive oil or vegetable oil
1 medium onion, finely chopped (about 1 cup)
2 cloves garlic, minced
1/2 teaspoon dried thyme
1/4 teaspoon smoked paprika (optional, but it adds a lovely subtle depth)
1/4 cup chicken broth or water (just a touch to moisten)
For the Glaze:
2 tablespoons soy sauce (or tamari for gluten-free)
1 tablespoon honey or maple syrup (for a touch of sweetness)
1 teaspoon cornstarch (this thickens it beautifully)
Step-by-Step Instructions
Step 1: Preheat & Prep Pan
Okay, first things first, let’s get our oven ready. Preheat it to 375°F (190°C). Grab a good-sized oven-safe skillet or a baking dish that’s about 9×13 inches. You don’t need to grease it; the chicken and batter will handle all the moisture.
Step 2: Mix Dry Ingredients
In a medium bowl, whisk together the flour, baking powder, salt, and pepper. Give it a good mix so everything is evenly distributed. The baking powder is your friend here; it’s what makes the batter light and fluffy, giving us that melt in your mouth texture.
Step 3: Mix Wet Ingredients
In a separate, smaller bowl, pour in your milk. It’s best if it’s at room temperature, not ice cold, as this helps everything emulsify better. Whisk it gently.
Step 4: Combine
Now, here’s where the magic starts to happen. Pour the wet ingredients into the dry ingredients. Whisk them together *just* until they’re combined. It’s okay if there are a few lumps; seriously, don’t overmix! Overmixing develops the gluten in the flour, which can make the chicken tough. We want tender, remember? The batter should be thick but pourable, almost like pancake batter, but a bit thicker.
Step 5: Prepare Filling
While your batter is resting for a minute, let’s make the simple filling. Heat the olive oil in a small saucepan over medium heat. Add the chopped onion and cook until it’s softened and translucent, about 5-7 minutes. Stir in the minced garlic, thyme, and smoked paprika (if using), and cook for another minute until fragrant. Add the chicken broth or water and let it simmer for a minute to deglaze the pan and create a little moisture.
Step 6: Layer & Swirl
Take your chicken pieces and gently toss them in the batter until they’re evenly coated. Don’t let them sit in the batter for too long, or it can get gummy. Now, arrange the battered chicken pieces in your prepared skillet or baking dish. Spoon the onion and garlic mixture evenly over the chicken. If you want a really pretty swirl effect, you can gently swirl the onion mixture into the batter a little with a fork, but don’t overdo it. The goal is pockets of flavor.
Step 7: Bake
Pop that skillet or dish into your preheated oven. Bake for about 25-30 minutes, or until the chicken is cooked through and the batter is golden brown and puffed up. The edges should look slightly crispy, while the inside remains incredibly tender. If you’re using Chicken Breasts, you might need to check them a little sooner, around 20-25 minutes, to prevent them from drying out.
Step 8: Cool & Glaze
Once the chicken is baked, carefully remove it from the oven. Let it rest for about 5 minutes – this is *so* important for juices to redistribute. While it’s resting, quickly whisk together the soy sauce, honey (or maple syrup), and cornstarch in a small bowl. Pour this glaze mixture evenly over the chicken. The residual heat will help the cornstarch thicken the glaze beautifully. You can even pop it back into the oven for just 2-3 minutes to let the glaze get nice and glossy, but this is optional. Be careful not to overcook it at this stage.
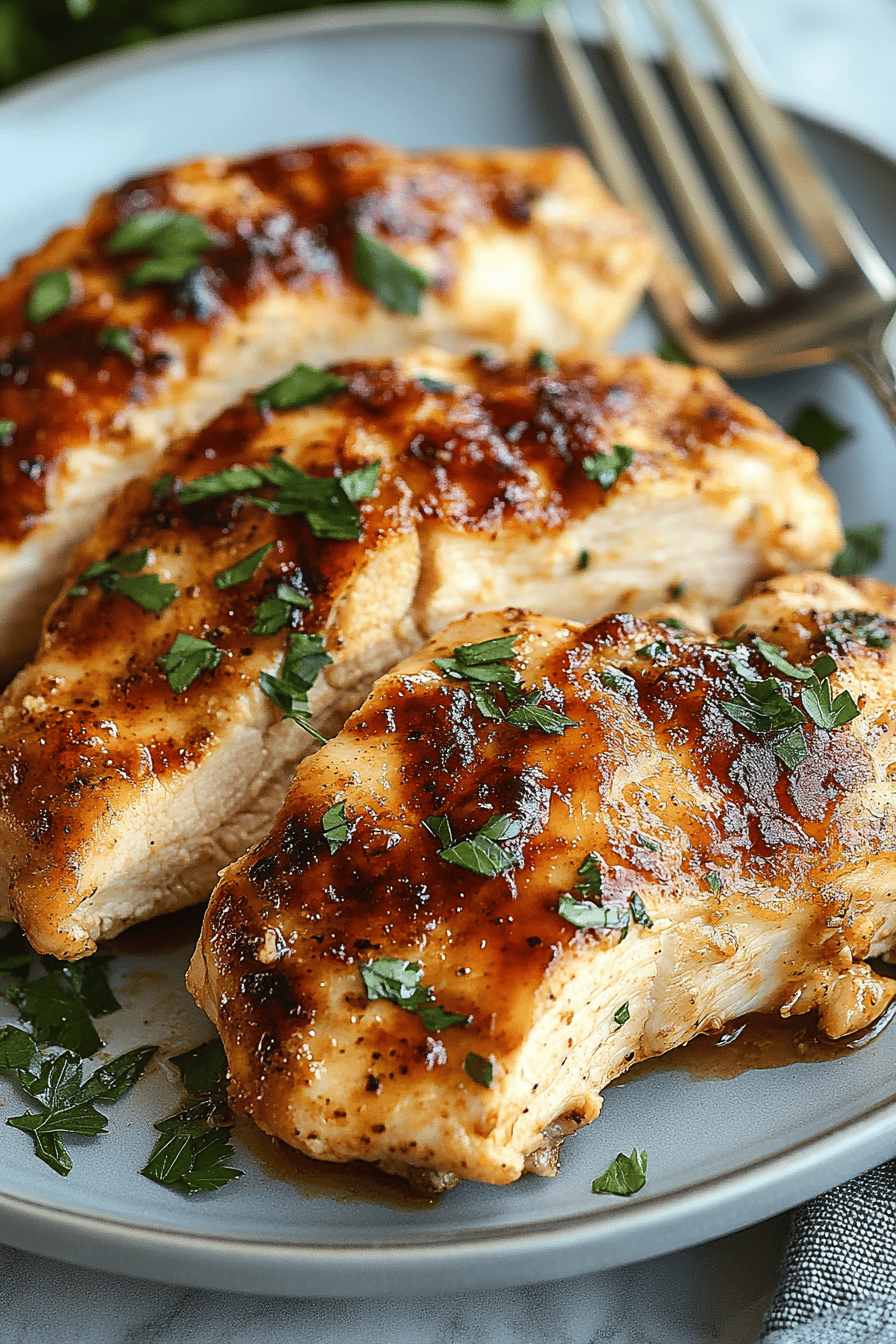
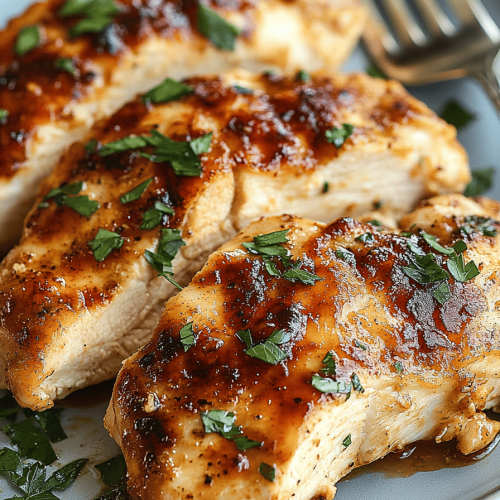
Step 9: Slice & Serve
Now for the best part! Slice the melt in your mouth chicken into portions if you like, or just serve it directly from the skillet. The sauce will be luscious and coating every piece. Serve it hot and watch it disappear!
What to Serve It With
This melt in your mouth chicken is so versatile, it’s a joy to pair with different sides depending on the occasion. For a simple and quick breakfast or early morning bite, I love serving it alongside some fluffy scrambled eggs and a sprinkle of fresh chives. The savory chicken is a fantastic contrast to the light eggs. If you’re planning a lovely brunch, think elegant plating. I’ll often serve it with a small side of roasted Sweet Potatoes, a dollop of avocado crema, and a scattering of microgreens. For a sophisticated touch, a crisp, dry prosecco or a light mimosa is perfect. When I’m craving something sweet but don’t want to bake a whole cake, this is my go-to for dessert! Seriously, the way the glaze caramelizes and the chicken is so tender, it feels indulgent. I pair it with a small scoop of vanilla bean ice cream or a dollop of whipped cream. For those cozy snack moments, especially on a rainy day, it’s fantastic with some warm crusty bread for dipping into that delicious glaze, or alongside a comforting bowl of creamy mashed potatoes. My kids also love it with a side of steamed broccoli or green beans. We’ve even had it cold the next day, straight from the fridge, and it’s still incredibly good!
Top Tips for Perfecting Your Melt-in-Your-Mouth Chicken
Over the years, I’ve picked up a few tricks that I think really elevate this melt in mouth chicken from good to absolutely unforgettable. When it comes to the chicken itself, always use thighs if you can for maximum tenderness and moisture. If you do opt for breasts, make sure they’re not too thick; you might even want to butterfly them to ensure even cooking. For the batter, remember that the secret to that airy, delicate texture is not to overmix. Seriously, a few lumps are perfectly fine! It’s better to have a slightly lumpy batter than a tough chicken. Think of it like this: we’re aiming for a cloud-like coating, not a dense pastry. When it comes to the filling, don’t skip the step of softening the onions and cooking the garlic until fragrant; it builds a really lovely base flavor. And that splash of broth? It makes a difference in preventing the onion mixture from drying out. For the swirl, I like to use a fork and just gently pull the onion mixture down into the batter a bit. It creates beautiful little pockets of flavor and looks really appealing, but avoid over-stirring or you’ll lose that distinct swirl effect. When baking, oven temperatures can vary, so always keep an eye on your chicken. It should be beautifully golden brown and cooked through. The baking time is a guideline, so use your judgment! If the glaze seems a bit thin after baking, you can always pop it back in for a few extra minutes, or give it a quick whisk with a tiny bit more cornstarch mixed with water if you want it thicker. I’ve found that letting the chicken rest for a few minutes after baking before adding the glaze is crucial. It allows the juices to settle, making the chicken even more succulent and helping the glaze adhere better without making everything soggy. And a personal favorite tip: I sometimes add a tiny pinch of red pepper flakes to the filling if I want a little kick. It’s a subtle heat that complements the sweetness of the glaze beautifully. Trust me on this one; it’s a little extra something that makes it even more addictive.
Storing and Reheating Tips
This melt in mouth chicken is so good, you’ll want to savor every bite, and thankfully, it stores and reheats beautifully! If you happen to have any leftovers (which is rare in my house!), you can store them at room temperature for no more than two hours. After that, it’s best to get them into the fridge. For refrigerator storage, make sure the chicken has cooled down completely first. Transfer it to an airtight container. It will stay delicious and retain its amazing texture for about 3 to 4 days. The glaze might firm up a bit in the fridge, but don’t worry, that’s normal. When it comes to freezer instructions, I’d recommend freezing it *before* you add the glaze, if possible, to maintain the best texture. Wrap individual portions tightly in plastic wrap, then in foil, or place them in freezer-safe bags. It can be frozen for up to 2 months. When you’re ready to thaw, it’s best to do it overnight in the refrigerator. For reheating, the best method is usually in the oven. If refrigerated, place the chicken in a lightly greased oven-safe dish and bake at around 300°F (150°C) for about 10-15 minutes, or until heated through. If frozen, thaw first, then reheat as directed. If you’ve frozen it with the glaze, reheat it very gently in a low oven or on the stovetop over low heat to avoid making the glaze too sticky or burnt. Sometimes, I’ll even add a splash of water or broth when reheating to help revive the moisture. For the glaze timing advice, if you plan on storing leftovers for a while, it’s sometimes best to add the glaze right before serving the reheated chicken, or just warm it separately and drizzle it over. This prevents it from potentially becoming too thick or heavy during storage and reheating.
Frequently Asked Questions
Final Thoughts
Honestly, I could talk about this melt in your mouth chicken all day. It’s one of those recipes that just makes me feel so good about cooking. The way it transforms simple chicken into something so incredibly tender and delicious is truly a kitchen triumph. It’s the perfect example of how a few simple ingredients and a little bit of care can create something truly special. It’s the kind of dish that makes people ask for the recipe, and then you get to smile and say, “Oh, it’s super easy!” If you love this recipe, I think you might also enjoy my [Link to another recipe, e.g., “Lemon Herb Roasted Chicken”] or my [Link to another recipe, e.g., “Garlic Parmesan Baked Chicken Thighs”] for more weeknight meal inspiration. I can’t wait for you to try this melt in your mouth chicken! Please let me know in the comments below how yours turns out, what you served it with, or any little tweaks you made. Your feedback and stories truly make my day!
Melt in Mouth Chicken
Ingredients
Main Ingredients
- 1.5 pound boneless, skinless chicken thighs
- 0.5 cup chicken broth
- 0.25 cup heavy cream
- 2 tablespoon butter
- 1 teaspoon garlic powder
- 0.5 teaspoon onion powder
- 0.5 teaspoon paprika
- 0.25 teaspoon salt
- 0.25 teaspoon black pepper
Instructions
Preparation Steps
- Preheat your oven to 375°F (190°C).
- Pat the chicken thighs dry with paper towels. In a small bowl, mix together garlic powder, onion powder, paprika, salt, and black pepper.
- Season the chicken thighs evenly with the spice mixture.
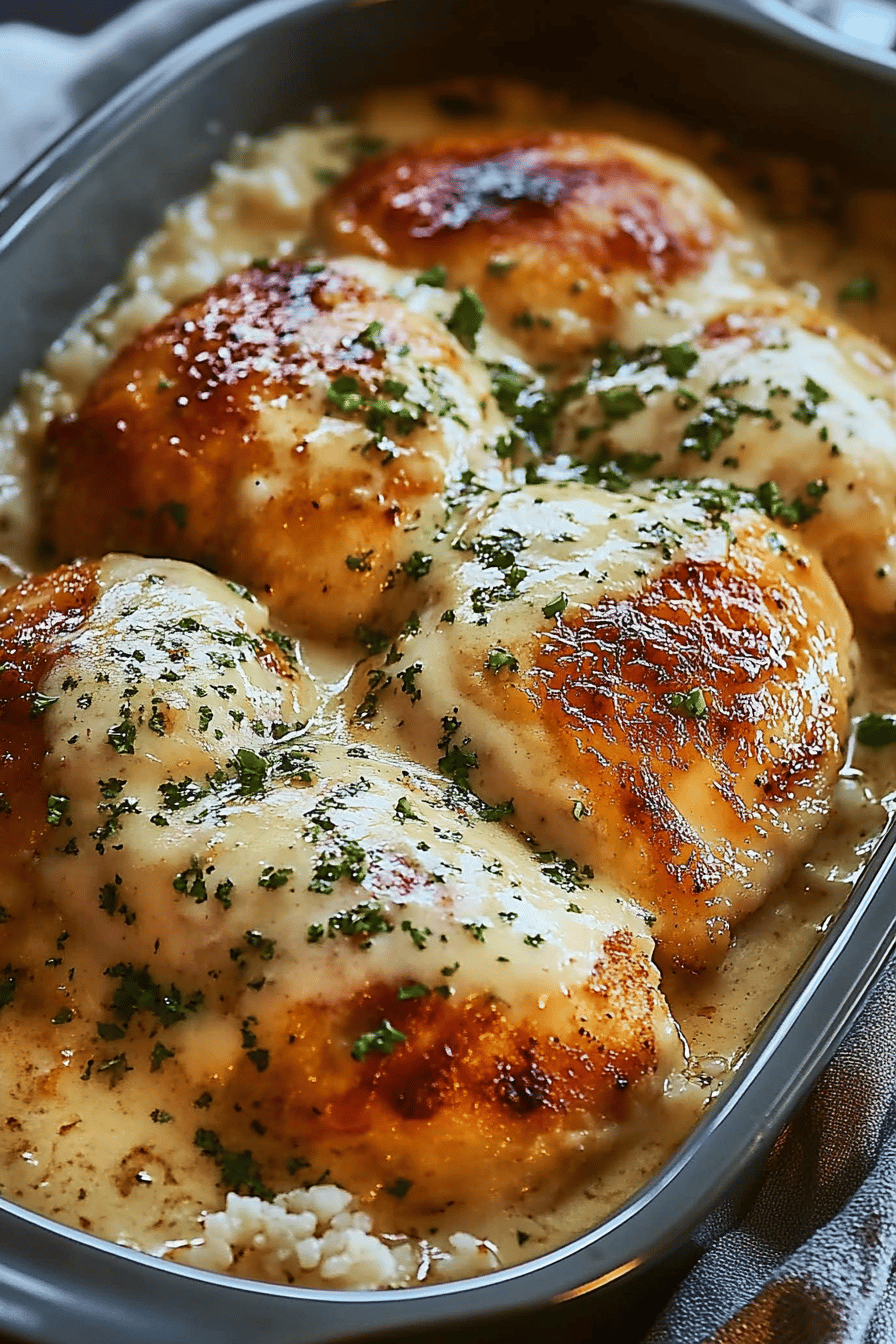
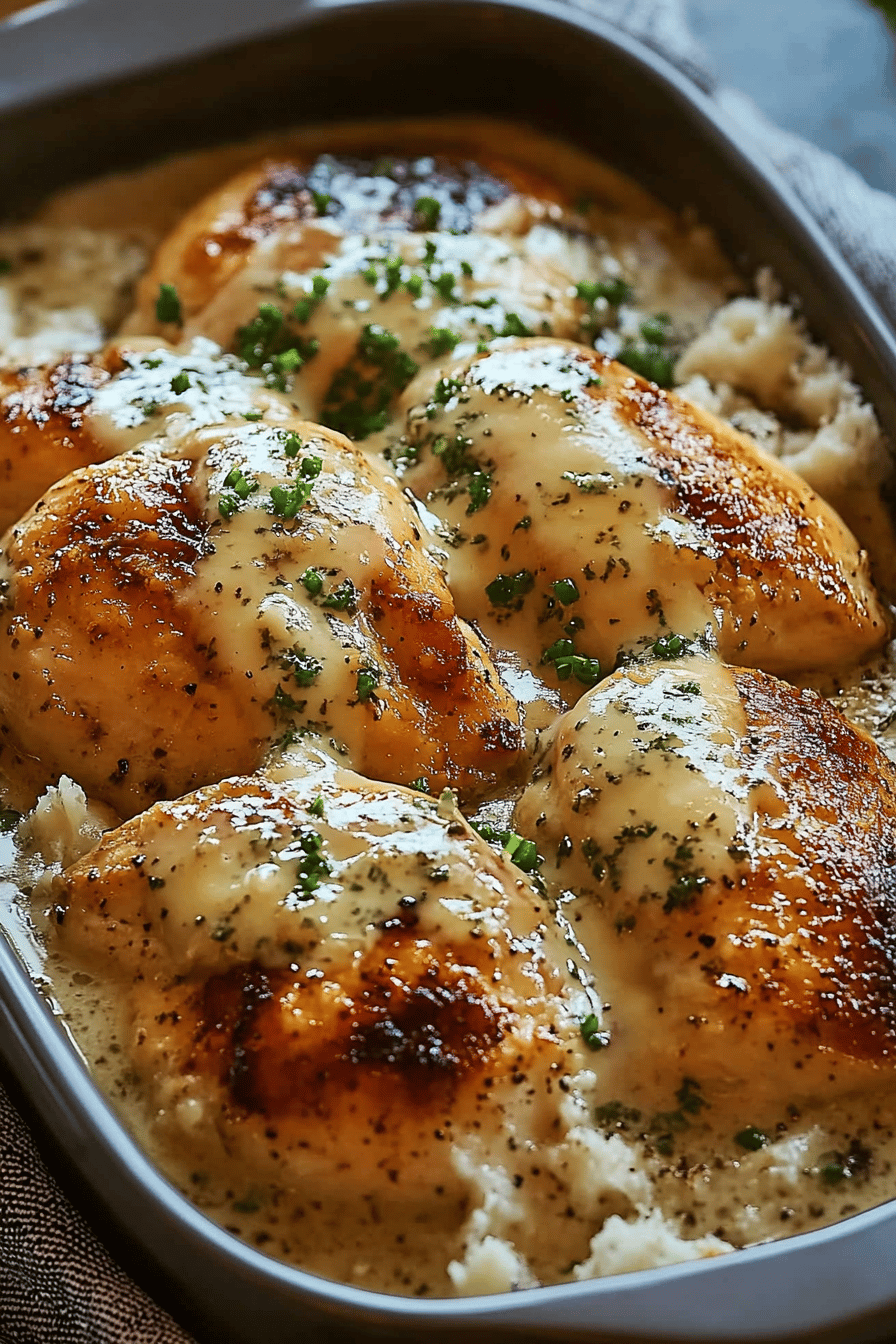
- In an oven-safe skillet, melt the butter over medium-high heat. Sear the chicken thighs for 2-3 minutes per side until golden brown.
- Pour in the chicken broth and heavy cream. Bring to a simmer.
- Transfer the skillet to the preheated oven. Bake for 20-25 minutes, or until the chicken is cooked through and tender.
- Let the chicken rest for a few minutes before serving. Spoon the sauce from the skillet over the chicken.