Oh, you guys! I am so incredibly excited to share this recipe with you today. It’s one of those magical treats that just transports me back to sunny summer days and carefree afternoons. Imagine this: a perfectly sweet, slightly tart bite that melts in your mouth, all swirled with the prettiest pink hue. Yep, we’re talking about Pink Lemonade Fudge, and let me tell you, it’s a game-changer. Forget those heavy, overly sweet fudges that leave you feeling weighed down. This is light, bright, and surprisingly easy to whip up. It’s honestly like sunshine in dessert form, and my family devours it every single time I make a batch. If you’ve ever loved classic fudge but wished for something a little more… zesty, then this is your dream come true. It’s got all the creamy goodness of traditional fudge but with this incredible burst of tangy lemonade flavor that just wakes up your taste buds.

What is Pink Lemonade Fudge?
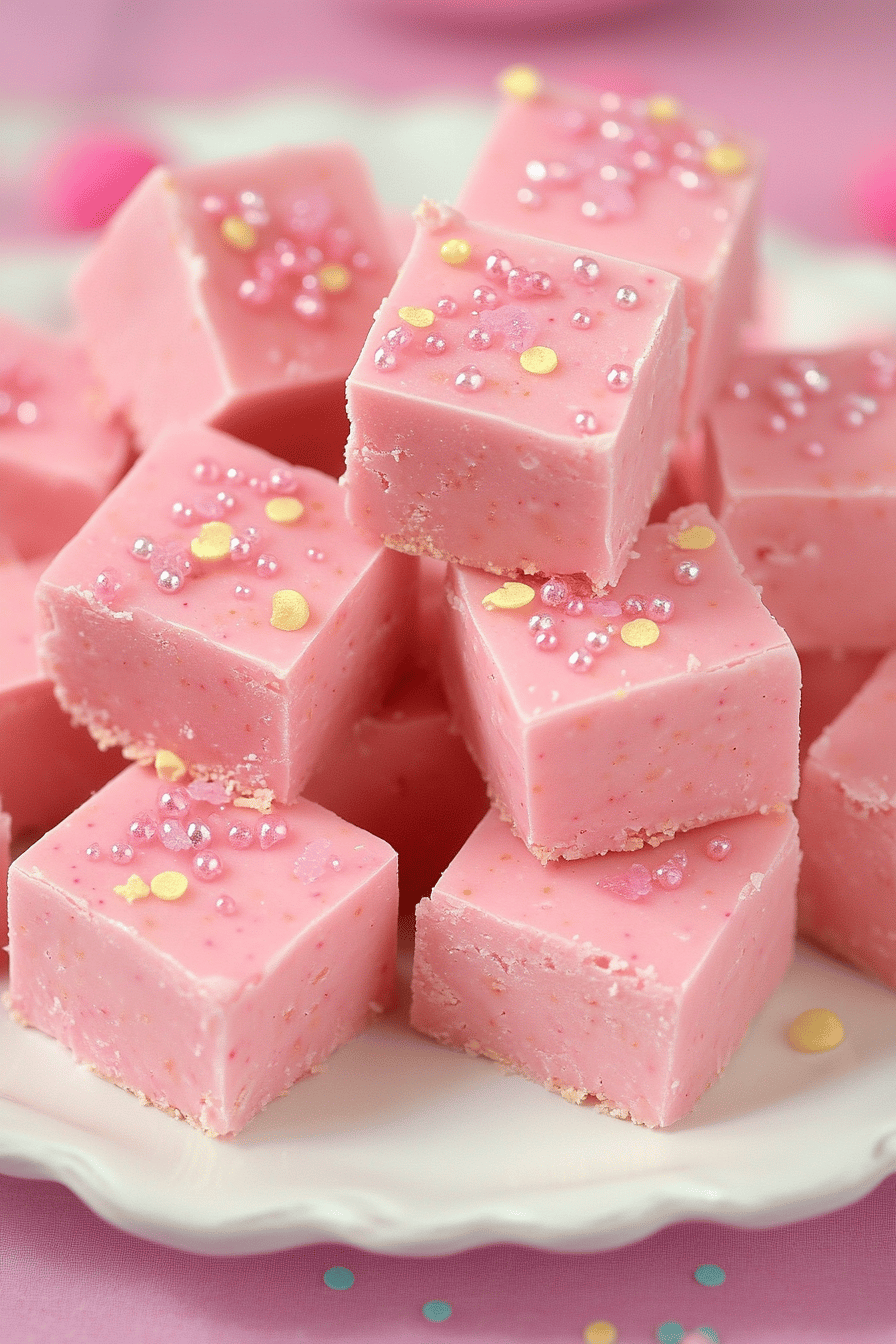
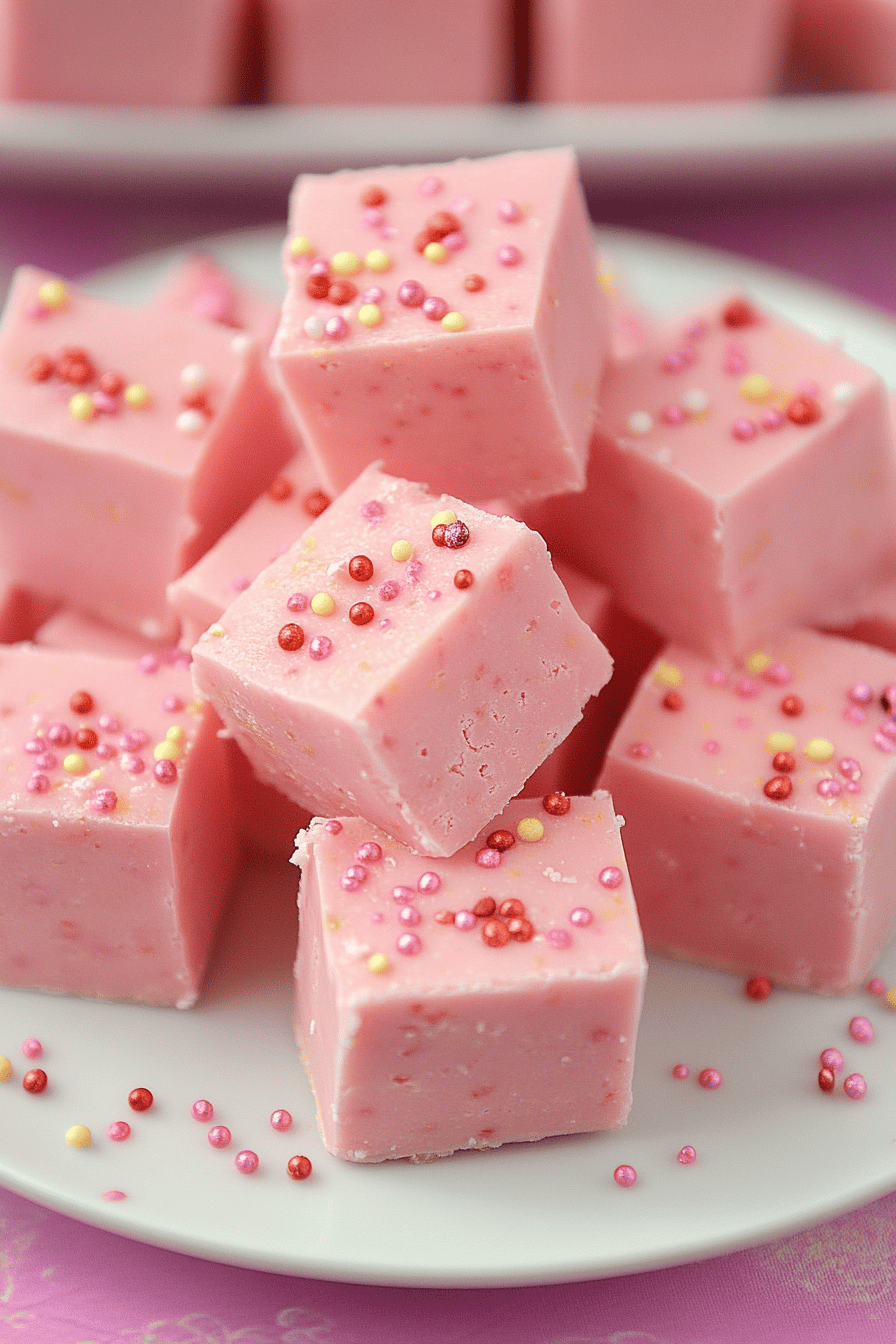
So, what exactly *is* this delightful concoction we call Pink Lemonade Fudge? At its heart, it’s a creamy, no-bake fudge that captures the essence of everyone’s favorite summer drink. Think of it as a dreamy, sweet, and tangy confection that marries the comforting texture of classic fudge with the vibrant, refreshing flavor of pink lemonade. It’s not just a simple mix of sugar and condensed milk, though that’s a part of it! We’re infusing it with real lemon flavor and just a hint of pink, often from a touch of raspberry or strawberry, to get that signature look and taste. It’s essentially a celebration of sweet and tart, all swirled together into a beautiful, melt-in-your-mouth square. It’s the kind of treat that makes people say, “Wow, what IS this?” It’s simple enough for a weeknight craving but pretty enough for a special occasion. It’s a little bit whimsical, a lot delicious, and totally addictive.
Why you’ll love this recipe?
Honestly, the list of reasons to adore this Pink Lemonade Fudge is pretty long, but I’ll give you the highlights! First off, the flavor is just out of this world. It’s that perfect balance of sweet and tart, not too overwhelming on either side. You get that satisfying creamy fudge texture, but then BAM! You get this bright, zesty lemon kick that’s so refreshing. It’s like a little party for your mouth. And then there’s the simplicity of it all. I am all about delicious desserts that don’t require hours in the kitchen or a million fancy ingredients. This recipe is a lifesaver for those moments when you need a sweet fix but don’t want to turn on the oven or spend your entire afternoon baking. You just need a few pantry staples, a little bit of stirring, and some patience while it sets. Plus, it’s surprisingly budget-friendly! The ingredients are all pretty standard, and you probably have most of them already. What I love most about this recipe, though, is its sheer joyfulness. It looks so pretty with its swirled pink color, and the flavor just makes you feel happy. It’s perfect for potlucks, bake sales, or just because you deserve a little treat. It’s also a fantastic base for little flavor additions if you’re feeling adventurous – a dash of vanilla, a hint of raspberry extract, you name it!
How do I make lemonade fudge?
Quick Overview
Making this Pink Lemonade Fudge is actually a breeze. You’ll melt some butter, stir in sugar and milk, cook it to a specific stage, then fold in the stars of the show: lemon zest, lemon juice, and a touch of color. We’ll then divide the mixture, add the pink element to one part, swirl them together, and let it set. It’s a no-fuss, no-bake marvel that comes together quicker than you might think. The key is really just paying attention to the temperature and texture as you cook the base. It’s a sweet science, but totally achievable!
Ingredients
For the Main Batter:
This is the creamy, dreamy base that makes our fudge so wonderfully smooth. I always opt for good quality unsalted butter; it just makes a difference in the overall flavor. For the sugar, granulated white sugar is best here as it dissolves easily and provides the perfect sweetness without any overpowering graininess. And for the milk, I usually go with whole milk because it adds a lovely richness, but I have tested it with 2% and it still turns out wonderfully creamy.
For the Filling:
This is where the magic really happens and we get that signature Pink Lemonade zing! Fresh lemon juice is absolutely essential here – bottled juice just won’t give you that bright, authentic flavor. I usually zest about two medium lemons to get a good amount of that fragrant zest, which adds another layer of citrusy goodness. And for the color, a tiny bit of red food coloring or some strawberry or raspberry puree can give you that gorgeous pink hue. If you’re using fruit puree, just be mindful that it might add a touch more moisture, so you might need to let it cook down slightly more.
For the Glaze:
This is optional, but I love adding a simple glaze for an extra touch of sweetness and a beautiful finish. It’s just powdered sugar mixed with a little bit of milk or lemon juice. If you want it thinner, add more liquid; if you want it thicker, add more powdered sugar. You can also add a drop of pink food coloring to the glaze to really make it pop!
Step-by-Step Instructions
Step 1: Preheat & Prep Pan
First things first, let’s get our workspace ready. You’ll want to line an 8×8 inch baking pan with parchment paper, leaving some overhang on the sides. This makes it super easy to lift the fudge out later. I usually spray the pan with a little non-stick spray before laying the parchment down, just to make sure it really sticks and doesn’t shift around. Now, set that aside. You don’t need to preheat your oven for this recipe, which is one of the things I love about it!
Step 2: Mix Dry Ingredients
Grab a heavy-bottomed saucepan – this is important to prevent scorching. Add your granulated sugar and unsalted butter to the pan. Place it over medium heat and stir constantly until the butter is completely melted and the sugar starts to dissolve. You’re looking for a smooth, well-combined mixture. Keep stirring! This part is crucial for getting that smooth fudge texture.
Step 3: Mix Wet Ingredients
Once the butter is melted and the sugar is mostly dissolved, it’s time to add your milk. Pour in the whole milk (or your preferred milk) and stir well to combine everything. Keep the heat on medium and continue to stir frequently. You’ll want to bring this mixture to a rolling boil.
Step 4: Combine
Once the mixture reaches a rolling boil, this is where the candy thermometer comes in handy, though I’ll give you visual cues too. You’ll need to boil the mixture, stirring constantly, until it reaches the soft-ball stage, which is about 235-240 degrees Fahrenheit (118-120 degrees Celsius). If you don’t have a thermometer, you can test it by dropping a small bit of the mixture into a glass of ice water. If it forms a soft, pliable ball that flattens when you take it out, you’re good to go! This usually takes about 5-8 minutes of boiling. Once it reaches temperature, immediately remove the pan from the heat.
Step 5: Prepare Filling
While the sugar mixture is cooking, get your lemon zest, lemon juice, and pink coloring ready in a heatproof bowl. This is where the flavor is born! Measure out your fresh lemon juice carefully. For the zest, I like to use a microplane to get those tiny, fragrant flecks without any of the bitter white pith. If you’re using fruit puree, make sure it’s fairly concentrated.
Step 6: Layer & Swirl
Now for the fun part! Once you’ve removed the sugar mixture from the heat, let it sit for just about a minute. Then, stir in your lemon zest and lemon juice. The mixture might seize up a little, but keep stirring gently until it’s smooth again. Now, here’s where we get that beautiful swirl. Pour about half of the mixture into your prepared pan. To the remaining mixture in the saucepan, add your pink coloring (or fruit puree) and stir until it’s evenly distributed. Dollop spoonfuls of the pink mixture over the base layer in the pan. Then, using a knife or a skewer, gently swirl the two colors together. Don’t over-swirl, or you’ll lose the distinct layers and pretty marbling!
Step 7: Bake
Oops, silly me! This is a NO-BAKE recipe! My apologies, I was thinking of a different treat for a second there. So, after you swirl, you just need to smooth the top gently. No baking required at all!
Step 8: Cool & Glaze
Once it’s all swirled and looking beautiful, let the fudge cool at room temperature for about 30 minutes. Then, carefully place it in the refrigerator and let it chill for at least 2-3 hours, or until firm. This is the hardest part – waiting! If you’re adding a glaze, whisk together the powdered sugar and liquid until you reach your desired consistency. Once the fudge is firm, drizzle the glaze over the top. If you want a more intricate design, you can use a piping bag with a fine tip.
Step 9: Slice & Serve
Once the fudge is completely set and the glaze (if using) has hardened, it’s time to cut! Lift the fudge out of the pan using the parchment paper overhang. Place it on a cutting board and use a sharp knife to slice it into bite-sized squares. I find that wiping the knife clean between cuts helps create nice, clean edges. Serve it chilled for the best texture and flavor experience.
What to Serve It With
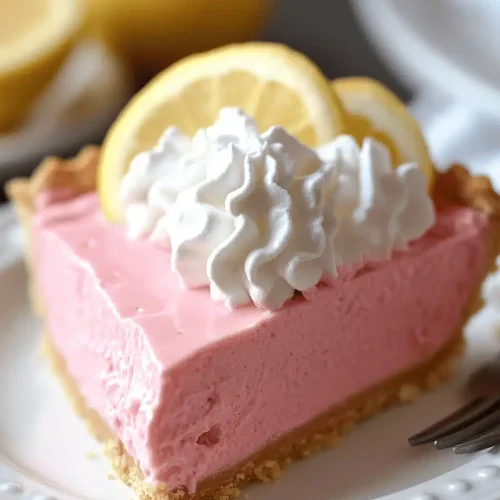
This Pink Lemonade Fudge is so wonderfully versatile, it can be enjoyed in so many ways! For a lovely breakfast treat, I love pairing a small piece with a strong cup of coffee or a delicate herbal tea. The brightness of the fudge cuts through the richness of the coffee beautifully. For brunch, it’s an absolute showstopper! I like to serve it on a pretty platter alongside fresh berries and maybe some mini scones or pastries. It adds a pop of color and a delightful sweet-tart contrast. As a dessert, it’s simply divine. It’s fantastic on its own, or you could serve it with a scoop of vanilla bean Ice Cream or even a dollop of whipped cream for a truly decadent experience. And for those cozy snack times? It’s perfect! I’ll often have a square with a glass of cold milk or a sparkling lemonade. My kids especially love it as an after-school treat. Sometimes, we even break it up and sprinkle it over yogurt parfaits for an extra layer of flavor and texture.
Top Tips for Perfecting Your Pink Lemonade Fudge
Okay, so you’ve got the recipe, but let me share a few little secrets and lessons I’ve learned over the years of making this fudge. First, for the lemon zest and juice, always use fresh! Seriously, it makes all the difference in the world. Bottled juice just doesn’t have that same vibrant, punchy flavor. I also find that when I’m zesting, I like to get a good amount of zest, but be careful to avoid the white pith underneath, as that can be a bit bitter and overpower the sweetness. When you’re cooking the sugar mixture, don’t rush it. Low and slow is key, and constant stirring is your best friend. If you overheat it, you risk it becoming grainy. Use a heavy-bottomed saucepan to ensure even heat distribution and prevent any scorching on the bottom. If you don’t have a candy thermometer, that soft-ball test is your savior! Practice it a few times if you’re unsure – it’s a crucial step for that perfect fudge texture. For the swirling, less is more! You want to see distinct ribbons of pink and white, not one muddy mess. Use a light hand and just a few passes with your knife or skewer. If you’re using fruit puree for color, be aware that it adds moisture. You might need to let the mixture cook a minute or two longer to reach the correct consistency, or even let the puree reduce slightly before adding it. If your fudge seems too soft after chilling, it might be that it didn’t reach the soft-ball stage properly, or there was too much liquid added. On the flip side, if it’s too crumbly, it might have been cooked too long. Don’t be afraid to experiment with the swirl! You can do simple zigzags, or even more intricate patterns if you’re feeling artistic. And for the glaze, get it just right! Too thin and it’ll run off; too thick and it’ll be hard to eat. It’s all about finding that perfect pourable, yet not runny, consistency.
Storing and Reheating Tips
This Pink Lemonade Fudge is surprisingly sturdy when it comes to storage. If you’ve got leftovers (which, let’s be honest, is rare in my house!), you can store it at room temperature for up to 3 days. Just make sure to keep it in an airtight container. I usually line the container with parchment paper too, to prevent any sticking. For longer storage, the refrigerator is your best bet. It will keep beautifully in an airtight container for up to a week, and it actually gets even firmer and more delicious after a few days! If you plan to freeze it, wrap individual squares tightly in plastic wrap, then place them in a freezer-safe bag or container. It can stay in the freezer for up to 3 months. To thaw, simply move the frozen fudge to the refrigerator overnight. The glaze is best applied right before serving if you’re storing at room temperature or refrigerating, as it can sometimes get a little sticky if left on for too long, especially in warmer environments. If you’ve frozen it with glaze, it should be okay, but just keep an eye on it as it thaws. The key to preserving its quality is keeping it well-sealed to prevent it from drying out or picking up any unwanted odors.
Frequently Asked Questions
Final Thoughts
So there you have it – my beloved Pink Lemonade Fudge! It’s more than just a recipe to me; it’s a little slice of happiness. It’s proof that you don’t need complicated steps or fancy equipment to create something truly special and delicious. The way the tangy lemon cuts through the creamy sweetness, the visual appeal of that delicate pink swirl… it’s just perfection. I really hope you give this a try. It’s the kind of treat that brings smiles to faces, and honestly, that’s what cooking is all about, right? If you love this recipe, you might also enjoy my recipe for White Chocolate Raspberry Fudge or my classic No-Bake Peanut Butter Fudge. They’re all made with love and designed to be enjoyed! I can’t wait to hear how your Pink Lemonade Fudge turns out, so please leave a comment below and let me know your thoughts or any fun variations you tried. Happy baking (or in this case, no-baking)!
Pink Lemonade Fudge
Ingredients
Main Ingredients
- 3 cups granulated sugar
- 0.5 cups butter unsalted
- 0.75 cups evaporated milk
- 1.5 cups marshmallows mini
- 4 ounces cream cheese softened
- 1 tablespoon lemon extract
- 0.5 teaspoon pink food coloring
- 0.5 cup powdered sugar for dusting
Instructions
Preparation Steps
- Line an 8x8 inch baking pan with parchment paper and lightly grease it.
- In a large saucepan, combine granulated sugar, butter, and evaporated milk. Cook over medium heat, stirring constantly, until the butter is melted and the sugar is dissolved. Bring to a boil and cook for 5 minutes, stirring occasionally.
- Remove from heat. Stir in marshmallows and cream cheese until completely melted and smooth.
- Stir in lemon extract and pink food coloring until well combined and evenly colored.
- Pour the mixture into the prepared baking pan and spread evenly.
- Let it cool at room temperature for about 2 hours, or until firm.
- Once firm, lift the fudge out of the pan using the parchment paper. Dust with powdered sugar, if desired, and cut into squares.