There’s something about the smell of red velvet cake baking that takes me right back to cozy Sunday afternoons at my grandma’s house—warm kitchen, laughter echoing, and that unmistakable hint of cocoa and vanilla dancing in the air. But my absolute favorite twist? When that red velvet meets a creamy, dreamy cheesecake layer. This red velvet cheesecake feels like the best of both worlds, marrying the rich, cakey flavors with the smooth tang of cream cheese. Honestly, it’s that perfect treat where classic comfort meets a little bit of fancy, and trust me, it’s easier to pull off than you might think. If you’re like me and usually debate between baking a cake or a cheesecake, this combo settles the debate in a delicious way — two crowd-pleasers rolled into one sensational dessert.
What is Red Velvet Cheesecake?
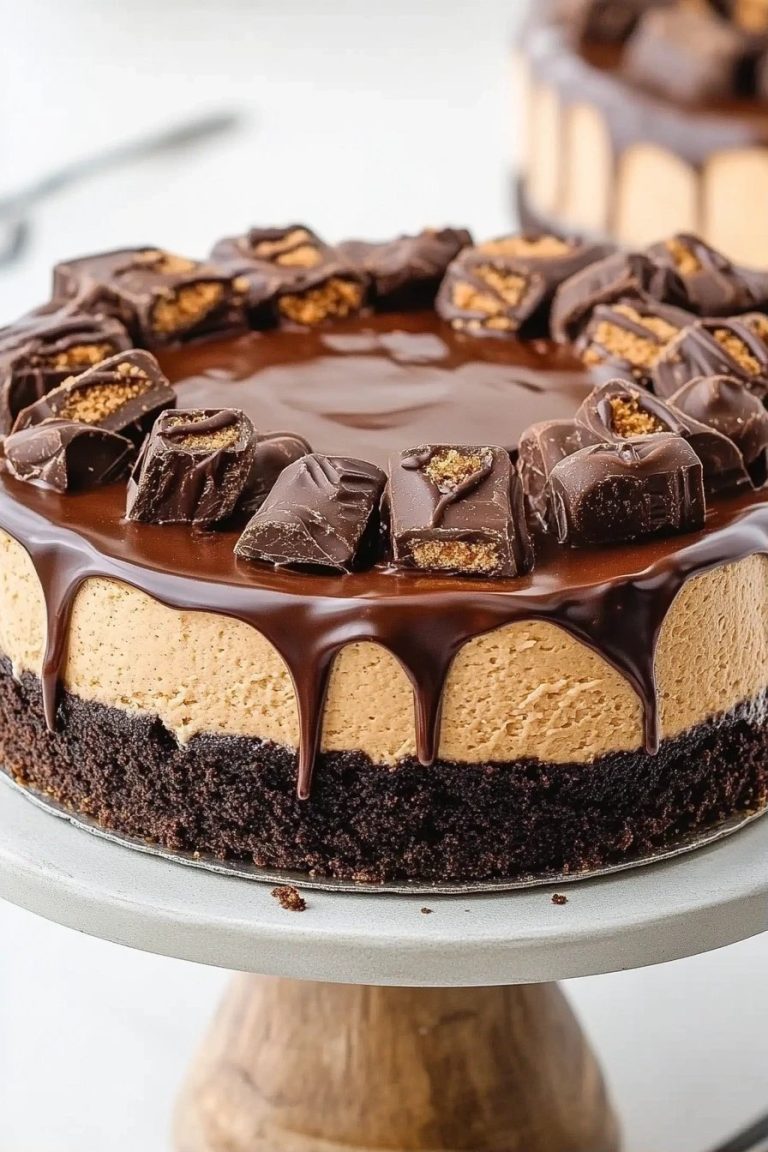
Think of red velvet cheesecake as a glorious hybrid that brings together the iconic red velvet cake’s subtle cocoa flavor and velvety red-hued crumb with the rich, smooth cream cheese layer that cheesecake lovers swoon over. It’s essentially a luscious cake base topped (or swirled) with a thick, tangy cream cheese filling, then baked until perfectly set. The “red velvet” part comes from that deep, inviting red color coupled with just a whisper of cocoa, making it not too chocolatey, but plenty indulgent. It’s like a love letter to indulgence that’s approachable enough for home bakers. Plus, it has this beautiful marbled look when done right — the visual appeal’s really something special and always draws in a crowd!
Why you’ll love this recipe?
What I love most about this red velvet cheesecake is how it balances richness without feeling too heavy. The cheesecake layer gives it a creamy, tangy lift that offsets the sweet, tender cake. It’s a bit of magic on the tongue — that buttery, velvety texture of the cheesecake meets the cozy softness of the red velvet. I’ve seen plenty of layered cakes or cheesecakes, but this simple technique of swirling gives you the best flavor burst in every bite.
Plus, it’s made with ingredients you probably already have on hand — nothing fussier than your average cake and cheesecake staples. So, it’s kind of a lifesaver on busy weekends or when friends drop by unexpectedly. Oh, and if you’re on a budget, you don’t have to hunt for expensive specialty items either — just basic pantry staples and cream cheese. My family goes nuts over this one, and honestly, it’s become our go-to treat for birthdays and holidays.
If you’re a fan of classic red velvet or a cheesecake devotee, this recipe feels like a cozy hug because it combines both worlds without ending up too dense or too light. And because it’s versatile, you can whip it up as a cake, bars, or even cupcakes if you want to mix things up. I like to serve it a bit chilled so you get that nice clean slice and a cool, refreshing sweetness after a big meal. Every time I make it, I get asked if I’ll double the recipe — so fair warning, it tends to disappear in minutes!
How do I make Red Velvet Cheesecake?
Quick Overview
Here’s the gist: you start with your classic red velvet batter, whip up a silky cream cheese filling, and then swirl them together in one pan before baking. The trick to this method is getting the right swirl so you get that gorgeous marbled effect and balanced flavors in every bite. It’s surprisingly straightforward, especially if you’re used to baking cakes or cheesecakes separately. The biggest win? No need for complicated layering — just pour, swirl, bake, and wait for that intoxicating aroma to fill your kitchen. It’s one of those recipes that’ll make you feel like a pro with minimal stress.
Ingredients
For the Main Batter:
– 1 ½ cups all-purpose flour (I sift mine to keep it light)
– 1 tablespoon unsweetened cocoa powder (for just a hint of chocolate)
– ½ teaspoon baking soda
– ⅓ cup vegetable oil (neutral flavor really helps here)
– 1 cup sugar (granulated is perfect for that classic texture)
– 1 egg, at room temperature
– 1 teaspoon vanilla extract (real vanilla does make a difference)
– 1 cup buttermilk (if you don’t have buttermilk, stir 1 tablespoon lemon juice into milk and let it sit for 5 minutes)
– 1 ½ tablespoons red food coloring (I prefer gel for more vibrant color without thinning the batter)
– 1 teaspoon white vinegar (helps boost that red velvet tang and tenderness)
For the Filling:
– 16 oz cream cheese, softened (use block cream cheese for the smoothest texture)
– ¾ cup powdered sugar (feel free to add a little more if you want it sweeter)
– 1 large egg (room temperature)
– 1 teaspoon vanilla extract (this layer really benefits from vanilla!)
– 2 tablespoons heavy cream or sour cream (this adds silkiness and moisture)
For the Glaze:
– 1 cup powdered sugar
– 2–3 tablespoons cream cheese, softened
– 1 teaspoon vanilla extract
– 1-2 teaspoons milk, until smooth (start slow; you want a nice drizzle consistency, not runny)
– Optional: a pinch of salt to balance sweetness
Step-by-Step Instructions
Step 1: Preheat & Prep Pan
Preheat your oven to 325°F (160°C). I usually use a 9-inch springform pan — it’s lifesaving for cheesecake because it makes release so easy. Lightly grease the bottom and sides, then line the bottom with parchment paper for an extra non-stick guarantee. If you’re worried about leaks, wrap the outside of the pan with a double layer of aluminum foil (especially if using a water bath). Setting this step carefully saves you a world of stress later!
Step 2: Mix Dry Ingredients
In a medium bowl, whisk together the flour, cocoa powder, and baking soda until well combined. You want an even blend so the red velvet flavor is consistent throughout with no weird cocoa clumps. I always give it a final sift right before mixing into the wet ingredients to keep it super airy!
Step 3: Mix Wet Ingredients
In a large bowl, beat together the oil, sugar, egg, vanilla, buttermilk, red food coloring, and vinegar until smooth and shiny. The batter should have a deep red color and look glossy — this step really brings that classic red velvet vibe to life. I usually do this with a hand mixer on medium speed and stop as soon as it’s combined to avoid overbeating. The texture matters here — you want it smooth but not frothy.
Step 4: Combine
Slowly add the dry ingredients to the wet, stirring gently with a spatula or on low speed just until no flour pockets remain. Count on a few lumps disappearing on their own; don’t overmix or your cake might turn out too dense. The batter should be thick but pourable — if it feels too stiff, a splash of buttermilk can help. This part always makes me nervous but trust me, less is more here.
Step 5: Prepare Filling
Beat the cream cheese until smooth and fluffy, then add powdered sugar and mix until creamy. Add in the egg, vanilla, and heavy cream (or sour cream), beating until silky and uniform — no lumps! This filling is what brings the richness and tang that makes this cheesecake heavenly. Make sure the cream cheese is softened at room temp or you’ll end up with little chunks in your final swirl.
Step 6: Layer & Swirl
Pour half of the red velvet batter into your prepared pan, then spoon half of the cream cheese filling over it in small dollops. Repeat with the remaining batter and filling layers. Grab a butter knife or skewer and gently swirl through the layers to create that beautiful marbled effect. I always swirl slowly and aim for loose loops — too much swirling and the layers blend too much, too little and it looks unfinished.
Step 7: Bake
Bake at 325°F for about 50-60 minutes, or until the edges are set but the center still wobbles slightly when you gently shake the pan. Every oven is a bit different, so keep an eye after 45 minutes and test with a toothpick or cake tester — it should come out mostly clean but a tiny bit moist if testing in the filling parts. If the top starts browning too much, tent loosely with foil.
Step 8: Cool & Glaze
Let your cheesecake cool in the pan on a wire rack for about an hour, then chill in the fridge for at least 4 hours — overnight is best for clean slicing. Once cold, whisk together the glaze ingredients until smooth and pourable. Drizzle over the top or spread lightly for a delicate finish. This glaze adds a wonderful sweet-tangy contrast that ties the whole dessert together.
Step 9: Slice & Serve
For the cleanest, prettiest slices, run a sharp knife under hot water and wipe dry before cutting each piece. I like to serve mine chilled or just slightly warmed, with a cup of coffee or a glass of cold milk. The contrast of creamy, rich filling and tender red velvet cake always gets me every time. Plus, the deep red marbling makes for stunning, mouthwatering presentation.
What to Serve It With
For Breakfast: My kids love it with a side of fresh strawberries and a big mug of hot coffee — the sweetness feels like a special morning treat that somehow keeps them happy until lunch.
For Brunch: This cheesecake pairs brilliantly with sparkling rosé or a fruity mimosa. I also like to dole out small slices alongside creamy ricotta toast and fresh fruit for a luxurious but approachable spread.
As Dessert: Serve it with a dollop of whipped cream, fresh raspberries, or even a scoop of vanilla bean ice cream for a playful, indulgent finish. A drizzle of chocolate sauce or a dusting of powdered sugar amps up the presentation when guests come over.
For Cozy Snacks: When the afternoon slump hits, a thick chunk of this cheesecake with a cup of chai tea or hot cocoa just feels like the ultimate comfort combo — perfect for snuggling up on the couch.
We’ve made this red velvet cheesecake the star of many family celebrations and casual days alike. It’s become a tradition for birthdays and random weekend baking campaigns — the look of delight on everyone’s faces is totally worth the effort!
Top Tips for Perfecting Your Red Velvet Cheesecake
Red Velvet Prep: Use good quality cocoa powder and sift it well to avoid clumps. I learned the hard way that not sifting means little pockets of bitterness that distract from that velvety sweetness.
Mixing Advice: When combining wet and dry, stir just until incorporated to avoid a tough cake — overmixing is the classic newbie mistake. Keep folds gentle, and trust that a few small lumps won’t ruin your bake.
Swirl Customization: For the prettiest marbling, don’t overdo the swirl. I like a few loose figure-eights across the surface to keep distinct layers visible after baking. Too much swirling and the batter loses that visual wow-factor.
Ingredient Swaps: Tried using almond milk instead of buttermilk once — surprisingly creamy and added a nice nutty undertone! Just swap 1:1 and add a teaspoon of vinegar to mimic acidity. Coconut sugar can replace granulated sugar, but keep in mind it might darken the batter due to molasses content.
Baking Tips: Position your pan on the middle rack for even heat. If your oven runs hot, lower the temp by 10-15 degrees and add a few extra minutes to baking time. The cheesecake should still have a slight wobble in the center when done — it firms up as it cools.
Glaze Variations: I often jazz up the glaze with a touch of lemon zest or a splash of bourbon for grown-up flavor. You can skip the glaze too and dust with cocoa powder or a light sprinkle of powdered sugar if you want something simpler.
One lesson I’ve learned through trial and error — never rush cooling! Patience here makes slicing polite and beautiful instead of crumbly and sad. The glaze sets beautifully once chilled, so don’t glaze until it’s fully cooled or the layer might slide off.
Storing and Reheating Tips
Room Temperature: This cheesecake can hang out at room temp for 2-3 hours if covered loosely with a cake dome or foil to avoid drying out. Perfect for parties.
Refrigerator Storage: Store leftovers in an airtight container or re-cover your pan tightly with plastic wrap. It keeps best for up to 5 days, staying moist and bursting with flavor. I often slice into smaller portions before storing — makes grabbing a snack easier.
Freezer Instructions: Wrap slices individually in plastic wrap and place in a freezer-safe bag or container. It freezes well up to 2 months. Thaw overnight in the fridge and let it come to room temp before serving for best texture.
Glaze Timing Advice: If you’re freezing, it’s best to glaze after thawing to keep that shiny topping fresh and avoid sogginess. For fridge storage, go ahead and glaze right away — it’s ready to impress immediately.
Keeping these tricks in mind means less waste and more delicious enjoyment, every time.
Frequently Asked Questions
Final Thoughts
This red velvet cheesecake has become one of those recipes that feels like a hug from the inside out. It’s rich, beautiful, and do-able—which is a golden combo in my kitchen. Whether you’re baking for holidays, birthdays, or just a midweek treat, it never fails to brighten the table and the mood. I hope you enjoy it as much as my family does—there’s nothing quite like watching everyone’s faces light up when that slice comes out, all marbled and layered with love.
If you’re curious, try swapping the glaze for a light drizzle of chocolate ganache or experiment with zesting a little orange into the batter for a fresh twist—sometimes the little tweaks make your own recipe magic. Please come back and share how your red velvet cheesecake turns out, or any fun spins you put on it! Happy baking and dessert devouring!
red velvet cheesecake
Ingredients
Main Ingredients
- 1 box red velvet cake mix
- 1 large egg
- 0.5 cup unsalted butter softened
- 8 ounces cream cheese room temperature
- 1 large egg room temperature
- 0.25 cup granulated sugar
- 0.25 cup sour cream room temperature
- 1 teaspoon vanilla extract
- 0.5 cup mini chocolate chips
Instructions
Preparation Steps
- Preheat oven to 350°F. Line a 9x13-inch pan with foil and spray with cooking spray.
- In a stand mixer fitted with a paddle attachment, mix softened butter, one egg, and red velvet cake mix until a thick dough forms. Press the dough evenly into the bottom of the prepared pan.
- Beat the cream cheese until smooth. Add sugar and mix until combined. Add the second egg, sour cream, and vanilla extract and beat until smooth with no lumps. Stir in mini chocolate chips, then pour this mixture over the red velvet crust.
- Bake for 30 to 40 minutes, until the cheesecake edges begin to brown and the center is set but still slightly jiggly. Cool completely at room temperature, then refrigerate for at least 4 hours or overnight before slicing into bars.