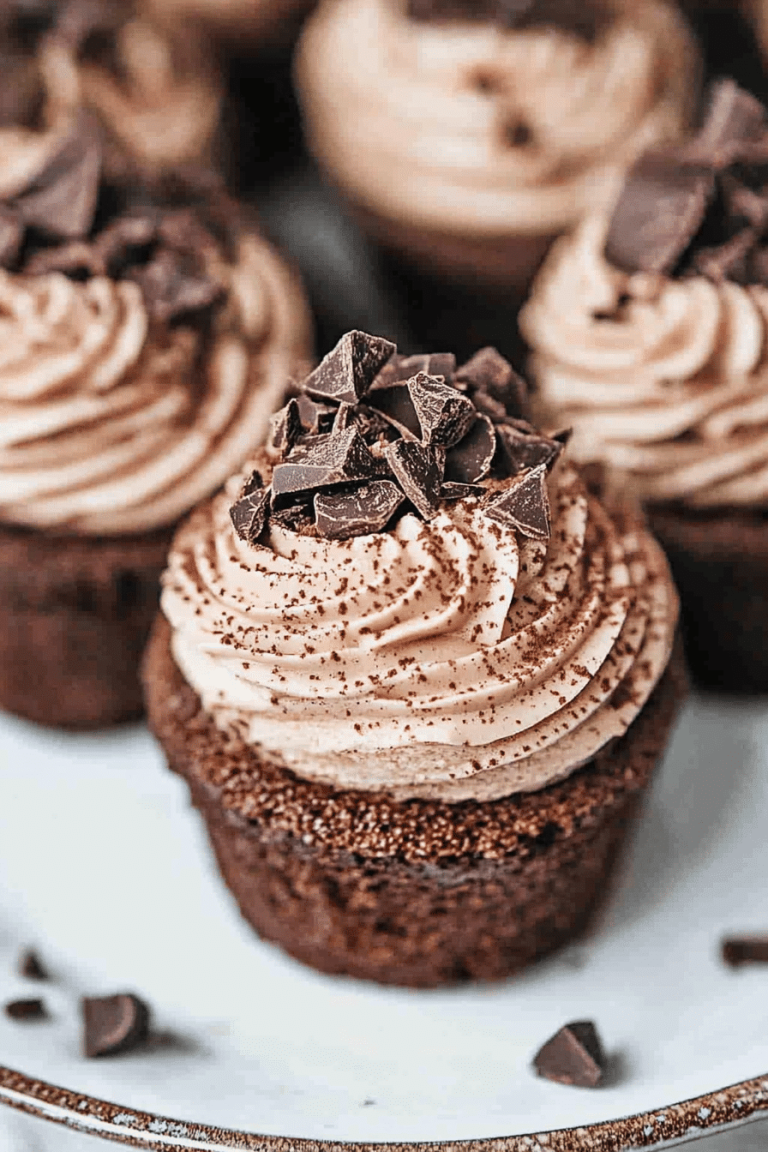
Some days, all I want is something rich and chocolatey but without the fuss of baking a whole cake. That’s when these brownie cookies come to the rescue — crispy on the edges, gooey in the center, and full of deep, fudgy flavor. I remember the first time I whipped these up after a particularly long week; the smell alone had my kids and husband swarming the kitchen, their faces lighting up with that joyful “this is amazing” grin. Honestly, it’s like a brownie and a cookie had the best baby ever. If you love the cocoa-packed punch of brownies but want that quick snack vibe of a cookie, these will become your new obsession.
What is Brownie Cookies?
Think of brownie cookies as the best of both dessert worlds. It’s essentially a hybrid where the chewy, gooey texture of a classic brownie gets baked into the fun-sized, handheld form of a cookie. The name comes from this brilliant mashup: “brownie” for the rich chocolate base, and “cookie” because, well, you get little round treats that you can grab and go. What makes them so approachable is how they feel homemade without requiring any fancy techniques. Unlike traditional cookies that are more cakey or crumbly, brownie cookies cling to that dense and fudgy magic that only good brownies have. I love serving these to friends who say they’re “not really a cookie person” — it usually wins them over every time!
Why you’ll love this recipe?
What I adore most about these brownie cookies is how they strike a perfect balance between indulgent and doable. The chocolate flavor is intense but never overpowering; there’s just enough sweetness to keep things cozy, not cloying. And let me tell you, this recipe couldn’t be simpler — everything comes together in just one bowl, and I never even bother with special equipment. I also love that it’s pretty forgiving: I once accidentally added an extra egg and ended up with even fudgier cookies that my family devoured in minutes. Bonus points if you’ve got pantry staples — no need for fancy ingredients! Plus, you can get creative here. Sometimes I toss in walnuts or sprinkle sea salt on top for that little gourmet touch. It’s pretty versatile, whether you want a simple treat with your afternoon coffee or a decadent dessert for when guests come over. If you enjoy recipes like my twice-baked chocolate chip cookies or chewy fudge brownies, then these brownie cookies will quickly become a staple in your kitchen rotation.
How do I make Brownie Cookies?
Quick Overview
This recipe really is a breeze. You mix the dry ingredients, whisk together the wet stuff, then gently combine just until everything comes together. The magic happens when you drop spoonfuls onto a baking sheet and watch them puff and crack just right. No chilling required, which is a lifesaver on busy days. Baking these is quick too – you’ll have warm chocolatey bites in under 20 minutes. The gooey centers set as the cookies cool, so patience is key — but trust me, they’re worth it.
Ingredients
For the Main Batter:
- 1 cup all-purpose flour – I prefer unbleached for the best flavor
- ½ cup unsweetened cocoa powder – choose Dutch-processed for a richer taste
- ½ teaspoon baking powder – just enough to let the cookies rise a bit
- ¼ teaspoon salt – balances out the sweetness beautifully
- ¾ cup granulated sugar – you can swap half for brown sugar for extra chewiness
- ½ cup unsalted butter, melted and slightly cooled – gives that luscious fudgy texture
- 1 large egg – room temperature works best here
- 1 teaspoon vanilla extract – a must for warmth and depth
For the Filling:
- ½ cup semisweet chocolate chips or chunks – I like a mix of small and large pieces for texture
- Optional: ¼ cup chopped walnuts or pecans – if you’re feeling nutty
For the Glaze:
- ¼ cup powdered sugar – sifted for smoothness
- 1 tablespoon milk or cream – add slowly to reach perfect consistency
- Optional: dash of espresso powder or a pinch of cinnamon for a twist
Step-by-Step Instructions
Step 1: Preheat & Prep Pan
First things first: preheat your oven to 350°F (175°C). Line a baking sheet with parchment paper or a silicone mat — it really helps prevent sticking and makes cleanup super easy. I always set the oven on the middle rack for even baking. If you’re using dark pans, you might want to shave off a couple minutes on the timer since they heat faster.
Step 2: Mix Dry Ingredients
In a medium bowl, whisk together the flour, cocoa powder, baking powder, and salt. This step is so important because it ensures that the rising agent and cocoa powder are evenly distributed. It helps prevent clumps and gives those brownie cookies a consistent texture from edge to center.
Step 3: Mix Wet Ingredients
In a larger bowl, stir the melted butter with sugar until combined and slightly glossy. Add in the egg and vanilla extract, stirring until smooth and shiny. I always crack the egg into a separate bowl just in case — no one wants a surprise shell in their batter! The mixture should be silky, not foamy.
Step 4: Combine
Pour the dry ingredients into the wet and gently fold everything together using a spatula or wooden spoon. The trick here is to mix just until you see no flour streaks. Overmixing can lead to tough cookies, and you want these fudgy, not chewy like a traditional cookie. I usually stop right as the batter looks unified, so it stays tender.
Step 5: Prepare Filling
Fold the chocolate chips and nuts into the batter. Wait to add nuts if you want to keep it kid-friendly or nut-free. The chocolate chips melt partially in the oven, giving gorgeous pockets of gooey chocolate in each bite.
Step 6: Layer & Swirl
Use a tablespoon or cookie scoop to drop generous spoonfuls of batter onto the prepared sheet. Keep about 2 inches between each to allow for spread. For a fun twist, you can drizzle a bit of chocolate ganache or caramel and swirl it lightly with a toothpick. It makes the cookies look bakery-fancy but requires zero artistic skill.
Step 7: Bake
Pop the tray in the oven and set your timer for about 10-12 minutes. The edges should look set and slightly cracked, but the center will still be soft — that’s where the magic lies. If you like them more cakey, bake for an extra minute or two but watch closely. Every oven is different, so I recommend testing with one cookie to perfect your timing.
Step 8: Cool & Glaze
Let the cookies cool on the baking sheet for 10 minutes — this sets the centers but keeps that gooey charm. Then transfer to a wire rack to cool completely. When cool, whisk up your glaze and drizzle it over the top. I love to add a pinch of cinnamon or espresso powder to the glaze for an extra layer of flavor. If you’re in a rush, you can skip the glaze altogether, but it really adds that lovely sweet finish.
Step 9: Slice & Serve
Okay, these aren’t sliced like brownies because, well, they’re cookies! But I always recommend serving them at room temp so that fudgy center doesn’t stiffen. They’re sensational with a cold glass of milk or a hot coffee on the side. If you want to make them look extra special, sprinkle with a little flaky sea salt just before serving — trust me on this one; it elevates the chocolate flavor like nothing else.
What to Serve It With
For Breakfast: I like to serve these brownie cookies alongside a creamy latte or a bold black coffee. The slight bitterness cuts through the sweetness and makes mornings feel extra cozy, especially on chilly weekends.
For Brunch: These cookies make a playful, unexpected addition alongside fresh fruit and a light yogurt parfait. Serve with sparkling water infused with lemon or a chilled mocktail for a beautiful spread that feels indulgent but not over-the-top.
As Dessert: Pair with vanilla ice cream and fresh berries for an old-school yet irresistible combo. I’ve even spooned warm caramel or raspberry sauce over these for a fancy touch when guests are over. Sprinkle chopped toasted nuts on top for an extra crunch.
For Cozy Snacks: Whenever a mid-afternoon slump hits, I grab one of these with a mug of hot chocolate or chai tea. My kids often ask for seconds during homework time, so they’ve become our go-to “pick me up” snack on busy days.
It’s funny how such a simple cookie can fit into so many different moments—from rushed mornings to slow Sunday afternoons. That’s what makes them a keeper in my recipe box.
Top Tips for Perfecting Your Brownie Cookies
Flour Quality: Using fresh, good-quality flour really makes a difference. If you’ve got unbleached pastry flour, give it a try — your cookies will be tender with a fine crumb. Also, measuring flour properly is key: spoon it into your cup and level off instead of scooping, which can pack too much in.
Mixing Advice: One of my earliest mistakes was overmixing in excitement. It toughens the dough and kills that fudgy texture. Always fold gently, and stop as soon as the flour vanishes. The batter will be thick but slightly lumpy – that’s perfect!
Swirl Customization: If you want more visual wow factor, swirl in softened cream cheese or peanut butter right before baking. Use a skewer for artistic veining and watch your guests get impressed without any real effort.
Ingredient Swaps: For a dairy-free version, I use melted coconut oil instead of butter, and almond milk in the glaze instead of cream. The flavor shifts subtly, but you still get that satisfying fudgy texture. Adding espresso powder to the dry mix amps up the chocolate depth without making it taste like coffee.
Baking Tips: Position the rack in the middle of your oven and don’t open the door while baking — the temperature drop can make the centers collapse. If your oven runs hot, check a minute or two early. The cookies look fragile but firm up as they cool.
Glaze Variations: Sometimes I swap powdered sugar for a quick ganache made with chopped chocolate and cream — it’s richer but needs refrigerated setting time. Or, sprinkle cinnamon sugar on top before baking for a lightly sweet crust.
I learned all this the hard way after dozens of test batches, so if your first round isn’t perfect, don’t sweat it. Brownie cookies are forgiving and taste great even as “practice” cookies!
Storing and Reheating Tips
Room Temperature: Store these in an airtight container at room temp for up to three days. I like using a glass container with a tight seal to keep moisture in that just-right chewy range. If you leave them uncovered, they’ll get crusty fast.
Refrigerator Storage: If you need to keep them longer, refrigerate in a sealed container for up to a week. They’ll firm up but soften quickly if you warm them slightly before serving. Let them sit at room temp for 10 minutes or pop in the microwave for a few seconds, but watch for overheating.
Freezer Instructions: These freeze really well! Wrap individual cookies tightly in plastic wrap and place them in a ziplock bag or airtight container. They keep up to three months. To enjoy, thaw at room temp or microwave briefly. Freshly baked texture returns with warming.
Glaze Timing Advice: If you plan to store cookies for longer than a day, it’s best to glaze just before serving. The glaze can get tacky or crumbly otherwise. For same-day eating, glaze as soon as cookies cool for the prettiest presentation.
I’ve found that following these simple tips keeps my brownie cookies tasting fresh and mouthwateringly delicious every time.
Frequently Asked Questions
Final Thoughts
These brownie cookies are one of those rare recipes that feel effortless but deliver a big, heartwarming payoff. Every batch I make brings back memories of cozy afternoons and sticky fingers, and I’m always surprised at how quickly they disappear. Whether you’re craving a quick sweet fix or need something to impress at your next get-together, these cookies fit right in. I’d love for you to try them out and tell me about your twists or topping combos — there’s nothing better than swapping kitchen stories! Thanks for stopping by, and happy baking. Can’t wait to hear how yours turn out!
brownie cookies
Ingredients
Main Ingredients
- 16.5 oz refrigerated chocolate chip cookie dough
- 16.3 oz brownie mix
- 0.25 cup vegetable oil
- 2 large eggs room temperature
- 1 tbsp water
Instructions
Preparation Steps
- Press or roll the refrigerated chocolate chip cookie dough on parchment paper into a 9x13 inch rectangle about 0.25-inch thick.
- In a medium bowl, mix the brownie mix, vegetable oil, eggs, and water until a thick, spreadable batter forms.
- Spoon about 0.75 cup of the brownie batter over the cookie dough and spread evenly, leaving a 0.5-inch border on all sides.
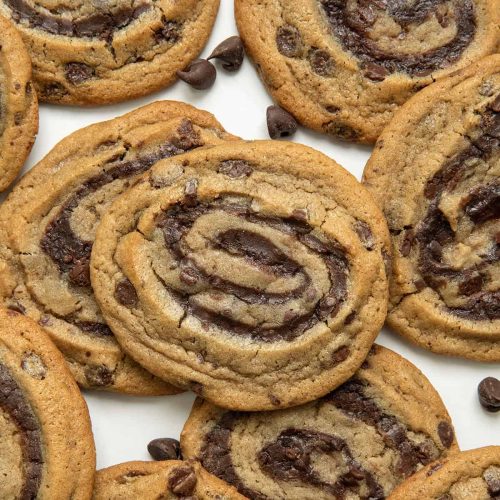
- Carefully roll the dough from one long edge into a log, similar to a cinnamon roll.
- Wrap the log tightly in plastic wrap and freeze for 1 hour or refrigerate for at least 2 hours until firm.
- Preheat the oven to 350°F and line two baking sheets with parchment paper.
- Slice the log into 0.75-inch thick swirls and place them 2 inches apart on the prepared baking sheets.
- Bake for 10 to 12 minutes until edges are golden and centers are set but still soft.
- Let the cookies cool on the baking sheets for 5 minutes, then transfer to a wire rack to cool completely.