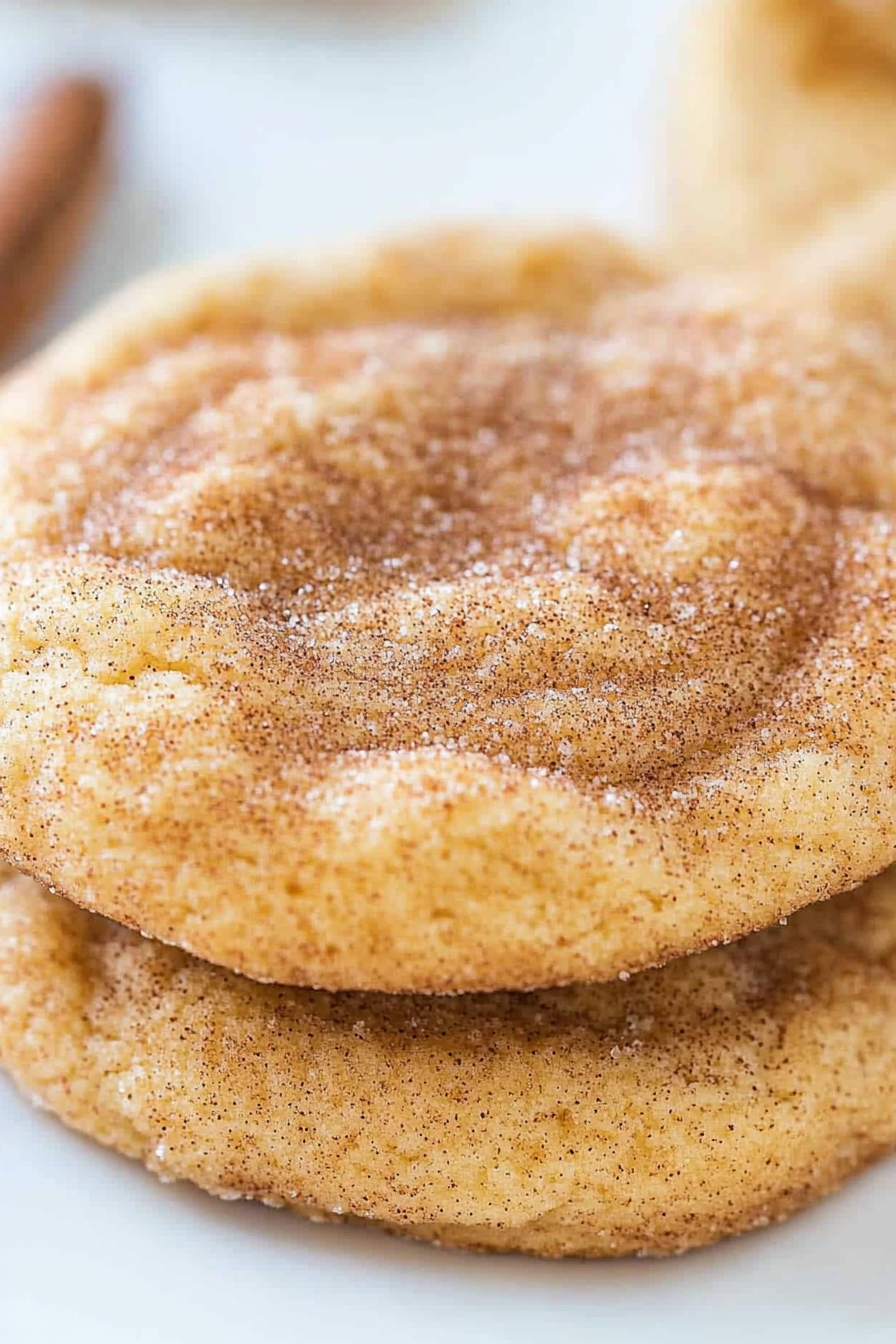
There’s something magical about a snickerdoodle cookie, isn’t there? That soft, chewy interior, the slight tang from cream of tartar, and that delightful cinnamon-sugar coating that just melts in your mouth. For me, snickerdoodles aren’t just cookies; they’re pure nostalgia. They instantly take me back to my grandma’s kitchen, the air thick with the sweet scent of baking, and her beaming smile as she’d hand me a warm one straight off the cooling rack. It’s funny, I’ve tried so many cookie recipes over the years – decadent Chocolate Chip, crisp gingerbread, even some fancy French macarons – but when I’m craving that perfect balance of sweet, a little tart, and a lot of comfort, it’s always the humble snickerdoodle that calls to me. If you’re a fan of classic comfort bakes, this snickerdoodle recipe is a game-changer. It’s ridiculously easy and delivers that authentic, melt-in-your-mouth goodness everyone loves. Honestly, it’s my go-to when I need a little pick-me-up or want to bring a dose of pure joy to a gathering. Forget those store-bought imitations; this is the real deal!
What is a snickerdoodle?
So, what exactly makes a snickerdoodle so special? At its heart, it’s a Sugar Cookie, but with a few key twists that elevate it to a whole new level. The most distinctive feature, besides that iconic cinnamon-sugar coating, is the generous use of cream of tartar. This ingredient, which is actually a byproduct of winemaking, reacts with baking soda to give snickerdoodles their characteristic slightly chewy texture and a subtle, delightful tang that cuts through the sweetness. Think of it as the secret weapon that gives them that signature “zing.” Unlike a basic sugar cookie that might be crisp or cakey depending on the recipe, snickerdoodles are almost always wonderfully soft and chewy. The name “snickerdoodle” itself is just plain fun, isn’t it? While its exact origins are a bit fuzzy, many believe it’s of German or Dutch descent, possibly a variation on a cookie called “schneckennudel,” meaning snail noodle (referring to the rolled shape). Whatever its name, it’s become a beloved American classic, and for good reason!
Why you’ll love this recipe?
There are so many reasons why this snickerdoodle recipe has become a staple in my kitchen, and I just know you’re going to fall in love with it too. First and foremost, the flavor is just out of this world. That perfect marriage of sweet dough and the warm, comforting embrace of cinnamon creates a taste that’s both familiar and utterly addictive. They’re not overly sweet, thanks to that little bit of tang from the cream of tartar, which I find makes them so much more appealing, especially when you want a treat that isn’t cloying. And let’s talk about the texture! These cookies are gloriously soft and chewy in the center, with just a hint of crispness around the edges. It’s that ideal cookie texture that makes you want to close your eyes and savor every bite. What I particularly love about this recipe is its straightforward simplicity. You don’t need any fancy equipment or complicated techniques. If you can cream butter and sugar, you can make these snickerdoodles. The ingredients are all pantry staples, making it incredibly budget-friendly, which is always a bonus, right? Plus, they’re incredibly versatile. While they’re perfect on their own, they’re also fantastic served with a glass of cold milk, alongside a steaming mug of coffee, or even crumbled over Ice Cream for a quick and easy dessert. They’re so reliable; I’ve made them countless times, and they always turn out wonderfully, whether I’m baking for a crowd or just for my family. They’re more forgiving than some other delicate cookies, which makes them a lifesaver when I’m short on time but still want to whip up something special.
How do I make snickerdoodles?
Quick Overview
Making these snickerdoodles is a breeze! You’ll simply mix your dry ingredients, cream your butter and sugar, add in your eggs and vanilla, then combine it all. The dough gets rolled into balls, then coated in a dreamy cinnamon-sugar mixture before baking. It’s a straightforward process that yields incredibly rewarding results. The magic really happens in the baking – you want them to be lightly golden around the edges but still soft in the center. Trust me, the whole process from start to finish takes less time than you’d think, and the payoff is huge!
Ingredients
For the Main Batter:
2 ½ cups all-purpose flour (spooned and leveled) – I always make sure my flour is fresh; it really does make a difference in texture!
1 teaspoon baking soda – This works with the cream of tartar to give them lift and that signature chew.
2 teaspoons cream of tartar – Don’t skip this! It’s crucial for the classic snickerdoodle tang and texture.
½ teaspoon salt – To balance out the sweetness and enhance all the other flavors.
1 cup (2 sticks) unsalted butter, softened – Make sure it’s properly softened, not melted. Room temperature is key for creaming!
1 ½ cups granulated sugar, divided – We’ll use some for the dough and the rest for coating.
2 large eggs – At room temperature, they incorporate much better.
1 teaspoon pure vanilla extract – Always use the good stuff if you can; it adds so much depth.
For the Filling:
(Not applicable for classic snickerdoodles, but if you were making a filled version, this is where you’d list ingredients like cinnamon, sugar, or a fruit compote! For our classic snickerdoodles, we’re focusing on the coating.)
For the Glaze:
(Classic snickerdoodles don’t typically have a glaze, but if you’re feeling adventurous, a simple powdered sugar glaze with a splash of milk and vanilla works beautifully. For this recipe, we’re sticking to the traditional cinnamon-sugar coating.)
Step-by-Step Instructions
Step 1: Preheat & Prep Pan
First things first, let’s get our oven preheated to 375°F (190°C). I like to line my baking sheets with parchment paper. This is a little trick I learned years ago; it prevents sticking, makes for super easy cleanup, and helps the cookies bake more evenly without getting too dark on the bottoms. Set your prepared baking sheets aside.
Step 2: Mix Dry Ingredients
In a medium bowl, whisk together the all-purpose flour, baking soda, cream of tartar, and salt. Give it a good whisk to make sure everything is evenly distributed. This ensures that your leavening agents and salt are spread throughout the dough, preventing any pockets of bitterness or uneven rise. You want a light, fluffy mixture.
Step 3: Mix Wet Ingredients
In a separate large bowl, cream together the softened butter and 1 cup of the granulated sugar using an electric mixer (or a lot of elbow grease!). Beat until light and fluffy, about 2-3 minutes. This creaming process incorporates air, which is essential for a tender cookie. Next, beat in the eggs, one at a time, making sure to scrape down the sides of the bowl after each addition. Finally, stir in the vanilla extract.
Step 4: Combine
Gradually add the dry ingredients to the wet ingredients, mixing on low speed (or stirring with a spatula) until just combined. Be careful not to overmix! Overmixing can develop the gluten in the flour, resulting in tough cookies. You want to stop as soon as you no longer see streaks of dry flour. The dough will be soft.
Step 5: Prepare Filling
(As mentioned, traditional snickerdoodles don’t have a separate filling. The “filling” in essence is the delicious dough itself, destined for a coating!) For our cinnamon-sugar coating, in a small bowl or shallow dish, combine the remaining ½ cup granulated sugar with 2 tablespoons of ground cinnamon. Stir it all together until well combined. The amount of cinnamon can be adjusted to your preference – I sometimes add a tiny bit more if I’m feeling extra cinnamon-y!
Step 6: Layer & Swirl
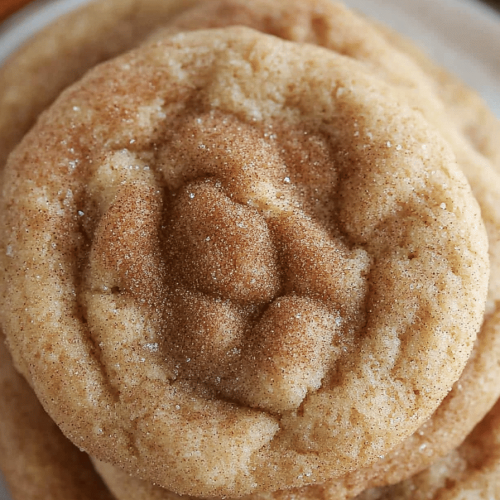
Roll the dough into balls, about 1 inch in diameter. I like to use a cookie scoop for uniform size. Then, roll each dough ball generously in the cinnamon-sugar mixture, making sure it’s well coated on all sides. Place the coated dough balls about 2 inches apart on your prepared baking sheets. They will spread as they bake.
Step 7: Bake
Bake for 8-10 minutes, or until the edges are lightly golden and the centers look slightly underbaked. They’ll continue to set up as they cool. It’s better to slightly underbake them than to overbake, as they’ll become wonderfully chewy that way. Keep an eye on them, as oven temperatures can vary.
Step 8: Cool & Glaze
Let the cookies cool on the baking sheets for about 5 minutes before transferring them to a wire rack to cool completely. This allows them to firm up. Since we’re not doing a traditional glaze here, the cinnamon-sugar coating is the star! If you *were* glazing, you’d usually do it once the cookies are completely cool so the glaze doesn’t melt off.
Step 9: Slice & Serve
Once cooled, these snickerdoodles are ready to be devoured! They are absolutely divine when still slightly warm, but they also hold up beautifully once fully cooled. Serve them on a pretty platter for maximum impact, or just grab one (or two!) straight from the cooling rack. They’re perfect for sharing, but I won’t tell if you decide to keep them all to yourself!
What to Serve It With
These snickerdoodles are so versatile, they truly fit into any occasion! For a cozy breakfast or a mid-morning treat, nothing beats pairing them with a hot cup of coffee or a steaming mug of tea. The warmth of the beverage just complements the sweet, spicy cookie perfectly. I often lay them out on a nice plate with my morning coffee, and it just feels like such a special start to the day. When it comes to brunch, these snickerdoodles are a welcome addition to any spread. They add a delightful homemade touch without being too fussy. You could arrange them alongside muffins, scones, or even fresh fruit. For a more elegant presentation, I like to dust them lightly with a bit of extra powdered sugar (if you’re feeling fancy, even though it’s not part of the main recipe) or arrange them in a decorative pattern. They also make a fantastic light dessert. Instead of a heavy cake, these offer a delightful sweet finish to a meal. I sometimes serve them warm with a tiny scoop of vanilla bean ice cream – pure heaven! And for those moments when you just need a little something sweet to lift your spirits, these snickerdoodles are the ultimate cozy snack. They’re comforting, satisfying, and always hit the spot. My kids especially love them after school with a glass of cold milk; it’s a tradition we’ve kept up for years, and it always brings a smile to their faces.
Top Tips for Perfecting Your Snickerdoodles
I’ve been making these snickerdoodles for ages, and over time, I’ve picked up a few tricks that I think really help elevate them from good to absolutely phenomenal. For the dough, the most crucial thing is to **not overmix** once you combine the wet and dry ingredients. Seriously, mix until just combined – that’s the golden rule for tender cookies. Overmixing develops gluten, which can make them tough. It’s a mistake I made early on, and I learned that a slightly shaggy dough is perfectly fine! Another tip is about the butter: make sure it’s softened, not melted or cold. Softened butter creams better, incorporating air that makes the cookies light and airy. When it comes to the cinnamon-sugar coating, don’t be shy! Give those dough balls a good, generous roll. This is where a lot of that signature snickerdoodle flavor comes from. I also like to press them lightly into the cinnamon-sugar mixture to really ensure it sticks well. For baking, **don’t overbake**. This is probably the most important tip for achieving that perfect chewy texture. You want the edges to be set and just beginning to turn golden, but the centers should still look a little soft and underdone. They will continue to bake and set up on the hot baking sheet after you take them out of the oven. Trust me on this one – it’s the secret to that irresistible chewy center! If you find your cookies are spreading too much, chilling the dough for about 30 minutes before rolling can help. I haven’t needed to do this much with this particular recipe, but it’s a good trick for any cookie that tends to spread. Finally, for ingredient swaps, I’ve experimented with different types of sugar, but for the classic snickerdoodle flavor and texture, granulated sugar is best. Using brown sugar would change the flavor profile significantly, making it more caramel-like. Also, while I haven’t tried it myself, I’ve heard that using a good quality cinnamon, like Ceylon cinnamon, can really bring out a more nuanced flavor in the coating.
Storing and Reheating Tips
One of the best things about these snickerdoodles, besides tasting amazing, is how well they store! If you have any leftovers, which I highly doubt will happen, you can keep them at room temperature in an airtight container for up to 3-4 days. I usually just pop them into a cookie tin or a plastic container with a tight-fitting lid. They tend to stay nice and soft for a few days that way. If you find they’ve gotten a little too soft for your liking, you can actually lay them out on a counter for a few hours to crisp up slightly. For longer storage, the refrigerator is your friend, though I usually don’t need it for snickerdoodles! They can be stored in the fridge for about a week, but they might become a bit firmer. To bring them back to their chewy glory, you can gently warm them in a low oven (around 300°F or 150°C) for just a couple of minutes. For truly long-term storage, freezing is the way to go. You can freeze the baked cookies in a single layer on a baking sheet until solid, then transfer them to a freezer-safe bag or container. They’ll keep well in the freezer for up to 2-3 months. To thaw, simply let them come to room temperature. If you want that “freshly baked” feel, a quick warm-up in the oven works wonders. Regarding the glaze (if you were to add one), it’s best applied right before serving or just before storing at room temperature. Glazed cookies don’t store as well for extended periods, as the glaze can get sticky or soft.
Frequently Asked Questions
Final Thoughts
There you have it – my tried-and-true snickerdoodle recipe! This recipe truly embodies what I love about baking: simple ingredients coming together to create something utterly comforting and delicious. It’s the kind of cookie that makes people smile, that brings back happy memories, and that’s just plain fun to make and eat. I honestly can’t imagine a holiday season, or even just a regular Tuesday, without a batch of these golden gems. If you’re a fan of classic cookies that deliver on flavor and texture without a fuss, you’ve got to give these snickerdoodles a try. I think you’ll find them just as irresistible as my family and I do. If you enjoy this recipe, you might also want to check out my recipe for chewy chocolate chip cookies or my simple vanilla sugar cookies for more classic baking fun. I can’t wait to hear what you think of these snickerdoodles! Please leave a comment below and let me know how yours turned out, or if you tried any fun variations. Happy baking, and enjoy every bite!
Snickerdoodles
Ingredients
Cookie Dough
- 1 cup unsalted butter softened
- 1.5 cup granulated sugar
- 2 large eggs
- 2.75 cup all-purpose flour
- 2 teaspoons cream of tartar
- 1 teaspoon baking soda
- 0.25 teaspoon kosher salt
Cinnamon Sugar Coating
- 0.5 cup granulated sugar
- 2 teaspoons cinnamon
Instructions
Preparation Steps
- Preheat the oven to 350 degrees F (175 degrees C). Prepare two baking sheets with parchment paper or silicone mats.
- In a large bowl, beat together the softened butter and granulated sugar until light and fluffy, about 2-3 minutes.
- Beat in the large eggs one at a time until well combined.
- In a separate medium bowl, whisk together the all-purpose flour, cream of tartar, baking soda, and kosher salt.
- Gradually add the dry ingredients to the wet ingredients, mixing until just combined and a dough forms. Do not overmix.
- In a small bowl, combine the 0.5 cup of granulated sugar and 2 teaspoons of cinnamon for the coating.
- Using your hands or a small cookie scoop, roll rounded tablespoons of dough into balls.
- Roll each dough ball generously in the cinnamon-sugar mixture.
- Place the coated dough balls about 2 inches apart on the prepared baking sheets.
- Bake for 8 to 10 minutes, or until the edges are lightly golden and the centers are no longer doughy.
- Let the cookies cool on the baking sheets for 5 minutes before transferring them to a wire rack to cool completely.