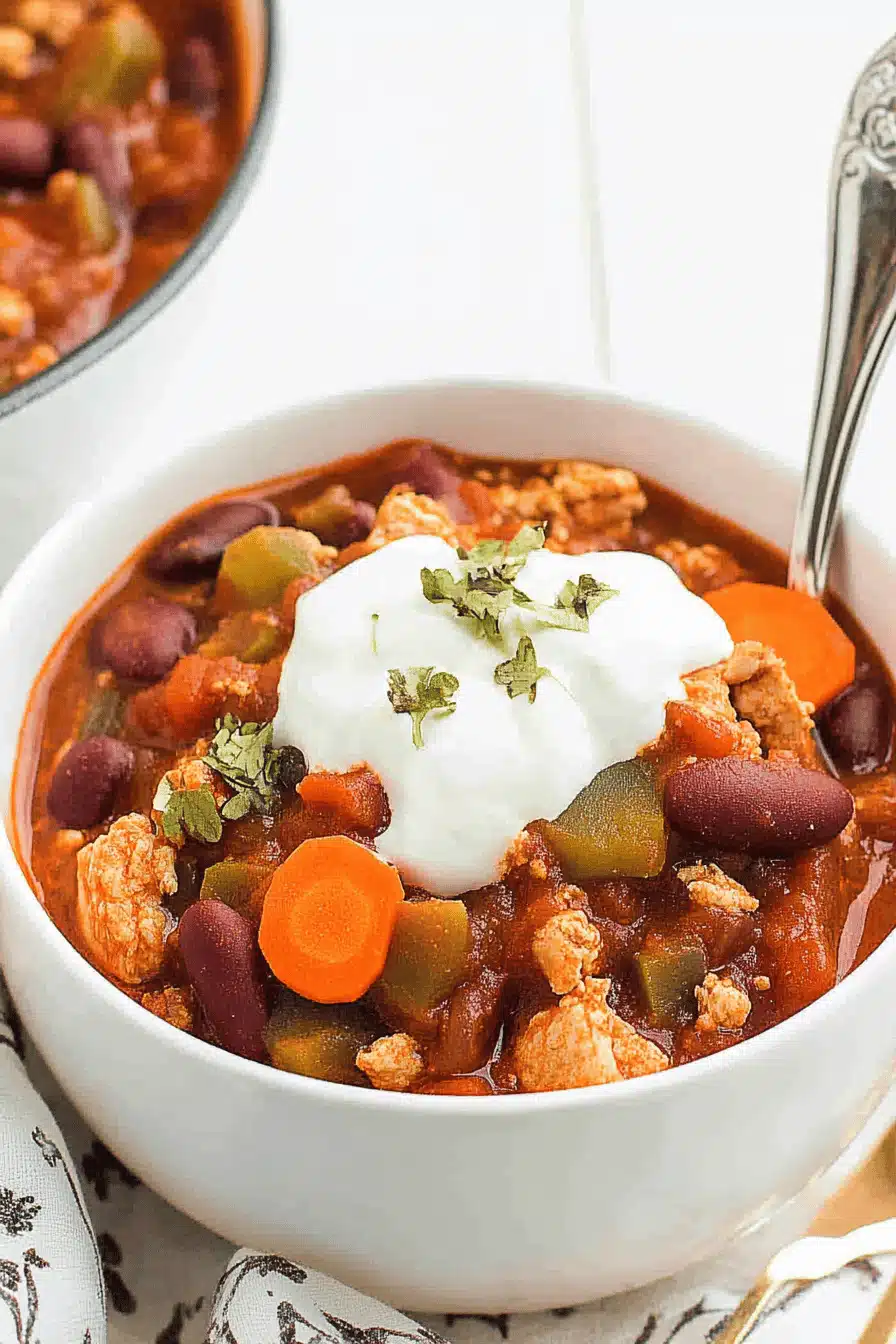
There’s something about the smell of chicken chili simmering on the stove that instantly reminds me of chilly autumn afternoons when my family would gather around the kitchen table, sharing stories over bowls brimming with warmth and comfort. This chicken chili isn’t just any recipe—it’s the kind of dish that hugs you from the inside out. I still remember the first time I made it; the rich aroma of smoked paprika and cumin filled the air, making my kids sneak a sample straight from the pot. Whether you’re a chili traditionalist or looking to mix it up from the usual beef version, this chicken chili delivers bold flavor without a ton of fuss. It’s surprisingly simple but layered with ingredients that sing together, making it a go-to when I want something hearty yet healthy. Trust me, once you taste this, you might just swap your usual chili for chicken in a heartbeat.
What is chicken chili?
Think of chicken chili as a cousin to the classic beef chili—same hearty, warming spirit but with tender chicken as the star. It’s essentially a stew packed with shredded or diced chicken, beans, tomatoes, and a smoky blend of spices that give it that signature kick. The beauty of chicken chili is that it’s lighter than its red-meat counterpart but still incredibly satisfying. It gets its name simply because chicken replaces ground beef or pork, making it a wonderful alternative for folks who prefer white meat or want something a little less heavy. What I love is how approachable it feels; it’s not fancy, just honest cooking that comforts your soul after a long day. Plus, it embraces all those kitchen staples in one pot—you can easily throw it together even when life gets hectic.
Why you’ll love this recipe?
Where do I even start? What I love most about this chicken chili is how it balances deep, smoky flavor with fresh, bright notes from the tomatoes and peppers. The cumin and smoked paprika combo creates this cozy aroma that fills your whole house—my family always comes running when I’m making it! It’s pure comfort food, but without the heaviness you sometimes get with beef chili. I’ve made this countless times, and each batch has that perfect blend of warmth and a touch of spice that’s never overwhelming.
Another perk is how straightforward it is. Seriously, if I can make it on a busy weeknight after work, you definitely can. The ingredients are budget-friendly too—especially if you keep beans and canned tomatoes in your pantry (which I always do). And versatility? Oh yeah, this chicken chili wears many hats. I serve it over rice, use it as a filling for tacos, or even ladle it over baked potatoes. Sometimes I add a dollop of sour cream or sprinkle cheddar on top, and my kids go wild for it. If you’ve ever enjoyed my turkey chili or that slow-cooker white bean soup, you’re going to find this recipe just as satisfying but with a fresh spin that’s perfect for anyone craving a new chili experience.
How do I make chicken chili?
Quick Overview
This chicken chili comes together in one pot, which is exactly what I need after a long day. You’ll start by gently browning your chicken, then layer in spices for that magia flavor boost, followed by tomatoes, beans, and just enough broth to create a rich, thick stew in no time. The slow simmer lets everything meld beautifully, making your kitchen smell like pure comfort. What’s great about this method is that you can prep most of the ingredients ahead, toss it all in, and then let it work its magic while you unwind or set the table.
Ingredients
For the Chili Base:
- 1 lb boneless, skinless chicken thighs (they stay tender and juicy, but breasts work fine too)
- 1 medium onion, finely diced — I like yellow for sweetness
- 3 cloves garlic, minced — fresh is key here, no shortcuts
- 1 bell pepper, chopped — I usually go red or orange for color and sweetness
- 1-2 jalapeños, seeded and diced (for just the right amount of heat)
- 1 (14 oz) can diced tomatoes — fire-roasted if you can find it, adds great depth
- 1 (15 oz) can black beans, drained and rinsed — kidney beans are a nice swap
- 1 (15 oz) can pinto beans, drained and rinsed
- 2 cups low-sodium chicken broth — homemade or store-bought, but homemade wins hands down
For the Spice Mix:
- 2 tsp ground cumin — this gives it that earthy warmth
- 1 tsp smoked paprika — trust me, it makes a difference
- 1 tsp chili powder — for the classic chili punch
- ½ tsp dried oregano — subtle herbal note to brighten things up
- Salt and pepper to taste
Step-by-Step Instructions
Step 1: Brown the Chicken
Start by heating a splash of olive oil in a large pot or Dutch oven over medium heat. Pat the chicken dry with paper towels (helps with browning) and add it to the pot. Cook until the pieces develop a nice golden crust, about 4-5 minutes per side. Don’t crowd the pan—do it in batches if you need to. This step locks in flavor and ensures tender chicken later on.
Step 2: Sauté the Veggies
Remove the browned chicken to a plate and reduce the heat slightly. Toss in the onion, bell pepper, and jalapeños, stirring as you go. Cook until softened and fragrant, about 5 minutes. Add the garlic in the last minute; you don’t want it to burn, just soften and release its aroma.
Step 3: Toast the Spices
Sprinkle in the cumin, smoked paprika, chili powder, and oregano. Stir constantly for about 30 seconds to “wake up” the spices—this little trick deepens their flavors and perfumes the whole kitchen.
Step 4: Add Tomatoes, Beans, and Broth
Toss the chicken back in, then add the diced tomatoes with their juice, both cans of beans, and the chicken broth. Use a wooden spoon to scrape up any tasty browned bits stuck to the bottom of the pot. Bring it all to a simmer, then reduce to low.
Step 5: Simmer and Shred
Cover and let your chili gently bubble for about 30 minutes. Once the chicken is cooked through and tender, remove it, shred with two forks, and return to the pot. This shredding step is what makes the chili super comforting and easy to eat.
Step 6: Final Simmer and Adjust Seasoning
Let the chili cook uncovered for another 10-15 minutes to thicken up a bit. Taste and adjust salt, pepper, and heat—sometimes I add a dash more chili powder or a squeeze of lime juice to brighten everything just right.
Step 7: Serve with Your Favorite Toppings
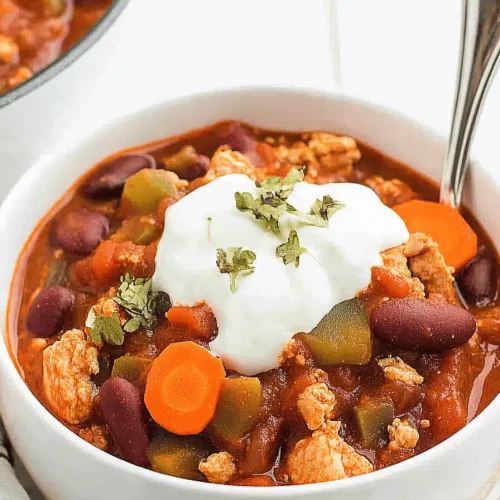
Ladle into bowls and pile on the good stuff: shredded cheddar, sour cream, chopped cilantro, or crunchy tortilla chips. The toppings bring texture and cool contrast that truly make this chicken chili shine.
What to Serve It With
For Cozy Weeknight Dinners: Nothing beats a simple green salad on the side or just an easy crusty bread to dunk into the chili’s rich sauce. At my house, we often stir in a little shredded cheese right before serving—it melts into gooey gold, every single time.
For Family-Friendly Lunches: Try stuffing leftovers into warm tortillas or over baked sweet potatoes. My kids love it “chili style” with a spoon alongside some corn on the cob, making it a quick, no-fuss meal.
For Casual Game Day Snacking: Turn this into chili fries or make mini chili bowls topped with jalapeño slices and scallions. It always gets devoured fast at our gatherings, and honestly, the smell alone brings everyone out of the woodwork.
I love how this chicken chili adapts to the mood—whether you’re in for a quick supper, a cozy weekend meal, or a lively night with friends, it’s always a welcome guest.
Top Tips for Perfecting Your Chicken Chili
Chicken Selection: I almost always use thighs because they stay juicy even after the slow simmer. If you opt for breasts, watch the cooking time carefully to avoid dryness.
Spicing It Right: Don’t rush the toasting of spices. That 30-second sizzle in the pot makes the chili taste like it’s been bubbling for hours, even if you’re short on time.
Beans: Rinsing canned beans removes excess sodium and tinny flavors, which helps your chili taste fresher. I like to use a mix of black and pinto beans—adds nice contrast in texture.
Simmer Slow and Low: Patience is your friend here. Letting everything simmer gently lets flavors marry and develop depth. If you’re short on time, a pressure cooker can speed things up without sacrificing taste.
Adjusting Heat: Jalapeños give just the right warmth, but if you’re feeding kids or sensitive palates, start with half a pepper and add a dash of hot sauce at the table instead.
Toppings and Variations: I mix things up by swapping sour cream for Greek yogurt for a tangy twist or adding corn kernels for a little pop. Sometimes a bit of shredded smoked cheese brings out the smoky notes even more.
Storing and Reheating Tips
Room Temperature: You can leave chicken chili covered on the counter for up to 2 hours—perfect if you’re serving it right away at a gathering. Just make sure it doesn’t sit too long to stay safe.
Refrigerator Storage: Leftovers in an airtight container keep beautifully for 3-4 days. I always cool mine completely before refrigerating to avoid sogginess. Reheat gently on the stove with a splash of broth if it thickened too much.
Freezing Instructions: This chili freezes like a charm! Store in heavy-duty freezer bags or containers for up to 3 months. When you thaw, do it overnight in the fridge then reheat slowly to keep the textures inviting.
Glaze and Topping Tips: Since this chili doesn’t have a traditional glaze, save your toppings like cheese, cilantro, or sour cream for just before serving—otherwise, they lose their magic in the fridge or freezer.
Frequently Asked Questions
Final Thoughts
Honestly, this chicken chili has become one of those kitchen staples I reach for when I want something both hearty and fresh. It’s the kind of dish that makes your home feel warm long before dinner hits the table. I love how approachable the recipe is—nothing complicated, just good ingredients coming together in a pot of pure comfort. If you’re someone who appreciates a tasty, adaptable meal you can dress up or down, this is right up your alley. And hey, if you try it, come back and tell me how it went or share your favorite toppings—I love hearing what little tweaks everyone adds! Keep your coffee warm and your chili simmering, friend. Can’t wait to hear how yours turns out!
chicken chili
Ingredients
Main Ingredients
- 3 tablespoons olive oil
- 3 cups yellow onion peeled and diced small (about 2 medium/large onions)
- 1 large jalapeno pepper remove seeds for less heat
- 7.5 ounces canned green chiles do not drain; mild heat
- 4 cloves garlic peeled and finely minced
- 32 ounces low-sodium chicken broth
- 4 cups shredded cooked chicken
- 30 ounces cannellini beans two 15-ounce cans
- 1 tablespoon lime juice freshly squeezed
- 1 tablespoon cumin ground
- 1 teaspoon dried oregano
- 1 teaspoon salt or to taste
- 1 teaspoon black pepper
- 0.5 teaspoon red chili flakes
- 0.25 teaspoon cayenne pepper optional, to taste
- 0.33 cup fresh cilantro leaves finely minced
Instructions
Preparation Steps
- Heat olive oil in a large Dutch oven or stockpot over medium-high heat until warm.
- Add diced onion, jalapeno, and green chiles. Sauté for about 7 minutes until the vegetables soften, stirring intermittently.
- Add minced garlic and sauté for 1 to 2 minutes, stirring occasionally.
- Add chicken broth, shredded chicken, whole cannellini beans, and a blended bean mixture (blend 1 cup of beans with a splash of broth or water until smooth) to the pot and stir to combine.
- Stir in lime juice, cumin, oregano, salt, black pepper, red chili flakes, and optional cayenne pepper. Bring the chili to a boil.
- Let the chili boil gently for 7 to 10 minutes. If it becomes too thick, add up to 1 cup water and adjust seasonings as needed. For thicker chili, boil uncovered longer to reduce.
- Add the finely minced cilantro and boil for an additional 1 minute.
- Taste and adjust salt and seasonings as needed for flavor balance.
- Serve the chili hot with optional garnishes like tortilla strips, chips, diced avocado, shredded cheese, or sour cream.
- Store leftover chili in an airtight container in the refrigerator for 5 to 7 days or freeze up to 4 months.