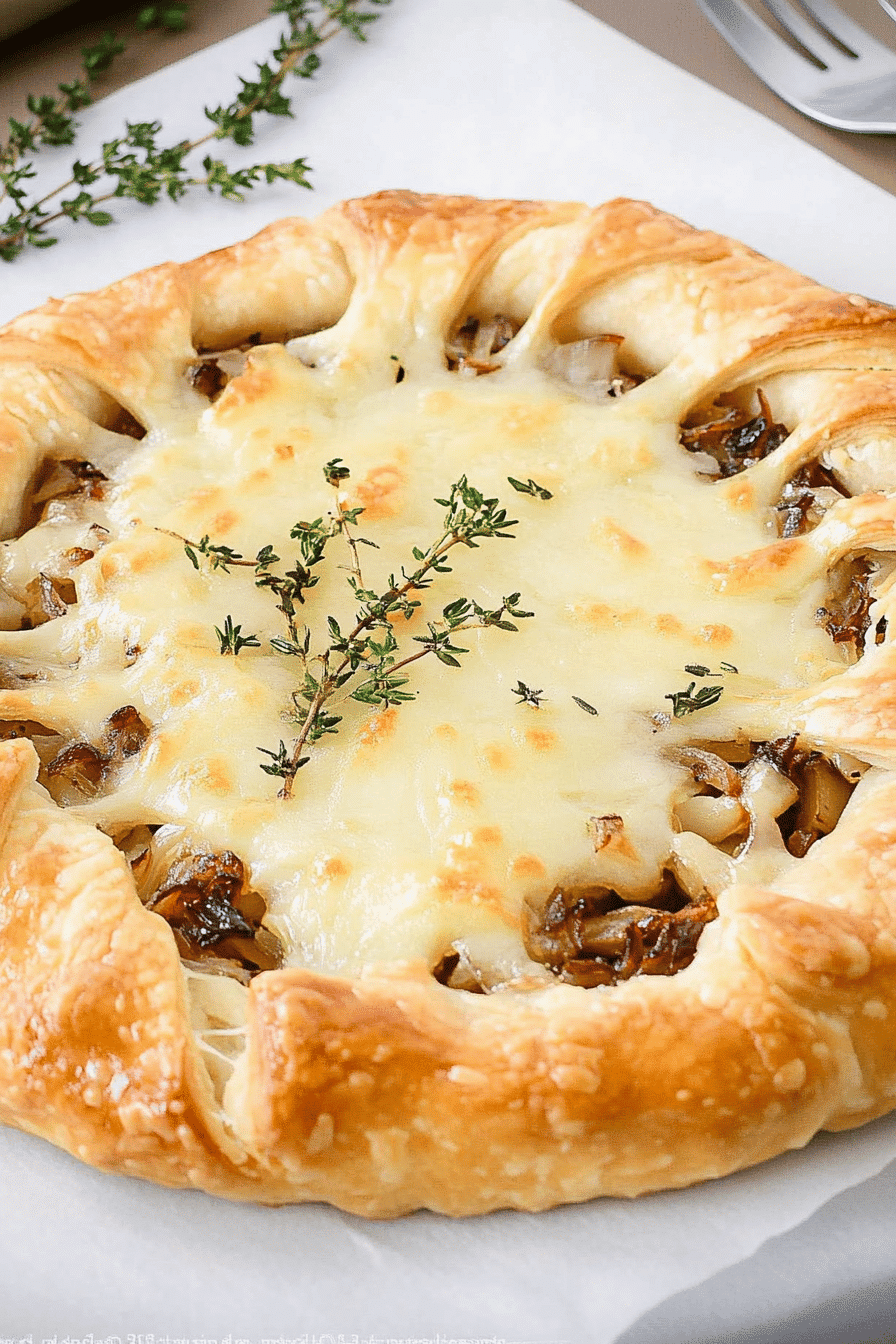
I still remember the first time I made a French tart—my kitchen smelled like a little bakery, warm and inviting, with just enough sweetness to pull me in like a cozy hug. I was craving something elegant but didn’t want to wrestle with a complicated pastry shell or fuss over a million steps. This French tart recipe has become my go-to whenever I want that delicate, buttery flavor with a surprising hint of fresh fruit, all wrapped up in a flaky, tender crust. It’s like a prettier, more delicate cousin of the ever-popular fruit galette, but with a twist that makes it feel a little more special. Honestly, this is the kind of recipe that doesn’t just fill your stomach but also warms your heart—perfect for Sunday afternoons or whenever you want to impress brunch guests without breaking a sweat.
What is French Tart?
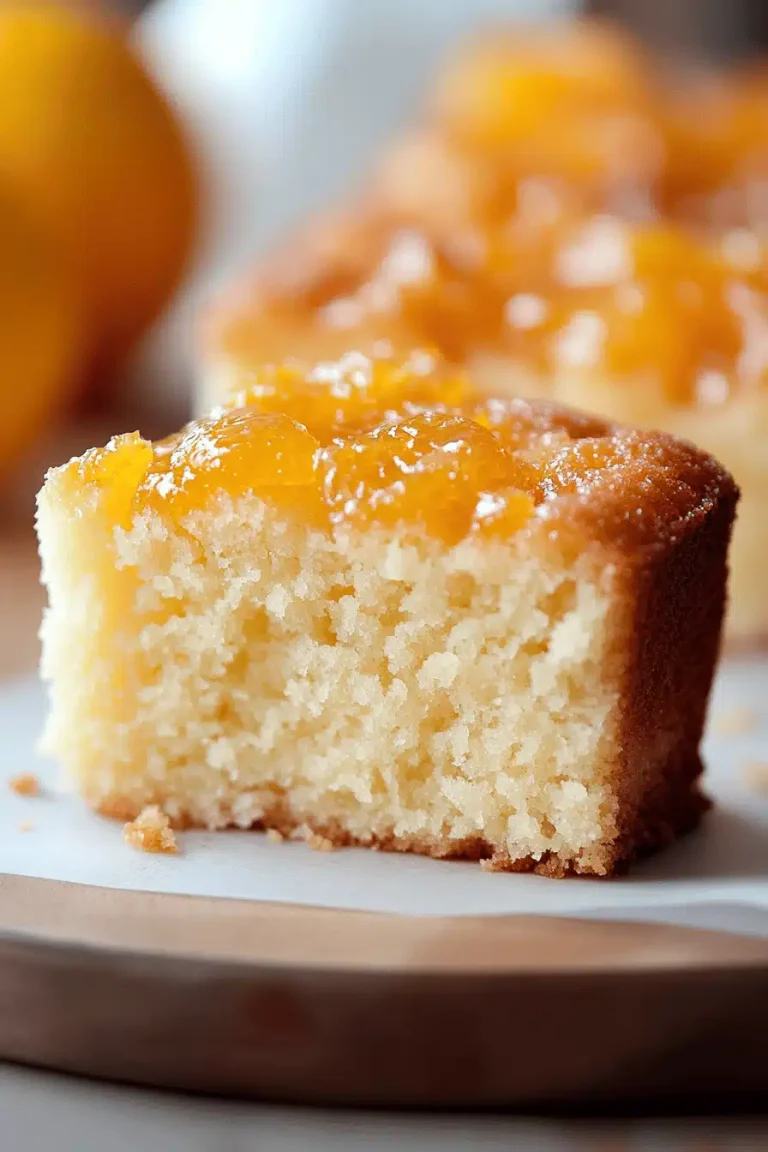
Think of a French tart as a charming slice of culinary art—it’s essentially a pastry crust filled with luscious fruit or creamy custard, and then baked until golden and irresistible. The origin of the French tart comes from France, where everyday baking magically turns simple ingredients into something truly delightful. It’s often thinner and more refined than the deep-dish pies we’re used to, focusing on texture and balance rather than heaps of filling. At its heart, a French tart is a celebration of fresh flavors and buttery, flaky dough. If that sounds a little fancy, don’t worry—this recipe strips away the fuss to something homemade and cozy, perfect for anyone who loves a dessert that’s as beautiful as it is tasty.
Why you’ll love this recipe?
What I love most about this French tart is how it perfectly blends incredible flavor with ease—you don’t have to be a pastry pro to get a beautiful result. The crust turns out tender and buttery, and once baked, it almost melts in your mouth. The filling, whether you go for a classic lemon custard or mixed berries, sings bright and fresh without overpowering the crust. I’m always impressed how relatively few ingredients can come together to create something so sophisticated. Plus, the recipe is surprisingly forgiving. You won’t have to make a flawless dough or fret about fancy techniques, which is a lifesaver on busy weeks.
And bonus: this tart is incredibly budget-friendly, making those fresh, seasonal fruits stand out without needing a pile of pricey extras. It’s flexible, too — I’ve played with everything from apples to stone fruits, and even a quick cream cheese layer that my kids absolutely adore. You can dress it up with a dusting of powdered sugar for afternoon tea or serve it warm with a scoop of vanilla ice cream for dessert. It’s honestly a crowd-pleaser every time, and my family often fights over the last slice!
How do I make French Tart?
Quick Overview
This French tart begins with a simple yet flaky pastry dough that you’ll press into your pan—no rolling pin required, which makes things so much easier. You prepare the filling separately then layer it in, sometimes swirling it a little for a rustic, charming look. Baking transforms everything into a golden masterpiece that’s crispy on the edges and tender in the middle. It’s straightforward, quick to whip up, and such a satisfying process to watch it come together in your oven.
Ingredients
For the Pastry: A Recipe for a Healthy Pastry.
- 1 1/4 cups all-purpose flour – fresh and unbleached if possible for best texture
- 1/2 teaspoon sea salt – balances the sweetness nicely
- 1/2 cup unsalted butter, chilled and cubed – the key to that flaky crust
- 3-4 tablespoons ice water – add gradually so dough just holds together
For the Filling:
- 1 cup fresh seasonal fruit (berries, sliced apples, or stone fruits) – washed and patted dry
- 1/4 cup sugar – adjust depending on your fruit’s sweetness
- 1 teaspoon vanilla extract – adds a lovely warmth
- Optional: 2 tablespoons cream cheese or mascarpone – for a creamy base
For the Glaze:
- 2 tablespoons apricot jam – warmed and strained for a smooth finish
- 1 tablespoon water – to loosen the jam if it’s too thick
Step-by-Step Instructions
Step 1: Preheat & Prep Pan
Set your oven to 375°F (190°C). I like to use a 9-inch tart pan with a removable bottom—it just slips out so easily when the tart is done. Lightly butter the pan or spray with nonstick spray, then dust with a tiny bit of flour to keep the crust from sticking.
Step 2: Mix Dry Ingredients
In a large bowl, whisk together the flour and salt. This step might seem small, but it’s super important to evenly distribute the salt so every bite has just the right balance of flavor.
Step 3: Mix Wet Ingredients
Cut chilled butter into the flour mixture using your fingers or a pastry cutter, working quickly until the mixture resembles coarse crumbs—like tiny peas, with some pea-sized bits still visible. Then, slowly add ice water one tablespoon at a time until the dough just begins to cling and form a rough ball. Don’t overdo it or the crust will turn out tough.
Step 4: Combine
Gather the dough into a disk, wrap it up, and pop it into the fridge for 30 minutes. Chilling lets the butter firm up again so the layers in your crust bake beautifully flaky. I tried skipping this once—big mistake: the crust turned out dense and chewy instead of tender and flaky.
Step 5: Prepare Filling
While the dough chills, toss your fruit with sugar and vanilla. If you’re using cream cheese or mascarpone, spread a thin layer on the bottom of the tart shell right before adding the fruit—it creates this dreamy, tangy contrast that’s just divine. You can also add a little cinnamon or lemon zest here for extra depth.
Step 6: Layer & Swirl
Press the dough into the tart pan gently with your fingers—no rolling needed, which is a huge relief when you’re short on time. Pour in your fruit filling, smoothing it out evenly. If you went with the cream cheese base, use a spoon to swirl the cream and the fruit together for that lovely marbled effect — it looks fancy but is super easy.
Step 7: Bake
Slide your tart onto the middle rack and bake for about 35-40 minutes. The edges should be a golden brown, and the fruit bubbly. You’ll know it’s done when the crust looks dry and crisp, not pale or soft. If you notice the edges browning too quickly, tent with foil halfway through.
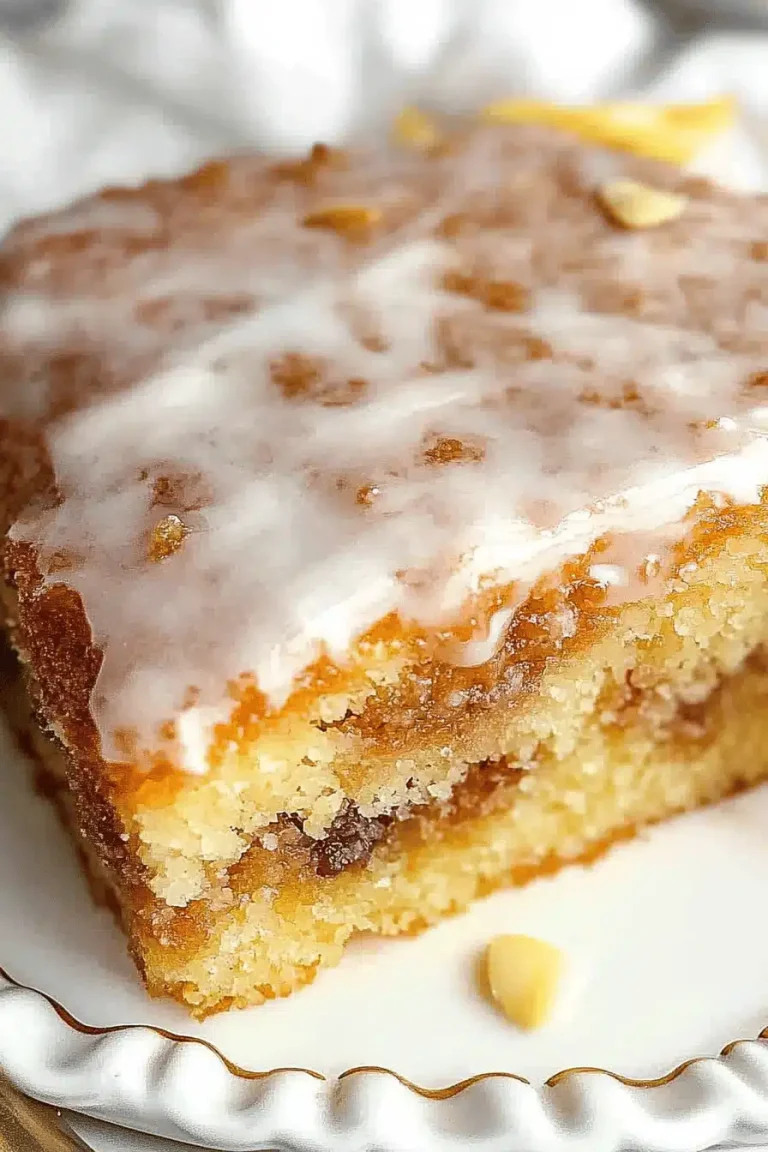
Step 8: Cool & Glaze
Once out of the oven, let the tart cool in the pan on a wire rack for at least 15 minutes. While it cools, warm your apricot jam with a touch of water and brush it evenly over the fruit. This adds a subtle shine and seals in freshness. Trust me, skipping this step makes the tart look a little flat—and who wants that?
Step 9: Slice & Serve
Use a sharp serrated knife to make clean slices. Serve slightly warm or room temperature for the best flavors. I often add a little dollop of whipped cream or a scoop of vanilla ice cream on the side—because let’s be honest, sometimes we just want to indulge.
What to Serve It With
For Breakfast: Freshly brewed coffee with a splash of cream and a side of sliced fresh fruit complements the tart’s buttery crust and lively sweetness perfectly.
For Brunch: Plate slices with a drizzle of homemade honey and sprinkle over fresh mint leaves. Pair with a glass of sparkling rosé or a light herbal tea for a classy vibe.
As Dessert: After a cozy dinner, serve warmed slices topped with mascarpone or lightly whipped cream, plus a dusting of cinnamon or nutmeg if you like. This tart’s subtle flavors won’t compete with your main dishes but will feel like a real treat.
For Cozy Snacks: When the afternoon lazy slump hits, a slice of tart and a hot cup of chai or your favorite spiced tea is like a warm hug. My kids actually ask for seconds, which is how I know the magic worked.
Top Tips for Perfecting Your French Tart
Pastry Prep: Cold butter is your best friend here. If it softens too much while mixing, just pop your dough back in the fridge before proceeding. Also, handle the dough gently to keep those flaky layers intact.
Mixing Advice: I learned early on that overmixing is the enemy of flaky pastry. Mix only until the wet and dry ingredients come together—any more and you risk a tough crust.
Swirl Customization: When swirling cream cheese or mascarpone into your fruit filling, use a toothpick or skewer in gentle, circular motions. This not only looks beautiful but balances the flavors in every bite.
Ingredient Swaps: Tried it with half whole wheat flour and it adds a lovely nutty flavor, but keep the rest white flour for structure. For dairy-free options, I tested almond milk in the filling, and it actually made the custard creamier!
Baking Tips: Oven temps vary, so start checking 5 minutes before the timer. I usually rotate the tart halfway through baking for even color. If your edges brown fast, foil is your friend.
Glaze Variations: If apricot jam isn’t your thing, try a light honey syrup or even a dusting of powdered sugar after cooling. These choices change the finish but keep that charming look.
One important thing I’ve learned: never rush the cooling. The tart firms up as it cools, and slicing too early risks it falling apart on you. Patience pays off here, trust me.
Storing and Reheating Tips
Room Temperature: You can keep the tart covered at room temp for up to 24 hours on your counter, but if it’s warm or humid, better pop it in the fridge sooner.
Refrigerator Storage: Store leftover tart in an airtight container or cover tightly with plastic wrap to maintain freshness. It’ll last 3-4 days and still taste pretty fresh.
Freezer Instructions: I’ve wrapped tarts in foil and frozen for up to two months. To thaw, just leave it in the fridge overnight and brush on glaze before serving for that fresh shine.
Glaze Timing Advice: For fridge or freezer storage, it’s best to glaze right before serving. Glazing before storing can make your crust soggy over time, and nobody wants that. Just heat the apron jam gently and brush on last minute.
Frequently Asked Questions
Final Thoughts
This French tart has truly earned a special place in my kitchen rotation because it blends effortless elegance with down-to-earth comfort. It’s the kind of recipe you can come back to again and again—whether you’re craving a simple treat to enjoy with your morning coffee or a light dessert to impress friends without drama. Each bite brings that cozy feeling of homemade goodness wrapped in flaky pastry and fresh filling. If you loved this, I encourage you to explore similar recipes like rustic fruit galettes or classic clafoutis to keep the French-inspired sweetness going in your kitchen. I can’t wait to hear how yours turns out—let me know if you get creative with the filling or glaze! Happy baking!

French tart
Ingredients
Main Ingredients
- 15 count oreo cookies crushed
- 5 tablespoons butter melted
- 1.5 cups whipping cream
- 1 cup chocolate chips
- 1 cup whipping cream for whipped topping
- 0.5 teaspoons pure vanilla extract
- 1 tablespoon sugar
- chocolate shavings for garnish (optional)
Instructions
Preparation Steps
- Combine the crushed oreo cookies and melted butter in a small bowl; mix well and press onto the bottom of an 8-inch springform pan.
- Refrigerate the crust until needed to fill.
- Pour 1.5 cups whipping cream into a medium bowl and microwave for 1.5 to 2 minutes, or until hot.
- Add the chocolate chips to the hot cream and whisk until melted and smooth.
- Refrigerate the chocolate mixture for at least one hour until cold and slightly thickened.
- Prepare the whipped cream topping by combining 1 cup whipping cream, vanilla extract, and sugar.
- Cover and chill the whipped cream mixture in the refrigerator for 30 minutes.
- When chilled, beat the whipped cream mixture until stiff peaks form.
- Take out the chilled chocolate mixture and beat on medium speed until stiff peaks form.
- Spread the chocolate mixture evenly over the oreo crust.
- Spoon whipped cream topping over the chocolate layer and spread evenly.
- Refrigerate for one hour or until set.
- Garnish with chocolate shavings before serving.