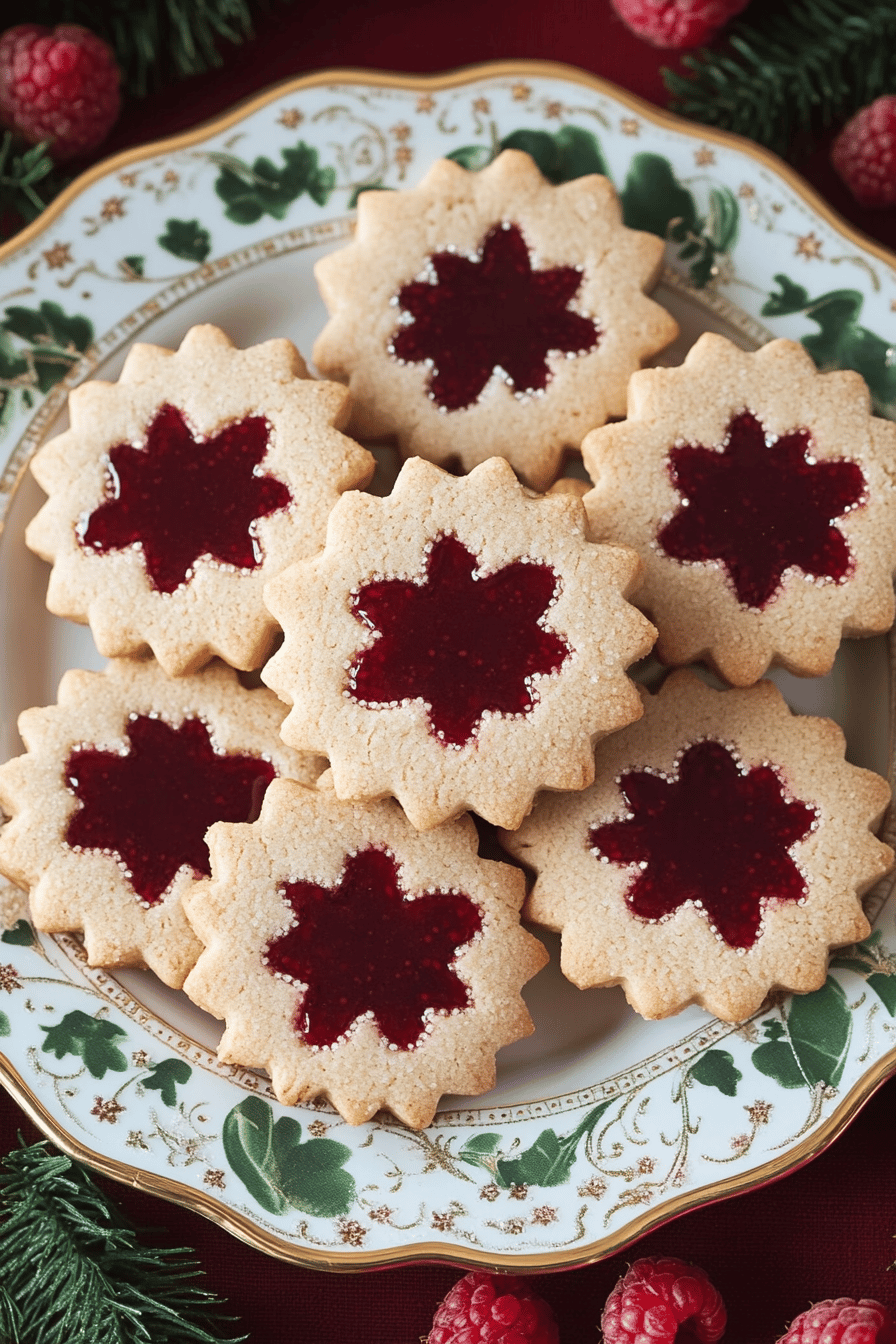
Oh, these Raspberry Swirl Cookies! Just thinking about them makes me happy. They’re one of those recipes I pull out when I need a little pick-me-up, or when unexpected guests drop by and I need something delightful to serve without a fuss. Seriously, the vibrant pink swirls against the soft, slightly golden cookie are just *gorgeous*, and the flavor? A perfect balance of sweet, a little tangy from the raspberries, and that comforting cookie goodness. It’s like sunshine and happiness baked into a treat. They remind me so much of my grandmother’s kitchen; she always had a batch cooling on the rack whenever we’d visit. If you’ve ever loved a good jam thumbprint cookie, these are like their more glamorous, sophisticated cousin, but honestly, they’re way easier to make. The swirl is the star here, turning a simple cookie into something truly special.
What are Raspberry Swirl Cookies?
So, what exactly are these delightful little morsels? Think of them as a soft, buttery Sugar Cookie base that gets a beautiful, colorful marble effect from a swirl of bright raspberry filling. It’s not a complicated process at all! We’re essentially making a classic cookie dough, then dolloping and swirling in a quick, easy raspberry mixture right before baking. The magic happens in the oven when those two elements meld together, creating those gorgeous streaks of pink that make them so visually appealing. It’s essentially a celebration of simple ingredients coming together to create something that looks and tastes incredibly impressive. The name itself, Raspberry Swirl Cookies, perfectly captures what you see and taste – that beautiful swirl of berry goodness!
Why you’ll love this recipe?
Honestly, there are so many reasons why this Raspberry Swirl Cookie recipe has earned a permanent spot in my recipe binder, and I just *know* you’ll love it too. First off, the flavor profile is just divine. You get that classic, comforting sweetness from the cookie base, and then BAM! – a bright, slightly tart burst of raspberry that cuts through the richness. It’s not overly sweet, which I really appreciate, and the raspberry adds this lovely fruity dimension that just makes you want another one. And then there’s the texture: these cookies are wonderfully soft and chewy, with just the slightest tender crisp around the edges. They’re not cakey, they’re not crunchy, they’re just… perfect.
Secondly, and this is a big one for me, they are surprisingly simple to make. Even if you’re not a seasoned baker, you can totally nail these. The dough comes together quickly, and the swirling technique is more forgiving than you might think. I’ve even gotten my kids involved in the swirling part, and they have a blast making their own unique patterns! It’s a fantastic recipe for busy weeknights or when you need a crowd-pleaser without spending hours in the kitchen. Plus, the ingredients are super budget-friendly. Flour, sugar, butter, eggs – pantry staples for most of us. And the raspberries? You can use fresh or frozen, and even a good quality jam works in a pinch, making this a very adaptable recipe. What I love most about these Raspberry Swirl Cookies is that they look so elegant and special, but they’re truly a comforting, down-to-earth treat. They’re perfect for bake sales, potlucks, or just enjoying with a cup of tea on a quiet afternoon. They definitely stand out from your average Chocolate Chip Cookie, but they’re just as universally loved.
How do I make Raspberry Swirl Cookies?
Quick Overview
This recipe is all about creating a delicious, soft cookie base and then swirling in a vibrant raspberry filling. We’ll mix our dry and wet ingredients separately before combining them into a smooth dough. Then, it’s simply a matter of layering dollops of raspberry mixture onto the dough and swirling them gently to create those beautiful patterns. Bake until golden and set, then cool and glaze. It’s a straightforward process that yields incredibly impressive results, making it perfect for bakers of all levels!
Ingredients
For the Main Batter:
We start with good quality, unsalted butter. Make sure it’s softened to room temperature – this is crucial for getting that creamy, smooth texture in your dough. I usually take mine out about an hour before I start mixing. You’ll need granulated sugar for sweetness and structure, and then a touch of brown sugar for that lovely subtle caramel note and chewiness. Don’t skip the brown sugar; it makes a difference! Eggs provide richness and help bind everything together. I always use large eggs, and again, room temperature is best for seamless incorporation. For the flour, all-purpose is perfect. I like to sift it, not because it’s strictly necessary, but it just makes for an airier batter. Baking powder and a pinch of salt are essential for leavening and balancing the sweetness. A splash of vanilla extract is a must for that classic cookie flavor.
For the Filling:
This is where the magic happens! Fresh or frozen raspberries are ideal. If you’re using frozen, no need to thaw them completely; just toss them straight into the mixture. You want a bright, slightly tart raspberry flavor to contrast with the sweet cookie. I usually add a bit of sugar to sweeten the raspberries just slightly, as they can be quite tart on their own. A little cornstarch helps to thicken the filling as it bakes, preventing the cookies from becoming too soggy. You can absolutely use a good quality raspberry jam if you’re in a real hurry, just be sure it’s not too runny. I sometimes add a tiny squeeze of lemon juice to the filling to really amp up that fruity tang.
For the Glaze:
This is totally optional but highly recommended for that extra touch of sweetness and polish! We’ll mix powdered sugar with a little milk or lemon juice. Milk will give you a more classic sweet glaze, while lemon juice adds a lovely zesty kick that pairs beautifully with the raspberry. I usually start with just a tablespoon or two of liquid and add more very slowly until I get a drizzle-able consistency. You want it thin enough to pour but not so thin that it runs right off the cookies. A tiny bit of vanilla extract or even a drop of almond extract can be lovely in the glaze too.
Step-by-Step Instructions
Step 1: Preheat & Prep Pan
First things first, let’s get our oven ready. Preheat it to 350 degrees Fahrenheit (175 degrees Celsius). This is a pretty standard baking temperature that works perfectly for these cookies. While the oven is heating up, I like to line my baking sheets with parchment paper. This does two things: it prevents the cookies from sticking, which is a lifesaver when it’s time to move them, and it also helps them bake more evenly by creating a gentle barrier between the cookie and the hot pan. You can also use silicone baking mats if you have those. Make sure your baking sheets are cool before you start placing dough on them.
Step 2: Mix Dry Ingredients
In a medium bowl, whisk together your all-purpose flour, baking powder, and salt. I find whisking them thoroughly ensures that the leavening and salt are evenly distributed throughout the flour, which means a more consistent rise and flavor in your cookies. If you’re feeling extra fancy, you can sift your flour, but honestly, whisking is usually good enough for me. Set this bowl aside for a moment; we’ll come back to it soon.
Step 3: Mix Wet Ingredients
Now for the creamy goodness! In a large bowl, cream together the softened unsalted butter, granulated sugar, and brown sugar. You can do this with an electric mixer (handheld or stand mixer) on medium speed until the mixture is light and fluffy, which usually takes about 2-3 minutes. It should look pale yellow and have a smooth, almost whipped texture. Next, beat in the eggs one at a time, making sure each one is fully incorporated before adding the next. Then, stir in the vanilla extract. The mixture might look a little curdled after adding the eggs; don’t worry, that’s totally normal and it will smooth out when you add the dry ingredients.
Step 4: Combine
Now we bring it all together! Gradually add the dry ingredients from Step 2 to the wet ingredients in the large bowl. Mix on low speed (or stir gently with a spatula) until *just* combined. This is super important: do not overmix! Overmixing can develop the gluten in the flour, resulting in tough cookies. You want to mix until you no longer see streaks of dry flour. A few little lumps are perfectly fine. The dough should be soft but hold its shape. If it feels too sticky, you can chill it in the refrigerator for about 15-20 minutes, which makes it easier to handle.
Step 5: Prepare Filling
While the dough is chilling (or if it’s already the right consistency), let’s get our raspberry swirl ready. In a small bowl, gently mash the raspberries with a fork. You want some chunks to remain for texture. Stir in the sugar and cornstarch until well combined. If you’re using jam, just give it a good stir to loosen it up. If you want a smoother filling, you can pulse the raspberries a few times in a food processor. Remember that bit of lemon juice I mentioned? If you’re using it, add it now and stir well. The cornstarch will help thicken this mixture slightly as it bakes.
Step 6: Layer & Swirl
This is the fun, artistic part! Drop rounded spoonfuls of cookie dough onto your prepared baking sheets, leaving about 2 inches between them. Don’t worry about making them perfectly round; they’ll spread a bit. Now, take spoonfuls of your raspberry filling and dollop them randomly onto the cookie dough. Don’t go overboard; a little goes a long way! Then, take a toothpick or a knife and gently swirl the raspberry filling into the dough. You want to create those beautiful marbled patterns. Don’t over-swirl, or you’ll just end up with pink cookies instead of swirled ones. Just a few quick passes through the dough should do it. Aim for a marbled effect, not a uniform blend.
Step 7: Bake
Pop those baking sheets into your preheated oven. Bake for about 10-12 minutes, or until the edges of the cookies are lightly golden and the centers look set. They shouldn’t be overly browned; we want them to stay nice and soft. The exact baking time will depend on your oven and the size of your cookies. It’s always a good idea to check them a minute or two before the suggested time, just in case. They’ll continue to firm up as they cool on the baking sheet.
Step 8: Cool & Glaze
Once baked, let the cookies cool on the baking sheets for about 5-10 minutes. This allows them to set up properly so they don’t break when you move them. Then, carefully transfer them to a wire rack to cool completely. While they’re cooling, prepare your glaze if you’re using one. In a small bowl, whisk together the powdered sugar with a tablespoon of milk or lemon juice. Add more liquid, a tiny bit at a time, until you reach a smooth, drizzly consistency. Once the cookies are completely cool, drizzle the glaze over them using a spoon or a piping bag. Let the glaze set before storing.
Step 9: Slice & Serve
And there you have it! Your beautiful Raspberry Swirl Cookies are ready to be devoured. They’re delicious served as is, or you can get fancy with presentation. I love arranging them on a pretty platter. They are perfect for sharing, but I won’t judge if you want to keep a few just for yourself! They taste amazing at room temperature and are at their absolute best within a day or two of baking.
What to Serve It With
These Raspberry Swirl Cookies are so versatile, they fit in anywhere! For breakfast, they’re a delightful little treat to pair with your morning coffee or tea. Imagine a bright, sunny morning, you’ve got your favorite mug, and you reach for one of these – pure bliss! They’re not overly sweet, so they feel right at home with a cup of joe.
For a lovely brunch spread, they add a pop of color and elegance. Arrange them on a tiered stand with other pastries, fruits, and maybe some mini quiches. They look so pretty, and everyone will be asking for the recipe. Serve them with a glass of sparkling cider or a light mimosa.
As a dessert, they’re simply wonderful. They’re a lighter option than a heavy cake or pie, but still satisfy that sweet craving. Serve them after dinner with a scoop of vanilla bean Ice Cream, or alongside a bowl of fresh berries. The combination of warm cookie and cold ice cream is heavenly!
And for those cozy snack times? This is where they truly shine for me. After a long day, when I just need something comforting and sweet, these are my go-to. They’re perfect with a glass of milk, a cup of hot chocolate, or just on their own while you curl up with a good book. My family loves them as an after-school snack, and they’re always gone in a flash! They’re also fantastic for packing in lunchboxes – a little ray of sunshine in their day.
Top Tips for Perfecting Your Raspberry Swirl Cookies
Over the years, I’ve learned a few tricks that have really helped me get these Raspberry Swirl Cookies just right, every single time. For the raspberry filling, using good quality raspberries is key. If you’re using frozen ones, don’t feel like you need to thaw them completely. They’ll break down just fine in the mixture, and sometimes the extra moisture from thawing can make the filling a bit too wet. When you’re mashing them, aim for a rustic texture; you want some small chunks of berry to remain. This adds a lovely texture and visual appeal to the swirl. And don’t be tempted to add too much sugar to the filling; the cookie itself is sweet, and you want that tartness of the raspberry to balance it out.
When it comes to mixing the dough, the biggest mistake people make is overmixing once the flour is added. Seriously, just mix until the flour disappears. A few streaks of flour are fine, as they’ll get incorporated during the swirling. Overmixing develops gluten, and that leads to tough cookies, and nobody wants a tough cookie! If your dough feels a little too sticky to handle, don’t hesitate to pop it in the fridge for 15-20 minutes. This is a lifesaver, especially if your kitchen is warm. It firms up the butter, making the dough much easier to scoop and swirl without it sticking everywhere.
The swirling technique is where you can really get creative! Don’t go crazy with it. You want distinct swirls of raspberry, not a uniform pink color. Just a few gentle drags with your toothpick or knife will create beautiful marbling. Think of it like painting; you want to create lines and patterns, not blend all the colors together. For even more visual interest, you can try different swirling patterns. Sometimes I’ll just do a simple zig-zag, other times I’ll make a figure-eight motion. Experiment and see what you like best! For ingredient swaps, if you don’t have raspberries, you can absolutely use other berries like strawberries or blueberries. Just mash them up the same way. If you’re out of cornstarch, a teaspoon of all-purpose flour can work in a pinch for thickening the filling, though cornstarch usually gives a clearer result.
When baking, keep an eye on your oven. Ovens can be quirky, and baking times can vary. I always check my cookies a minute or two before the suggested time. You’re looking for edges that are just starting to turn golden brown, but the center should still look a little soft. They’ll continue to cook and set up as they cool on the baking sheet. If you tend to get hot spots in your oven, rotating your baking sheets halfway through the baking time can help ensure even cooking. For the glaze, the consistency is key. Start with less liquid than you think you need and add more very slowly. It’s much easier to thin out a glaze than to thicken it up! If you accidentally make it too thin, just whisk in a little more powdered sugar until it’s just right for drizzling.
Storing and Reheating Tips
These Raspberry Swirl Cookies are best enjoyed fresh, but they do store quite well, which is great for when you want to make a batch ahead of time. At room temperature, they’ll stay delicious for about 2 to 3 days, as long as they’re stored properly. I like to keep them in an airtight container. If you’ve glazed them, make sure the glaze is completely set before you put the lid on, or they might stick. If you notice them getting a little less soft after a day or two, you can place a small piece of bread in the container with them. It sounds strange, but the bread will release moisture and help keep the cookies soft.
If you need to store them for a bit longer, the refrigerator is your best bet. They can last for up to a week in an airtight container in the fridge. Just be aware that they might firm up a bit more in the cold. When you’re ready to enjoy them from the fridge, I like to let them sit at room temperature for about 20-30 minutes to soften up before eating. This brings back that wonderful chewy texture.
For longer storage, freezing is absolutely an option! You can freeze the baked and cooled cookies for up to 2-3 months. The best way to do this is to wrap them individually in plastic wrap first, then place them in a freezer-safe bag or airtight container. This double-layer protection helps prevent freezer burn. When you’re ready to eat them, you can either let them thaw overnight in the refrigerator, or you can bring them to room temperature on the counter for a few hours. If they seem a little firm after thawing, a few seconds in the microwave (on a microwave-safe plate, of course!) can quickly warm them up and make them wonderfully soft again.
A quick note on the glaze: it’s generally best to add the glaze *after* the cookies have cooled completely, and ideally, right before you plan to serve them or store them at room temperature. If you’re freezing glazed cookies, the glaze might soften or become a bit sticky upon thawing, though it’s still perfectly edible. If you plan to freeze them for a long time, you might consider glazing them after they’ve thawed and are back at room temperature for the best appearance.
Frequently Asked Questions
Final Thoughts
I really hope you give these Raspberry Swirl Cookies a try! They’re more than just a recipe to me; they’re a little piece of joy that always brings a smile to my face, and hopefully to yours too. The way the raspberry ribbons weave through the tender cookie base is just so pretty, and the taste is simply delightful – that perfect blend of sweet and tart that makes you keep reaching for just one more. They’re proof that you don’t need fancy ingredients or complicated techniques to create something truly special and delicious.
If you love the idea of beautiful swirled desserts, you might also enjoy my [link to another swirl cookie recipe, e.g., Lemon Poppy Seed Swirl Cookies] or my [link to a cake recipe, e.g., Marble Bundt Cake]. They all have that wonderful visual appeal and incredible flavor. So go ahead, gather your ingredients, put on some music, and have fun in the kitchen. I can’t wait to hear how your Raspberry Swirl Cookies turn out! If you make them, please share your photos and let me know what you think in the comments below. Happy baking!

Raspberry Swirl Cookies
Ingredients
Cookie Dough
- 0.5 cup unsalted butter softened
- 1 cup granulated sugar
- 1 large egg
- 1 teaspoon vanilla extract
- 2.5 cups all-purpose flour
- 0.5 teaspoon baking soda
- 0.25 teaspoon salt
Raspberry Swirl
- 0.5 cup raspberry jam
Instructions
Preparation Steps
- In a large bowl, cream together the softened butter and granulated sugar until light and fluffy.
- Beat in the egg and vanilla extract until well combined.
- In a separate bowl, whisk together the flour, baking soda, and salt.
- Gradually add the dry ingredients to the wet ingredients, mixing until just combined. Do not overmix.
- Divide the dough in half. Roll each half into a rectangle approximately 9x12 inches.
- Spread half of the raspberry jam evenly over one rectangle of dough, leaving a small border.
- Roll up the dough tightly from the long side. Repeat with the other rectangle and remaining jam.
- Slice each roll into 12 equal cookies. Place cookies on a baking sheet lined with parchment paper.
- Bake at 375°F (190°C) for 10-12 minutes, or until golden brown around the edges.
- Let cool on the baking sheet for a few minutes before transferring to a wire rack to cool completely.