You know those days when a craving hits, and it’s not just for anything sweet, but for something that feels like a warm hug on a chilly afternoon? That’s exactly when I reach for my pumpkin rose cookies. They’re a little bit of pure magic, and honestly, they smell like autumn itself is baking in your kitchen. I first stumbled upon a variation of these years ago, trying to capture that perfect balance of spice and sweetness without it being *too* much like a dense muffin or a hard cookie. This recipe? It’s the one that finally nailed it. It’s got this delicate, almost floral hint from the way the spices bloom, and the texture is just heavenly – soft enough to melt in your mouth, but with a satisfying chew. If you love a good Pumpkin Spice something but are looking for something a bit more refined than your average cookie, these are absolutely it. They’re my little secret weapon for impressing guests or just treating myself after a long day.
What are pumpkin rose cookies?
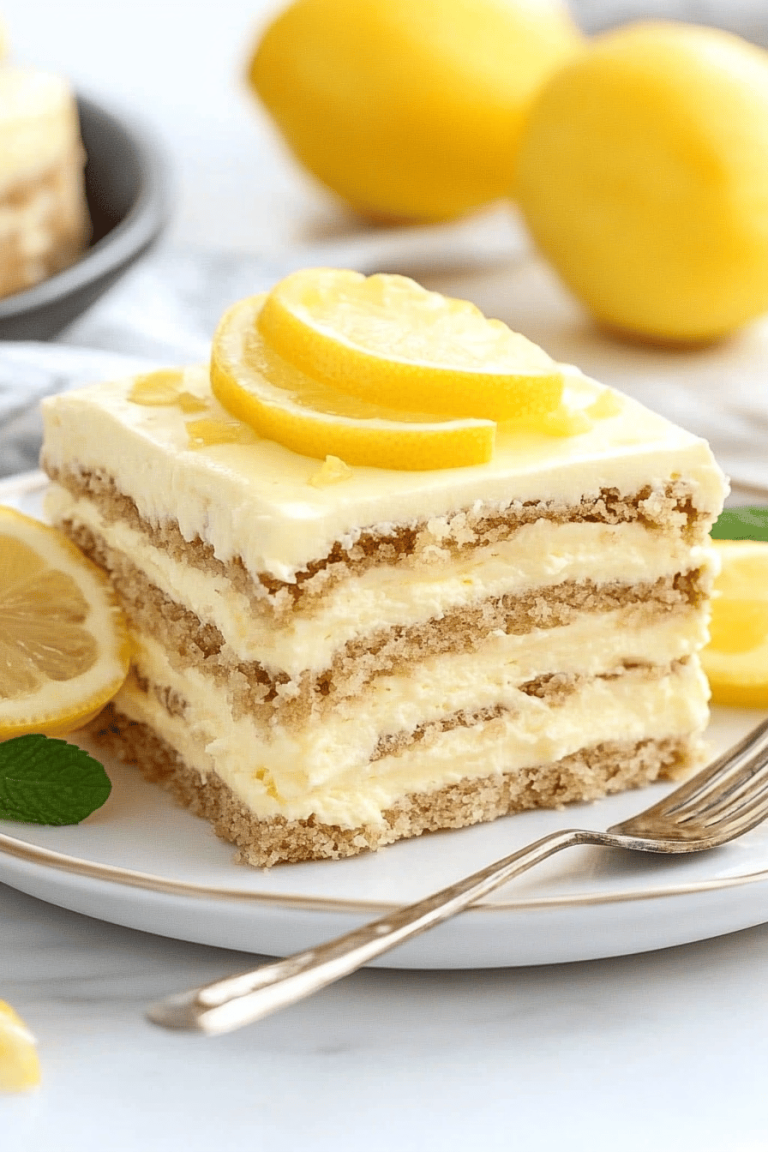
So, what exactly *are* pumpkin rose cookies? Think of them as the sophisticated cousin of your everyday Chocolate Chip Cookie, but with all the cozy flavors of fall. The “rose” part doesn’t mean they taste like actual roses (though you could totally add a drop of rosewater if you’re feeling adventurous!), it’s more about the beautiful, delicate swirling pattern we create with the pumpkin spice filling, which often resembles the petals of a rose. It’s essentially a soft, spiced cookie dough swirled with a richer, more concentrated pumpkin and spice mixture. It’s this marbling effect that makes them visually stunning, almost too pretty to eat, but trust me, you’ll want to dive right in! They’re not overly complicated, but they have this elegant presentation that makes them feel really special, even though the ingredients are pretty standard pantry staples for anyone who bakes during the fall season.
Why you’ll love this recipe?
Okay, let me tell you why this recipe is a total winner in my book, and I have a feeling it will be in yours too! Firstly, the FLAVOR. Oh my goodness, the flavor! It’s that perfect symphony of warm spices – cinnamon, nutmeg, cloves, and a hint of ginger – all mingling beautifully with the subtle sweetness of pumpkin. It’s not overpowering; it’s just right. What I love most is that it tastes authentically autumnal, like a cozy bonfire and crisp leaves rolled into one bite. Then there’s the SIMPLICITY. Even though they look fancy with their swirled tops, these cookies are surprisingly easy to whip up. The dough comes together quickly, and the filling is just a matter of mixing a few things in a bowl. I’ve made these on busy weeknights, and they’re still on the table within an hour or so, which is a lifesaver. And let’s talk COST-EFFICIENCY. Most of the ingredients are pantry staples. You likely already have most of them, and the star, pumpkin puree, is usually quite affordable, especially this time of year. This makes it a budget-friendly way to enjoy a gourmet-feeling treat. Plus, they are SO VERSATILE! You can have them for breakfast with your coffee (shhh, don’t tell anyone!), as a delightful addition to a brunch spread, or as a comforting dessert after dinner. They’re also fantastic just for a mid-afternoon pick-me-up with a cup of tea. Honestly, they’ve become my go-to when I want something comforting but also a little bit elegant. They’re just so much more interesting than a plain Sugar Cookie or even a standard pumpkin cookie, and they always get rave reviews.
How do I make pumpkin rose cookies?
Quick Overview
This recipe is all about creating two distinct but complementary mixtures: a soft, spiced cookie dough and a rich, concentrated pumpkin swirl. We’ll gently combine these, swirl them together for that signature rose pattern, and bake them until golden and fragrant. The beauty of this method is that it’s straightforward, yielding a cookie that’s incredibly tender with bursts of intense Pumpkin spice flavor in every bite. It’s designed to be manageable even if you’re not a seasoned baker, and the result is always impressive.
Ingredients
For the Main Batter:
You’ll need about 2 ½ cups of all-purpose flour. Make sure it’s spooned and leveled, not scooped directly from the bag, to avoid making your cookies too dense. A little bit of baking soda, around 1 teaspoon, is crucial for that perfect lift and texture. And ½ teaspoon of salt to balance out all the sweetness. For richness and moisture, we’ll use 1 cup (2 sticks) of unsalted butter, softened but not melted – this is key for texture! I always use good quality butter; it really makes a difference. Then, 1 ½ cups of granulated sugar for sweetness, though you can slightly reduce this if you prefer a less sweet cookie. One large egg, at room temperature, helps bind everything together. And for that lovely subtle flavor, 1 teaspoon of vanilla extract. I find that pure vanilla extract is worth the splurge.
For the Filling:
This is where the magic happens! We’ll start with 1 cup of pumpkin puree. Make sure it’s pure pumpkin puree, NOT Pumpkin Pie filling, as that already has added sugars and spices. A 15-ounce can is usually perfect. To spice it up, we’ll use 1 teaspoon of ground cinnamon, ½ teaspoon of ground nutmeg, ¼ teaspoon of ground cloves, and ¼ teaspoon of ground ginger. These spices are the heart of that cozy fall flavor! We’ll also add ¼ cup of packed brown sugar for a deeper, caramelly sweetness and richness that complements the pumpkin so well. And just a tablespoon of all-purpose flour to help thicken the filling slightly so it holds its shape when swirled. A tiny pinch of salt here too, just to enhance those warm spices.
For the Glaze:
This is totally optional, but I think it adds a lovely touch. You’ll need about 1 cup of powdered sugar. Sift it if you can to avoid any lumps. Then, 2-3 tablespoons of milk or even heavy cream for a richer glaze. You can also use a little bit of the pumpkin puree instead of milk for extra flavor, which I sometimes do! Add ½ teaspoon of vanilla extract for a touch of aroma. If you want to make it even more festive, a tiny pinch of pumpkin pie spice in the glaze can be lovely too. The goal is a pourable but not too runny consistency.
Step-by-Step Instructions
Step 1: Preheat & Prep Pan
First things first, let’s get your oven ready. Preheat it to 375°F (190°C). While the oven is heating up, grab your baking sheets and line them with parchment paper or silicone baking mats. This is a trick I learned ages ago – it prevents sticking and makes cleanup a breeze. You don’t want your beautiful cookies to get stuck! I usually use two large baking sheets, and you can bake them one at a time or both if your oven bakes evenly.
Step 2: Mix Dry Ingredients
In a medium bowl, whisk together your 2 ½ cups of all-purpose flour, 1 teaspoon of baking soda, and ½ teaspoon of salt. Whisking them thoroughly ensures that the leavening agents and salt are evenly distributed throughout the flour, which is super important for consistent cookies. Just give it a good mix until everything looks well combined. Set this bowl aside for now.
Step 3: Mix Wet Ingredients
In a separate, larger bowl, cream together your 1 cup of softened unsalted butter and 1 ½ cups of granulated sugar. You can use a stand mixer with a paddle attachment or a hand mixer for this. Beat them together until the mixture is light and fluffy – this usually takes about 2-3 minutes. Then, beat in the large egg and 1 teaspoon of vanilla extract until just combined. Make sure to scrape down the sides of the bowl a couple of times to get everything incorporated evenly.
Step 4: Combine
Now, it’s time to bring those dry and wet ingredients together. Gradually add the dry ingredient mixture to the wet ingredients, mixing on low speed (or by hand) until just combined. Be careful not to overmix here! Overmixing can develop the gluten too much, leading to tough cookies. Stop mixing as soon as you don’t see any more dry flour streaks. The dough will be soft and slightly sticky.
Step 5: Prepare Filling
In a small bowl, combine the 1 cup of pumpkin puree, 1 teaspoon cinnamon, ½ teaspoon nutmeg, ¼ teaspoon cloves, ¼ teaspoon ginger, ¼ cup packed brown sugar, 1 tablespoon all-purpose flour, and a tiny pinch of salt. Stir everything together until it’s smooth and well combined. This mixture will be thicker than the cookie dough, which is exactly what we want for our beautiful swirl.
Step 6: Layer & Swirl
This is the fun, artistic part! Drop rounded tablespoons of the cookie dough onto your prepared baking sheets, leaving about 2 inches between each cookie since they will spread. Then, using a small spoon or a piping bag with a small round tip, dollop about ½ to 1 teaspoon of the pumpkin filling onto the center of each cookie dough mound. Now, grab a toothpick or the tip of a knife and gently swirl the filling into the dough. You don’t want to over-swirl, just a few gentle motions to create that marbled, rose-like effect. Too much swirling and the colors will blend completely.
Step 7: Bake
Pop those baking sheets into your preheated oven. Bake for 10-12 minutes, or until the edges are lightly golden and the centers look set. The exact time will depend on your oven, so keep an eye on them. You want them to be cooked through but still soft in the middle for that chewy texture. If you’re baking two sheets at once, you might want to rotate them halfway through baking for even cooking.
Step 8: Cool & Glaze
Once baked, let the cookies cool on the baking sheets for about 5 minutes. This is important because they’ll be soft and fragile right out of the oven. After 5 minutes, carefully transfer them to a wire rack to cool completely. While they’re cooling, you can whip up the glaze. In a small bowl, whisk together the 1 cup of powdered sugar, 2-3 tablespoons of milk (or cream, or pumpkin puree!), and ½ teaspoon of vanilla extract until smooth. You’re aiming for a consistency that’s thick enough to coat but still drizzly. Once the cookies are completely cool, drizzle or lightly spread the glaze over the tops. Let the glaze set for about 15-20 minutes before serving or storing.
Step 9: Slice & Serve
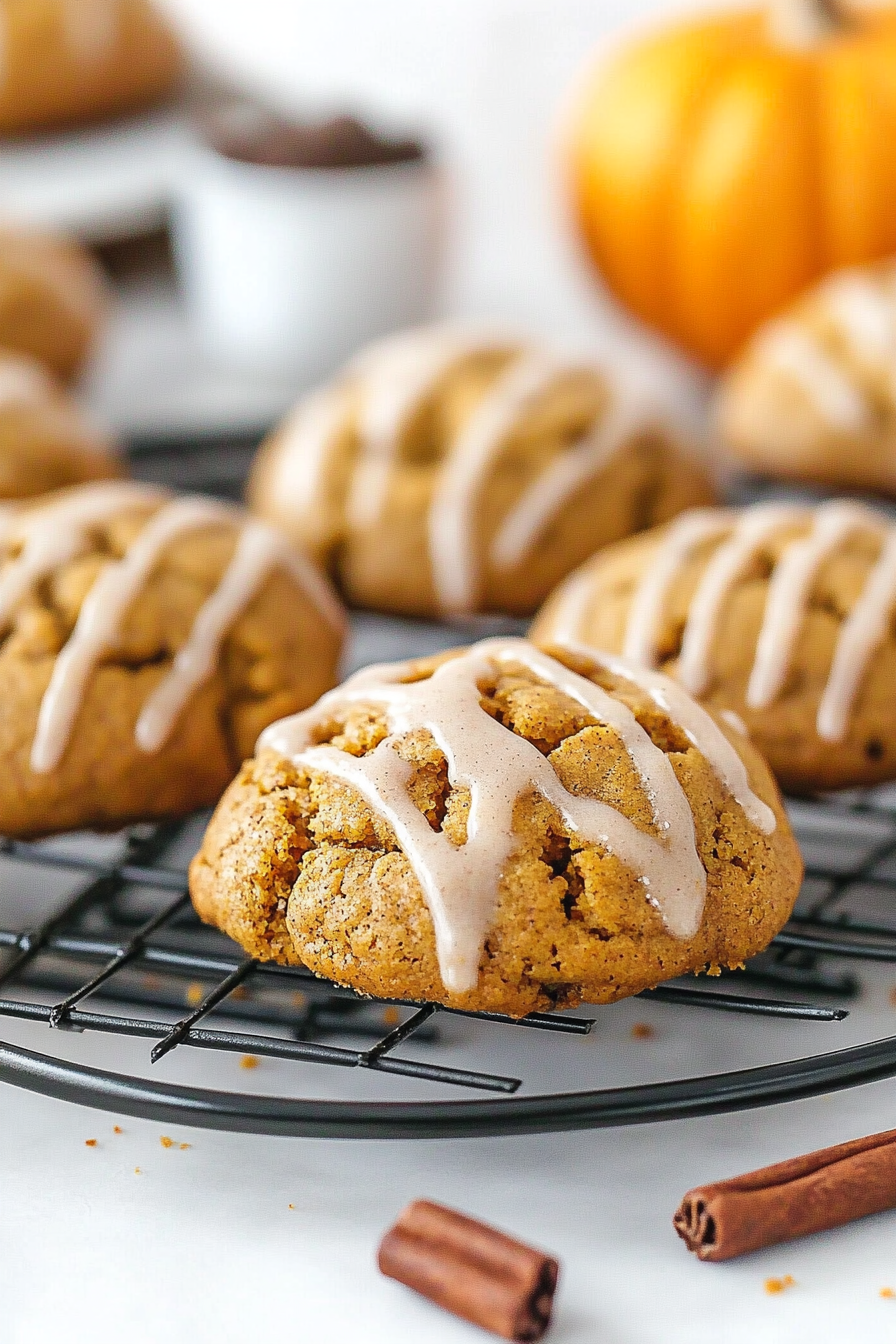
And there you have it! Your gorgeous pumpkin rose cookies are ready to be enjoyed. They’re perfect served as is, but if you want to get fancy, a tiny sprinkle of extra cinnamon on top of the glaze before it sets looks lovely. They’re best served at room temperature when the glaze is firm. I like to arrange them on a pretty platter – they’re a real showstopper!
What to Serve It With
These pumpkin rose cookies are so wonderfully versatile, they fit into almost any meal or snack time. For BREAKFAST, they’re an absolute dream alongside a hot cup of coffee or a creamy latte. They’re not too sweet to start your day, and that hint of spice is just invigorating. I love to have one or two with my morning brew on a weekend. For BRUNCH, they add such an elegant touch. Arrange them on a tiered stand or a decorative plate with other pastries and fruits. They pair beautifully with mimosas or a sparkling cider. Their unique look always gets compliments! As a DESSERT, they are simply divine. Serve them after dinner with a scoop of vanilla bean ice cream, or perhaps with a warm caramel sauce drizzled over them. They also make a wonderful addition to a dessert cheese board. And for COZY SNACKS, this is where they truly shine in my house. They are the ultimate comfort food with a warm mug of apple cider or even a glass of milk. They’re perfect for movie nights or just curling up with a good book. My family has a tradition of making these every year when the first crisp leaves start to fall, and we always have them with hot chocolate. It just feels like the holidays are here!
Top Tips for Perfecting Your Pumpkin Rose Cookies
I’ve made these pumpkin rose cookies more times than I can count, and over the years, I’ve picked up a few tricks that really make a difference. Let’s talk about ingredient prep first. For the cookie dough, make sure your butter is truly softened – not melted, but soft enough that you can easily indent it with your finger. This is crucial for achieving that tender, chewy texture and preventing greasy cookies. If your butter is too cold, it won’t cream properly with the sugar, and if it’s melted, your cookies will spread too much. For the pumpkin filling, using pure pumpkin puree is non-negotiable. Pumpkin pie filling has added sweeteners and spices that will throw off the flavor balance and consistency of your swirl. Always double-check the can! When it comes to MIXING, the golden rule is: do not overmix the dough once you add the flour. Mix until *just* combined. Overmixing develops gluten, which makes cookies tough and chewy in a not-so-good way. For the swirling technique, my best advice is to be gentle and don’t overdo it. You want distinct swirls, not a muddy mess. A few light passes with a toothpick are all you need. Think of it like creating abstract art; embrace the imperfections! For Ingredient SWAPS, if you’re out of regular milk for the glaze, heavy cream will make it richer, or even a splash of orange juice can add a lovely citrus note that pairs well with pumpkin. If you want to make these cookies nuttier, you could try substituting about ½ cup of the all-purpose flour with almond flour, but be aware this can sometimes make cookies a little more crumbly. For BAKING, ovens can be tricky, so trust your eyes and your nose more than the timer sometimes. If your cookies are browning too quickly on the edges, you can loosely tent them with foil for the last few minutes of baking. And when testing for doneness, the edges should look set and lightly golden, while the center should still look slightly soft. They’ll continue to cook on the hot baking sheet after you take them out. For the GLZE, if it’s too thick, add milk a teaspoon at a time until it reaches your desired consistency. If it’s too thin, add more powdered sugar a tablespoon at a time. I’ve also found that letting the cookies cool *completely* before glazing is key. If they’re even slightly warm, the glaze will just melt right off. Don’t rush that cooling process!
Storing and Reheating Tips
One of the best things about these pumpkin rose cookies is that they store beautifully, so you can enjoy them for days. If you’re planning to eat them within a day or two, you can store them at ROOM TEMPERATURE. Just place them in an airtight container. They’ll stay nice and soft. I usually wait until the glaze is fully set before packing them away. If you have a lot of them and want them to last a bit longer, REFRIGERATOR STORAGE is your best bet. Again, an airtight container is key. They’ll keep well in the fridge for up to a week, though they are best within the first 4-5 days for optimal texture. When you want to enjoy one from the fridge, you can eat it cold, or I sometimes let it sit out on the counter for about 15-20 minutes to take the chill off, which brings back some of that soft cookie texture. For longer storage, FREEZER INSTRUCTIONS are fantastic. You can freeze the unfrosted cookies for up to 3 months. Let them cool completely, then wrap them tightly in plastic wrap, and then place them in a freezer-safe bag or container. When you’re ready to eat them, thaw them overnight in the refrigerator, and then frost them once they’re at room temperature. If you’ve already glazed them, you can freeze them too, but the glaze might get a little sticky upon thawing. The best advice for GLAZE TIMING is to always wait until the cookies are completely cool before applying the glaze if you plan to store them for more than a day. If you’re eating them all right away, you can glaze them and serve them within a couple of hours. For cookies that are stored unfrosted, you can make a fresh batch of glaze when you’re ready to serve them.
Frequently Asked Questions
Final Thoughts
So there you have it – my beloved pumpkin rose cookies! I truly hope you give these a try. They’re more than just a recipe to me; they’re a little bit of comfort, a touch of autumnal magic, and a whole lot of deliciousness all rolled into one. The way the warm spices meld with the pumpkin and the sweet swirl is just perfection, and they look so pretty on a plate, don’t they? They’re proof that you don’t need complicated techniques to create something truly special for your family and friends. If you love classic pumpkin treats but are looking for something a little different, something that feels a bit more elevated yet still incredibly approachable, then these are for you. They’re fantastic for holiday gatherings, bake sales, or just because you deserve a treat. I’d love to hear how yours turn out! Please share your thoughts, any variations you try, or even just how much your family devoured them in the comments below. Happy baking, and may your kitchen always smell as wonderful as mine does when these are in the oven!
Pumpkin Rose Cookies
Ingredients
Pumpkin Cookies
- 1 box spice cake mix 15.25 ounces
- 1 can pumpkin puree 15 ounces
Caramel Cream Cheese Frosting
- 8 ounces cream cheese, room temperature
- 4 tablespoons butter, room temperature
- 0.5 cup caramel sauce
- 1 teaspoon vanilla extract
- 3 cups confectioners' sugar
Instructions
Pumpkin Cookies
- Preheat oven to 350°F (175°C). Prepare a baking sheet by spraying it with cooking spray.
- In a large bowl, combine the spice cake mix with the can of pumpkin puree. Mix well until a dough forms.
- Pipe out the dough onto the prepared baking sheet. For a rose effect, you can use a star tip and pipe concentric circles.
- Bake for 14 minutes, or until edges are lightly golden. Allow the cookies to cool completely on the baking sheet before moving them.
Caramel Cream Cheese Frosting
- In a large bowl, beat the cream cheese and butter with a handheld mixer until smooth and creamy, about 1 minute.
- Add the caramel sauce and vanilla extract. Beat until blended.
- Gradually add the confectioners' sugar, one cup at a time, beating on low speed until just incorporated. Add more confectioners' sugar if needed to reach your desired frosting consistency.
- Increase the mixer speed to medium-high and beat for up to 2 minutes until light and fluffy.
- Pipe or spread the cream cheese frosting between two cooled pumpkin cookies to create sandwich cookies.