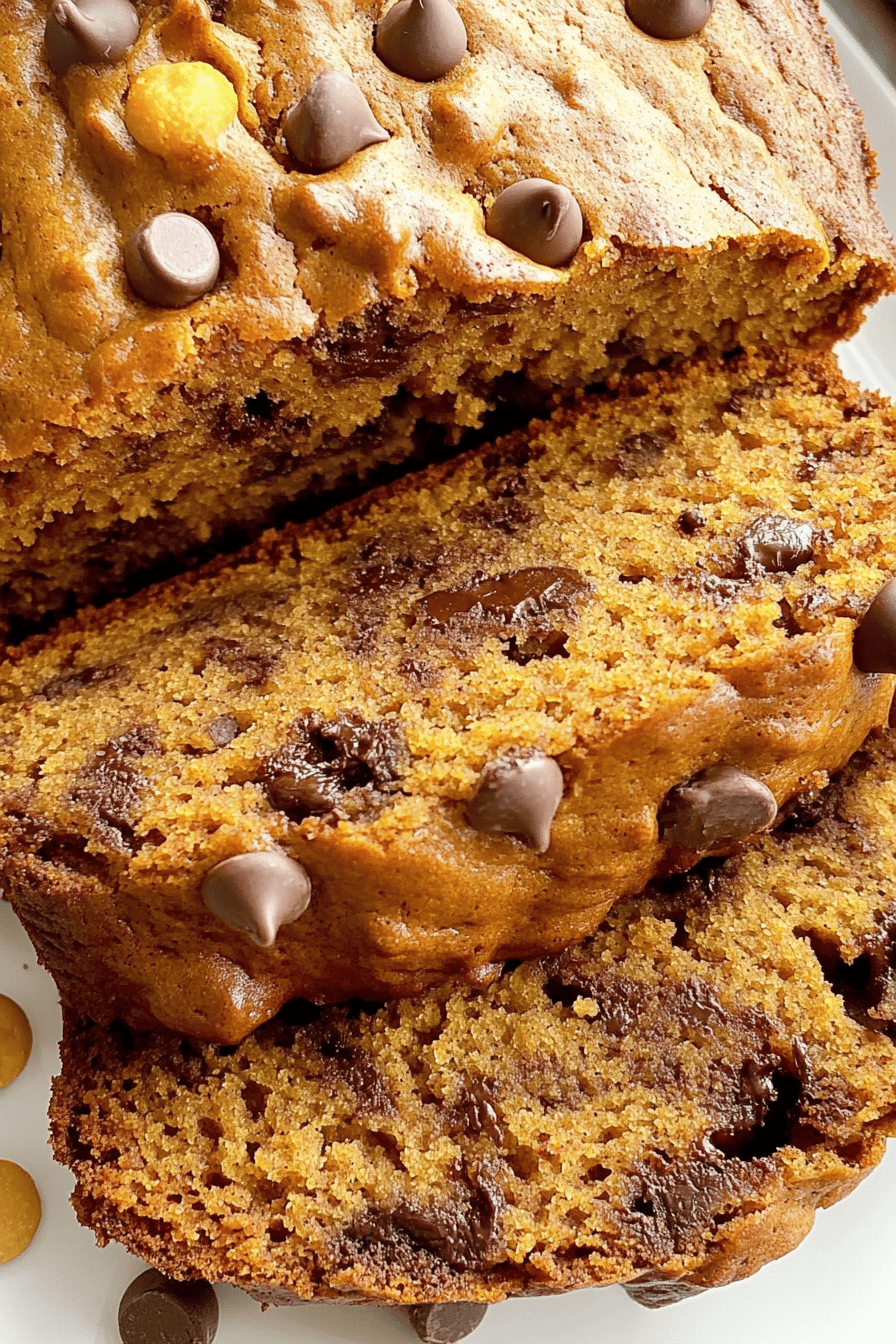
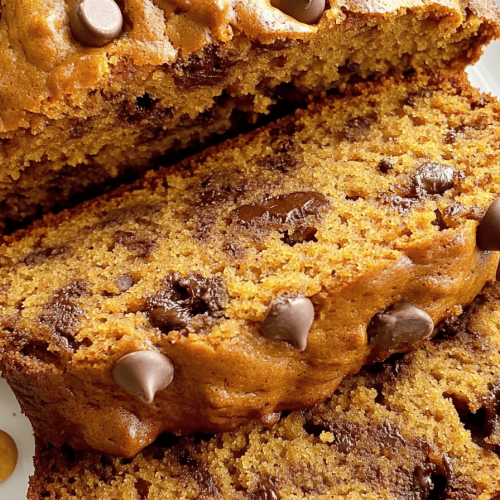
You know those days when you just need a little bit of comfort, something warm and sweet to hold onto? For me, that’s often a crisp autumn morning, or a chilly afternoon when the rain is just drumming against the windows. And in those moments, my mind immediately goes to baking. But sometimes, I don’t have hours to fuss. That’s where these pumpkin banana scones come in. They’re like a hug in a bite, and honestly, they’re my absolute go-to when I want something truly special without a ton of effort. Forget your average dry scone; these are ridiculously moist, bursting with cozy fall flavors, and have this incredible tender crumb that just melts in your mouth. If you’ve ever loved a good banana bread or a hearty pumpkin muffin, you are going to be head-over-heels for this recipe. It’s a little bit of both, all wrapped up in a perfect scone package.
What is a pumpkin banana scones?
So, what exactly are pumpkin banana scones? Think of it as the best of both worlds, married into one delightful baked good. We take the comforting, earthy sweetness of pumpkin – that classic fall flavor we all adore – and blend it with the natural, mellow sweetness and amazing moistness that ripe bananas bring to the table. Instead of a loaf or a muffin tin, we shape this delicious batter into wedges, like traditional scones, but with a twist. This means you get those lovely crisp edges that give way to an incredibly tender, almost cake-like interior. It’s not overly sweet on its own, making it the perfect canvas for a simple glaze or just a dollop of butter. They’re hearty enough for breakfast but decadent enough for dessert. Essentially, they are your shortcut to pure, unadulterated cozy baking bliss.
Why you’ll love this recipe?
There are so many reasons why this pumpkin banana scone recipe has become a staple in my kitchen, and I just know you’re going to fall in love with it too. First off, the flavor profile is just *chef’s kiss*. You get that warm spice from the pumpkin, hints of cinnamon and nutmeg, and then this lovely, subtle banana undertone that just rounds everything out beautifully. It’s not just sweet; it’s complex and comforting. And then there’s the texture – oh my goodness. These scones are so incredibly moist and tender, thanks to the pumpkin and the mashed banana. They don’t crumble apart like some scones can; they hold together perfectly. What I also adore is how surprisingly simple they are to whip up. Seriously, even if you’re not a seasoned baker, you can totally nail this. The ingredients are pretty basic pantry staples for most of us, especially during fall, making it super cost-efficient too. Plus, they’re so versatile! I’ll get into that more later, but you can enjoy these for breakfast with a cup of coffee, as a mid-afternoon pick-me-up, or even as a lighter dessert. They’re just one of those recipes that always delivers. I’ve tried so many scone variations over the years, and this pumpkin banana combination just hits different. It’s familiar, yet somehow new and exciting every time I make it. This recipe is what I reach for when I’m craving something homemade and delicious but I’m short on time or energy.
How do you make pumpkin banana scones?
Quick Overview
The process is wonderfully straightforward. You’ll basically mix your dry ingredients, then your wet ingredients separately, and then gently combine them. The magic happens when you fold in the pumpkin and banana, creating that signature moistness. We’ll then shape the dough, slice it into wedges, and bake them until they’re golden and fragrant. A simple glaze drizzled over the top at the end is the crowning glory, but honestly, they’re amazing even without it. It’s a no-fuss, high-reward kind of recipe that I promise will become a favorite for you too.
Ingredients
For the Main Batter:
2 ½ cups all-purpose flour: I usually just grab whatever’s in my pantry, but if you can, using a good quality unbleached all-purpose flour will give you the best texture. Make sure it’s measured correctly by spooning it into your cup and leveling it off, not scooping directly from the bag, as that can lead to dry scones.
½ cup granulated sugar: This gives us just enough sweetness without being overpowering. You can adjust this slightly, but I find this amount to be perfect for balancing the other flavors.
2 teaspoons baking powder: This is crucial for getting that lovely lift and tenderness in our scones.
½ teaspoon baking soda: A little bit of baking soda helps with the rise and also reacts with the acidic components (like pumpkin) for an even lighter crumb.
½ teaspoon salt: Salt is a flavor enhancer, bringing out the best in all the other ingredients.
1 teaspoon ground cinnamon: The quintessential fall spice! Make sure it’s fresh for the best aroma and flavor.
½ teaspoon ground nutmeg: A little goes a long way, adding that warm, slightly nutty depth.
¼ teaspoon ground ginger (optional): This adds a lovely warmth and a slight zing, but it’s totally fine if you skip it.
½ cup (1 stick) unsalted butter, very cold and cut into small cubes: Using very cold butter is key to flaky scones. It melts in the oven, creating steam pockets that make them light and tender. Make sure it’s cut into pea-sized pieces.
1 cup pumpkin puree (not Pumpkin Pie filling): Make sure you’re using 100% pure pumpkin puree. The pie filling has added sugar and spices, which can mess with the recipe.
2 ripe bananas, mashed until very smooth: The riper the bananas, the sweeter and more moist your scones will be. You should have about ¾ cup of mashed banana. I always save my overripe bananas in the freezer specifically for baking!
1 large egg, lightly beaten: This acts as a binder and adds richness.
¼ cup milk (or buttermilk for extra tang): Whole milk works best for richness, but I’ve had success with 2% too. Buttermilk adds a delightful tang and moisture, making them even more tender.
For the Filling:
This is optional, but oh-so-worth-it if you want an extra layer of flavor and visual appeal. My family loves this part!
2 tablespoons packed light brown sugar: Adds a nice caramel note.
1 teaspoon ground cinnamon: For that warm spice.
Pinch of ground nutmeg: Just a whisper of extra warmth.
For the Glaze:
1 cup powdered sugar: The base for our simple, sweet glaze.
2-3 tablespoons milk (or cream): Start with 2 tablespoons and add more, a teaspoon at a time, until you reach your desired consistency.
½ teaspoon vanilla extract: For a touch of classic flavor.
Step-by-Step Instructions
Step 1: Preheat & Prep Pan
First things first, get your oven preheated to 400°F (200°C). This higher temperature helps the scones puff up nicely. Then, line a baking sheet with parchment paper. This is my little trick for easy cleanup – no stuck-on bits! Make sure the parchment paper covers the entire surface of the baking sheet so your scones don’t stick.
Step 2: Mix Dry Ingredients
In a large bowl, whisk together the flour, granulated sugar, baking powder, baking soda, salt, cinnamon, nutmeg, and ginger (if using). Give it a good whisk to make sure everything is evenly distributed. This ensures consistent flavor and leavening throughout your scones. You want to see a nice, uniform color.
Step 3: Mix Wet Ingredients
In a separate medium bowl, whisk together the pumpkin puree, mashed bananas, lightly beaten egg, and milk (or buttermilk). It might look a little lumpy with the banana, and that’s perfectly fine. Just make sure they’re well combined. I like to ensure my egg is really incorporated so there are no streaks of pure white.
Step 4: Combine
Now, pour the wet ingredients into the bowl with the dry ingredients. Using a spatula or a wooden spoon, gently mix until *just* combined. I cannot stress this enough: do NOT overmix! Overmixing develops the gluten in the flour, which will result in tough, dense scones. Stop mixing as soon as you no longer see dry flour. A few streaks of flour are okay; they’ll get incorporated later. The dough will be quite sticky at this point, and that’s exactly what you want for moist scones.
Step 5: Prepare Filling
If you’re making the filling, in a small bowl, mix together the brown sugar, cinnamon, and nutmeg. This little mixture is going to add a delightful spiced layer when we swirl it in.
Step 6: Layer & Swirl
Turn the sticky dough out onto your parchment-lined baking sheet. It’s going to be a shaggy, wet-ish dough. You can either gently pat it into a disc about ¾ inch thick, or for a more rustic look, just spread it out a bit. Now, sprinkle the cinnamon-sugar mixture evenly over the dough. If you’re feeling fancy, you can gently swirl it in with a butter knife or the back of your spoon, creating pretty patterns. Don’t over-swirl; we want distinct layers of spice. Then, gently pat or shape it again to about ¾ inch thickness. Using a sharp knife or a bench scraper, cut the disc into 8 wedges, like you would a pizza. You can also gently score lines to guide where you’ll cut later.
Step 7: Bake
Pop that baking sheet into your preheated oven. Bake for 20-25 minutes, or until the edges are golden brown and a toothpick inserted into the center comes out clean (or with a few moist crumbs, but no wet batter). The aroma that fills your kitchen during this time is just divine – pure fall comfort!
Step 8: Cool & Glaze
Once baked, carefully remove the baking sheet from the oven. Let the scones cool on the baking sheet for about 5-10 minutes. This allows them to firm up slightly. Then, transfer them to a wire rack to cool completely before glazing. For the glaze, whisk together the powdered sugar, 2 tablespoons of milk, and vanilla extract in a small bowl. Add more milk, a teaspoon at a time, until you get a pourable but not too thin consistency. Drizzle the glaze over the cooled scones. If you want a thicker glaze, use less milk. If you want it more watery and drippy, add more milk.
Step 9: Slice & Serve
Once the glaze has set a bit, you can slice through the score marks you made earlier if you didn’t fully cut them apart. Or, just serve them as is. These are best served the same day they are baked, while they’re still fresh and the glaze is lovely and soft. But don’t worry, they’re still delicious the next day too!
What to Serve It With
These pumpkin banana scones are incredibly versatile, making them perfect for so many occasions. Here are some of my favorite ways to enjoy them and serve them to friends and family:
For Breakfast: The simplest and often the best! Pair a scone with a hot cup of coffee or a steaming mug of tea. They’re hearty enough to keep you satisfied until lunch, and the subtle sweetness is a lovely way to start the day. I often just have one with my morning coffee while I’m catching up on emails. They’re also great with a side of yogurt and berries if you want a more balanced meal.
For Brunch: Elevate them by arranging them on a beautiful platter. They look gorgeous nestled amongst a spread of other brunch favorites like scrambled eggs, crispy bacon, fresh Fruit Salad, and maybe some mini quiches. A mimosa or a sparkling cider pairs wonderfully with the warm spices of the scone.
As Dessert: Don’t underestimate these for a sweet treat! While they’re not overly sweet, the glaze adds a lovely dessert-like touch. Serve them warm with a scoop of vanilla bean Ice Cream or a dollop of lightly sweetened whipped cream. A drizzle of caramel sauce over the top takes them to another level of indulgence. They’re a much lighter alternative to a heavy cake or pie.
For Cozy Snacks: This is perhaps my most frequent use for them. When that 3 pm slump hits, or I’m craving something a little special in the evening but don’t want a full dessert, a scone is perfect. They’re fantastic with a glass of cold milk, or a warm chai latte. My kids absolutely love them after school with a glass of milk – they disappear in minutes!
Top Tips for Perfecting Your Pumpkin Banana Scones
I’ve made these scones more times than I can count, and over the years, I’ve picked up a few tricks that really help ensure they turn out perfectly every single time. I hope these tips help you nail them too!
Zucchini Prep: Wait, did I say zucchini? Oh, I meant BANANA! My brain sometimes jumps ahead. So, for the banana, make sure they are *very* ripe. The browner the peel, the better! This ensures maximum sweetness and moisture, which is key for tender scones. Mash them until they are completely smooth with no big lumps. This helps them incorporate evenly into the batter and contribute to that melt-in-your-mouth texture. If your bananas aren’t super ripe, you might find your scones aren’t as moist as you’d like.
Mixing Advice: This is probably the most critical tip for scone making. Overmixing is the enemy of tender scones. As soon as you add the wet ingredients to the dry, mix *just* until there are no dry streaks of flour left. It’s better to have a few small lumps in the dough than to overwork it. The dough will be sticky, and that’s a good thing! Resist the urge to add more flour, as this will make them dry. Remember, gentle hands make tender scones!
Swirl Customization: The cinnamon-sugar swirl is optional but adds such a lovely touch. Don’t go overboard with the swirling, though. You want to see distinct ribbons of spiced sugar running through the scone, not a muddy mess. A gentle swirl with a knife or spoon is perfect. For an even more rustic look, you can skip the swirl entirely and just sprinkle the sugar on top before baking for a little sparkle and crunch.
Ingredient Swaps: If you don’t have buttermilk, regular milk works fine, but adding a teaspoon of lemon juice or vinegar to regular milk and letting it sit for 5 minutes creates a good buttermilk substitute. For a dairy-free option, I’ve had success using a plant-based milk like almond or soy milk, and using vegan butter. The texture might be slightly different, but still delicious! If you’re out of granulated sugar, you can use an equal amount of brown sugar, but it might make the scones a bit darker and chewier.
Baking Tips: Always preheat your oven thoroughly. A hot oven is essential for a good rise. I usually bake these on the middle rack to ensure even cooking. If you find the tops are browning too quickly before the inside is cooked, you can loosely tent the baking sheet with foil for the last 10-15 minutes of baking. The toothpick test is your best friend for doneness – just make sure you’re testing in the thickest part of a scone.
Glaze Variations: If you’re not a fan of powdered sugar glaze, try a cream cheese frosting drizzle – it’s divine with pumpkin! Or, for a healthier option, just dust them with a little extra cinnamon or powdered sugar. For a thicker, more decorative glaze, use less liquid. For a thinner, more drippy glaze, add more liquid a teaspoon at a time until it’s the consistency you like. You can also add a touch of orange zest to the glaze for a citrusy kick.
Storing and Reheating Tips
These pumpkin banana scones are at their absolute best when they’re fresh, but they do store quite well, and I always like to have a plan for any leftovers (though there rarely are any!).
Room Temperature: If you plan to eat them within a day or two, you can store them in an airtight container at room temperature. I like to place a piece of parchment paper between layers if I’m stacking them to prevent sticking. They’ll maintain their moisture reasonably well for about 2 days. Make sure the glaze is fully set before sealing the container.
Refrigerator Storage: For longer storage, up to 4-5 days, keep them in an airtight container in the refrigerator. The texture might become a little firmer, but they’ll still be very tasty. I find that gently warming them up makes them taste almost as good as fresh.
Freezer Instructions: These scones freeze beautifully! Once they are completely cooled (and the glaze is set), wrap them individually and tightly in plastic wrap, then place them in a freezer-safe bag or container. They can be stored in the freezer for up to 2-3 months. To thaw, simply remove them from the freezer and let them thaw at room temperature for a few hours, or gently reheat them. You can also thaw them in the refrigerator overnight.
Glaze Timing Advice: If you plan to freeze your scones, I highly recommend glazing them *after* they’ve been thawed and reheated. The glaze can sometimes become a bit sticky or melty if frozen and thawed. Alternatively, if you want to glaze them before freezing, make sure the glaze is completely dry and hardened before wrapping. Another option is to freeze unfrosted scones and then make a fresh batch of glaze to add once they are thawed and ready to eat.
Reheating: To refresh slightly stale scones, you can warm them up in a 300°F (150°C) oven for about 5-10 minutes, or until just heated through. This brings back some of their tenderness and makes them smell wonderful again. You can also pop them in the microwave for about 10-15 seconds, but be careful not to overheat them, as they can become tough.
Frequently Asked Questions
Final Thoughts
I really hope you give these pumpkin banana scones a try. They are truly special, offering that perfect balance of cozy fall flavors and incredible texture. They’re proof that you don’t need complicated steps or fancy ingredients to create something truly memorable and comforting in your own kitchen. Whether you’re looking for a delightful breakfast treat, a special brunch item, or just a little something sweet to brighten your day, these scones are a winner. They’re the kind of recipe that makes your home feel extra warm and inviting. If you love this recipe, you might also enjoy my Spiced Apple Cider Donuts or my Easy Cranberry Orange Bread for more seasonal baking delights. I can’t wait to hear how yours turn out! Please feel free to share your thoughts, any variations you tried, or your favorite way to enjoy them in the comments below. Happy baking!
Pumpkin Banana Scones
Ingredients
Main Ingredients
- 2 cup all-purpose flour
- 0.33 cup granulated sugar
- 2 teaspoon baking powder
- 0.5 teaspoon ground cinnamon
- 0.25 teaspoon ground nutmeg
- 0.125 teaspoon ground ginger
- 0.125 teaspoon salt
- 0.33 cup unsalted butter, cold and cut into cubes
- 0.5 cup pureed pumpkin
- 0.5 cup mashed ripe banana
- 0.33 cup heavy cream
- 1 large egg, lightly beaten
Instructions
Preparation Steps
- Preheat oven to 400°F (200°C). Line a baking sheet with parchment paper.
- In a large bowl, whisk together flour, sugar, baking powder, cinnamon, nutmeg, ginger, and salt.
- Cut in the cold butter using a pastry blender or your fingertips until the mixture resembles coarse crumbs.
- In a separate bowl, whisk together the pureed pumpkin, mashed banana, heavy cream, and beaten egg.
- Add the wet ingredients to the dry ingredients and stir until just combined. Do not overmix.
- Turn the dough out onto a lightly floured surface and gently pat into a 0.75-inch thick disk.
- Cut the disk into 8 wedges using a knife or bench scraper.
- Place the scones on the prepared baking sheet.
- Bake for 18-20 minutes, or until golden brown and a toothpick inserted into the center comes out clean.
- Let cool on the baking sheet for a few minutes before transferring to a wire rack to cool completely.