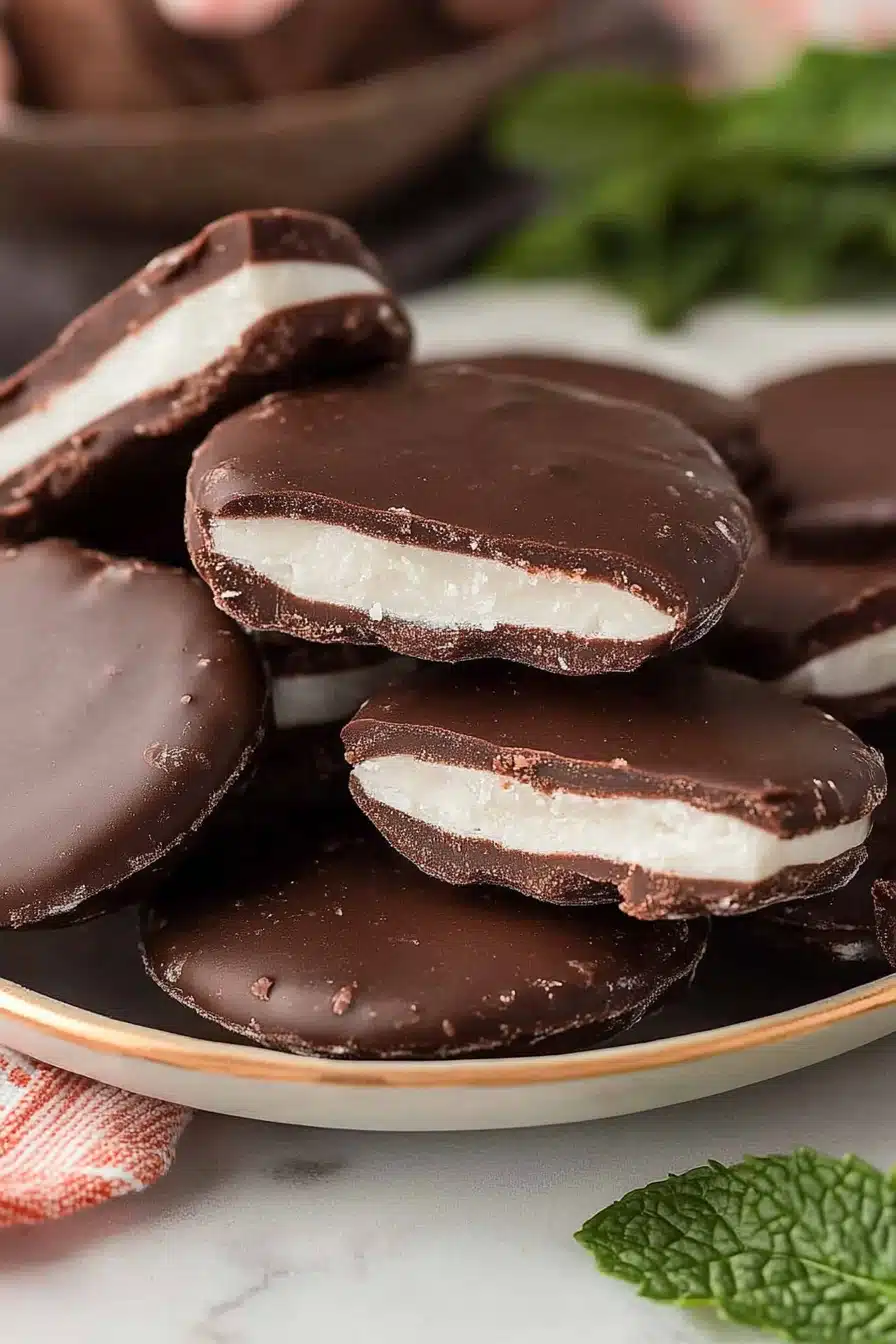
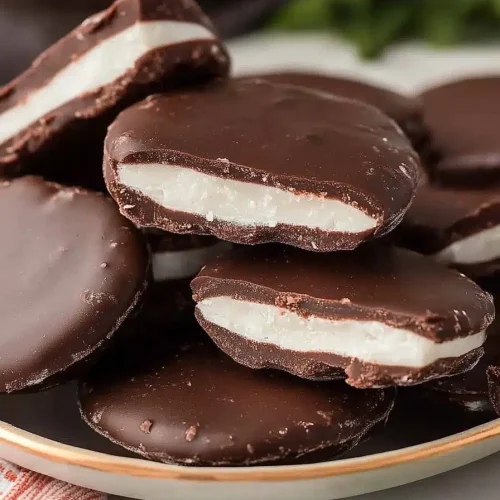
You know those moments? The ones where a craving hits, a deep, almost primal urge for something sweet and utterly satisfying, but you *really* don’t want to spend hours in the kitchen? Yeah, I live for those moments, and this recipe for peppermint patties is my absolute saving grace. Forget those store-bought ones that are sometimes too chalky or have an artificial flavor that just screams “processed.” We’re talking about melt-in-your-mouth goodness, a perfect balance of sweet and cool mint, all enrobed in a luscious dark chocolate coating. It reminds me so much of being a kid, sneaking one after dinner, but the grown-up version is so much richer and more flavorful. If you love those classic thin mints you might get around the holidays, prepare to have your mind blown because these homemade peppermint patties are ten times better and surprisingly simple to whip up!
What are peppermint patties?
So, what exactly are these delightful little treats? At their heart, peppermint patties are a confection made from a smooth, melt-in-your-mouth fondant center infused with a bright, refreshing peppermint flavor. This soft center is then coated in a rich, usually dark, chocolate shell. Think of it as the ultimate after-dinner mint, but with a satisfying chewiness and a clean, crisp minty finish that dances on your tongue. The name itself is pretty straightforward – they’re patties, and they’re peppermint flavored! The magic really lies in the texture contrast: that cool, slightly yielding center against the snap of the chocolate. It’s a deceptively simple combination that’s been a favorite for generations, and I’m so excited to share my version with you!
Why you’ll love this recipe?
Honestly, there are so many reasons I keep coming back to this peppermint patty recipe, and I know you will too! First off, the flavor is just out of this world. It’s that perfect cool, minty burst that isn’t overwhelming, paired with the deep, slightly bitter notes of dark chocolate. It’s sophisticated and comforting all at once. Then there’s the simplicity. I know “Homemade candy” can sound intimidating, but this is genuinely one of the easiest confections I’ve ever made. You don’t need any fancy equipment, just a little patience and a few basic ingredients. Speaking of ingredients, this recipe is incredibly cost-effective. You’re likely to have most of what you need in your pantry already, and the things you might need to pick up are super affordable. This means you can make a big batch without breaking the bank! And versatility? Oh yes! These aren’t just for after dinner. I love having them with my morning coffee, tucking a few into lunchboxes for a special treat, or making a big platter for parties. They’re also fantastic when you need a little pick-me-up during a busy afternoon. What I love most about this recipe, though, is the feeling it gives me. It’s nostalgic, it’s rewarding, and it’s a little slice of homemade happiness that always seems to bring a smile to everyone’s face. It’s way better than any store-bought version, and you get to say, “I made these!”
How do I make peppermint pat
Quick Overview
The process is really quite straightforward: we’ll make a simple sugar syrup for the fondant center, add in our minty flavor, shape it into little patties, and then dip them in chocolate. The key is a bit of patience during the cooling and shaping stages, but the payoff is so worth it. It’s a recipe that proves you don’t need to be a pastry chef to create something truly special. You’ll end up with these beautiful, glossy peppermint patties that taste like they came straight from a gourmet chocolate shop!
Ingredients
For the Main Filling:
3 cups granulated sugar
1 cup water
1/4 teaspoon cream of tartar (this helps prevent crystallization and keeps the fondant smooth)
2 teaspoons peppermint extract (use a good quality one, it makes a difference!)
1/4 teaspoon green food coloring (optional, but it gives them that classic look)
For the Chocolate Coating:
1 1/2 pounds good quality dark chocolate chips or chopped dark chocolate (I prefer something with at least 60% cocoa)
2 tablespoons coconut oil or vegetable shortening (this helps the chocolate melt smoothly and set with a nice sheen)
Step-by-Step Instructions
Step 1: Preheat & Prep Pan
First things first, let’s get our workspace ready. Line a baking sheet with parchment paper. You don’t want these sticking! Make sure you have enough space in your fridge or a cool spot to place this sheet later. I usually clear out a shelf so I can slide it in easily without disturbing anything. This step is super simple, but it’s crucial for keeping things organized as we go.
Step 2: Mix Dry Ingredients
In a medium saucepan, combine the granulated sugar, water, and cream of tartar. Stir them together gently over medium heat until the sugar is completely dissolved. You shouldn’t feel any grittiness when you rub a little between your fingers. Once the sugar is dissolved, stop stirring. This is important because stirring can encourage crystallization.
Step 3: Mix Wet Ingredients
Boil the sugar syrup mixture without stirring until it reaches 240 degrees Fahrenheit (115 degrees Celsius) on a candy thermometer. This is the soft-ball stage. Once it hits that temperature, immediately remove the pan from the heat. Let it sit undisturbed for about 5-10 minutes to cool slightly. This cooling step is vital for the fondant to form correctly.
Step 4: Combine
Now, the magic happens! Add the peppermint extract and the food coloring (if using) to the slightly cooled syrup. Stir vigorously with a wooden spoon or a sturdy spatula. You’ll notice the mixture start to turn opaque and thicken, almost like magical frosting forming. Keep stirring until it becomes very thick and creamy, and the color is evenly distributed. This can take a few minutes. It will feel like you’re stirring through something substantial. You want it to be a thick, smooth paste.
Step 5: Prepare Filling
Once the fondant is thick and has lost most of its heat (it should be warm, not hot to the touch), you can start shaping. This is where your hands come in! I like to lightly grease my hands with a tiny bit of vegetable oil or cooking spray so the fondant doesn’t stick too much. Take about a tablespoon of the fondant mixture and roll it into a small ball, then flatten it into a disc about 1/2 inch thick and 1 1/2 to 2 inches in diameter. They don’t have to be perfectly round; a little rustic charm is lovely!
Step 6: Layer & Swirl
Place the shaped peppermint patty centers onto your prepared parchment-lined baking sheet. Make sure they have a little space between them so they don’t stick together. Once all the fondant is shaped, pop the baking sheet into the refrigerator for at least 30 minutes, or until firm. This chilling step is crucial. It makes them firm enough to handle and dip in the chocolate without falling apart. They should feel solid to the touch.
Step 7: Bake
There’s no baking involved for the fondant centers! They firm up in the refrigerator. So, while the centers are chilling, you can get your chocolate ready. This is the “baking” part, in a way – it’s about tempering or simply melting the chocolate perfectly.
Step 8: Cool & Glaze
Once the centers are firm, melt the dark chocolate chips and coconut oil/shortening together. You can do this in a double boiler over simmering water, stirring constantly until smooth, or in the microwave in 30-second intervals, stirring between each, until melted and smooth. Once melted, it’s time to dip! You can use a fork, a toothpick, or even specialized dipping tools. Drop a chilled peppermint patty center into the chocolate, turn it to coat completely, then lift it out and tap off any excess chocolate. Place the coated patty back onto the parchment paper. Repeat with all your centers. If the chocolate starts to seize or get too thick, gently reheat it. Let the dipped patties sit at room temperature until the chocolate is set, which usually takes about 30 minutes. For a really glossy finish, some people like to place them in the fridge for a few minutes, but I find room temperature works best for a smooth set.
Step 9: Slice & Serve
Once the chocolate is completely set, your homemade peppermint patties are ready to enjoy! You can gently peel them off the parchment paper. They look absolutely gorgeous just as they are. If you like, you can drizzle a little extra melted chocolate over the tops in a decorative pattern, but honestly, they’re perfect without any fuss.
What to Serve It With
These homemade peppermint patties are so wonderfully versatile, you can enjoy them in so many ways! For breakfast, I sometimes have one with my morning cup of black coffee. The cool mint and rich chocolate cut through the coffee’s bitterness beautifully. For brunch, I like to arrange a few on a small dessert plate with a tiny sprig of mint. They feel a bit fancy without any effort! As a dessert, they’re pure indulgence. I’ll serve them after a rich meal like lasagna or a hearty stew, as their refreshing quality cleanses the palate perfectly. They also pair wonderfully with a scoop of vanilla bean ice cream or a warm brownie. And for those cozy snack moments? They’re the ultimate treat. I often have one (or two!) with a glass of cold milk, just like I did as a kid. Sometimes, I’ll even crumble a few over a bowl of chocolate ice cream for an extra special treat. My family loves them after movie nights, and they always disappear fast!
Top Tips for Perfecting Your Peppermint Patties
I’ve made these peppermint patties more times than I can count, and I’ve learned a few tricks along the way that I think will really help you nail them! First, when you’re making the fondant center, the cream of tartar is your friend. It might seem like a tiny ingredient, but it truly prevents that grainy texture that can ruin a batch of fondant. So, don’t skip it! For the mixing of the fondant, be patient. It takes a bit of elbow grease to get it to that thick, smooth paste consistency, but keep going! The more you stir, the smoother and more pliable it becomes. When shaping the patties, a little bit of oil on your hands really does make a difference. You don’t need much, just enough to prevent sticking. If your fondant feels too sticky, a tiny bit more oil; if it’s too dry, a tiny splash of water might help, but be careful not to add too much. For the chocolate coating, use good quality chocolate. It doesn’t have to be the most expensive, but something decent makes a world of difference in taste and how smoothly it melts. And that little bit of coconut oil or shortening is key for that lovely sheen and for making sure the chocolate sets up nicely without being brittle. When dipping, a fork works perfectly for most people. Just let the excess chocolate drip off before placing it on the parchment. If your chocolate starts to get too thick while you’re dipping, don’t panic! Just pop it back into the microwave for 15-20 seconds or warm it gently over the double boiler for a minute. This recipe is so forgiving, and even if your patties aren’t perfectly shaped, they’ll taste amazing. My biggest “lesson learned” was not to rush the chilling process of the fondant centers. They *must* be firm before dipping, or you’ll end up with a melty mess. Trust me, I’ve been there!
Storing and Reheating Tips
Storing these delicious peppermint patties is pretty straightforward, and they keep wonderfully, which is a huge bonus! At room temperature, if they’re fully set in their chocolate coating, they’ll stay good for about a week. Just keep them in an airtight container. I like to place a piece of parchment paper between layers if I’m stacking them, just to prevent any sticking, although it’s usually not a problem once the chocolate is fully hardened. If your kitchen is particularly warm, you might want to store them in the refrigerator, but be aware that sometimes condensation can form on the chocolate once it comes back to room temperature, which can slightly dull the shine. For longer storage, definitely go for the refrigerator. They’ll maintain their quality for up to two to three weeks in an airtight container. The chocolate might firm up a bit more in the fridge, so let them sit out for about 10-15 minutes before enjoying to get that perfect melt. If you want to make a really big batch and keep them for a special occasion down the line, the freezer is your best friend! Wrap them very well in plastic wrap, then place them in a freezer-safe bag or container. They can last for up to three months in the freezer. To thaw, simply transfer them from the freezer to the refrigerator overnight, then let them come to room temperature for about 30 minutes before serving. The glaze, if you add any extra drizzle, holds up well with all these storage methods, as long as it’s fully set before storing.
Frequently Asked Questions
Final Thoughts
I truly hope you give these homemade peppermint patties a try. They are such a delightful treat, and the process of making them is surprisingly rewarding. It’s more than just a recipe; it’s a little bit of homemade joy that you can share with everyone you love. The combination of that cool, smooth mint filling and the rich, satisfying dark chocolate coating is just unbeatable. They’re perfect for special occasions, a sweet ending to any meal, or just because you deserve a little something special. If you love these, you might also enjoy my recipes for Classic Fudge Brownies or No-Bake Chocolate Oatmeal Cookies, which are also crowd-pleasers. I can’t wait to hear how yours turn out! Please leave a comment below with your thoughts or any fun variations you tried. Happy baking, or should I say, happy candy-making!
Homemade Peppermint Patties
Ingredients
Peppermint Filling
- 1 jar Marshmallow Cream (Fluff) 7 ounce
- 10 tablespoons unsalted butter softened
- 1.5 teaspoon vanilla extract
- 1 teaspoon peppermint extract
- 5.5 cups powdered sugar
Chocolate Coating
- 1 package Ghirardelli dark chocolate melting wafers 16 ounce
- 0.5 package Ghirardelli white chocolate melting wafers optional for football shapes
Instructions
Preparation Steps
- In a large mixing bowl, beat marshmallow cream, butter, and extracts until fully combined. Add in powdered sugar and mix on medium speed until well blended. It may take a couple of minutes for the mixture to come together.
- Line a large baking sheet with parchment paper. Using about 1 tablespoon of filling per patty, shape into a ball, then flatten it for a traditional round shape. If you want to make football shapes, shape into a ball and then pinch the ends. Continue until all filling is used. Cover with plastic wrap and freeze for at least 2 hours, or preferably overnight, until firm.
- Melt Ghirardelli dark chocolate melting wafers according to package directions. Using a toothpick, dip each frozen peppermint patty into the melted chocolate. Let the excess chocolate drip off and place the coated patty back onto the parchment paper. Repeat until all patties have been coated. The chocolate should set quickly due to the cold patties.
- If making football shapes, melt the white chocolate wafers according to package directions. Pour the melted white chocolate into a small zip-top bag, snip off a tiny corner of the bag, and pipe laces onto the chocolate-coated football shapes.
- Store the peppermint patties at room temperature in a covered container.