Oh, where do I even begin with these oreo peanut butter cookies? If there’s one thing that can instantly transport me back to childhood sleepovers and cozy evenings, it’s the smell of warm, freshly baked cookies filling the house. And these? These are in a league of their own. Forget your basic Chocolate Chip, these are the real deal, a magical fusion of two absolute classics. I remember the first time I tried to combine the heavenly, crumbly goodness of an Oreo with the rich, comforting embrace of peanut butter in cookie form. It was a revelation! Honestly, if you’re anything like me and find it impossible to pick just *one* favorite cookie flavor, this oreo peanut butter cookie recipe is your new best friend. It’s like the cookie equivalent of a perfect duet, where both stars shine brilliantly together. They’re decadent, they’re fun, and they disappear faster than you can say “more, please!”
What is Oreo Peanut Butter Cookies?
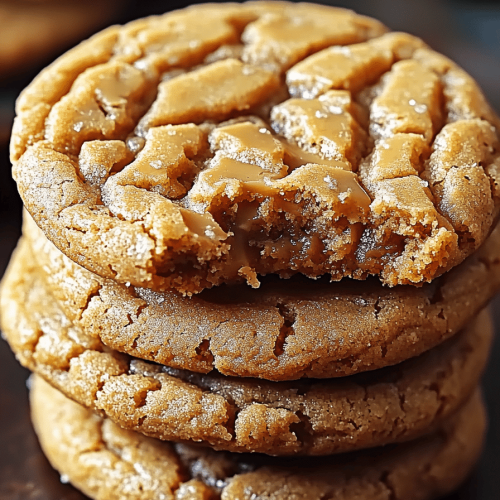
So, what exactly are these delightful little treats we’re talking about? Think of them as the ultimate mashup for anyone who loves a good cookie, especially if you’re a fan of the dynamic duo that is Oreos and Peanut Butter. These aren’t just cookies *with* Oreos crumbled in, oh no. We’re talking about a rich, chewy peanut butter cookie base that’s studded with chunks of real Oreo cookies. And then, if that wasn’t enough heaven, we often add a swirl of peanut butter right into the dough, or even a drizzle of peanut butter icing on top. It’s essentially taking everything you love about a classic peanut butter cookie and amping it up with that unmistakable, satisfying crunch and chocolatey flavor of an Oreo. It’s the cookie that dreams are made of, for sure!
Why you’ll love this recipe?
Let me tell you, there are a million reasons why this oreo Peanut Butter cookie recipe has become a staple in my kitchen, and I’m pretty sure it’ll become one of yours too. First off, the flavor explosion is just incredible. You get that deep, nutty, buttery taste from the peanut butter cookie, and then BAM! You hit a pocket of crunchy, chocolatey Oreo goodness. It’s a textural and flavor party in every single bite. My kids go absolutely bonkers for these; they’re always the first ones to disappear from the cookie jar. And for something that tastes so gourmet and decadent, they are surprisingly simple to whip up. Seriously, if you can stir ingredients together, you can make these! I often make a batch on a weeknight when a craving hits, and it’s just so satisfying. Plus, they’re super budget-friendly. Most of the ingredients are pantry staples, and even the Oreos and peanut butter aren’t going to break the bank. They’re also wonderfully versatile. You can add a chocolate drizzle, some sea salt on top, or even stuff them with a little extra peanut butter filling. They’re perfect for bake sales, potlucks, or just making a regular Tuesday feel a little bit special. I’ve tested variations of this recipe over the years, and this specific balance of peanut butter to Oreo, and the chewy-to-crunchy texture, is just *chef’s kiss* perfection. It’s that go-to recipe I always come back to when I want a guaranteed crowd-pleaser.
How do I make Oreo Peanut Butter Cookies?
Quick Overview
Making these oreo Peanut Butter cookies is a joy because it’s straightforward and rewarding. You’ll start by creaming your butter and sugars, then adding your wet ingredients, followed by the dry. The magic happens when you fold in your chopped Oreos and that extra peanut butter goodness. A quick chill to help them hold their shape, a scoop onto a baking sheet, and then a short bake until they’re golden brown and smell absolutely divine. What makes this method so great is that it ensures a wonderfully chewy cookie center with slightly crisp edges, and perfectly distributed Oreo pieces throughout. It’s really that simple, and the results are always spectacular!
Ingredients
For the Main Batter:
You’ll need some softened, unsalted butter – about a cup (that’s two sticks). Make sure it’s not melted, just softened to room temperature. This is key for getting that light and fluffy texture when you cream it with the sugar. Speaking of sugar, we’re using both granulated sugar and light brown sugar. About 3/4 cup of granulated and 1 cup of packed light brown sugar. The brown sugar is going to give you that lovely moisture and chewy texture that makes these cookies irresistible. Don’t skimp on it! For the Peanut Butter, about 1 cup of creamy peanut butter. I like to use standard creamy peanut butter, not the natural kind where the oil separates, as it can affect the texture. You’ll also need two large eggs, straight from the fridge is fine, and a teaspoon of pure vanilla extract. Vanilla adds a subtle depth that really rounds out the flavors. For the dry ingredients, we’ve got our all-purpose flour – about 2 1/4 cups. I always measure my flour by spooning it into the cup and leveling it off, rather than scooping directly from the bag, to avoid packing too much in. Then, 1 teaspoon of baking soda for lift, and about 1/2 teaspoon of salt to balance out the sweetness and enhance all those delicious flavors.
For the Oreo Goodness:
This is where the fun really begins! You’ll need about 15-20 Oreo cookies, roughly chopped. You can chop them by hand, pulse them gently in a food processor, or even just break them up with a rolling pin inside a ziplock bag. I like to leave some chunks a little bigger for a more satisfying bite. If you want an extra punch of peanut butter flavor, you can also add about 1/4 cup of extra creamy peanut butter, just melted slightly so it’s pourable, to the batter before you add the dry ingredients. This makes them extra gooey!
Step-by-Step Instructions
Step 1: Preheat & Prep Pan
First things first, preheat your oven to 375 degrees Fahrenheit (190 degrees Celsius). While the oven is warming up, grab your baking sheets and line them with parchment paper or silicone baking mats. This is a lifesaver for preventing sticking and making cleanup a breeze. Make sure your baking sheets are completely cool before you start placing cookie dough on them. If they’re warm, the dough will start to melt and spread too quickly.
Step 2: Mix Dry Ingredients
In a medium-sized bowl, whisk together your all-purpose flour, baking soda, and salt. Whisking them thoroughly ensures that the leavening agent and salt are evenly distributed throughout the dough, which means more consistent cookies every time. Give it a good couple of stirs until it all looks like one uniform mixture. Set this bowl aside for now.
Step 3: Mix Wet Ingredients
In a large bowl, using an electric mixer (handheld or stand mixer with the paddle attachment works perfectly), cream together your softened butter, granulated sugar, and light brown sugar. Beat them until the mixture is light and fluffy, usually about 2-3 minutes. Scrape down the sides of the bowl as needed. Then, beat in the peanut butter until it’s well combined. Next, add your eggs, one at a time, beating well after each addition. Stir in the vanilla extract. This creates the luscious base for our cookies.
Step 4: Combine
Now, it’s time to bring it all together. Gradually add the dry ingredients to the wet ingredients, mixing on low speed until just combined. Be careful not to overmix! Overmixing can develop the gluten in the flour too much, resulting in tougher cookies. You want to stop as soon as you don’t see any streaks of dry flour. If you’re adding the extra melted peanut butter, now’s the time to gently stir it in. The dough will be soft and sticky, and that’s exactly what we want!
Step 5: Prepare Filling (Optional but Recommended!)
If you want an extra gooey surprise inside, this is where you prep it. In a small bowl, mix about 1/4 cup of creamy peanut butter with a tablespoon or two of powdered sugar until it forms a thick, paste-like consistency. This will make it easier to handle and keep its shape when you’re assembling the cookies.
Step 6: Layer & Swirl (or Fold!)
Gently fold in your chopped Oreo cookies into the cookie dough until they are evenly distributed. If you’re using the extra peanut butter filling, now you can form balls of cookie dough, flatten them slightly, place a small dollop of the peanut butter filling in the center, and then gently fold the dough around it to enclose it. Alternatively, you can just make regular cookie dough balls and then gently press a few extra Oreo chunks on top before baking for a more rustic look. For oreo peanut butter cookies, I often just fold the chopped Oreos right into the dough – it’s the easiest and gives you those delightful little surprises throughout.
Step 7: Bake
Drop rounded tablespoons of dough onto your prepared baking sheets, leaving about 2 inches between cookies. I like to use a cookie scoop for uniform size. If you like your cookies a little flatter, you can gently press down on the top of each dough ball with your palm or the bottom of a glass. Bake for 10-12 minutes, or until the edges are golden brown and the centers look slightly underbaked. They will continue to cook on the baking sheet as they cool. For extra flair, right when they come out of the oven, you can press a few more Oreo pieces or a sprinkle of flaky sea salt on top.
Step 8: Cool & Glaze
Let the cookies cool on the baking sheet for 5-10 minutes before carefully transferring them to a wire rack to cool completely. If you’re adding a glaze, now’s the time to make it! For a simple peanut butter glaze, whisk together about 1 cup of powdered sugar, 2 tablespoons of softened butter, and 2-3 tablespoons of milk or cream until smooth and pourable. Drizzle it over the cooled cookies or spread it on with a spatula. You can even add a touch more melted peanut butter to the glaze for an intensified flavor. Let the glaze set before serving.
Step 9: Slice & Serve
Once the cookies are completely cooled and any glaze has set, they are ready to be devoured! These oreo peanut butter cookies are best enjoyed at room temperature. If you’ve glazed them, give the glaze a good hour to set properly before slicing, or just dive in and enjoy the slightly gooey glaze! They look beautiful piled high on a platter, but honestly, just grabbing one (or two!) straight from the cooling rack is pure bliss.
What to Serve It With
These oreo peanut butter cookies are so versatile, they fit right in with almost any occasion. For a truly indulgent Breakfast, I love pairing them with a strong cup of coffee. They’re not overly sweet on their own, so that rich coffee flavor cuts through the peanut butter and chocolate perfectly. They also make a fantastic addition to a weekend brunch spread. Imagine them nestled amongst some fresh fruit and maybe some mini quiches – pure magic! For Dessert, they’re a showstopper. Serve them warm with a scoop of vanilla bean ice cream – the hot cookie and cold ice cream combination is divine. Or, for a more sophisticated dessert, try them with a glass of milk (classic, I know!) or even a red wine like a port. And for those simple, Cozy Snacks moments, there’s nothing better. Curl up on the couch with a good book and a couple of these cookies and a tall glass of cold milk. It’s pure comfort. My family loves them after dinner, especially if we have friends over. They’re always a guaranteed hit, and I usually make a double batch just to be safe because they vanish so quickly!
Top Tips for Perfecting Your Oreo Peanut Butter Cookies
I’ve made these oreo peanut butter cookies more times than I can count, and over the years, I’ve picked up a few tricks that I think really elevate them. First off, when you’re chopping your Oreos, don’t go for a fine powder. You want some noticeable chunks; that’s where you get those fantastic little bursts of cookie flavor and texture. A medium chop is perfect. For the peanut butter, use the standard commercial creamy peanut butter, not the natural kind. The oil separation in natural peanut butter can make your cookies spread too much and become greasy. Trust me on this one; I’ve learned that the hard way! When you’re creaming your butter and sugars, really take your time to get it light and fluffy. This is crucial for the texture. Don’t rush this step! And for combining the wet and dry ingredients, stop mixing as soon as you don’t see any dry flour. A little bit of flour still visible is fine because you’ll be folding in the Oreos, which can incorporate any remaining bits. Overmixing is the enemy of a tender cookie! If you want to jazz things up, consider a sprinkle of flaky sea salt on top just before baking. It cuts through the sweetness beautifully and really enhances the peanut butter and chocolate flavors. For baking, pay attention to your oven. Ovens can vary, so use the visual cues – golden brown edges and a slightly soft center – rather than just relying on the timer. They’ll continue to cook on the hot baking sheet, so slightly underbaked is the way to go for that perfect chewy texture. If you’re adding a glaze, make sure the cookies are completely cool first. If they’re warm, the glaze will just melt off and become a sticky mess. For the glaze, if it’s too thick, add milk or cream a teaspoon at a time until it reaches your desired drizzling consistency. If it’s too thin, add a little more powdered sugar. It’s all about getting that perfect, drizzly flow!
Storing and Reheating Tips
Proper storage is key to keeping these oreo peanut butter cookies tasting fresh and delicious. At Room Temperature, I find they’re best enjoyed within 3-4 days. Store them in an airtight container or a cookie tin. I usually layer them between sheets of parchment paper to prevent them from sticking together, especially if they have glaze. Don’t pack them too tightly. For Refrigerator Storage, they can last a bit longer, up to a week, but they can sometimes lose a bit of their chewiness and become a tad harder. If you do store them in the fridge, make sure they are in an airtight container. When you want to eat them, let them come back to room temperature for about 15-20 minutes for the best texture. If you’re looking to Freezer Instructions, these cookies freeze remarkably well, which is a lifesaver! You can freeze the baked and cooled cookies (without glaze is best for freezing) by wrapping them tightly in plastic wrap, then a layer of aluminum foil, or placing them in a freezer-safe bag or container. They’ll keep for up to 2-3 months. To thaw, just take them out of the freezer and let them sit at room temperature for a few hours. If you want to reheat them slightly, you can pop them in a warm oven (around 300°F or 150°C) for a few minutes until they’re just warmed through. For the glaze, I always recommend adding it *after* the cookies have been thawed and are at room temperature, just before serving. This keeps the glaze looking its best and prevents it from getting sticky or melting during storage.
Frequently Asked Questions
Final Thoughts
Honestly, if you’re looking for a recipe that delivers on pure, unadulterated joy, these oreo peanut butter cookies are it. They’re more than just a dessert; they’re a little piece of happiness that brings people together. The way the rich peanut butter dough melds with the crunchy chocolate of the Oreos is just perfection. They’re easy enough for a beginner baker but impressive enough to wow everyone at a party. I truly believe everyone needs a go-to cookie recipe that’s both comforting and exciting, and this one fits the bill perfectly. If you love these, you might also enjoy my classic chewy chocolate chip cookies or my incredibly fudgy brownies – they’re in the same ballpark of crowd-pleasing deliciousness! I really hope you give these oreo peanut butter cookies a try. I can’t wait to hear what you think and how they turn out for you! Happy baking, everyone!
Oreo Peanut Butter Cookies
Ingredients
Main Ingredients
- 0.5 cup Butter, softened
- 0.75 cup Peanut butter
- 0.75 cup Packed brown sugar
- 0.25 cup Granulated sugar
- 1 large Egg
- 1 teaspoon Vanilla extract
- 1 tablespoon Milk
- 0.25 teaspoon Salt
- 0.5 teaspoon Baking soda
- 1.75 cups All-purpose flour
- 12 Oreo cookies
- 20 Reese's Peanut Butter Cup Miniatures, unwrapped and chopped for topping
Instructions
Preparation Steps
- Preheat oven to 350°F (175°C). Lightly grease a 12-cavity muffin tin.
- In a large bowl, cream together the softened butter, peanut butter, brown sugar, and granulated sugar until light and fluffy.
- Beat in the egg, vanilla extract, milk, salt, and baking soda until well combined.
- Gradually add the all-purpose flour and mix until just combined, forming a thick dough.
- Scoop about 2 tablespoons of dough and press it into the bottom of each muffin cup. Place one Oreo cookie on top of the dough in each cup. Cover the Oreo with another 2 tablespoons of dough, ensuring it's completely enclosed.
- Sprinkle the tops of the cookies with the chopped peanut butter cups.
- Bake for 12-15 minutes, or until the edges are lightly golden brown. The centers should still be slightly soft.
- Let the cookies cool in the muffin tin for about 10 minutes before carefully removing them to a wire rack to cool completely. A small knife can help loosen them from the tin if needed.