There are some recipes that just instantly transport you back in time, aren’t there? For me, it’s this orange bread. The moment that sweet, citrusy aroma fills my kitchen, I’m a kid again, sneaking into the pantry for a slice of Grandma’s famous treat. It’s more than just a bread; it’s a warm hug, a sunny morning, and pure comfort all rolled into one. I’ve tried so many variations over the years, looking for that perfect balance of moistness and bright flavor, and I can honestly say, this one is it. It’s like a fluffy, tender cake that you can get away with eating for breakfast! If you love a good lemon poppy seed muffin or a classic banana bread, I promise, this vibrant orange bread will become your new go-to for a delightful treat.
What is orange bread?
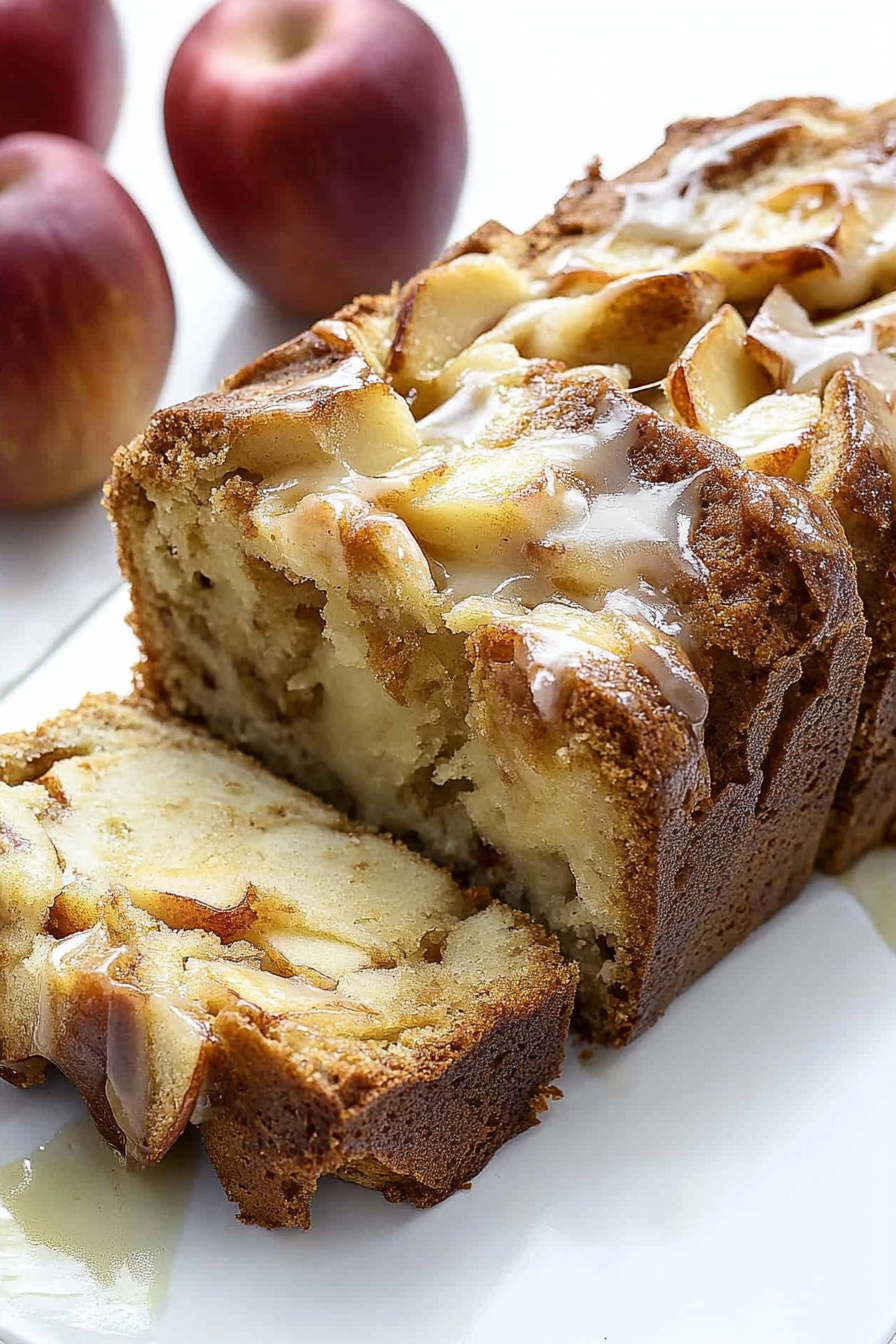
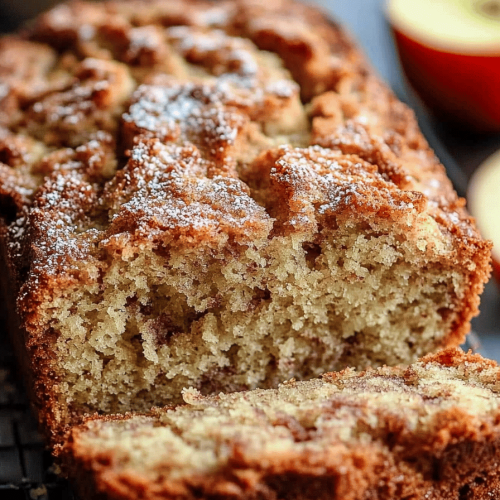
So, what exactly is this magical orange bread? Think of it as a delightful hybrid between a quick bread and a light, airy cake. It’s usually made with a simple batter, rich with the zest and juice of fresh oranges, and often includes a touch of oil or butter for that incredible moistness. It’s not meant to be dense like a pound cake, nor is it as light and delicate as a sponge cake. Instead, it hits that perfect sweet spot – tender, wonderfully moist, and bursting with bright, zesty orange flavor. My Grandma called it “Sunshine Bread” because of its color and cheerful taste, and that name always stuck with me. It’s essentially a celebration of oranges in baked good form, approachable enough for a weeknight bake but special enough for company.
Why you’ll love this recipe?
Honestly, there are so many reasons why this orange bread has earned a permanent spot in my recipe binder, and I’m so excited for you to discover them too! First and foremost, the flavor is just out of this world. It’s not just a hint of orange; it’s a full-on citrus party in your mouth, bright and refreshing, without being too tart. Then there’s the texture. It’s unbelievably moist and tender, a result of a few key ingredient choices I’ll share later. You know those quick breads that can sometimes turn out a little dry? Not this one! It stays wonderfully soft for days. And speaking of days, this recipe is a lifesaver on busy mornings or when unexpected guests pop over. It comes together surprisingly quickly, using ingredients you probably already have in your pantry. It’s also incredibly budget-friendly, which is always a bonus. Beyond that, its versatility is fantastic. You can enjoy it plain, slathered with butter, or even topped with a light glaze. It’s perfect with a cup of coffee in the morning, as a light dessert after dinner, or even as a sweet treat with your afternoon tea. What I love most about this recipe, though, is the sheer joy it brings. The smell alone is enough to lift your spirits, and the taste is pure sunshine. It’s one of those recipes that makes you feel like a baking pro, even if you’re just starting out.
How do you make orange bread?
Quick Overview
Making this delightful orange bread is a breeze! You’ll simply whisk together your dry ingredients, then combine your wet ingredients, and finally, gently bring them together before folding in some luscious orange filling. A quick swirl to marbleize it, and it’s ready for the oven. The whole process, from start to finish, takes less than 20 minutes of active prep time. It’s really that simple, and the results are consistently amazing, yielding a beautifully golden, fragrant loaf every single time. This method ensures a perfectly tender crumb without any fuss.
Ingredients
For the Main Batter:
You’ll need all-purpose flour, granulated sugar, baking powder for lift, and a pinch of salt to balance the sweetness. I always recommend sifting your flour; it really does make a difference in the final texture, making it lighter and airier. For the sugar, don’t be tempted to reduce it too much – it plays a role in moisture and tenderness, not just sweetness. If you want to get fancy, you could even use some superfine sugar for an extra-smooth batter.
For the Filling:
This is where the magic really happens! You’ll need softened butter, more sugar, some vibrant orange zest (don’t skip this, it’s where so much of the flavor comes from!), and a touch of orange juice to bind it all together. Make sure your butter is truly softened, almost spreadable, not melted. This ensures it mixes into a smooth, luscious paste.
For the Glaze:
A simple combination of powdered sugar and fresh orange juice is all you need. You want the glaze to be thick enough to coat the bread but still pourable. I like to start with a small amount of juice and add more until it reaches the perfect consistency. A little extra orange zest in the glaze is never a bad idea either!
Step-by-Step Instructions
Step 1: Preheat & Prep Pan
First things first, let’s get your oven preheated to 350°F (175°C). While it’s warming up, grab a standard 9×5 inch loaf pan. I like to grease it really well with butter or cooking spray, and then dust it with a little flour. You can even line it with parchment paper, leaving an overhang on the sides – this makes lifting the baked bread out so much easier. Make sure you get into all the corners!
Step 2: Mix Dry Ingredients
In a large bowl, whisk together 2 cups of all-purpose flour, 1 1/2 cups of granulated sugar, 2 teaspoons of baking powder, and 1/2 teaspoon of salt. Whisking thoroughly ensures everything is evenly distributed, which means your bread will rise evenly and have a consistent flavor. I always give it a good whisk for at least 30 seconds to make sure there are no lumps and all the leavening is evenly mixed.
Step 3: Mix Wet Ingredients
In a separate medium bowl, whisk together 1 cup of milk (whole milk or even buttermilk works beautifully here for extra tenderness!), 1/2 cup of vegetable oil (or melted unsalted butter, though oil often yields a moister result), 2 large eggs, and the zest of two medium oranges. The zest is crucial for that intense orange flavor, so don’t skimp on it! Make sure the eggs are at room temperature; they incorporate better into the batter.
Step 4: Combine
Pour the wet ingredients into the bowl with the dry ingredients. Now, this is important: mix *just until combined*. Overmixing develops the gluten in the flour, which can lead to a tough bread. A few streaks of flour remaining are perfectly fine; they’ll disappear as you fold in the filling. I usually use a spatula and gently fold until I don’t see any large dry patches. It should be a thick, smooth batter.
Step 5: Prepare Filling
In a small bowl, cream together 1/4 cup of softened unsalted butter, 1/4 cup of granulated sugar, and the zest of one more medium orange. You want this mixture to be smooth and spreadable, almost like a thick paste. If your butter isn’t quite soft enough, you can give it a quick zap in the microwave for 10-15 seconds, but be careful not to melt it. This filling is what gives the bread those wonderful pockets of concentrated orange goodness.
Step 6: Layer & Swirl
Pour about half of the batter into your prepared loaf pan. Dollop half of the orange filling mixture over the batter. Then, pour the remaining batter on top, followed by the rest of the filling. Now, take a butter knife or a skewer and gently swirl the filling into the batter. Don’t over-swirl; you want distinct ribbons of filling, not a uniformly mixed batter. Aim for about 4-5 gentle swirls.
Step 7: Bake
Place the loaf pan in your preheated oven. Bake for 50-60 minutes, or until a wooden skewer inserted into the center of the loaf comes out clean. Ovens can vary, so start checking around the 50-minute mark. If the top starts browning too quickly before the inside is cooked, you can loosely tent it with aluminum foil. You’re looking for a beautiful golden-brown crust.
Step 8: Cool & Glaze
Once baked, let the orange bread cool in the pan for about 10-15 minutes. This allows it to set up properly. Then, carefully invert it onto a wire rack to cool completely. This is crucial! If you try to glaze a warm loaf, the glaze will just melt and run off. Once it’s completely cool, whisk together 1 cup of powdered sugar with 2-3 tablespoons of fresh orange juice until you have a smooth, drizzly consistency. Drizzle it all over the top of the cooled bread. Let the glaze set for a few minutes before slicing.
Step 9: Slice & Serve
Once the glaze has set, it’s time to slice and enjoy! I like to use a serrated knife for clean cuts. This orange bread is wonderful served at room temperature, but it’s also delicious slightly warmed. The aroma when you slice into it is just heavenly!
What to Serve It With
This orange bread is a champion all on its own, but if you’re looking to elevate your experience or pair it with other delights, I’ve got some fantastic ideas! For breakfast, it’s simply divine with a hot cup of strong coffee or a soothing mug of herbal tea. A little smear of butter is all it needs to start your day on a bright note. When it comes to brunch, it really shines. Serve it as part of a larger spread alongside some scrambled eggs, crispy bacon, and maybe a fresh fruit salad. It adds a wonderful burst of color and citrusy sweetness. For a more elegant dessert, consider serving a slice with a dollop of whipped cream or a light vanilla bean ice cream. The creamy sweetness of the cream or ice cream is a lovely counterpoint to the bright orange flavor. And for those cozy snack times, it’s perfect with a glass of milk or even a light sparkling cider. My family has a tradition of having a slice with a Hot Chocolate on chilly autumn afternoons – it’s the ultimate comfort combo!
Top Tips for Perfecting Your Orange Bread
I’ve made this orange bread more times than I can count, and through those countless bakes, I’ve picked up a few tricks that I just have to share. First, when it comes to the orange zest, use a microplane if you have one. It zests super finely without getting too much of the bitter white pith. And don’t be shy with it! The more zest, the more intense and delicious that orange flavor will be. When you’re mixing the wet and dry ingredients, remember that gentle touch is key. Overmixing is the enemy of tender quick breads. I always tell people to stop mixing as soon as they don’t see any large dry pockets of flour; a few tiny ones are fine and will sort themselves out. For the filling, ensuring your butter is perfectly softened is a game-changer. It needs to be spreadable, not melted. If it’s too cold, it won’t mix well into a paste, and if it’s melted, your filling might seep too much into the batter. When you’re swirling, less is more. You want distinct ribbons of that buttery, zesty filling, not a homogenous mixture. Think elegant swirls, not aggressive stirring. For baking, always trust the skewer test, but know that your oven might run a little hotter or cooler than the recipe states. It’s always better to slightly underbake than overbake, as you can always pop it back in for a few more minutes if needed, but you can’t fix a dry, overbaked loaf. If you find your loaves are browning too quickly on top, don’t hesitate to tent them loosely with foil. It’s a simple trick that saves many a bake! Lastly, for the glaze, the consistency is everything. Start with less liquid and add more drop by drop. You want it to be thick enough to coat but thin enough to drizzle. A little extra zest in the glaze adds another pop of brightness!
Storing and Reheating Tips
Knowing how to store your baked goods is almost as important as knowing how to make them, right? This orange bread is wonderfully forgiving. At room temperature, it stays perfectly fresh for about 2-3 days. I usually store it in an airtight container or wrap it tightly in plastic wrap. If I’m going to be eating it within a day or two, I might just leave it on the counter, well-covered. For longer storage, the refrigerator is your friend. Wrapped tightly, it can last up to a week. The texture might become slightly firmer in the fridge, but it’s still delicious. To bring it back to its former glory, you can warm up individual slices in a toaster oven or a low-heat regular oven for a few minutes. If you plan to freeze it, I highly recommend doing so *without* the glaze. Wrap the completely cooled loaf (or individual slices) tightly in plastic wrap, then in a layer of aluminum foil, and pop it into a freezer-safe bag. It will keep well for up to 2-3 months. To thaw, unwrap it and let it come to room temperature on the counter for a few hours, or gently reheat it in a low oven. Once thawed and warm, you can then add a fresh drizzle of glaze.
Frequently Asked Questions
Final Thoughts
I really hope you give this orange bread a try. It’s one of those recipes that just brings a little extra sunshine into your day, whether you’re baking it for your family or for yourself. The bright citrus flavor, the wonderfully moist crumb, and that delightful ribbon of filling make it a truly special treat that’s surprisingly easy to achieve. It’s the kind of recipe that reminds you why you love to bake in the first place. If you enjoy this, you might also love my recipe for Lemon blueberry scones or my Classic Chocolate Chip Banana Bread – they’re all about comforting, delicious flavors! I can’t wait to hear what you think. Please leave a comment below with your thoughts, or share a picture of your beautiful orange bread! Happy baking!
Orange Bread
Ingredients
Main Ingredients
- 2.5 cups all-purpose flour
- 1.5 cups granulated sugar
- 1 teaspoon baking soda
- 0.5 teaspoon salt
- 0.5 cup unsalted butter, softened
- 2 large eggs
- 0.5 cup fresh orange juice
- 1 tablespoon orange zest from about 2 oranges
- 0.5 cup milk
Orange Glaze
- 1 cup powdered sugar
- 2 tablespoons fresh orange juice
Instructions
Preparation Steps
- Preheat oven to 350°F (175°C). Grease and flour a 9x5 inch loaf pan.
- In a large bowl, whisk together the flour, granulated sugar, baking soda, and salt.
- In a separate bowl, cream together the softened butter and sugar until light and fluffy. Beat in the eggs one at a time, then stir in the orange juice and orange zest.
- Add the dry ingredients to the wet ingredients alternately with the milk, beginning and ending with the dry ingredients. Mix until just combined. Do not overmix.
- Pour the batter into the prepared loaf pan and spread evenly.
- Bake for 50-60 minutes, or until a wooden skewer inserted into the center comes out clean.
- Let the bread cool in the pan for 10-15 minutes before inverting it onto a wire rack to cool completely.
- While the bread is cooling, prepare the glaze. In a small bowl, whisk together the powdered sugar and orange juice until smooth. Add more orange juice if needed for desired consistency.
- Drizzle the glaze over the cooled bread.