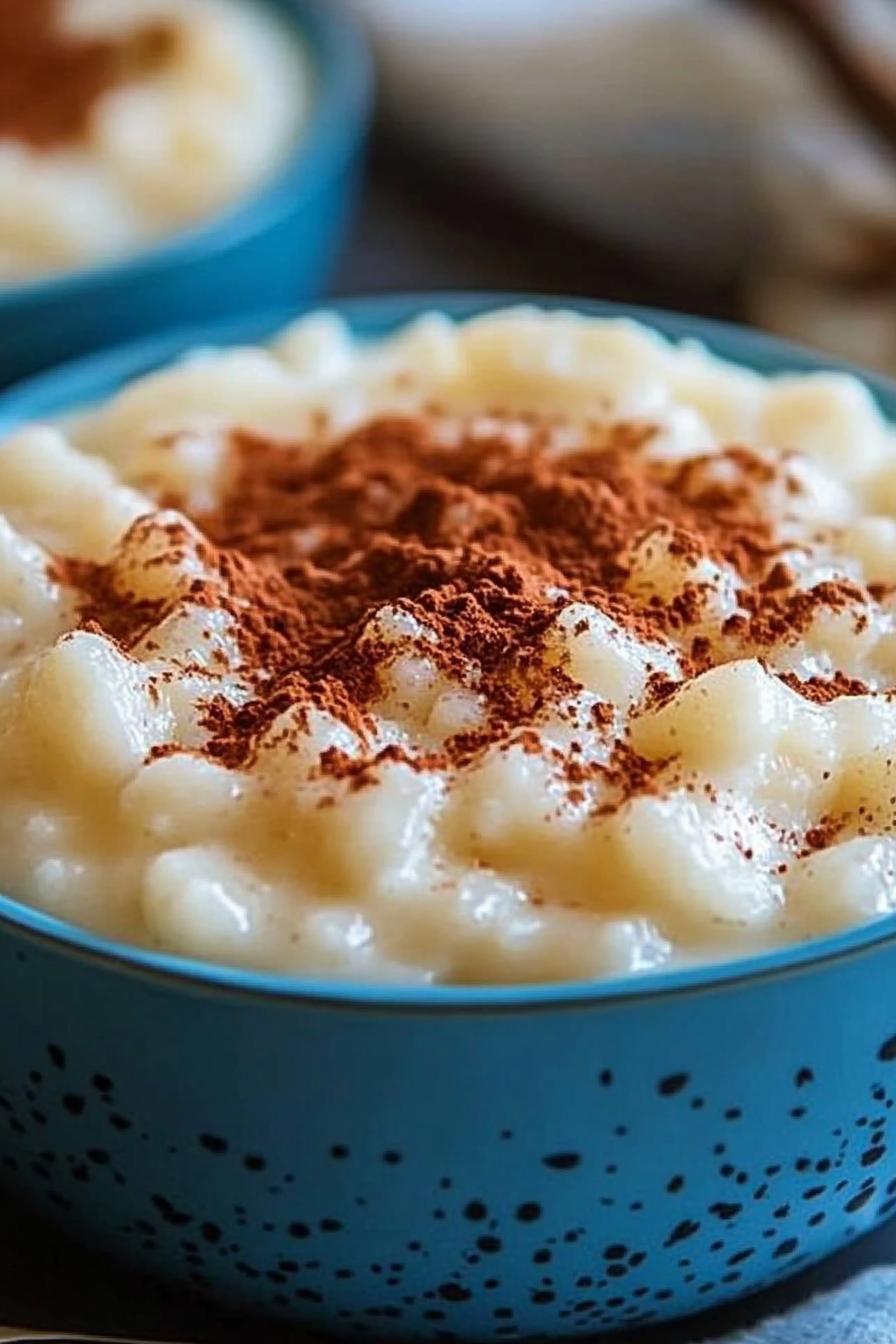
Oh, this old fashioned rice pudding. It’s the kind of dessert that just wraps you up in a hug, you know? It’s not fancy, it’s not fussy, but it is pure comfort in a bowl. I remember my Grandma making this on rainy Sunday afternoons. The whole house would fill with this warm, sweet, slightly spiced aroma, and it was like a signal that good things were coming. This isn’t like those quick, stovetop versions that can sometimes be a bit gummy or bland. This is the slow-cooked, custard-like, ridiculously creamy rice pudding that tastes like childhood. If you’ve ever tried a traditional baked rice pudding and found it too eggy or not creamy enough, stick with me, because this one is a game-changer. It’s the kind of recipe you’ll want to make again and again, especially when you’re craving something truly special without a whole lot of fuss.
What is Old Fashioned Rice Pudding?
So, what exactly *is* this old fashioned rice pudding we’re talking about? Think of it as the ultimate comfort food dessert, elevated. It’s essentially a simple mixture of rice, milk, sugar, and a few flavorings, all baked together low and slow until it becomes this incredibly luscious, creamy concoction. Unlike its stovetop cousins, the baking process allows the rice to slowly absorb the milk and create a wonderful, velvety texture. The name “old fashioned” really speaks to its roots – it’s a classic for a reason. It’s the kind of dessert that was common in kitchens generations ago, using simple, readily available ingredients to create something truly magical. It’s humble, yes, but the resulting flavor and texture are anything but. It’s the kind of dish that feels timeless, deeply satisfying, and always, always welcome at the table.
Why you’ll love this recipe?
I love this old fashioned rice pudding recipe. I know you will too.flavorIs this a good vanilla and cinnamon Ice Cream?simplicity. Even though it’s baked, the actual active prep time is surprisingly short. You just mix a few things together and let the oven do the hard work. It’s a lifesaver when you want a homemade dessert but don’t have hours to spend in the kitchen. And let’s talk about cost-efficiency! The ingredients are incredibly budget-friendly – rice, milk, sugar, eggs. You probably have most of them in your pantry right now. This is a dessert that doesn’t break the bank but feels like a real treat. What I love most, though, is its versatility. While it’s fantastic on its own, it’s also a perfect canvas for all sorts of toppings. Think fresh berries, a sprinkle of nutmeg, or even a dollop of whipped cream. It’s comforting enough for a chilly evening, but light enough to enjoy on a warmer day too. It truly stands out because of that incredibly creamy texture that you just don’t get with quicker methods. It’s pure, unadulterated bliss in a dish!
How to Make Old Fashioned Rice Pudding
Quick Overview
This old fashioned rice pudding is all about patience and letting simple ingredients transform in the oven. You’ll start by gently cooking the rice with milk and sugar until it’s tender and creamy. Then, we’ll whisk in eggs and flavorings before baking it low and slow until it’s set and golden. It’s a straightforward process that yields the most incredible texture and flavor. The gentle heat of the oven is what really makes this recipe sing, preventing scorching and ensuring an even, creamy consistency throughout.
Ingredients
For the Main Pudding:
* 1/2 cup Arborio rice (or other medium-grain rice like Calrose. Arborio gives it that extra creamy texture, trust me!)
* 4 cups whole milk (I’ve tried 2% and it’s just not the same; whole milk is key for that rich creaminess)
* 1/2 cup granulated sugar (you can adjust this slightly based on your preference, but this is a good starting point)
* 1/4 teaspoon salt (don’t skip this, it balances the sweetness!)
* 1 teaspoon pure vanilla extract (the good stuff makes a difference!)
* 1/2 teaspoon ground cinnamon (or a small cinnamon stick for infusing)
* 2 large eggs, lightly beaten (these bind everything together and add richness)
For Serving (Optional but Recommended):
* Extra ground cinnamon or nutmeg for dusting
* Fresh berries (raspberries or blueberries are divine!)
* Whipped cream or a dollop of Greek yogurt
Step-by-Step Instructions
Step 1: Preheat & Prep Pan
First things first, let’s get that oven going. Preheat it to 325°F (160°C). You’ll want to use a baking dish that’s about 8×8 inches or a similar-sized oval gratin dish. I find that a ceramic or glass dish works best because it distributes heat evenly. I always give my dish a quick spray of non-stick cooking spray or a tiny rub of butter, just to be safe. It’s not strictly necessary if you’re using a good quality dish, but it ensures your beautiful pudding won’t stick!
Step 2: Cook the Rice (Partially)
In a medium saucepan (not the baking dish yet!), combine the Arborio rice, whole milk, sugar, and salt. If you’re using a cinnamon stick, toss it in now. Heat this mixture over medium heat, stirring occasionally, until it just starts to simmer around the edges. Don’t let it come to a rolling boil. Once it’s simmering, reduce the heat to low, cover the saucepan, and let it cook for about 15-20 minutes, stirring every 5 minutes or so, until the rice is tender but still has a slight bite to it. This step is crucial for pre-cooking the rice so it doesn’t take forever in the oven and ensures a better texture.
Step 3: Temper the Eggs
While the rice is simmering, in a separate small bowl, lightly beat your two eggs. Now, this is an important step: tempering the eggs. You don’t want to scramble them in the pudding! So, take about half a cup of the hot milk mixture from the saucepan and *slowly* drizzle it into the beaten eggs while whisking constantly. This gently heats up the eggs without cooking them. Once you’ve added about half a cup of the hot liquid, you can then pour the tempered egg mixture back into the saucepan with the rest of the rice and milk, whisking continuously.
Step 4: Add Flavorings and Transfer
Stir in the vanilla extract and the ground cinnamon (if you didn’t use a stick). If you used a cinnamon stick, give it a quick fish out and discard it. Now, pour this glorious mixture into your prepared baking dish. Give it a gentle stir to make sure everything is evenly distributed. You’ll notice it’s quite liquidy at this stage, but don’t worry, it will thicken up beautifully in the oven. It’s supposed to be a loose, creamy base!
Step 5: Bake Until Set
Place the baking dish into your preheated 325°F (160°C) oven. Now, the waiting game begins. Bake for about 45-60 minutes. You’re looking for the pudding to be mostly set, with just a slight wobble in the very center. The top should be a beautiful golden-brown color, and you might even see some lovely caramelized bits on the edges – those are the best part! Don’t overbake it, or it can become rubbery. It will continue to set up as it cools.
Step 6: Cool and Rest
This is probably the hardest part: letting it cool! Once it comes out of the oven, let it sit on a wire rack for at least 20-30 minutes. This allows it to firm up properly. While it’s still warm, the texture is a bit softer, but it gains that perfect creamy, custard-like consistency as it cools. I usually can’t resist trying a tiny spoonful while it’s still warm, though!
Step 7: Serve and Enjoy
Serve your old fashioned rice pudding warm or at room temperature. A dusting of fresh cinnamon or nutmeg on top is classic. I also love adding fresh berries for a burst of freshness, or a big dollop of whipped cream if I’m feeling decadent. It’s perfect just as it is, too. The creamy texture and comforting flavor are truly something special.
What to Serve It With
This old fashioned rice pudding is so wonderfully versatile! For a cozy start to the day, I love serving it warm with a strong cup of coffee. A simple swirl of cream or a sprinkle of cinnamon is all it needs to feel special. For a more elegant brunch spread, I’ll sometimes serve it in small ramekins, topped with fresh raspberries and a tiny sprig of mint. It looks so pretty and feels like a decadent treat. As a dessert, it’s a classic for a reason. It pairs beautifully with a light Fruit Salad, or just on its own with a side of rich dark chocolate. My kids, though, absolutely adore it as a special after-school snack. They love it straight from the fridge, nice and cold, sometimes with a drizzle of honey or a few chocolate chips mixed in. One of my favorite family traditions is making a big batch on a Sunday evening and having it for dessert after dinner. The whole house smells amazing, and it’s just the perfect way to wind down the weekend. It’s also fantastic for potlucks because it travels so well and is always a crowd-pleaser!
Top Tips for Perfecting Your Old Fashioned Rice Pudding
I’ve made this old fashioned rice pudding more times than I can count, and over the years, I’ve picked up a few little tricks that make a big difference. When it comes to the rice, always go for Arborio or another medium-grain rice. Long-grain like basmati or jasmine won’t give you that creamy, slightly starchy texture that’s so characteristic of a great rice pudding. The grains need to be able to release some of their starch to thicken the milk beautifully. For the milk, I can’t stress enough the importance of whole milk. It’s the backbone of the creaminess! Using skim or even 2% milk will result in a thinner, less luxurious pudding. If you’re feeling adventurous and want to experiment, I’ve found that using half-and-half instead of some of the milk creates an even richer, more decadent dessert, but it’s definitely not for everyday. When it comes to the sweetness, the 1/2 cup of sugar is my sweet spot, but I know everyone’s palate is different. If you prefer it less sweet, start with 1/3 cup and you can always stir in a touch more honey or maple syrup after it’s baked. Conversely, if you have a serious sweet tooth, you can go up to 2/3 cup, but be careful not to overpower the delicate flavors. Don’t be afraid of the salt! That pinch of salt might seem odd in a dessert, but it’s crucial for balancing the sweetness and enhancing all the other flavors. It really makes the vanilla and cinnamon pop. And speaking of cinnamon, if you can find whole cinnamon sticks, steeping one in the milk while it heats up adds a much more subtle, complex cinnamon flavor than ground cinnamon alone. Just remember to remove it before adding the eggs!
The tempering of the eggs is probably the most “technical” step, but it’s so worth it to avoid scrambled bits in your pudding. Just remember to add the hot milk *slowly* to the eggs while whisking constantly. It’s like gently introducing them to the heat. Once the pudding is in the oven, resist the urge to peek too often. Letting it bake undisturbed is key to developing that lovely golden crust and creamy center. If you notice it browning too quickly on top before the center is set, you can always loosely tent it with foil for the last 10-15 minutes of baking. Finally, patience is your best friend when it comes to cooling. It needs that time to set up properly. Cutting into it too soon will result in a delicious, but perhaps runnier, pudding. It’s worth the wait, I promise!
Storing and Reheating Tips
This old fashioned rice pudding stores beautifully, which is one of the reasons I love making a big batch. If you have any leftovers (which is rare in my house!), let the pudding cool completely to room temperature before storing. This is important for food safety and for maintaining the best texture. Once cooled, transfer it to an airtight container. It will keep well in the refrigerator for about 3-4 days. The texture will firm up quite a bit when chilled, which I personally enjoy – it becomes almost like a creamy dessert bar. To reheat, you can gently warm individual portions in the microwave for 30-60 seconds, or warm the entire dish in a low oven (around 300°F or 150°C) for about 10-15 minutes, until heated through. You might need to add a splash of milk or cream when reheating if it seems a bit too stiff. I rarely freeze this, as the dairy and rice can sometimes change texture upon thawing, but if you absolutely must, wrap individual portions very well in plastic wrap and then foil and freeze for up to a month. Thaw overnight in the refrigerator before reheating.
Frequently Asked Questions
Final Thoughts
There you have it – my tried-and-true recipe for old fashioned rice pudding. It’s a dessert that truly embodies the warmth and comfort of home cooking. The creamy texture, the subtle hint of spice, and the sheer simplicity of it all just make it irresistible. It’s the kind of dish that makes you feel good, both while you’re making it and while you’re savoring every spoonful. If you’re looking for a dessert that’s both comforting and a little bit special, I really hope you give this one a try. I think you’ll find, like I have, that it’s a recipe that quickly becomes a beloved staple. It’s perfect for those times you want something sweet without the stress, or when you just need a taste of pure nostalgia. If you end up making it, please let me know how it turns out in the comments below! I’d love to hear about your own family traditions and any twists you put on it. Happy baking!

Old Fashioned Rice Pudding
Ingredients
Main Ingredients
- 0.5 cup Arborio rice
- 4 cups Milk whole milk recommended
- 0.5 cup Granulated sugar
- 0.5 teaspoon Salt
- 2 Large egg yolks lightly beaten
- 1 teaspoon Vanilla extract
- 0.25 teaspoon Ground cinnamon for serving (optional)
Instructions
Preparation Steps
- In a medium saucepan, combine the rice, milk, sugar, and salt.
- Bring the mixture to a gentle simmer over medium heat, stirring occasionally.
- Reduce the heat to low, cover, and cook for 30-40 minutes, stirring every 10 minutes to prevent sticking, until the rice is tender and the pudding has thickened.
- Remove from heat. In a small bowl, whisk the egg yolks and vanilla extract.
- Gradually whisk about 1 cup of the hot rice pudding mixture into the egg yolks to temper them. Then, stir the tempered egg yolk mixture back into the saucepan with the remaining rice pudding.
- Cook over low heat, stirring constantly, for another 2-3 minutes, until slightly thickened. Do not boil.
- Remove from heat and stir in the vanilla extract.
- Serve warm or chilled. Sprinkle with cinnamon, if desired.


