The first time I made Nutella Rice Krispie Treats, the kitchen smelled like a warm hug. I was balancing school schedules and a million to-dos, and a pan of glossy, chocolatey bars cooled on the counter like a small victory. These treats aren’t just candy-tasty; they’re a reminder that something as simple as melted marshmallows, butter, and a spoonful of Nutella can conjure comfort in minutes. They’re incredibly easy, which makes them a lifesaver on busy nights, and my kids actually ask for seconds, which is basically the best compliment a parent can hear. If you’ve ever reached for a quick snack that feels special, you’re in the right place. Nutella Rice Krispie Treats are the snack you crave after a long day, the dessert you can whip up on a weeknight, and the treat I secretly promise myself I’ll keep in the freezer for emergencies (you know the ones). This isn’t just a recipe; it’s a little ritual I love sharing with friends over coffee.
What is Nutella Rice Krispie Treat?
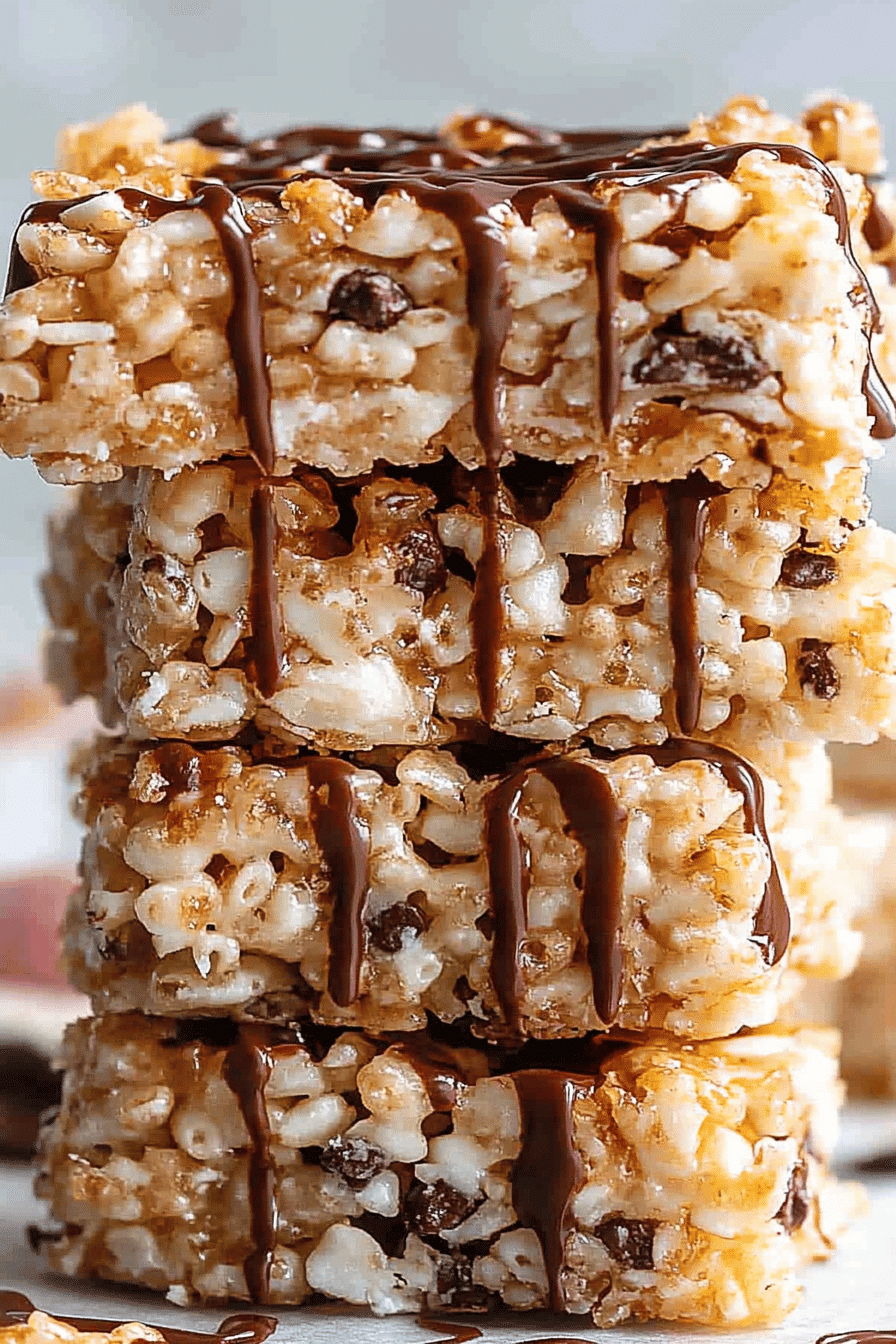
Think of Nutella Rice Krispie Treats as a grown‑up riff on the classic no‑bake cereal bars. It’s essentially marshmallows and butter melted into a glossy pool, then folded with crispy Rice Krispies and a generous swirl of Nutella. The result is a chewy, crisp-edged square with ribbons of hazelnut chocolate running through it. The name is simple enough to explain to kids: Nutella (that famous hazelnut-chocolate spread) meets Rice Krispies (the puffed rice cereal) in a sweet, gooey, snackable bar. It’s the kind of recipe that feels indulgent but comes with the comforting familiarity of a favorite childhood treat—just a little more decadent, a little more lush, and a lot more fun to cut into squares and share with friends. It’s essentially a quick answer to “I want something chocolatey and chewy, but I don’t want to bake.”
Why you’ll love this recipe?
What I love most about Nutella Rice Krispie Treats is how quickly they come together without skimping on flavor. This isn’t a faint chocolate finish; you get a pronounced Nutella presence that blankets every bite. The kid-friendly nature is the real magic here—my little ones can lend a hand with stirring and layering, and they feel like little kitchen heroes when we lift the tray and see those glossy ribbons of Nutella peeking through. The simplicity is unbeatable: melt, mix, press, and slice. And because it’s a rice cereal treat, it’s budget-friendly, too—nothing fancy, but the outcomes feel special enough for a celebration or a casual after-school snack. It’s a versatile recipe that travels well for potlucks, lunches, or a cozy weekend movie night. If you’re curious about similar favorites, you might also love my Chocolate Peanut Butter Rice Krispie Treats, which share the same technique with a different flavor profile. Nutella Rice Krispie Treats are a staple in my kitchen because they hit every sweet-spot: deeply chocolatey, impossibly easy, and endlessly adaptable.
How do you make Nutella Rice Krispie Treats?
Quick Overview
This is the kind of recipe that makes you feel like a kitchen genius even when you’re juggling life at full speed. You’ll melt butter with marshmallows until glossy and smooth, stir in a big handful of Rice Krispies, and fold in a generous swirl of Nutella. The batter goes into a lined pan, a second ribbon of Nutella is swirled through, and a light bake (or a quick chill, if you prefer no-bake) sets the bars up for slicing. It’s a one-bowl, no-fuss process that rewards you with chewy, chocolatey goodness that holds its shape for sharing. The result is chewy, slightly crisp at the edges, and perfectly gooey in the center—a comforting treat that still feels a little fancy.
Ingredients
For the Main Batter:
- 6 cups Rice Krispies (or any crispy rice cereal labeled gluten-free if you need it gluten-free)
- 10 oz mini marshmallows (about 40 cups) or 4 cups mini marshmallows
- 3 tablespoons unsalted butter
- 1/2 teaspoon vanilla extract
- pinch of salt
- 1/2 cup Nutella, gently warmed until pourable
For the Filling:
- 1/2 cup Nutella, warmed with 1 tablespoon cream or milk to a silky drizzle
- (Optional) 2 tablespoons chopped hazelnuts for extra crunch
For the Glaze:
- 1/2 cup powdered sugar
- 1–2 tablespoons cocoa powder
- 1–2 tablespoons milk or cream
- Additional melted Nutella for drizzling (optional)
Step-by-Step Instructions
Step 1: Preheat & Prep Pan
Preheat your oven to 350°F (175°C) if you’re opting to bake, or skip to the chilling route if you prefer no-bake. Line a 9×13-inch pan with parchment paper or lightly grease it. Trust me, parchment makes life easier when you go to lift the bars out for slicing. I always do this one-pan setup because it keeps clean-up friendly and the bars hold their shape when you cut them later.
Step 2: Mix Dry Ingredients
In a large bowl, whisk together the Rice Krispies and a pinch of salt. The salt helps balance the sweetness and gives the cereal a little bite that isn’t cloying, especially when you bite into that Nutella swirl.
Step 3: Mix Wet Ingredients
In a large saucepan over low heat, melt the butter. Stir in the marshmallows and vanilla, letting everything melt together until you’ve got a glossy, smooth mixture. Remove from heat. If you’re using almond milk or a dairy alternative, add a splash here to loosen the mixture slightly and help it come together.
Step 4: Combine
Pour the marshmallow mixture over the dry ingredients and fold gently until every puffed grain is coated. Drizzle in about half of the warm Nutella and fold just enough to create marble ribbons throughout the batter. If you want more intense Nutella flavor, stir a touch more in, but be careful not to overwork it—the goal is soft swirls, not a uniform chocolatey paste.
Step 5: Prepare Filling
In a small bowl, whisk the warmed Nutella with 1 tablespoon of cream until it’s smooth and pourable. This will become the center swirl of your bars. If you’re after a nuttier bite, fold in the chopped hazelnuts here. The filling is optional, but I find it adds a little surprise in every bite.
Step 6: Layer & Swirl
Spread about half of the cereal mixture evenly in the prepared pan. Dollop or stripe the Nutella filling over the surface, then top with the remaining cereal mixture. Use a spatula to press firmly and then swirl a few strokes with a knife or skewer to create pretty marbling. The swirls are what make these look fancy and still feel homey.
Step 7: Bake
If you’re baking for a crisper finish, bake for 8–10 minutes, watching closely so they don’t brown too much. If you prefer softer, chewier bars (my favorite), you can skip the oven entirely and let them set at room temperature or refrigerate for 1–2 hours. Either way, you’re aiming for the edges to feel set but the center still a little soft when you cut into it. I’ll admit, the kitchen smells amazing during bake time—the Nutella and marshmallow aroma is a total mood booster.
Step 8: Cool & Glaze
Let the bars cool completely in the pan before glazing. If you want a glossy finish, whisk together the powdered sugar, cocoa, and enough milk to make a thick drizzle. Drizzle over the cooled bars, and if you’re feeling extra decadent, finish with a quick ribbon of melted Nutella. The glaze sets as it sits, turning shiny and inviting.
Step 9: Slice & Serve
Lift the bars from the pan using the parchment edges and place on a cutting board. Slice into 12–16 squares, depending on how big you want them. They’re best served slightly warm, with a glass of cold milk or a strong coffee on the side. This is the moment when the soft, chewy center gives way to a crisp edge and that familiar Nutella kiss in every bite.
What to Serve It With
Nutella Rice Krispie Treats are delicious on their own, but they also shine with simple accompaniments. Here are a few ideas, organized by occasion:
For Breakfast: A quick, chocolatey breakfast bite beside a mug of hot coffee. I love setting a small plate out for weekend brunch with fresh berries and a dollop of yogurt on the side to balance the sweetness.
For Brunch: Plate these with a Fruit Salad and a light sparkling beverage. The contrast between tart berries and the chocolatey bars is perfection, and the color‑contrast makes the tray look irresistible.
As Dessert: Serve with vanilla Ice Cream or a splash of raspberry sauce for a dessert option that feels special but is still easy. The warm-cool dynamic is particularly satisfying after a big family meal.
For Cozy Snacks: Pack a few squares into lunch boxes or place them on a small dessert board with nuts and dried fruit. They’re the kind of snack you can reach for without guilt on a busy afternoon.
My family tradition often includes a light dusting of powdered sugar and a tiny bowl of espresso for the grown-ups when we cut into these after dinner. They’re little moments of sweetness that remind us to slow down and savor the small wins. If you’ve got your own spin—drying out a little more for crunch, or adding white chocolate chips for a contrast—I’d love to hear it in the comments. This recipe is perfect for experimentation while still feeling wonderfully familiar.
Top Tips for Perfecting Your Nutella Rice Krispie Treats
Here’s where I let you in on the little techniques that make a big difference. The goal is soft, glossy bars with bright Nutella swirls and a clean slice every time.
Nutella Prep: Warm Nutella until it’s pourable but not hot. If it’s too hot, it will seize the moment you fold it in; if it’s too cool, it won’t swirl nicely. A gentle, even drizzle makes the marbling look intentional rather than accidental.
Mixing Advice: Don’t overmix the cereal with the marshmallow. A light fold keeps the Rice Krispies from becoming dense and hard. That light touch also helps preserve the pleasant chew once they set.
Swirl Customization: For dramatic visuals, reserve a little Nutella to swirl after you spread the top layer. Drag a skewer through the top to create bold, web-like patterns. It’s a tiny flourish that elevates the entire tray.
Ingredient Swaps: If you’re dairy-free, use a plant-based butter and dairy-free marshmallows (check labels). For a nuttier kick, add 1–2 tablespoons chopped roasted hazelnuts into the filling. If you’re gluten-free, ensure you’re using gluten-free Rice Krispies and check all labels for any added barley malt or malt flavoring.
Baking Tips: If you’re baking, keep a close eye on the edges; you don’t want them to brown. Oven temperatures vary, so a quick 8–10 minute bake can yield a crisper texture for the bar edges while the centers stay chewy.
Glaze Variations: Try a simple glaze by whisking cocoa powder into powdered sugar with a little milk. For a festive twist, add a pinch of chili powder or espresso powder for a mocha kick. A thin drizzle of melted white chocolate on top also looks gorgeous and tastes playful against the dark Nutella ribbons.
Lessons Learned: I learned that letting the mixture cool just a touch before adding to the pan helps reduce wear on your wrists when you’re pressing and smoothing. Patience here yields a cleaner edge and a more even cut. My kids can tell when I rushed it—the bars look rough, and the bite isn’t as pleasant. Slow and steady wins in the kitchen, especially with treats that demand a neat finish.
Storing and Reheating Tips
These Nutella Rice Krispie Treats stay delicious for days when stored properly. Here are my go-to methods to keep them at their best.
Room Temperature: Store in an airtight container for up to 3 days. If the weather is warm, a quick chill in the fridge will help prevent the glaze from getting soft or tacky.
Refrigerator Storage: In a tightly sealed container, they’ll keep 5–7 days. The bars firm up a bit when chilled, which some people love for a chewy contrast to the soft center.
Freezer Instructions: Wrap each square individually in parchment or plastic wrap, then store in a freezer-safe bag for up to 1–2 months. Thaw at room temperature for about 15–20 minutes before serving. If you’re freezing with glaze, it’s best to freeze without the glaze and add it after thawing for a glossy finish.
Glaze Timing Advice: If you’re freezing, skip the glaze or freeze unglazed bars and apply glaze after thawing for a fresher, shinier look. If you’re refrigerating, a light glaze can be added after chilling for a polished presentation.
Whether you’re enjoying them fresh from the pan or after a short chill, these bars stay tasty and transportable. The key is sealing them well and keeping them out of direct heat so the texture stays right where you want it: chewy with a tidy, glossy finish.
Frequently Asked Questions
Final Thoughts
Nutella Rice Krispie Treats aren’t just a dessert; they’re a reminder that playfully indulgent treats can be simple, reliable, and comforting. They travel well, feed a crowd, and still feel like a little celebration in every bite. I’ve made them for birthdays, after-school snack times, and last-minute movie nights, and they’ve never disappointed. If you’re craving that familiar, cozy chocolatey finish but want it with a glossy Nutella glow, this recipe is for you. Try a batch for your next family night, or surprise a neighbor with a homemade treat that tastes like a warm hug. And I’d love to hear how yours turn out—leave a comment with your tweaks, your favorite glaze variation, or a photo of your own glorious swirls. Happy baking!

Nutella Rice Krispie Treats
Ingredients
Main Ingredients
- 6 tablespoons salted butter
- 16 ounces mini marshmallows, divided
- 1 teaspoon vanilla extract
- 1.25 cup Nutella spread divided
- 6 cups Rice Krispies cereal
Instructions
Preparation Steps
- Line a 9-inch square baking dish with parchment paper and set it aside. I use binder clips to keep the parchment paper in place.
- In a large pot, melt butter over medium heat. Once melted, reduce heat to low and add all but 1 cup of the mini marshmallows to the pot.
- Stir until marshmallows are completely melted. Remove from heat. Add vanilla extract and 1 cup of the Nutella. Stir until smooth. Add cereal and remaining 1 cup of the mini marshmallows. Stir until cereal is completely covered in marshmallow mixture, then pour it into prepared pan.
- Melt remaining 0.25 cup of Nutella in microwave for 30 seconds. Drizzle over krispie treats. Allow treats to set about one hour. Cut and enjoy.