You know, sometimes the simplest things in life bring the most joy. For me, that often comes in the form of food, especially when it reminds me of my grandma. This Lorraine Quiche Recipe is one of those treasures. It’s not fancy, it’s not complicated, but oh my goodness, it is pure comfort. Whenever I need a little taste of home, or when unexpected guests pop by and I need something impressive yet easy, this is my go-to. It’s got that perfect balance of creamy, savory, and just a hint of richness that makes it utterly addictive. Honestly, if you haven’t tried a good quiche Lorraine, you’re missing out. It’s in the same family as a great frittata or a savory tart, but there’s something truly special about its classic elegance and deeply satisfying flavor. I can still picture Grandma, apron on, her hands dusting flour as she’d tell me stories while making this very quiche. That’s the magic it holds for me.
What is Lorraine Quiche?
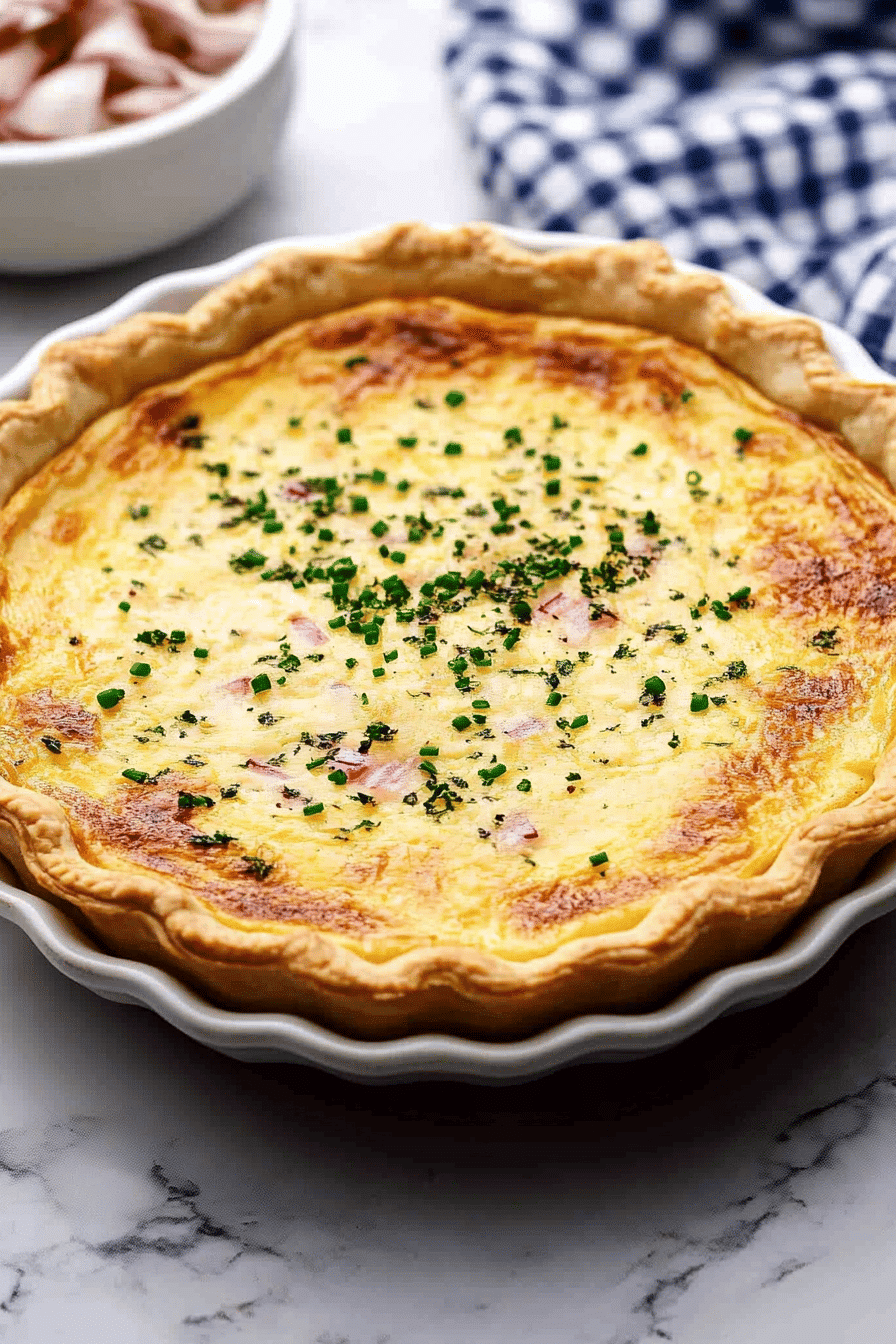
So, what exactly is this culinary marvel we call Lorraine quiche? At its heart, it’s a classic French tart that’s elegant without being fussy. Think of it as a savory custard pie, baked in a crisp pastry crust. The “Lorraine” part comes from the Lorraine region of France, and traditionally, the star players in this quiche are lardons (small strips of fatty bacon) and a creamy custard made from eggs and milk or cream. Sometimes a touch of nutmeg or a hint of onion finds its way in, but the beauty of this Lorraine quiche recipe lies in its foundational simplicity. It’s essentially a celebration of quality ingredients coming together in perfect harmony. It’s not a heavy meal, but it’s incredibly satisfying, making it a perfect star for brunch, lunch, or even a light supper.
Why you’ll love this recipe?
Let me tell you, there are so many reasons why this Lorraine quiche recipe has earned a permanent spot in my recipe box. First off, the flavor profile is just divine. The savory, slightly smoky taste of the bacon melts into the rich, creamy egg custard, all nestled in a buttery, flaky crust. It’s pure indulgence without being overwhelming. And the aroma as it bakes? Forget about it! It fills the entire house with a warm, inviting scent that’s guaranteed to draw everyone to the kitchen. What I love most about this recipe is its sheer simplicity, especially considering how impressive it turns out. You don’t need a culinary degree to make this sing. It’s also surprisingly cost-effective; the ingredients are pretty standard pantry staples for most home cooks. And talk about versatility! While it’s fantastic on its own, I’ll get into some of my favorite serving suggestions later. It’s the kind of dish that feels special enough for a holiday brunch but is also humble enough for a Tuesday night dinner when you just need something comforting. I’ve tried adding all sorts of things over the years – different cheeses, vegetables – but I always come back to this classic Lorraine quiche recipe because it just *works*. It’s a lifesaver on busy nights and a guaranteed crowd-pleaser. My kids, who can be the pickiest eaters, actually ask for this all the time, which is saying something!
How do you make Lorraine Quiche?
Quick Overview
Making this Lorraine quiche is wonderfully straightforward. We’ll start with a pre-made or homemade pastry crust, blind-bake it for that perfect crispness, then mix up a simple, luxurious custard with savory bacon bits. Pour that goodness into the shell, bake until golden and set, and voilà! You have a stunning, delicious quiche ready to impress. It’s the kind of recipe that feels elegant but is truly achievable for any home cook, even on a weeknight. The key is just a little bit of patience with the blind-baking, but trust me, it’s worth it for that shatteringly crisp crust.
Ingredients
For the Pastry Crust: What is the recipe?
One 9-inch pie crust, either store-bought or your favorite homemade recipe. If you’re making your own, I always add a tablespoon of Apple Cider vinegar to the dough; it makes the crust unbelievably tender and flaky! Make sure it’s chilled before you plan to use it.
For the Filling:
6 ounces thick-cut bacon, diced (I like using a good quality smoky bacon for extra flavor)
1/2 cup finely chopped yellow onion (optional, but I love the subtle sweetness it adds)
4 large eggs
1 ½ cups whole milk (you can use half-and-half for an even richer custard, but whole milk is perfectly lovely!)
1/2 teaspoon salt
1/4 teaspoon freshly ground black pepper
Pinch of freshly grated nutmeg (don’t skip this, it really elevates the flavor!)
1/2 cup shredded Gruyère cheese (this is classic and adds a wonderful nutty depth, but a good sharp cheddar works in a pinch!)
For the Glaze:
This quiche doesn’t typically have a glaze in the traditional sense, but if you want a little something extra, a light brushing of melted butter on the crust edges after baking can add a lovely sheen. We’ll focus on getting the quiche itself perfect!
Step-by-Step Instructions
Step 1: Preheat & Prep Pan
First things first, let’s get our oven preheated to 375°F (190°C). While that’s heating up, you’ll want to take your pie crust and gently press it into your 9-inch pie plate. Crimp the edges decoratively – it just makes it look so much prettier! To prevent the crust from puffing up too much during baking, we’re going to blind-bake it. This means lining the unbaked crust with parchment paper or aluminum foil, filling it with pie weights, dried beans, or even rice. Make sure the weights go all the way up the sides of the crust. Pop this into your preheated oven and bake for about 15 minutes.
Step 2: Mix Dry Ingredients
While the crust is blind-baking, let’s get our filling ready. In a medium skillet over medium heat, cook your diced bacon until it’s nice and crispy. This usually takes about 8-10 minutes. Once it’s crispy, remove the bacon from the skillet with a slotted spoon, letting the excess grease drain off. Place the crispy bacon bits on a paper towel-lined plate to absorb any remaining grease. If you’re using the onion, you can sauté it in about 1 tablespoon of the reserved bacon drippings until softened, about 5 minutes, then drain that too. We want the bacon flavor, but not a greasy quiche!
Step 3: Mix Wet Ingredients
In a medium bowl, whisk together the eggs until they’re well combined and slightly frothy. Then, gradually whisk in the whole milk (or half-and-half). Next, add your seasonings: the salt, black pepper, and that crucial pinch of nutmeg. Give it another good whisk until everything is smoothly incorporated. This mixture is going to form the creamy base of our delicious Lorraine quiche.
Step 4: Combine
Now, take your partially baked pie crust out of the oven. Carefully remove the parchment paper and pie weights. If you notice any spots where the crust has puffed up, gently prick them with a fork. Now, sprinkle the crispy bacon bits and the sautéed onions (if using) evenly over the bottom of the crust. Then, sprinkle the shredded Gruyère cheese over the bacon and onions. Finally, carefully pour the egg and milk mixture over everything. Make sure you pour slowly and evenly to fill the crust without overflowing.
Step 5: Prepare Filling
This step is actually already done as we combined the bacon and cheese with the custard in the previous step! The beauty of this Lorraine quiche recipe is that the filling ingredients are straightforward and come together quickly. The key is to ensure your bacon is crispy so it doesn’t make the quiche soggy, and that your cheese is evenly distributed for pockets of melted goodness throughout.
Step 6: Layer & Swirl
No swirling needed for a classic Lorraine quiche! The beautiful layering happens naturally as you add the bacon, cheese, and then pour the custard over top. The cheese will melt down into the custard as it bakes, creating lovely little pockets of deliciousness. The bacon bits will be dispersed throughout, providing that savory crunch in every bite.
Step 7: Bake
Carefully place the quiche back into the oven. Reduce the oven temperature to 350°F (175°C). Bake for approximately 35-45 minutes, or until the center is set and the top is a beautiful golden brown. To check if it’s done, you can gently jiggle the pan – the center should only have a slight wobble. You can also insert a knife near the center; it should come out clean. If the crust edges start to brown too quickly, you can always loosely tent the edges with foil.
Step 8: Cool & Glaze
Once your Lorraine quiche is perfectly baked, carefully remove it from the oven and place it on a wire rack to cool for at least 10-15 minutes before slicing. This is crucial! It allows the custard to fully set, making it much easier to cut neat slices. While it’s cooling, you can admire that gorgeous golden-brown crust and the delicious aroma. As for a glaze, if you want a little extra sheen on the crust, you can gently brush the edges with a tiny bit of melted butter once it’s out of the oven. It’s purely cosmetic, but adds a lovely finish.
Step 9: Slice & Serve
After your quiche has had a chance to cool slightly, it’s ready to be sliced and served! Use a sharp knife to cut into wedges. The inside should be firm yet tender, with those lovely pieces of bacon and melted cheese visible. Serve it warm, and just watch it disappear! It’s perfect for breakfast, brunch, lunch, or even a light dinner. The texture and flavor are just incredible when it’s fresh from the oven and slightly cooled.
What to Serve It With
Oh, the possibilities for serving this magnificent Lorraine quiche are endless! For a lovely **Breakfast** option, I often pair it with a simple side of fresh fruit, like a bowl of mixed berries or some sliced melon. A good cup of coffee is, of course, essential. For a more elegant **Brunch** spread, I love to serve it alongside a crisp green salad with a light vinaigrette. Tiny roasted potatoes or some smoked salmon can also elevate the meal beautifully. For **Dessert**, well, quiche isn’t typically a dessert, but if you’re having a very light, informal meal, a small slice might be nice with a dollop of crème fraîche or a sprinkle of chives. My family’s favorite for a more substantial **Cozy Snack** or light dinner is serving it with a side of lightly dressed mixed greens or some crusty bread for dipping. My kids, bless their hearts, are perfectly happy with just a slice of this quiche on its own – it’s that satisfying! We also sometimes have it with a side of roasted asparagus, which complements the richness of the quiche wonderfully. It’s truly a dish that fits into so many different meal occasions, which is another reason I adore it.
Top Tips for Perfecting Your Lorraine Quiche
I’ve made this Lorraine quiche recipe more times than I can count, and over the years, I’ve picked up a few little tricks that I think make all the difference. First, for the bacon: make sure you cook it until it’s truly crispy. Soggy bacon is a quiche killer! When you drain it, really let that excess grease drip off or pat it dry on paper towels. For the crust, blind-baking is non-negotiable for me. If you skip it, you risk a soggy bottom, and that’s just heartbreaking. I’ve learned that lining the crust with parchment paper and filling it with weights all the way up the sides ensures an even bake. When you’re mixing the custard, whisking the eggs until they’re frothy helps create a lighter, airier texture. And don’t be tempted to overfill the crust – leave a little room for expansion. I once had a quiche overflow in the oven, and let me tell you, cleaning up that mess was not fun! My kids also like a lot of cheese, so I often add a little extra Gruyère or even a sharp cheddar; it melts beautifully into the custard. For ingredient swaps, while Gruyère is classic, I’ve found that a good quality sharp white cheddar or even a Monterey Jack can work well if you can’t find Gruyère. Just be mindful of how much salt you add if your cheese is already salty. And for baking, always remember that ovens can vary. My oven tends to run a little hot, so I often pull mine out a few minutes earlier than the recipe states, just to be safe. The “slight wobble” test in the center is my most trusted method for checking doneness. Finally, the cooling period is essential! It’s tempting to dive right in, but letting it rest ensures you get those clean, beautiful slices without the custard running everywhere.
Storing and Reheating Tips
This Lorraine quiche recipe is pretty forgiving when it comes to storage, which is another reason it’s a weeknight hero! If you happen to have any leftovers (which is rare in my house!), you can keep it at **Room Temperature** for no more than two hours. After that, it really should be refrigerated. For **Refrigerator Storage**, I usually let the quiche cool completely first, then I cover it tightly with plastic wrap or transfer it to an airtight container. It will stay good in the fridge for about 3-4 days. The crust might soften slightly over time, but it’s still delicious. If you want to **Freeze Instructions**, I recommend freezing individual slices. Wrap each slice tightly in plastic wrap, then in aluminum foil, and place them in a freezer-safe bag or container. Frozen quiche should be good for about 1-2 months. To thaw, it’s best to take a slice out of the freezer and let it thaw in the refrigerator overnight. For reheating, whether it’s from the fridge or thawed from frozen, the best method is to pop it back into a moderate oven, around 300°F (150°C), for about 10-15 minutes, or until heated through. You want to gently warm it, not cook it further, so it stays tender. Microwaving is an option, but it can sometimes make the crust a bit less crisp and the custard a little rubbery. I find the oven method yields the best results for maintaining that lovely texture. The glaze timing advice is simple: if you do choose to brush the crust edges with butter for shine, do it right after it comes out of the oven while it’s still hot.
Frequently Asked Questions
Final Thoughts
I truly hope you give this Lorraine quiche recipe a try. It’s more than just a recipe to me; it’s a little piece of my childhood, a reminder of warmth and comfort, and a guaranteed way to make any meal feel a little more special. The combination of that perfectly crisp crust, the rich, savory custard, and the delightful bits of bacon is just pure magic. It’s the kind of dish that makes you want to slow down, savor each bite, and perhaps share a story or two. If you’re a fan of comforting, classic flavors, you absolutely must add this to your repertoire. And if you enjoy this quiche, you might also love my recipe for Creamy Tomato Soup which is perfect for dipping, or my Easy Garlic Bread for extra coziness. I can’t wait to hear what you think, and I’d be absolutely thrilled if you share your own twists or family traditions in the comments below! Happy baking, and enjoy every single delicious bite!

Lorraine Quiche Recipe
Ingredients
Crust
- 1 recipe All butter pie crust
Filling
- 8 slices Bacon
- 1 medium Onion diced
- 4 large Eggs
- 1 cup Milk
- 0.5 cup Half and half
- 0.25 teaspoon Salt
- 1.5 cups Swiss or Gruyère cheese shredded (6 ounces)
- 1 tablespoon All-purpose flour
Instructions
Preparation Steps
- Preheat oven to 450°F. Partially bake your pie crust: line the bottom of the chilled crust with parchment paper and pie weights. Bake for 8 minutes, then carefully remove parchment and weights. Poke holes in the bottom with a fork and bake again for 5 minutes. Lower the oven temperature to 325°F.
- Meanwhile, cook bacon over medium heat in a large skillet until crispy. Reserve fat and drain bacon on paper towels, then crumble.
- Cook diced onion in some of the reserved bacon fat over medium heat in the same skillet until tender and translucent, about 3-5 minutes.
- Toss shredded cheese with flour in a small bowl. Set aside.
- In a medium bowl, whisk together eggs, milk, half and half, and salt. Stir in the crumbled bacon, cooked onions, and the cheese mixture. Pour this filling into the partially baked pie crust.
- Place the pie on a cookie sheet and cover the edges with a pie shield to prevent over-browning.
- Bake for an additional 45-50 minutes, or until the center is just slightly wobbly when gently tapped and the top is a light golden color.
- Let the quiche cool for at least 1 hour before slicing and serving. This allows the filling to set properly.
- Store any leftovers in the refrigerator in an airtight container.