Oh, you guys, I am so incredibly excited to share this recipe with you today! It’s one of those dishes that just screams “happy place” for me. Every time I make this Hawaiian Chicken Recipe, it feels like a little vacation in my own kitchen. You know those meals that just instantly lift your mood and make your whole house smell amazing? This is it. It’s got that perfect balance of sweet, savory, and a little tangy zing that just makes you close your eyes and sigh with happiness. Honestly, it’s become my absolute favorite way to use chicken, rivaling even my beloved teriyaki chicken, but with its own unique, tropical flair. It’s the kind of dish that makes even the most mundane Tuesday feel like a weekend getaway. My family devours it, friends always ask for the recipe, and it’s surprisingly simple to whip up, even on a weeknight. Get ready to have your taste buds transported!
What is Hawaiian chicken?
So, what exactly is this magical Hawaiian chicken recipe I’m raving about? Think of it as a delightful tropical hug for your taste buds. It’s essentially tender pieces of chicken, usually thighs because they stay so juicy, coated in a luscious, vibrant sauce that’s a harmonious blend of sweet pineapple, tangy soy sauce, a touch of brown sugar for caramelization, and often some garlic and ginger to give it a little kick. It’s not overly complicated, which is a huge plus, but the flavor profile is anything but basic. The name comes from the inspiration behind the dish – those bright, sunny flavors we associate with the Hawaiian islands. It’s a dish that embodies that laid-back, island vibe. It’s not a traditional Hawaiian dish in the strictest sense, but rather an Americanized, super-popular take inspired by the flavors and the feeling of paradise. It’s approachable, forgiving, and always a crowd-pleaser. It’s basically comfort food with a passport!
Why you’ll love this recipe?
Okay, let me count the ways you’re going to fall head-over-heels for this Hawaiian chicken recipe. First and foremost, the FLAVOR. Oh my goodness, the flavor! It’s this incredible symphony of sweet, savory, and a little bit of that umami goodness from the soy sauce. The pineapple juice really does wonders here, tenderizing the chicken and adding a beautiful fruity sweetness that’s balanced out by the salty soy and the warmth of brown sugar. It caramelizes just perfectly, creating these delightful little sticky bits on the chicken. Then there’s the SIMPLICITY. Seriously, this is a lifesaver on busy weeknights. Most of the ingredients are pantry staples or easy to find, and the active cooking time is surprisingly short. You’re looking at maybe 10-15 minutes of prep, and then the magic happens on the stovetop or in the oven while you’re getting other things done. COST-EFFICIENCY is another big win. Chicken Thighs are generally more budget-friendly than breasts, and the sauce ingredients are all quite inexpensive. You get a restaurant-quality meal without the restaurant price tag. And don’t even get me started on VERSATILITY! This dish is fantastic served over fluffy white rice, but it’s also incredible with quinoa, brown rice, or even served in lettuce wraps for a lighter option. You can easily toss in some bell peppers or onions for extra veggies. What I love most about this recipe is that it’s consistently delicious. I’ve made it countless times, and it never fails to impress. It’s a stark contrast to some other recipes that can be a bit finicky or require obscure ingredients. This one is just pure, unadulterated joy in a pan. It’s truly my go-to when I want something comforting but also vibrant and exciting.
How do I make Hawaiian Chicken?
Quick Overview
The beauty of this Hawaiian chicken recipe lies in its straightforward approach. We’ll quickly sear some juicy Chicken Thighs until they’re golden brown, then simmer them in a mouthwatering sauce made from pantry staples like pineapple juice, soy sauce, and brown sugar. It’s all about building layers of flavor without a lot of fuss. The result is incredibly tender, succulent chicken coated in a sticky, sweet-and-savory glaze that’s simply irresistible. You can achieve this in a skillet on the stovetop or even bake it for hands-off cooking. It’s that easy, and trust me, the outcome is so worth it!
Ingredients
For the main chicken: For the main chicken: For the main chicken: For the main chicken: For the main chicken: For the main chicken: For
1.5 lbs boneless, skinless chicken thighs, cut into bite-sized pieces (I swear by thighs here; they stay so much moister than breasts! If you must use breasts, just be extra careful not to overcook them.)
2 tablespoons vegetable oil or other neutral cooking oil
Salt and freshly ground black pepper, to taste
For the Flavorful Sauce:
1 cup pineapple juice (from canned pineapple chunks or fresh, unsweetened is best)
1/2 cup soy sauce (or tamari for gluten-free)
1/4 cup packed brown sugar (light or dark, both work beautifully)
2 tablespoons ketchup (this adds a lovely tang and depth!)
1 tablespoon rice vinegar (for that essential tang)
2 cloves garlic, minced (don’t skimp on the garlic, it’s key!)
1 teaspoon grated fresh ginger (or 1/2 teaspoon ground ginger if fresh isn’t handy)
For Serving & Garnish (Optional but Recommended!):
Cooked white rice or brown rice
Chopped fresh pineapple chunks
Toasted sesame seeds
Sliced green onions
Step-by-Step Instructions
Step 1: Preheat & Prep Pan
First things first, let’s get everything ready. If you’re planning to serve this over rice, now’s the time to start cooking that. For the chicken, I like to pat the thigh pieces dry with paper towels. This helps them get a nice sear instead of just steaming. Then, season them generously with salt and pepper. Honestly, I always do this step right before I start cooking; it just ensures the seasoning adheres better. Grab a large skillet or a Dutch oven – something with a good, heavy bottom is ideal for even heating. You’ll want to heat 2 tablespoons of vegetable oil over medium-high heat until it’s shimmering. Don’t let it smoke, but you want it nice and hot.
Step 2: Mix Dry Ingredients
Wait, there aren’t any “dry ingredients” to mix in the traditional sense for this Hawaiian chicken recipe. The chicken itself is seasoned, and the sauce ingredients will be combined separately. So, while you can’t mix dry ingredients, think of this as the initial seasoning step for your chicken, ensuring each piece is well-coated with salt and pepper. This is super important for building flavor from the ground up. Some people even mix their chicken pieces with a little cornstarch at this stage for extra crispiness and to help the sauce cling, but I find it perfectly delicious without it. Just make sure those seasonings get all over the chicken!
Step 3: Mix Wet Ingredients
Now, let’s create that magical sauce! In a medium bowl or a large liquid measuring cup, whisk together the pineapple juice, soy sauce, brown sugar, ketchup, and rice vinegar. Make sure to really whisk it well until the brown sugar is mostly dissolved. Then, stir in the minced garlic and grated fresh ginger. The aroma already starts to get pretty enticing at this stage, doesn’t it? I always give it a taste here to see if it needs a little more sweetness or tanginess for my liking. It’s good to know what you’re working with before it all comes together!
Step 4: Combine
This is where the real magic begins! Carefully add your seasoned chicken pieces to the hot skillet in a single layer. Don’t overcrowd the pan, or the chicken will steam instead of searing. You might need to do this in batches. Let the chicken cook for about 3-4 minutes per side, until it’s nicely browned and starting to develop a golden crust. Once all the chicken is seared, remove it from the skillet and set it aside on a plate. Don’t worry if it’s not fully cooked through at this point; it will finish cooking in the sauce. Pour off any excess fat from the skillet, leaving just a tablespoon or so.
Step 5: Prepare Filling
In this particular Hawaiian chicken recipe, the “filling” is essentially the sauce we just mixed up in Step 3. There isn’t a separate filling component like in a pie or a pastry. The sauce acts as the flavor-packed coating and cooking liquid for the chicken. If you were to adapt this recipe to add veggies like bell peppers or onions, you’d sauté those briefly in the skillet after searing the chicken, before adding the sauce. But for the classic version, the sauce itself is the star that envelopes the chicken, creating that beautiful, sticky glaze.
Step 6: Layer & Swirl
This step is more about combining than layering and swirling in the traditional sense. Once your chicken is seared and removed, and the skillet is ready with a little bit of oil, you’ll add the sauce mixture back to the pan. Bring it to a simmer over medium heat. Then, return the seared chicken pieces to the skillet. Stir everything around to coat the chicken evenly with the sauce. Let it simmer gently for about 8-10 minutes, or until the chicken is cooked through and the sauce has thickened to a beautiful, syrupy glaze. Keep stirring occasionally to prevent sticking and to ensure the chicken cooks evenly in the luscious sauce. The ‘swirling’ happens naturally as the sauce reduces and coats everything!
Step 7: Bake
While this recipe is fantastic cooked entirely on the stovetop, you can also opt for baking. Once you’ve returned the seared chicken to the skillet with the sauce (after Step 6, before it’s fully thickened), you can transfer the oven-safe skillet (or pour everything into a baking dish) and bake it. Preheat your oven to 375°F (190°C). Bake for about 15-20 minutes, or until the chicken is cooked through and the sauce is bubbling and has thickened nicely. This method gives you a more hands-off approach, and the edges of the chicken can get wonderfully caramelized. It’s a great option if you’re juggling multiple things in the kitchen!
Step 8: Cool & Glaze
Once your Hawaiian chicken is cooked through and the sauce has thickened to your liking – you’re looking for that syrupy consistency that coats the back of a spoon – remove the skillet from the heat. Let it sit for just a couple of minutes. This allows the flavors to meld and the sauce to thicken just a little bit more. If you’re serving it immediately, the glaze is perfect. If you plan to store leftovers, the glaze will thicken even further as it cools. If it becomes too thick when you reheat it, you can always add a tiny splash of water or pineapple juice to loosen it up again. For serving, I like to spoon generous amounts of that sticky glaze over the chicken and rice.
Step 9: Slice & Serve
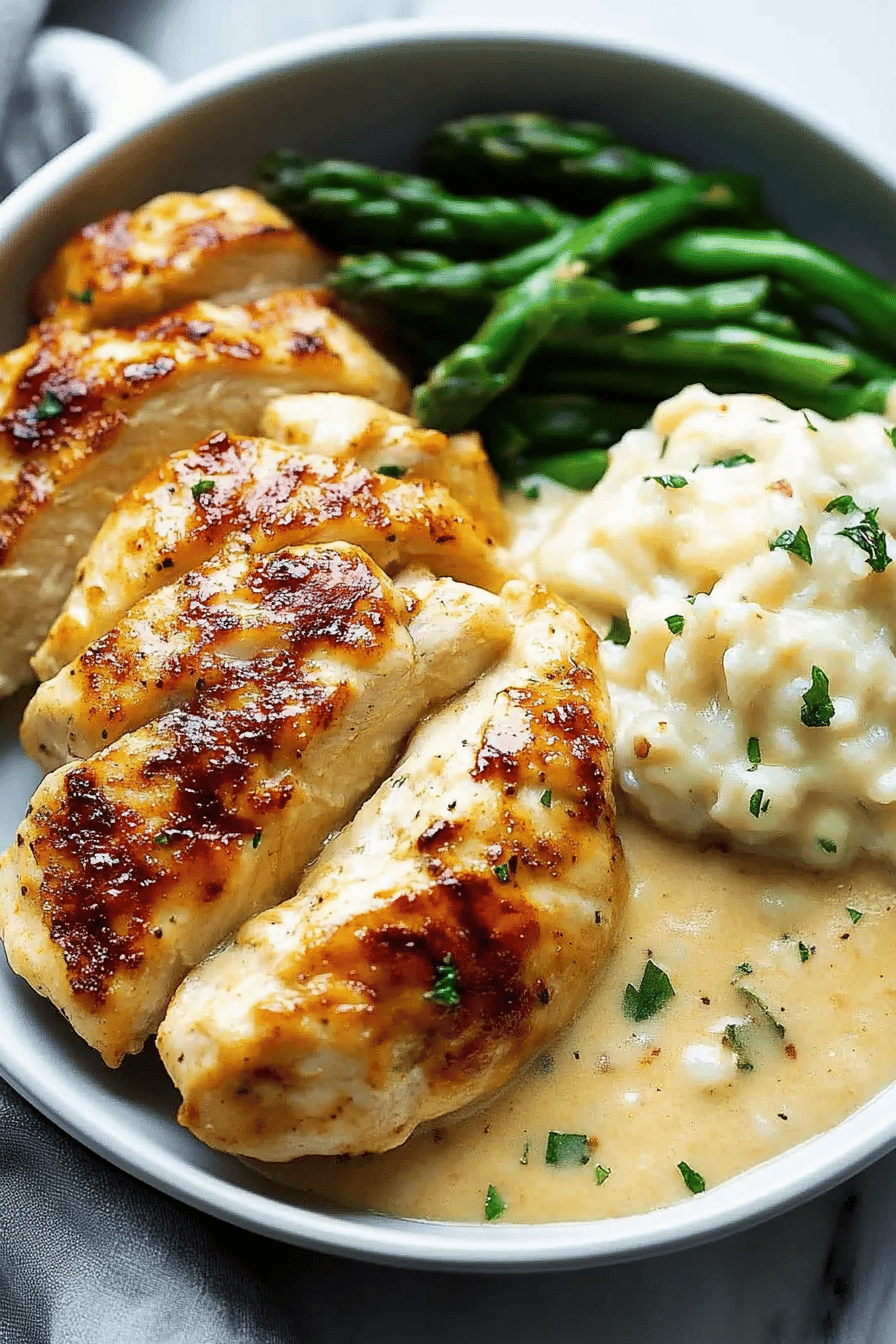
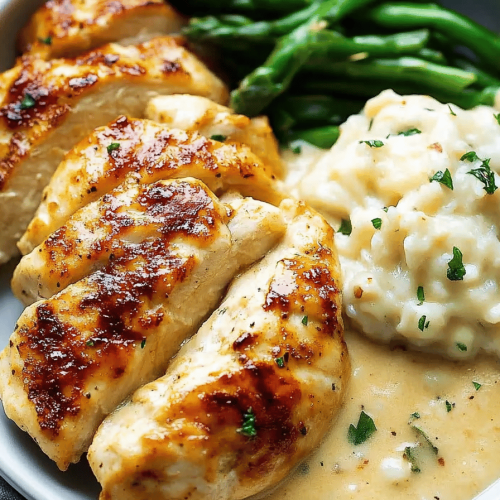
This is the best part! Ladle that gorgeous, saucy Hawaiian chicken over a bed of fluffy white or brown rice. I always like to add a sprinkle of toasted sesame seeds and some thinly sliced green onions for a pop of color and freshness. If you have them, some fresh pineapple chunks scattered around add an extra burst of tropical flavor and texture. Sometimes I even dice up a few of the pineapple chunks from the can and toss them in the sauce during the last few minutes of cooking. Slice the chicken into manageable, bite-sized pieces if you haven’t already, ensuring each piece is well-coated. Serve immediately while it’s warm and gloriously sticky!
What to Serve It With
This Hawaiian chicken recipe is so wonderfully versatile, making it perfect for practically any meal of the day! For breakfast, while it might sound a bit unusual, imagine a small portion served alongside some scrambled eggs with a side of sweet potato hash. The savory-sweet chicken is a surprising and delicious contrast! For brunch, this is an absolute star. Serve it over fluffy white rice, alongside some fresh fruit salad, maybe some crispy bacon, and a mimosa. The vibrant colors and tropical flavors really elevate the brunch experience. It’s a bit more exciting than your standard breakfast fare. As a main course for dinner, it’s obviously fantastic served over rice. But don’t stop there! Try it with a side of steamed broccoli or stir-fried mixed vegetables for a complete meal. For a lighter option, serve it in large lettuce cups with some shredded carrots and bean sprouts – it’s like a deconstructed spring roll! And for cozy snacks, I sometimes just eat leftovers straight from the container, no judgment! Or, serve it with some crusty bread to sop up all that glorious sauce. My family absolutely loves it with a side of macaroni salad, just like you might find at a Hawaiian plate lunch. It sounds a bit eclectic, but the creamy, cool mac salad is the perfect counterpoint to the warm, sticky chicken.
Top Tips for Perfecting Your Hawaiian Chicken Recipe
I’ve made this Hawaiian chicken recipe more times than I can count, and through trial and error (and a few delicious mistakes!), I’ve picked up some tricks that really make it shine. For the chicken itself, using thighs is non-negotiable in my kitchen. They just have the best fat content to stay incredibly moist and tender, even if you accidentally let them simmer a bit too long. If you *do* opt for chicken breasts, cut them into slightly smaller pieces and be super vigilant about cooking time; overcooked chicken breast is just heartbreakingly dry. Patting the chicken dry before searing is a game-changer for getting that nice golden-brown crust. Don’t skip it! When it comes to the sauce, using unsweetened pineapple juice is key. If you use the syrupy kind from a can of fruit cocktail, your sauce will be way too sweet. I’ve tested this with both light and dark brown sugar, and honestly, both work wonderfully. Dark brown sugar will give it a richer, deeper caramel flavor, while light brown sugar keeps it a little brighter. If your sauce isn’t thickening enough, don’t panic! You can always mix a teaspoon of cornstarch with a tablespoon of cold water (this is called a slurry) and stir it into the simmering sauce. Let it bubble for a minute or two, and it will thicken up beautifully. For those of you who like a little extra heat, feel free to add a pinch of red pepper flakes to the sauce. It adds a lovely warmth without overpowering the sweet and savory notes. I’ve also experimented with different vinegars – apple cider vinegar works in a pinch, but rice vinegar really gives it that authentic tang that balances the sweetness so well. Sometimes, when I’m feeling fancy, I’ll add a splash of sesame oil to the sauce at the very end for an extra layer of nutty flavor. And for serving, don’t underestimate the power of fresh garnishes. Those green onions and sesame seeds aren’t just for show; they add a fresh crunch and visual appeal that makes the dish feel complete. Trust me on these little tweaks; they make a world of difference!
Storing and Reheating Tips
One of the best things about this Hawaiian chicken recipe is how well it stores and reheats, making it perfect for meal prep or enjoying leftovers. If you’re keeping it at room temperature, I wouldn’t leave it out for more than a couple of hours, just to be safe, especially if there’s rice involved. For refrigerator storage, let the chicken and rice cool down completely before transferring them to an airtight container. It will stay delicious in the fridge for about 3-4 days. I’ve found that the flavors actually meld even more overnight, so sometimes leftovers are even better! If you want to freeze it, make sure everything is completely cooled. Portion it into freezer-safe containers or heavy-duty freezer bags. It should be good in the freezer for up to 2-3 months. When it comes to reheating, I usually opt for the stovetop or microwave. For the stovetop, gently reheat the chicken and rice in a skillet over low heat, adding a tablespoon or two of water or pineapple juice if it seems a bit dry. Stir frequently until heated through. This method helps retain the moisture and prevent the chicken from getting rubbery. In the microwave, just heat it in 30-60 second intervals, stirring in between, until it’s piping hot. If you froze your chicken, thaw it overnight in the refrigerator before reheating. For the glaze, it tends to thicken considerably when chilled. If it’s too thick when you reheat, a tiny splash of water, broth, or pineapple juice will loosen it right back up to that perfect sticky consistency. Don’t be afraid to adjust it to your preference!
Frequently Asked Questions
Final Thoughts
So there you have it, my absolute favorite Hawaiian chicken recipe! It’s a dish that truly embodies everything I love about cooking: incredible flavor, surprising ease, and the ability to bring smiles to the faces of everyone I share it with. It’s more than just a meal; it’s a little slice of sunshine, a way to escape the everyday and transport yourself to a tropical paradise with every delicious bite. If you’re looking for a recipe that’s consistently a winner, budget-friendly, and incredibly satisfying, this is it. It’s the kind of dish that becomes a staple in your recipe rotation. I really hope you give this one a try – it’s a true gem! If you do make it, please, please let me know how it turns out in the comments below! I’d love to hear about your experience, any variations you tried, or how much your family enjoyed it. Sharing your creations makes my day! And if you loved this recipe, you might also enjoy my Speedy Sheet Pan Lemon Herb Chicken or my readers’ favorite Garlic Parmesan Baked Chicken. Happy cooking, and I can’t wait to hear all about your delicious Hawaiian chicken adventures!
Hawaiian Shoyu Chicken
Ingredients
Main Ingredients
- 2 pounds bone-in, skin-on chicken thighs approximately 5-6 thighs
- 1 cup reduced sodium chicken broth
- 0.75 cup reduced sodium or lite soy sauce
- 0.5 cup light brown sugar packed
- 0.33 cup mirin
- 0.25 cup rice vinegar also labeled rice wine vinegar
- 3 cloves garlic finely minced
- 1 tablespoon grated fresh ginger or 1.5 teaspoons dried ginger
- 3 tablespoons water
- 3 tablespoons cornstarch
- 0.25 teaspoon red pepper flakes or to taste
Optional Garnish
- thinly sliced green onions
- sesame seeds
Instructions
Preparation Steps
- Place the chicken in the Dutch oven or skillet with the skin side up; set aside briefly.
- In a small bowl, add the broth, soy sauce, brown sugar, mirin, rice vinegar, garlic, and ginger. Whisk to combine and evenly pour the mixture over the chicken.
- Bring to a boil over high heat. After the liquid boils, turn the heat to medium-low or low and simmer for about 30 minutes, flipping the chicken over once midway through cooking. This is technically braising, meaning cooking in liquid over lower heat.
- Ensure chicken thighs reach an internal temperature of 170-175°F for optimal tenderness.
- After the thighs are done, remove them from the skillet and place on a plate momentarily. Keep the cooking liquids in the bottom of the skillet.
- In a small bowl, stir together the water and cornstarch to make a slurry.
- Add the slurry to the liquid in the bottom of the skillet, add the red pepper flakes, stir to combine, and heat over medium to medium-high heat for about 5 minutes, or until the sauce begins to bubble lightly and thicken. Stir nearly continuously.
- Add the chicken back into the pot, flip it over a few times and toss it around to coat it on all sides with the sauce.
- Optionally, evenly garnish with green onions or sesame seeds.
- Season with salt and pepper to taste if desired. Serve immediately.