Oh, friend, let me tell you about a recipe that’s practically a legend in my house: my perfectly grilled steak. There’s something truly magical about the way a good steak sizzles on the grates, filling the air with that irresistible smoky aroma. It instantly transports me back to summer evenings at my grandparents’ house, where my grandpa, a man of few words but incredible grilling skills, would preside over the barbecue with a focused gaze. He taught me the secret to a phenomenal grilled steak isn’t just about the cut, it’s about confidence, a little patience, and a whole lot of love. Forget those dry, chewy steaks you might have had at casual cookouts; this recipe delivers a juicy, tender, flavor-packed experience that rivals any high-end steakhouse. It’s a game-changer, honestly, and way simpler than mastering, say, a complicated beef wellington. You’re going to be amazed at how easy it is to achieve that beautiful crust and perfect medium-rare center right in your own backyard. Trust me on this one, your taste buds will thank you!
What is my Foolproof, Flavor-Packed Grilled Steak Recipe?
At its heart, this isn’t just any grilled steak recipe; it’s a commitment to maximizing flavor and achieving that elusive perfect doneness every single time. Think of it as your personal masterclass in steak grilling, distilled into easy-to-follow steps. It’s essentially about choosing the right cut, giving it a fantastic dry brine, searing it hot and fast for an incredible crust, and then letting that gorgeous meat rest to redistribute all those amazing juices. We’re not getting overly fancy with marinades here because honestly, a truly great piece of beef, seasoned properly and grilled to perfection, doesn’t need much else. It’s approachable for even the most hesitant grill masters but delivers results that’ll impress even the most discerning steak connoisseurs. This method is all about respecting the meat and letting its natural, delicious flavors shine through.
Why you’ll love this recipe?
There are so many reasons this grilled steak recipe has become my absolute go-to, and I’m just bursting to share them with you! What I love most about this is… well, everything, but if I had to pick:
- What is the flavor that explodes? We’re talking about a rich, beefy flavor amplified by a killer crust that brings out all those savory notes. Each bite of this grilled steak is juicy, tender, and seasoned just right. It’s got that smoky char you crave from the grill, perfectly balanced with the natural sweetness of the meat. It’s truly superior to a pan-seared steak because of that unique grilled essence.
- What is the most simple thing you’ve ever seen? Seriously, this recipe looks impressive, but it’s shockingly easy to pull off. It’s mostly hands-off time with the dry brine, and the actual grilling process is quick. This one’s a lifesaver on busy weeknights when you want something special without hours in the kitchen. My kids actually ask for seconds when I make this, and that’s saying something!
- How is Cost-Efficient? While quality steak can be an investment, this recipe ensures you get every penny’s worth by cooking it perfectly. You won’t be ruining an expensive cut by overcooking it, meaning less waste and more deliciousness. Plus, with simple ingredients, you’re not shelling out for a dozen obscure spices.
- Versatility for Days: This grilled steak is a chameleon! It’s perfect as the star of a celebratory dinner with roasted potatoes and asparagus, but I’ve also sliced leftovers cold for incredible steak salads or warm steak sandwiches the next day. It’s fantastic alongside a fresh summer salad or even chopped up into tacos. It definitely has more versatility than, say, a delicate salmon fillet, because its robust flavor holds up to so many different accompaniments. You’ll find yourself craving this method for all your beef cuts!
I’ve made this countless times and it never fails to impress. It’s the kind of meal that brings everyone to the table, eagerly anticipating that first bite. That’s why it stands out for me.
How to Make My Foolproof, Flavor-Packed Grilled Steak
Quick Overview
Getting a perfect grilled steak is all about setting yourself up for success. We’ll start with a little prep work that makes all the difference – a good dry brine for maximum flavor and tenderness. Then it’s a quick trip to a screaming hot grill to develop that gorgeous crust, followed by indirect heat to finish cooking evenly. The best part? It’s surprisingly quick once the initial brining is done, making it totally doable for a weeknight. You’ll achieve restaurant-quality results right in your own backyard without any fuss, I promise!
Ingredients
Alright, let’s talk about what you’ll need. The beauty of a truly great grilled steak is its simplicity. We’re not hiding anything here, just enhancing what’s already wonderful.
For the Star of the Show:
- 2 (1.5-inch thick) boneless ribeye, New York strip, or sirloin steaks: Quality matters here, friend! Look for good marbling – those little flecks of fat mean flavor and tenderness. I usually grab Prime or Choice grade when I can.
For the Dry Brine:
- 1 tablespoon coarse kosher salt: This isn’t just for seasoning; it’s a game-changer for tenderness. Don’t use fine table salt here; it’s too potent.
- 1 teaspoon freshly ground black pepper: The fresher, the better for that pungent kick.
- 1/2 teaspoon garlic powder: A little something extra to deepen the savory notes without burning on the grill.
For Finishing (Optional, but highly recommended!):
- 1 tablespoon unsalted butter: A pat of butter melts into the steak as it rests, adding incredible richness.
- Fresh herbs (rosemary or thyme sprigs): Just a couple of sprigs for aromatic magic during the rest.
Step-by-Step Instructions
Step 1: Preheat & Prep Your Steak
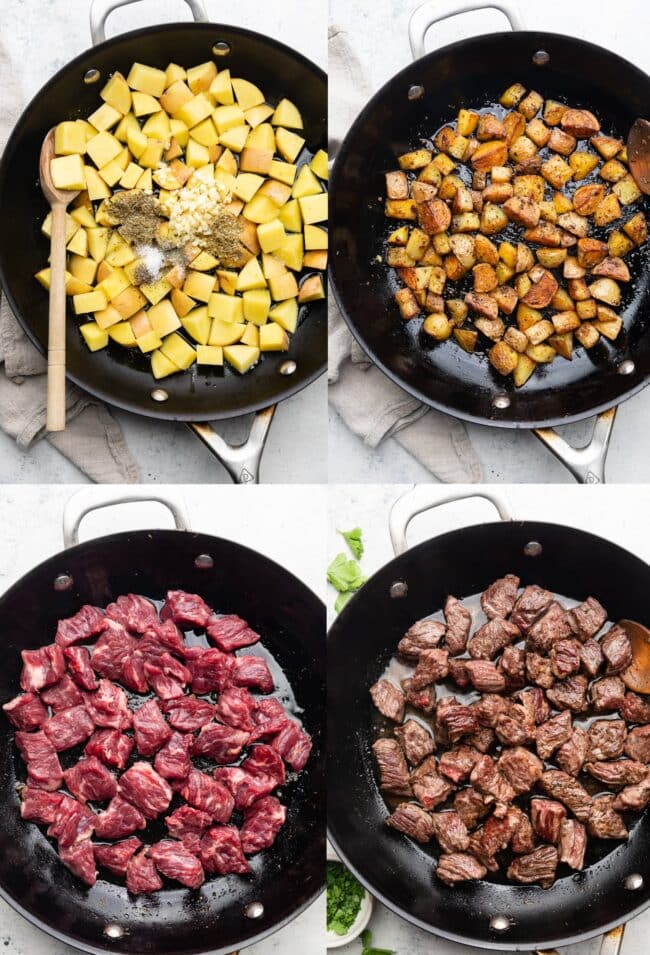
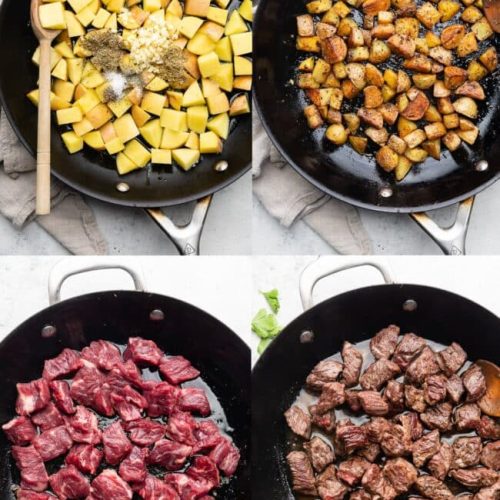
First things first, take your gorgeous steaks out of the fridge at least 30-60 minutes before you plan to grill. This helps them cook more evenly. While they’re coming to room temperature, liberally season both sides with the kosher salt, black pepper, and garlic powder. Don’t be shy with the salt; it’s going to draw moisture out, create a brine, and then reabsorb, seasoning the meat from within. Now, get your grill screaming hot. For a gas grill, crank all burners to high. For charcoal, get a good chimney full of coals blazing, then spread them mostly to one side for a two-zone setup: one scorching hot direct heat zone and one cooler indirect heat zone. Clean those grates like you mean it, then oil them with a folded paper towel dipped in high-smoke-point oil (like canola or grapeseed) using tongs. This prevents sticking and helps create those beautiful grill marks.
Step 2: Sear the Steaks
This is where the magic crust happens! Place your seasoned steaks directly over the hottest part of your grill. You want to hear that satisfying sizzle immediately. Let them sear undisturbed for 2-3 minutes per side. Resist the urge to peek or move them! This direct, high heat creates what’s called the Maillard reaction, developing those rich, complex flavors and that beautiful, dark brown crust. You’ll see grill marks forming, which is exactly what we’re after.
Step 3: Move to Indirect Heat & Finish Cooking
After searing both sides, move your grilled steak to the cooler side of the grill (the indirect heat zone). Close the lid and let them continue cooking. For medium-rare (my personal favorite!), you’re looking at an internal temperature of 130-135°F (54-57°C). This usually takes another 5-10 minutes, depending on the thickness of your steak and how hot your indirect zone is. I always use a reliable meat thermometer inserted into the thickest part of the steak, away from any bone, to check for doneness. This is not the time to guess, trust me!
Step 4: The Butter & Herb Finish (Optional)
If you’re feeling fancy (and you should be!), once the steaks are about 5 degrees shy of your target temperature, place a pat of unsalted butter on top of each one, along with a sprig of fresh rosemary or thyme. Close the lid for another minute or so, allowing the butter to melt and the herbs to infuse the steak with their aromatic goodness. This step adds an extra layer of flavor and richness that truly takes your grilled steak to the next level.
Step 5: Crucial Resting Period
This is arguably the most important step for a juicy grilled steak. Once your steaks hit their target temperature, immediately remove them from the grill and transfer them to a clean cutting board. Tent them loosely with foil and let them rest for at least 10 minutes, or even up to 15. I know it’s tempting to slice right in, but don’t! Resting allows the juices, which have been pushed to the center by the heat, to redistribute throughout the entire steak. If you cut it too soon, all those delicious juices will just run out onto your board, leaving you with a drier steak. Patience is a virtue here!
Step 6: Slice & Serve
After their well-deserved rest, it’s time to carve into your masterpiece. Slice the grilled steak against the grain into ½-inch thick slices. Cutting against the grain shortens the muscle fibers, making each bite incredibly tender. Arrange them beautifully on a platter, maybe with a sprinkle of flaky sea salt if you’re feeling it, and serve immediately. The aroma alone will have everyone rushing to the table!
What to Serve It With
Honestly, a perfectly grilled steak is so good it barely needs companions, but a few thoughtfully chosen sides can elevate the whole experience into a truly memorable meal. Here are some of my family’s favorite pairings:
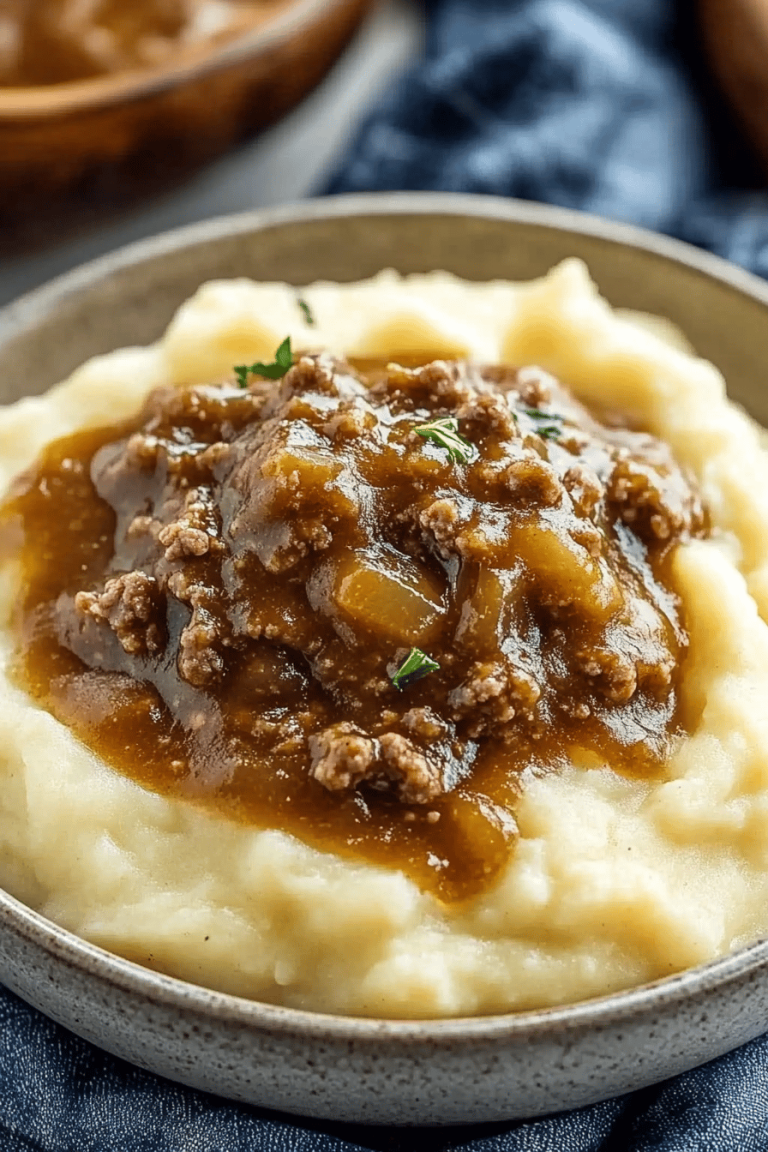
For Dinner Party Elegance: This grilled steak absolutely shines with something like creamy mashed potatoes (extra butter, please!) and crisp-tender asparagus spears. A glass of bold Cabernet Sauvignon is the perfect complement. For a bit of a twist, I sometimes add a simple chimichurri sauce on the side – the bright, herbaceous notes cut through the richness beautifully, and it feels a bit more special than just a plain sauce.
For a Cozy Weeknight Meal: When I’m aiming for comfort, I love serving sliced grilled steak alongside roasted sweet potatoes and a big, fresh green salad with a vinaigrette. It’s hearty, satisfying, and doesn’t feel too heavy. It’s truly a lifesaver when I want something delicious but don’t have hours to fuss. My kids ask for this all the time, especially if I add a side of crispy fries!
For a Summer BBQ Feast: Nothing says summer like grilled steak with classic barbecue sides. Think corn on the cob (grilled, naturally!), a vibrant coleslaw, and maybe some homemade baked beans. It’s casual, fun, and everyone loves digging in. This setup is perfect when you’re feeding a crowd because the steak is so impressive yet simple to manage on the grill.
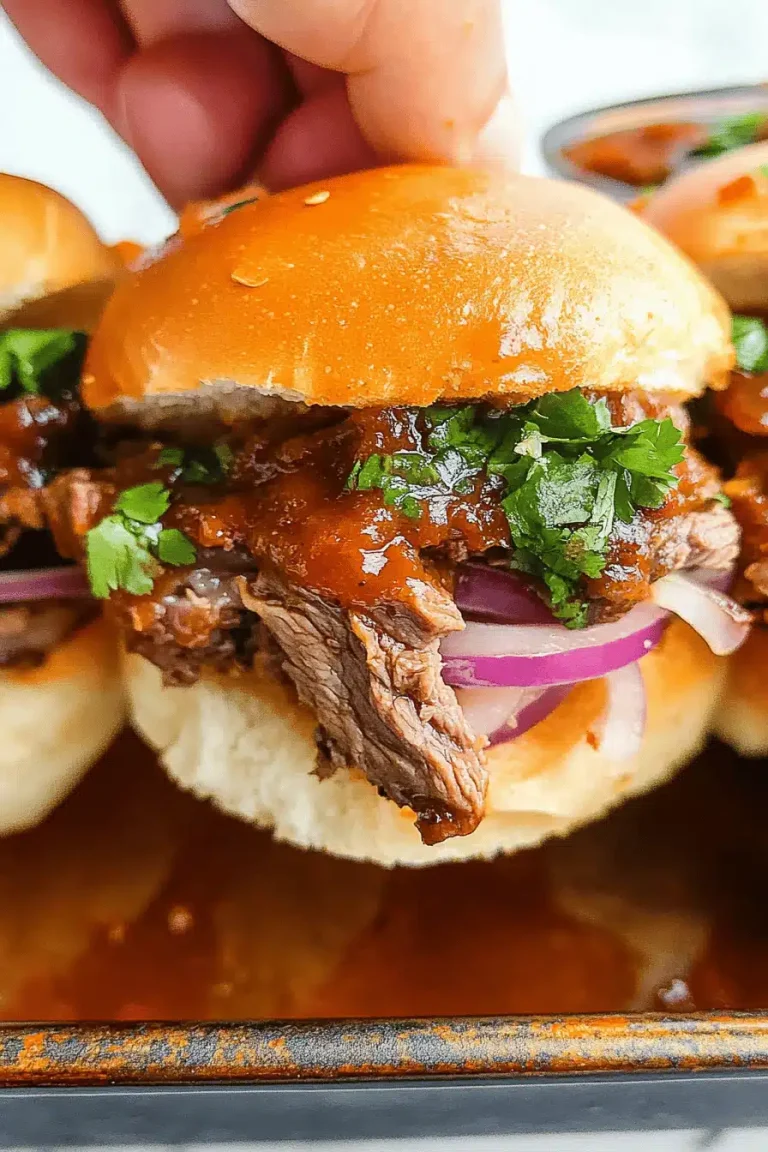
As a Delicious Leftover: Don’t underestimate the power of cold, sliced grilled steak! It makes an incredible steak sandwich on crusty bread with caramelized onions and a little horseradish sauce, or chopped into a hearty Cobb salad for lunch the next day. It’s perfect when you’re craving something savory and substantial without cooking from scratch.
I always find that simple, fresh ingredients let the grilled steak itself be the star, which is exactly what we want!
Top Tips for Perfecting Your Grilled Steak
After years of grilling steaks (and let’s be honest, a few mistakes along the way!), I’ve picked up some tricks that make all the difference. These are the “trust me on this one” tips that will take your grilled steak from good to absolutely legendary:
Choosing Your Cut: Don’t skimp on quality! Look for well-marbled steaks – those little streaks of fat are where the flavor lives and keeps your grilled steak juicy. Ribeye is my personal favorite for its richness, but New York strip and top sirloin are fantastic choices too. Thickness matters; I aim for 1.5-inch thick steaks for that perfect balance of sear and interior doneness.
The Dry Brine is Non-Negotiable: Seriously, this is the number one game-changer. Salting your steak and letting it sit in the fridge uncovered for 12-24 hours before grilling does two things: it draws moisture out of the steak, which creates a super dry surface for an amazing crust, and then the salt dissolves into that moisture and gets reabsorbed, seasoning the meat from the inside out. It’s like a marinade without the mess, and it tenderizes the meat beautifully. I learned this trick after years of making over-marinated, soggy steaks.
Room Temperature is Your Friend: Always, always take your steaks out of the fridge at least 30-60 minutes before grilling. This allows the meat to come up slightly in temperature, ensuring it cooks more evenly from edge to center. If you throw a cold steak on a hot grill, the outside will char before the inside has a chance to cook.
Master the Two-Zone Grill: This is critical for a perfectly grilled steak. You need one side of your grill screaming hot for searing (direct heat) and another cooler side for finishing (indirect heat). This allows you to get that beautiful, dark crust without overcooking the inside. Sear hot, then move to indirect to finish to your desired doneness. It’s a lifesaver!
Don’t Be Afraid of the Heat: When it’s time to sear, your grill needs to be *hot*. Like, “can’t hold your hand over it for more than a second” hot. This is how you achieve that coveted crust and those beautiful grill marks. A properly hot grill also helps prevent sticking.
Use a Meat Thermometer: Please, please, please invest in a good instant-read meat thermometer. It’s the only way to guarantee perfectly cooked grilled steak every single time. Guessing leads to sad, overcooked (or undercooked) meat. Pull your steaks 5 degrees below your target temperature, as they’ll continue to cook while resting.
The Power of the Rest: I cannot stress this enough – resting your steak is vital! It allows the juices to redistribute throughout the meat, resulting in a significantly juicier and more tender grilled steak. If you cut into it too soon, all those delicious juices will just run out, leaving you with a dry steak. Give it at least 10 minutes, tented loosely with foil. Trust me, it’s worth the wait.
Finish with Butter and Herbs: While optional, a pat of butter and a sprig of fresh rosemary or thyme during the last minute of grilling or during the rest adds an incredible layer of aroma and richness. It’s a little touch that makes a big difference.
Following these tips will consistently give you a grilled steak that disappears in minutes at my house!
Storing and Reheating Tips
Sometimes, against all odds, you might have a bit of leftover grilled steak. Don’t worry, it’s just as delicious the next day with the right storage and reheating!
Room Temperature: If you’ve just finished dinner and have a few slices left, your grilled steak can safely sit at room temperature for up to 2 hours. After that, it needs to be refrigerated to maintain freshness and safety. Make sure it’s covered loosely or on a plate to prevent it from drying out too much.
Refrigerator Storage: For longer storage, transfer any leftover grilled steak to an airtight container or wrap it tightly in plastic wrap or aluminum foil. It will keep beautifully in the refrigerator for 3-4 days. I often slice it against the grain before storing, as this makes it easier to grab a quick snack or add to a salad.
Freezer Instructions: If you’ve cooked up a big batch or just want to save some for a rainy day, grilled steak freezes surprisingly well! Wrap individual portions tightly in plastic wrap, then place them in a freezer-safe bag or container, pressing out as much air as possible. It will stay good in the freezer for up to 3 months. When you’re ready to enjoy, thaw it overnight in the refrigerator.
Reheating Tips: Reheating grilled steak can be tricky because you don’t want to dry it out or overcook it. My favorite method is a gentle one:
- For the Oven: Preheat your oven to a low temperature, around 250°F (120°C). Place the steak on a wire rack set over a baking sheet. Add a tablespoon or two of beef broth or water to the bottom of the pan to create some steam, then loosely tent with foil. Heat for 15-20 minutes, or until just warmed through. This prevents it from getting rubbery.
- For the Skillet: You can also gently warm slices in a lightly oiled skillet over medium-low heat for a few minutes per side, just until warmed through. Don’t blast it with high heat, or you’ll lose all that tenderness.
Sometimes, I just enjoy my leftover grilled steak cold, sliced thin over a salad, because the flavor is still incredible and it’s super convenient!
Frequently Asked Questions
Final Thoughts
Phew! We’ve covered a lot, haven’t we? But truly, the heart of it all is this: making a spectacular grilled steak doesn’t have to be complicated or intimidating. It’s about a few key techniques, a little love for the process, and understanding what makes beef sing on the grill. This isn’t just a recipe; it’s an invitation to create those incredible, memorable meals that gather everyone around the table, savoring every single juicy bite. The smell alone brings everyone to the kitchen, and watching faces light up after that first taste? Pure joy. If you’ve enjoyed mastering this, you might love exploring my other grilling recipes, like my perfect grilled chicken or even some smoked ribs! Don’t be shy in the comments; I can’t wait to hear how your grilled steak turns out. What are your favorite sides? Any secret tips you swear by? Happy grilling, my friend!
grilled steak
Ingredients
Marinade Ingredients
- 0.25 cup olive oil or other light oil
- 0.25 cup reduced sodium soy sauce
- 1 lime juiced
- 1 orange juiced
- 1 tablespoon minced garlic about 4 cloves
- 0.25 cup cilantro finely chopped
- 1 jalapeno finely chopped, remove seeds to reduce heat
- 1 teaspoon cumin
- 1 teaspoon salt
- 0.5 teaspoon ground black pepper
- 0.5 teaspoon smoked paprika
Main Ingredients
- 2 pounds flank steak or skirt steak
For Serving (Optional)
- tortillas
- cheese
- salsa
- guacamole
- lettuce
Instructions
Marinade & Steak Prep
- In a large zipper top gallon-sized baggie or a shallow dish with a lid, add the olive oil, soy sauce, juice of the lime, juice of the orange, garlic, cilantro, jalapeno, cumin, salt, pepper, and paprika.
- Use a fork to combine the marinade ingredients.
- Add the flank steak to the dish or bag and use the fork to move the steak around in the marinade to coat it well (or close up the bag and massage the marinade into the steak a bit).
- Cover or close the bag and place the steak in the fridge to marinade for 4 hours or up to 24 hours. Turn the bag or move the steak around in the dish a few times if you remember to make sure it stays evenly covered in the marinade.
Grilling & Serving
- When you are ready to prepare the carne asada, preheat your grill to medium-high heat.
- Clean and oil the grates (use a cleaning brush and then rub a paper towel dipped in oil on the grates; this helps everything to not stick).
- Place the steak pieces on the grill and cook for 6 minutes per side, flipping once for medium cooked steak.
- Remove from the grill and allow the meat to rest for 5 minutes.
- After the meat has rested, slice it thinly against the grain and serve it however you like best.
- The meat is great in tacos, on salad, in a burrito, in a Tex-Mex style rice bowl, the possibilities are endless.