You know those days when a craving hits, a *serious* craving? The kind that only a warm, gooey chocolate chip cookie can satisfy? For me, that craving always leads me to a batch of my favorite softbatch chocolate chip cookies. Forget those crisp, brittle cookies that shatter when you try to break them in half – we’re talking about the kind of cookie that has that perfect, pillowy chew, where the chocolate chips are still melty and the edges are just lightly golden. My grandma used to make something similar, and the smell of them baking always meant pure comfort. This recipe is my homage to her, a little tweaked and perfected over the years to guarantee that truly incredible softbatch texture every single time. It’s surprisingly simple, which is a lifesaver on busy weeknights when you need a little sweetness without a huge fuss. Honestly, these have become our go-to for everything from school bake sales to lazy Sunday afternoons with a mug of tea. I truly believe that a perfectly soft cookie is one of life’s greatest simple pleasures.
What is Softbatch Chocolate Chip Cookies?
So, what exactly *is* a softbatch chocolate chip cookie? Think of it as the antithesis of a thin, crispy cookie. The “softbatch” really speaks to the texture we’re aiming for: incredibly tender, moist, and chewy, with a slight pliability that lets you fold it gently in half without it breaking. It’s essentially a cookie that’s baked just long enough to set the edges but still leaves the center delightfully underdone, allowing it to continue baking and firming up slightly as it cools. This method relies on a precise balance of ingredients and a watchful eye in the oven. It’s not about achieving a delicate crunch; it’s about indulging in that luxurious, almost cake-like interior that melts in your mouth. It’s the kind of cookie that makes you close your eyes with the first bite and utter a little “mmm.” This recipe nails that balance, creating a cookie that’s wonderfully satisfying without being heavy.
Why you’ll love this recipe?
There are so many reasons why this softbatch chocolate chip cookie recipe has earned a permanent spot in my baking rotation, and I just know you’re going to fall in love with it too. First and foremost, the FLAVOR is out of this world. It’s that classic buttery, brown sugar goodness with plenty of rich chocolate. But it’s the TEXTURE that really sets it apart. These cookies are just… dreamy. They’re soft, they’re chewy, they have this wonderful yielding quality that just feels so comforting. And the SIMPLICITY! Honestly, if you can stir ingredients together, you can make these cookies. There are no complicated steps or fancy techniques involved. Plus, they are incredibly COST-EFFECTIVE. Most of the ingredients are pantry staples, making it a budget-friendly way to satisfy a crowd or just your own sweet tooth. The VERSATILITY is another huge plus. You can absolutely stick to classic chocolate chips, but I’ve experimented with adding nuts, a swirl of caramel, or even a sprinkle of sea salt on top, and they’re always a hit. What I love most about this recipe is that it’s incredibly forgiving. Even if you’re a bit of a beginner baker, you’re almost guaranteed success. It’s my go-to when I need a quick dessert that feels truly special, and my family devours them every single time. It’s also perfect when you’re craving something sweet at 10 pm but don’t want to bake a whole cake.
How do I make softbatch chocolate chip cookies?
Quick Overview
The magic of these softbatch chocolate chip cookies lies in a simple approach: creaming butter and sugars, incorporating eggs and vanilla, then gently folding in the dry ingredients. The key is not to overmix. We’ll then add our glorious chocolate chips, scoop generous mounds onto a baking sheet, and bake them until the edges are just set but the centers are still soft. A short cool on the pan before transferring to a wire rack is crucial for that perfect chewy center. It’s a straightforward process that yields spectacular results, promising that signature soft and chewy texture that makes these cookies so irresistible.
Ingredients
For the Main Batter:
Here’s what you’ll need to get that perfect softbatch base going. The quality of your butter and sugar really does make a difference, so use the good stuff if you can!
- 1 cup (2 sticks) unsalted butter, softened: Make sure it’s truly softened – not melted, but yielding when you press it. This is crucial for proper creaming.
- 3/4 cup granulated sugar: This provides sweetness and helps with structure.
- 1 cup packed light brown sugar: This is your secret weapon for chewiness and that lovely caramel undertone. Don’t skip it!
- 2 large eggs, room temperature: Room temperature eggs incorporate more easily and create a smoother batter.
- 2 teaspoons pure vanilla extract: Pure vanilla extract makes a world of difference in flavor compared to imitation.
- 2 1/2 cups all-purpose flour: Spooned and leveled, not scooped! Scooping can pack too much flour in.
- 1 teaspoon baking soda: This gives them a little lift and helps with the chewy texture.
- 1/2 teaspoon salt: Balances the sweetness and enhances all the other flavors.
For the Filling (Chocolate Chips!):
This is where the indulgence happens. You can customize this part endlessly!
- 2 cups (about 12 ounces) semi-sweet chocolate chips: I love semi-sweet for a classic flavor, but feel free to use milk chocolate, dark chocolate, or even a mix!
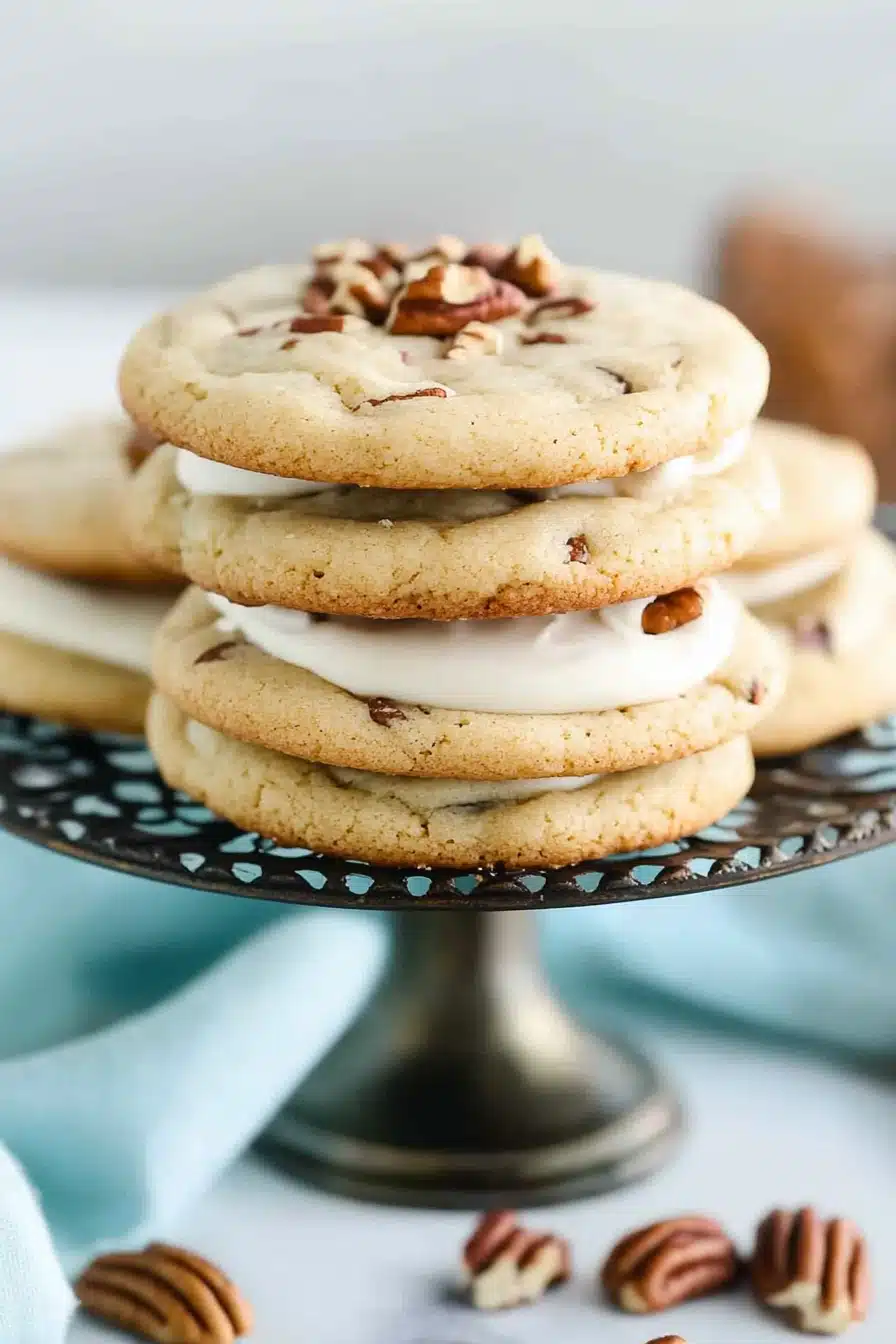
- Optional additions: Chopped nuts (walnuts or pecans are fantastic!), toffee bits, or a pinch of flaky sea salt to sprinkle on top after baking.
For the Glaze (Optional, but Recommended!):
A simple glaze adds an extra touch of sweetness and visual appeal. It’s optional, but oh-so-good!
- 1 cup powdered sugar: Sifted to avoid lumps.
- 2-3 tablespoons milk (or cream): Start with 2 and add more until you reach your desired drizzle consistency.
- 1/2 teaspoon vanilla extract: For a hint of extra flavor.
Step-by-Step Instructions
Step 1: Preheat & Prep Pan
First things first, let’s get the oven ready and your baking sheets prepped. Preheat your oven to 375°F (190°C). Line your baking sheets with parchment paper. This is a lifesaver for easy cleanup and ensures the cookies don’t stick. If you don’t have parchment paper, you can lightly grease your baking sheets, but I highly recommend parchment for the best results and simplest cleanup.
Step 2: Mix Dry Ingredients
In a medium bowl, whisk together the all-purpose flour, baking soda, and salt. Whisking helps distribute the leavening agent evenly, which is super important for consistent cookie texture. Make sure there are no lumps of baking soda or salt. Set this aside for now.
Step 3: Mix Wet Ingredients
In a large bowl (or the bowl of your stand mixer fitted with the paddle attachment), cream together the softened butter, granulated sugar, and packed light brown sugar. Beat on medium speed until the mixture is light and fluffy, about 3-4 minutes. This creaming process is key to incorporating air, which contributes to the cookie’s tender texture. Scrape down the sides of the bowl as needed. Next, beat in the eggs one at a time, mixing well after each addition. Finally, stir in the pure vanilla extract. The mixture should look smooth and well combined.
Step 4: Combine
Gradually add the dry ingredients to the wet ingredients, mixing on low speed until just combined. Be careful not to overmix! Overmixing can develop the gluten in the flour too much, leading to tough cookies. Stop mixing as soon as you no longer see streaks of flour. The dough will be soft and a little sticky, which is exactly what we want for softbatch cookies.
Step 5: Prepare Filling
Now for the best part – the chocolate chips! Gently fold in the semi-sweet chocolate chips (and any optional additions like nuts) using a spatula or wooden spoon. Make sure they’re evenly distributed throughout the dough. This is where the dough really starts to look irresistible.
Step 6: Layer & Swirl (Not applicable for this cookie, but for visualization of the dough!)
Alright, no swirling needed for this recipe, but we are going to make sure our dough is perfectly ready for scooping. Use a cookie scoop (about 1.5 to 2 tablespoons in size) to drop rounded mounds of dough onto your prepared baking sheets. Leave about 2 inches between each cookie, as they will spread a bit.
Step 7: Bake
Bake for 9-12 minutes, or until the edges are lightly golden brown and the centers still look slightly soft and underbaked. This is the secret to that amazing softbatch texture! Ovens can vary, so keep an eye on them. If you pull them out and they seem too soft, don’t worry, they’ll continue to set as they cool. For that perfect chewy texture, I usually aim for about 10 minutes in my oven.
Step 8: Cool & Glaze
Let the cookies cool on the baking sheets for about 5-10 minutes. This is another crucial step – it allows them to firm up just enough so they don’t fall apart when you move them. Then, carefully transfer them to a wire rack to cool completely. While they’re cooling, you can whip up the optional glaze: whisk together the powdered sugar, milk, and vanilla extract until smooth. You’re looking for a drizzly consistency. Drizzle the glaze over the cooled cookies.
Step 9: Slice & Serve
Once the cookies are completely cool (or just slightly warm if you can’t resist!), they are ready to be enjoyed! I love to serve these with a cold glass of milk or a hot cup of coffee. They’re perfect as is, or you can present them on a pretty plate for a sweet treat.
What to Serve It With
These softbatch chocolate chip cookies are incredibly versatile and just amazing on their own, but here are a few ideas to elevate your cookie experience:
For Breakfast: Believe it or not, one cookie with your morning coffee can be a delightful start to the day, especially if you didn’t get to have one the night before! The rich chocolate and comforting chew feel surprisingly satisfying. I often pack one in my husband’s lunch for a little mid-morning pick-me-up.
For Brunch: Serve a small platter of these alongside some fresh fruit salad or yogurt parfaits. They add a touch of indulgence without being too heavy for a morning meal. A glass of sparkling cider or mimosa pairs beautifully with the sweet notes.
As Dessert: This is their true calling! Serve a warm cookie (pop it in the microwave for 10-15 seconds if it’s cooled) with a scoop of good quality vanilla bean ice cream for an epic chocolate chip cookie sundae. A dusting of cocoa powder or a drizzle of extra chocolate ganache can make it feel extra fancy.
For Cozy Snacks: This is probably how we enjoy them most often. A cookie (or two!) with a mug of hot chocolate or herbal tea is pure bliss on a chilly evening. They’re also fantastic for kiddo snack time after school – just make sure you save one for yourself!
My family also loves to break them up and stir them into bowls of ice cream or even use them as the base for a quick trifle dessert, layering them with whipped cream and berries.
Top Tips for Perfecting Your Softbatch Chocolate Chip Cookies
I’ve baked countless batches of these cookies, and along the way, I’ve picked up a few tricks that I think really make a difference in achieving that perfect softbatch texture and flavor. These are the little things that turn a good cookie into a great one.
Zucchini Prep: (Wait, why are we talking about zucchini? Oh, that’s a different recipe! For these cookies, let’s focus on the batter!) Okay, let’s get back to these glorious cookies. My main tip for the *batter* is all about the ingredients.
Mixing Advice: The number one rule for soft cookies is NO OVERMIXING the flour. Mix until just combined. You should still see a few tiny streaks of flour, and that’s perfectly fine. Overmixing develops gluten, which leads to tough, cakey, or crispy cookies, and we want chewiness! Also, make sure your butter and eggs are truly at room temperature. Cold ingredients don’t emulsify properly, leading to a less tender cookie.
Swirl Customization: While there’s no swirling involved in the dough itself, you can customize the mix-ins beautifully! Don’t be afraid to mix and match your chocolates – dark chocolate chunks with milk chocolate chips, or white chocolate with macadamia nuts. A sprinkle of flaky sea salt on top of the dough balls before baking is a game-changer for balancing the sweetness and enhancing the chocolate flavor. It sounds simple, but trust me on this one!
Ingredient Swaps: If you’re out of all-purpose flour, you *can* try a good quality 1-to-1 gluten-free baking blend, but the texture might be slightly different. I’ve tested this recipe with almond milk instead of regular milk in the glaze, and it actually made it even creamier! For the butter, while unsalted is preferred for control over saltiness, salted butter can work in a pinch – just reduce the added salt in the recipe by about 1/4 teaspoon.
Baking Tips: Watch your cookies closely during the last few minutes of baking. The moment the edges look set and the centers still look a little soft and puffy is your cue to pull them out. They will continue to bake and firm up on the hot baking sheet. If you bake them until they look fully done, they will likely be too crispy once cooled. I always bake them on the middle rack for even heat distribution.
Glaze Variations: If you don’t love a glaze, a simple dusting of powdered sugar after cooling is lovely. You could also melt some good quality chocolate and drizzle that over the cooled cookies. For a slightly different flavor, add a tiny pinch of cinnamon or a drop of peppermint extract to the glaze.
Storing and Reheating Tips
The great thing about these softbatch cookies is that they actually stay wonderfully soft and chewy for several days, making them perfect for making ahead. Here’s how I like to keep them fresh:
Room Temperature: Once completely cooled, store the cookies in an airtight container at room temperature. They are usually best within 3-4 days. If you find they start to get a little too firm, you can place a slice of bread in the container with the cookies; the moisture from the bread will help soften them up overnight.
Refrigerator Storage: While I don’t typically refrigerate these cookies as it can sometimes dry them out, if you live in a very warm climate and worry about them melting or going stale quickly, you can store them in an airtight container in the fridge. They should last up to a week, though the texture might change slightly.
Freezer Instructions: For longer storage, freeze baked and cooled cookies in a single layer on a baking sheet until firm, then transfer them to a freezer-safe bag or airtight container. They’ll keep well for up to 3 months. You can also freeze the cookie dough! Scoop balls of dough onto a parchment-lined baking sheet, freeze until solid, then transfer to a freezer bag. Bake directly from frozen, adding a minute or two to the baking time.
Glaze Timing Advice: For the best results, I always recommend adding the glaze *after* the cookies have completely cooled. If you glaze them while they’re warm, the glaze will melt and become very thin and messy. If you’re storing them at room temperature for a few days, the glaze holds up well. If freezing, it’s often best to glaze them *after* thawing the cookies to prevent the glaze from becoming sticky or weeping in the freezer.
Frequently Asked Questions
Final Thoughts
There you have it – my tried-and-true recipe for the most wonderfully softbatch chocolate chip cookies. It’s the kind of recipe that brings smiles to faces, fills your kitchen with the most incredible aroma, and makes even the most ordinary day feel a little bit special. These cookies are a testament to the fact that sometimes, the simplest things are the most delicious. I really hope you give them a try and experience that perfect chewy, tender bite for yourself. They’re a reminder of home, comfort, and the pure joy of a well-baked treat. If you love this recipe, you might also enjoy my other chewy cookie variations or my famous double chocolate cookies! I can’t wait to hear how yours turn out, so please feel free to leave a comment below and share your thoughts or any fun variations you tried. Happy baking!
softbatch
Ingredients
Main Ingredients
- 0.5 cup unsalted butter softened
- 0.25 cup cream cheese softened
- 0.75 cup light brown sugar packed
- 0.25 cup granulated sugar
- 1 large egg
- 2 teaspoons vanilla extract
- 2.25 cups all-purpose flour
- 2 teaspoons cornstarch
- 1 teaspoon baking soda
- 0.25 teaspoon salt optional and to taste
- 2.25 cups semi-sweet chocolate chips or chunks
Instructions
Preparation Steps
- In a large bowl or stand mixer, beat together the softened butter, cream cheese, light brown sugar, granulated sugar, egg, and vanilla extract until light, creamy, and fluffy, about 5 minutes.
- Scrape down the sides of the bowl and add the all-purpose flour, cornstarch, baking soda, and optional salt. Mix on low speed until just combined, about 1 minute.
- Fold in the semi-sweet chocolate chips or chunks until evenly distributed throughout the dough.
- Using a medium 2-inch cookie scoop or spoon, form heaping mounds of dough. Place them on a large plate, slightly flatten with your palm, cover tightly, and chill in the refrigerator for at least 2 hours or up to 5 days.
- Preheat the oven to 350°F. Line baking sheets with a Silpat mat or parchment paper. Place chilled dough mounds on the baking sheet at least 2 inches apart.
- Bake the cookies for 8 to 9 minutes until the edges are set and the tops begin to look just set but still pale and slightly glossy in the center. Avoid baking longer than 10 minutes to keep them soft.
- Allow the cookies to cool on the baking sheet for 5 minutes before transferring them to a rack to cool completely.
- Store cookies in an airtight container at room temperature for up to one week or freeze for up to three months.