The first time I tasted garlic butter Shrimp, it felt like sunshine on a rainy week. We were waiting for a beach sunset, and in the tiny kitchen of my aunt’s cottage, the butter sizzled, garlic perfume filled the room, and the shrimp turned a perfect rosy pink. It’s amazing how something so simple can taste like a celebration. I make Garlic Butter Shrimp all the time now—it’s honestly my easiest move on busy weeknights. Think of it as a tiny, glossy skillet moment: succulent shrimp bathed in a buttery garlic sauce, a squeeze of lemon, and a crusty piece of bread for dunking. It’s the kind of dish that tastes expensive without breaking the bank, and my family swears it smells like a fancy dinner even when we’re just eating at the kitchen island. If you’ve got ten minutes, you’ve got dinner ready—and you’ll want to plate it with a flourish, I promise you that.
What is garlic butter shrimp?
garlic butter Shrimp is essentially shrimp that’s quickly seared in a hot pan and finished with a generous lick of garlic-infused butter. The name says it all: a lot of garlic, a lot of butter, and shrimp that’s just cooked through so tender you can almost bite through it with a sigh. The dish is humble enough for weeknights, yet elegant enough to serve to guests with a bright squeeze of lemon and a sprinkle of fresh parsley. The concept is simple: high heat, a little oil, the shrimp cooking in their own juices plus a garlicky butter sauce that emulsifies into a glossy glaze. It’s the kind of dish that proves less is more—perfectly cooked shrimp, a fragrant butter sauce, and a dash of citrus is all you need to feel transported. I love that the flavor builds quickly, so you can finish dinner in the time it takes to toast a baguette and pour a glass of wine. This Garlic Butter Shrimp isn’t shy about bold flavors, but it stays balanced, so the shrimp remain the star of the plate.
Why you’ll love this recipe?
What I love most about garlic butter Shrimp is how it feels like a warm hug from the stove. It’s got this incredible, almost movie-night aroma that turns plain weeknights into something a little magical. Here’s what keeps me coming back to this recipe again and again:
- Flavor:What is butter garlic sauce?
- Simplicity:I make this for last minute dinners when the fridge looks bare and somehow something magical happens on the pan.
- Cost-efficiency: You’re working with pantry staples—shrimp, butter, garlic, lemon—so it’s budget-friendly without feeling cheap.
- Versatility: This Garlic Butter Shrimp plays beautifully with pasta, rice, crusty bread, or a crisp salad. My kids love it over a bed of linguine, while my partner swears it’s perfect as a topping for steamed broccoli.
What I’ve learned over the years is that the magic isn’t just in the shrimp or the butter—it’s in the timing. If you pull the shrimp off a touch early, they stay juicy; if you push them a moment, they’re chewy instead of silky. The butter sauce loves to loosen up with a splash of wine or stock, but it’s equally delicious with just a squeeze of lemon and a handful of parsley. This Garlic butter Shrimp is a lifesaver on busy nights, yet it feels special enough to serve to guests who pop by unannounced. Trust me on this one: the moment you plate it with a lemon wedge and some parsley, everyone thinks you spent hours in the kitchen.
How to Make Garlic Butter Shrimp
Quick Overview
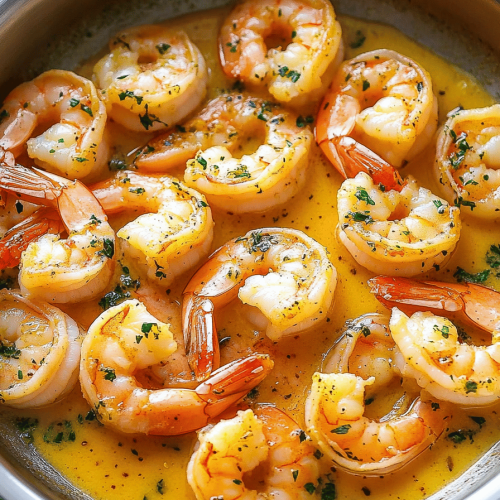
In a hot skillet, you’ll sear seasoned shrimp until they turn pink and just opaque. Then you’ll melt butter with garlic, lemon, and a splash of wine or stock if you’re feeling fancy. The shrimp get a quick toss in this garlicky glaze until they glisten and are perfectly sauced. A final squeeze of lemon and a scatter of parsley finish the dish with a fresh lift. The beauty of Garlic Butter Shrimp is its speed and its depth—the aromas alone sell the dish before you even taste it.
Ingredients
For the Main Shrimp:
- 1 pound large shrimp, peeled and deveined
- 1–2 tablespoons olive oil, for searing
- Salt and freshly ground black pepper, to taste
- 1 teaspoon smoked paprika or sweet paprika
- 1/4 teaspoon crushed red pepper flakes (optional, for a gentle lift)
- 1 tablespoon fresh lemon juice (optional, for a bright start)
For the Garlic Butter Sauce (the Filling):
- 6 tablespoons unsalted butter
- 4 garlic cloves, finely minced
- 1 tablespoon lemon zest
- 2 tablespoons fresh lemon juice
- 2 tablespoons dry white wine or chicken stock (optional, for depth)
- 2 tablespoons chopped fresh parsley
For the Finishing Touch (the Glaze):
- Extra 1 tablespoon butter, to finish and glaze
- Salt to taste, plus a final squeeze of lemon
- Extra chopped parsley for garnish
Step-by-Step Instructions
Step 1: Preheat & Prep Pan
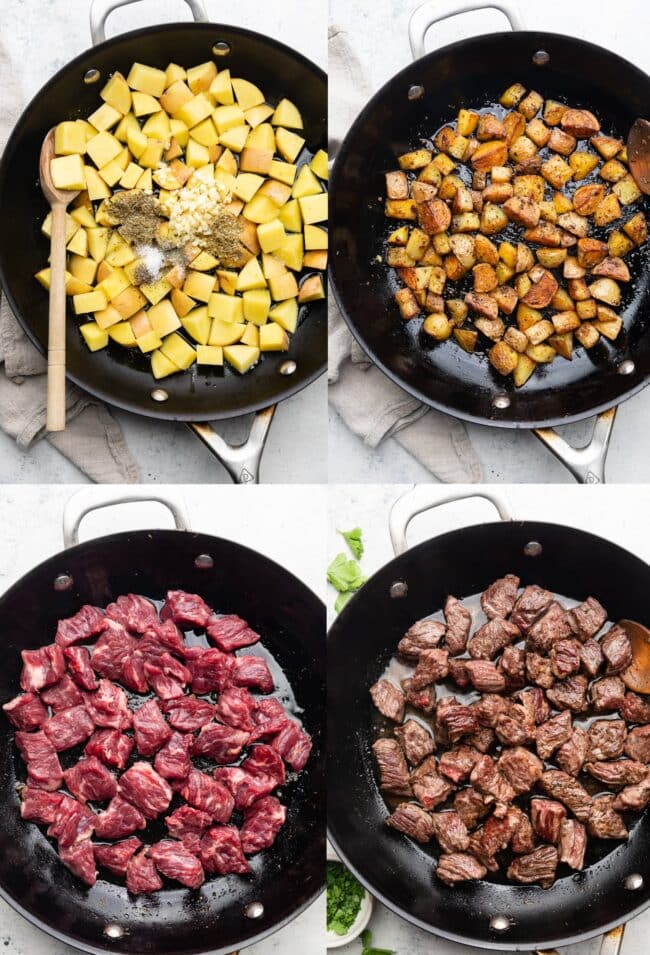
Set a large skillet over medium-high heat and give it a quick wipe with a paper towel to remove any lingering moisture. Pat the shrimp dry really well; moisture is the enemy of a good sear. When the pan is hot, splash in a little olive oil and let it shimmer—this is your stage for the dramatic sear that makes Garlic Butter Shrimp taste like a restaurant moment at home.
Step 2: Mix Dry Ingredients
In a small bowl, whisk together salt, pepper, paprika, and red pepper flakes. This dry mix is the backbone of your crusty-sear flavor. It also helps balance the richness of the butter later on. Sprinkle the mixture over the shrimp in a single, even layer so every piece gets a kiss of seasoning.
Step 3: Mix Wet Ingredients
In another pan or bowl, melt the butter gently until it’s just melted and a touch foamy. Stir in the minced garlic, lemon zest, and a splash of lemon juice. If you like a whisper of acidity, the lemon here really brightens the whole dish and keeps the richness from feeling heavy.
Step 4: Combine
Pat the shrimp dry again and lay them in the hot pan in a single layer. Don’t crowd—give them space to kiss the pan. Sear 1–2 minutes on the first side until they’re pink at the edges. Flip them and sear another 1–2 minutes on the other side, until they’re just opaque and curled. If you overcook them, they’ll get rubbery, and that’s the opposite of what we want in Garlic Butter Shrimp.
Step 5: Prepare Filling
Pour the garlicky butter sauce into the pan with the shrimp. Let the butter melt completely and mingle with the garlic. If you’re using wine or stock, pour it in now to loosen the sauce a touch and let it simmer briefly, scraping up any tasty caramelized bits from the bottom of the pan. This is where Garlic Butter Shrimp starts to glow and gather a glossy sheen.
Step 6: Layer & Swirl
Gently toss the shrimp in the sauce to coat evenly. Use a spoon to baste the shrimp with the garlicky butter, tilting the pan slightly to emulsify the sauce into a silky glaze that clings to each piece. You’ll notice the sauce turning a deeper gold and wrapping around the shrimp in a luxurious sheen.
Step 7: Bake
For a deeper, more lacquered finish, slide the pan under a hot broiler for 1–2 minutes. This step is optional, but it helps concentrate the flavors and gives the surface a tiny shimmer. Keep a careful eye on it so the garlic doesn’t burn—it happens in the blink of an eye.
Step 8: Cool & Glaze
Remove from heat and let the pan rest for a minute so the flavors settle. If you want an extra glossy finish, whisk in the remaining tablespoon of butter off the heat and drizzle it over the shrimp. A final squeeze of lemon brightens everything, and a last pinch of parsley adds a fresh, green note that makes Garlic Butter Shrimp feel complete.
Step 9: Slice & Serve
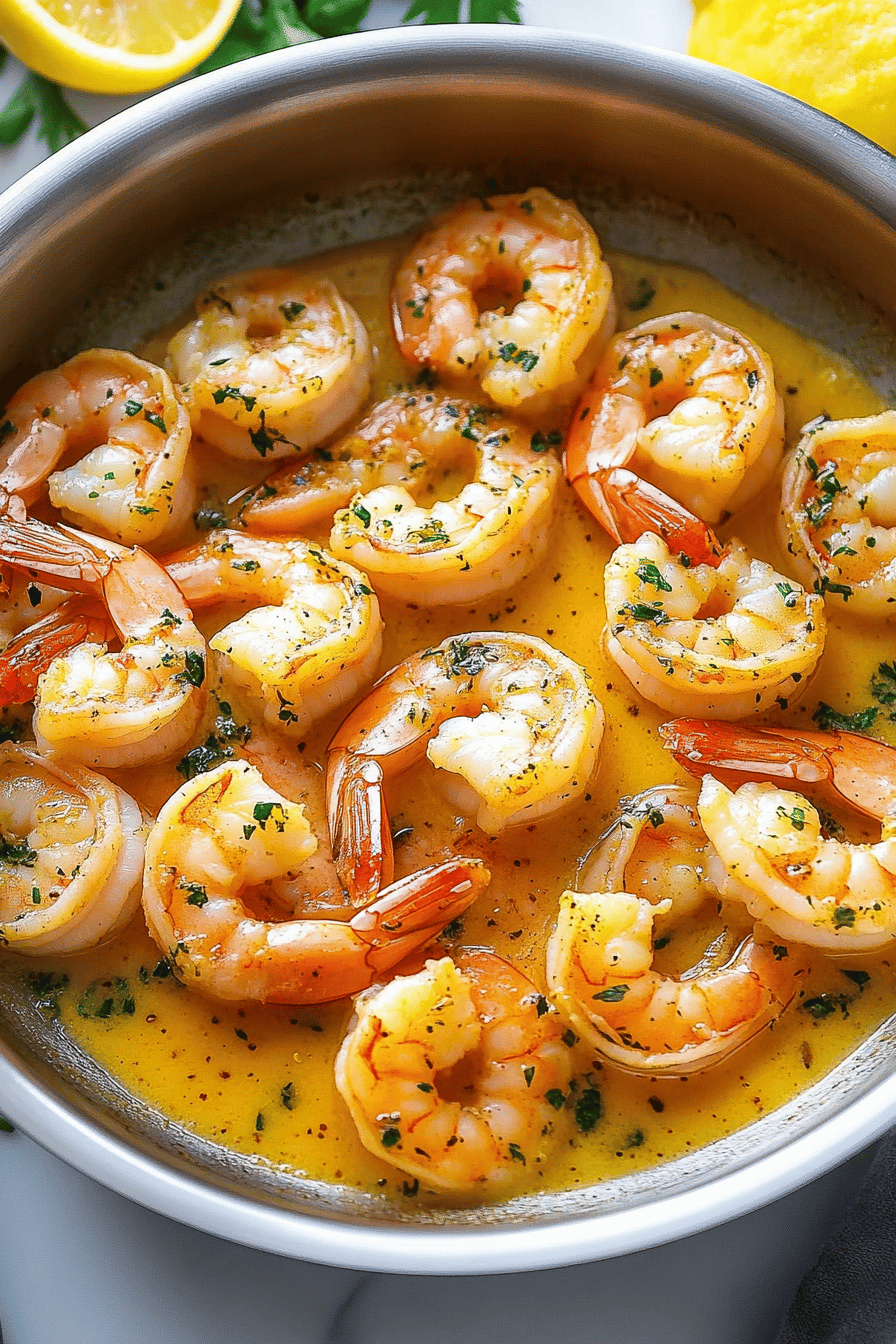
Plate the Garlic Butter Shrimp in a shallow dish so that some of that glorious sauce pools beneath. Spoon a little extra sauce over the top if you like. Garnish with a sprinkle of chopped parsley and a few lemon wedges on the side for squeezing. This is where your kitchen feels almost magical—the shrimp are perfectly tender, the garlic is aromatic, and the butter shines like a tiny sun on your plate. I love offering crusty bread for dunking; the butter-y garlic goodness practically begs to be soaked up.
What to Serve It With
Garlic Butter Shrimp shines on its own, but it’s also incredibly versatile for pairing. Here are ideas that have become family favorites in our house, organized by occasion:
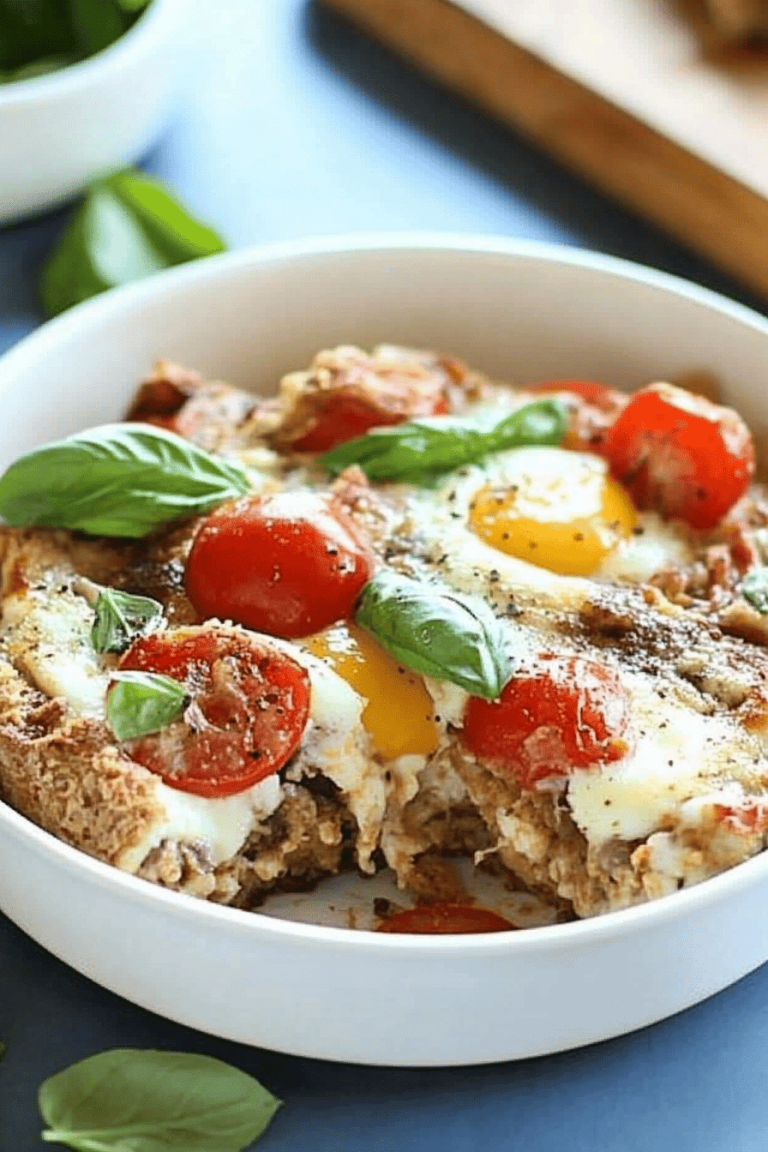
For Breakfast: A light, savory brunch where you tuck small garlic butter shrimp into soft scrambled eggs wrapped in warm tortillas, with a dab of avocado on the side. The scent alone makes everyone pause with a smile. If you’re serving guests, set out warm baguette slices and a quick arugula salad to balance the richness.
For Brunch: Spoon Garlic Butter Shrimp over a creamy farro or polenta base with a sunny-side-up egg on top. A glass of sparkling water with a lemon twist keeps it refreshing. You’ll notice how the butter and garlic lift the entire plate—the brunch crowd will ask for seconds, I’m sure of it.
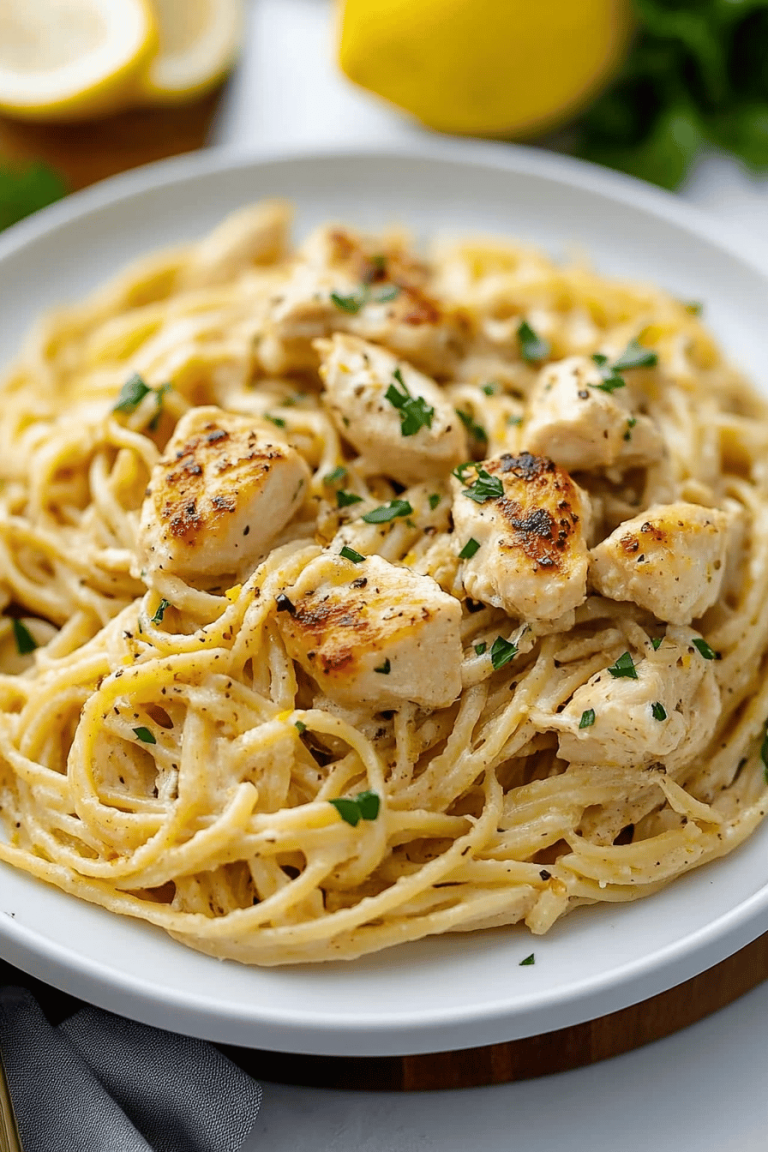
As Dessert (okay, not really, but bear with me): No dessert here, but dessert-like indulgence for the palate occurs when you serve this over a lemon-zested linguine with a sprinkle of parmesan—almost like a lemony seafood alfredo, which is a surprising crowd-pleaser after a big dinner. It’s all in the balance and the way the lemon picks up the butter’s richness without tipping into heaviness.
For Cozy Snacks: Serve Garlic Butter Shrimp with crusty bread, a chilled cucumber salad, and a cold white wine. It’s a perfect, cozy snack that still feels festive. On busy weeknights, I’ll toss some over a bed of warm rice and call it a complete meal—done in minutes, with big flavor.
Family tradition has taught me that a dish like Garlic Butter Shrimp isn’t just about the recipe; it’s about the ritual—the sizzling pan, the way the garlic blooms in butter, the quick flash of lemon, and the sharing that follows. We always keep a jar of fresh parsley on the counter and a bowl of crusty bread nearby, ready for the next scoop. This is one you’ll be tempted to make again tonight, and again tomorrow, and the day after that—because it’s that comforting, that bright, and that simple.
Top Tips for Perfecting Your Garlic Butter Shrimp
Here are some practical refinements I’ve learned over countless batches of Garlic Butter Shrimp. Tinker with them to fit your kitchen and your taste:
Zucchini Prep: If you’re adding zucchini ribbons or a quick veggie side, toss them in a separate pan first to soften any excess moisture. Squeeze out a little moisture before adding to the shrimp so you don’t crowd the pan and dilute that crackling sear we’re after. If you’re sticking to shrimp alone, you can skip this step, but the trick here is moisture control—pat dry, pat dry, pat dry.
Mixing Advice: I’ve found that a generous pat of salt in the shrimp along with paprika makes the flavors sing. Don’t overmix the shrimp when you season; a light dusting is enough. The goal is even seasoning, not a wetsuit of coating. Too much salt can draw out moisture; taste as you go and adjust.
Swirl Customization: Swirling the sauce in the pan helps emulsify and cling to every shrimp. If your sauce looks oily or separated, simply lift the pan off the heat for a moment and give it a gentle swirl while the butter finishes melting. A touch of wine or stock helps the emulsion come together and adds a whisper of depth.
Ingredient Swaps: Use ghee for a nuttier dairy note, or swap wine for a splash of chicken stock if you’re avoiding alcohol. If you’re dairy-free, a good olive oil and a squeeze of lemon can still yield a bright, garlicky finish. For a dairy-forward crowd, a little extra butter toward the end makes the glaze especially luxurious.
Baking Tips: Broiling is optional but transformative for a glossy finish. If your broiler is extra aggressive, keep the pan a few inches away and watch closely. The heat concentrates the flavors and gives a lacquered look that makes the dish feel premium without extra effort.
Glaze Variations: If you want even more brightness, finish with a drizzle of fresh lemon juice right before serving. For interest, stir in a teaspoon of honey or a splash of balsamic for a subtle sweetness or tang. Fresh herbs—tarragon or chives—play nicely too, adding an aromatic lift that makes Garlic Butter Shrimp feel new every time you make it.
From my kitchen to yours, these tweaks have saved me on nights when I’m tempted to reach for takeout. The essential lesson is to trust the pan: don’t overcrowd it, keep the heat steady, and taste as you go. The result will be claim-you-are-home level comfort in a skillet—Garlic Butter Shrimp that tastes like a memory you want to repeat.
Storing and Reheating Tips
Garlic Butter Shrimp is best enjoyed fresh, but you can safely store leftovers if needed. Here’s how I handle it to keep the shrimp tender and the sauce flavorful:
Room Temperature: If you’re not serving right away, keep the dish warm in a low oven (about 200°F/95°C) for a short period. Don’t leave shrimp at room temperature for more than two hours; once it’s cooled, refrigerate promptly to maintain texture and flavor.
Refrigerator Storage: Transfer to a shallow airtight container within two hours of cooking. The sauce may thicken a bit in the fridge; gently reheat in a skillet over low heat, adding a splash of water or stock to loosen the sauce if needed. The shrimp may seize slightly when reheated, so treat them gently.
Freezer Instructions: Freezing is not ideal for garlic butter shrimp, as the texture can become a bit tough after thawing. If you must freeze, do it with the sauce—shallowly pack into freezer-safe containers and thaw slowly in the fridge. Reheat gently in a skillet to revive the butter sauce, but know that it will taste best fresh.
Glaze Timing Advice: If you’re planning to glaze after refrigeration, rewarm the sauce first and whisk in a touch more butter for the gloss. Fresh lemon juice brightens the leftovers when you reheat, so don’t skip that final squeeze.
In our house, Garlic Butter Shrimp never lasts long enough to worry about leftovers. The aroma alone lingers in the kitchen long after the plates are cleared. If you do find yourself with leftovers, toss them with a little pasta and extra garlic butter for a quick post-dinner remix that still feels special.
Frequently Asked Questions
Final Thoughts
Garlic Butter Shrimp is a dish I keep returning to because it feels like comfort and elegance in one pan. It’s quick enough for a weeknight, yet indulgent enough to feel celebratory. If you’re cooking for someone you love, this is the dish to reach for—everything you need is likely already in your fridge, and the aroma alone invites conversation and smiles. I’ve tested this with minor tweaks over the years, and I’m always surprised by how a simple change—more lemon zest here, a splash of wine there—transforms the whole plate. If you try it and love it, drop a comment below and tell me how you served it—over pasta, with crusty bread, or tucked into a heaped bed of rice. I’d love to hear your variations and your family’s favorite companion sides. Happy cooking, friends, and may your garlic be fragrant and your butter be perfectly melted!
Garlic Butter Shrimp
Ingredients
Main Ingredients
- 1 lb shrimp, large, peeled and deveined
- 4 cloves garlic, minced
- 4 tablespoons unsalted butter
- 1 tablespoon olive oil
- 1 tablespoon fresh lemon juice
- 0.5 teaspoon salt
- 0.25 teaspoon black pepper
- 0.5 teaspoon paprika
- 0.25 teaspoon red pepper flakes optional
- 2 tablespoons fresh parsley, chopped
Instructions
Preparation Steps
- Pat shrimp dry and season with half of the salt and pepper. In a large skillet, melt butter with olive oil over medium heat.
- Add minced garlic and cook until fragrant, about 1 minute. Be careful not to burn the garlic.
- Add shrimp to the skillet in a single layer and cook for 1-2 minutes per side until pink and opaque.
- Stir in lemon juice, remaining salt, pepper, paprika, and optional red pepper flakes. Toss to coat.
- Garnish with chopped parsley and serve immediately with bread or over pasta if desired.