You know those recipes that just feel like a warm hug? The ones you come back to again and again, no matter what life throws at you? For me, that’s this classic white cake. It’s not fancy, it’s not complicated, but oh my goodness, it’s *perfect*. I’ve tried my fair share of cakes over the years – fluffy ones, dense ones, ones that promise the moon and deliver… well, less. But this white cake? It’s the one. It’s the answer to “What should we bake this weekend?” and the star of countless birthdays, holidays, and “just because” afternoons. It’s the kind of cake that makes you want to put on some music, maybe pour yourself a little something, and just enjoy the process. It reminds me of my grandmother’s kitchen, that sweet, comforting scent filling the air, and it always brings a smile to my face. If you’re looking for a reliable, incredibly delicious white cake recipe that’s a little bit special but totally achievable, you’ve found it. Forget those boxed mixes that taste… well, like a box. This is the real deal, and I can’t wait to share it with you.
What is a classic white cake?
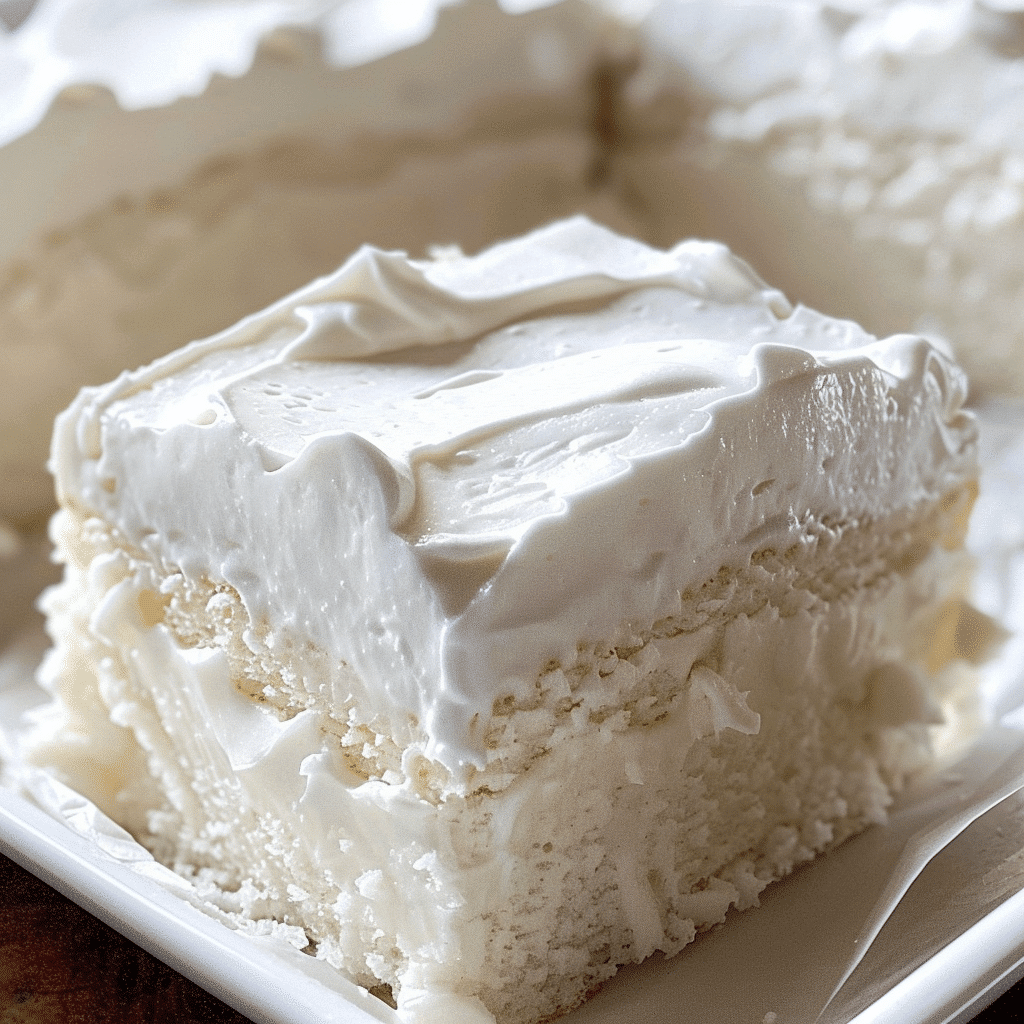
So, what exactly *is* this glorious white cake? Think of it as the quintessential vanilla cake, but elevated. It’s known for its incredibly tender crumb, a delicate, pure white color (hence the name!), and a flavor that’s subtly sweet with a lovely vanilla essence. Unlike yellow cake, which gets its color and richness from egg yolks, this white cake typically uses only egg whites. This not only keeps that beautiful pale hue but also contributes to its lighter, airier texture. It’s essentially the blank canvas of the cake world – beautiful on its own but also a perfect partner for almost any frosting or filling you can dream up. It’s the kind of cake that feels celebratory without being fussy, and it’s got that comforting, homemade taste that’s hard to beat. It’s the base for so many amazing desserts, but honestly, served with just a simple dusting of powdered sugar or a light glaze, it’s pure magic.
Why you’ll love this recipe?
Honestly, there are so many reasons I keep coming back to this white cake recipe, and I just know you’ll fall in love with it too. First and foremost, the flavor is just divine. It’s got this pure, sweet vanilla taste that isn’t overpowering. It’s delicate enough to let a really good frosting shine, but it’s also got enough character to be enjoyed all on its own. And the texture? Oh, the texture! It’s impossibly tender and moist, with a fine, delicate crumb that just melts in your mouth. It’s never dry, never crumbly – just pure, cakey bliss. What I also love is how surprisingly simple it is to make. You don’t need any fancy techniques or hard-to-find ingredients. Everything comes together with basic pantry staples, and before you know it, you’ve got this stunning cake ready to go. It’s incredibly cost-effective, too. You can whip up a beautiful cake that rivals any bakery’s for a fraction of the price. And talk about versatility! This white cake is a chameleon. Serve it as is, dress it up with buttercream, fill it with fruit, top it with chocolate ganache – the possibilities are truly endless. It’s perfect for birthdays, anniversaries, or just when you need a little pick-me-up. It’s the kind of recipe that builds confidence in the kitchen, and it’s the one I turn to when I want something reliable and delicious, every single time.
How do I make a white cake?
Quick Overview
The magic of this white cake lies in its straightforward approach. We’ll start by creaming butter and sugar until light and fluffy, which is key for that tender texture. Then, we’ll gently incorporate our wet and dry ingredients, being careful not to overmix. The result is a batter that bakes up into a beautifully light and airy cake. It’s a process that’s both satisfying and surprisingly quick, meaning you can have a delicious homemade cake ready without spending all day in the kitchen. Trust me, the aroma alone will make you feel like a baking pro.
Ingredients
For the Main Batter:
2 ¾ cups all-purpose flour (I always use unbleached, it seems to make a difference in texture!)
1 ½ cups granulated sugar
1 tablespoon baking powder
½ teaspoon salt
¾ cup unsalted butter, softened to room temperature (this is crucial for proper creaming!)
1 ½ cups milk (whole milk gives the best richness, but I’ve tested with 2% and it’s still great!)
4 large egg whites, at room temperature (room temp whites whip up better)
1 tablespoon vanilla extract (use the good stuff, it really shines here!)
½ teaspoon almond extract (optional, but adds a lovely depth)
For a Simple Vanilla Glaze:
1 ½ cups powdered sugar
2-3 tablespoons milk or cream
½ teaspoon vanilla extract
For a Richer Cream Cheese Frosting (if you prefer!):
8 ounces cream cheese, softened
½ cup unsalted butter, softened
3-4 cups powdered sugar, sifted
1 teaspoon vanilla extract
Step-by-Step Instructions
Step 1: Preheat & Prep Pan
First things first, let’s get the oven going! Preheat it to 350°F (175°C). For this recipe, I love using two 8-inch round cake pans. Grease them really well with butter or baking spray, then dust them with a little flour. Tap out any excess flour. Another trick I learned is to line the bottom with parchment paper circles – it guarantees they’ll slide right out without any sticking. Set these aside while you get the batter ready.
Step 2: Mix Dry Ingredients
In a large bowl, whisk together the flour, granulated sugar, baking powder, and salt. Give it a good whisking until everything is well combined and there are no clumps of baking powder. This ensures the leavening is distributed evenly, which is super important for a good rise. I usually sift the flour if I’m feeling extra careful, but a good whisk works wonders!
Step 3: Mix Wet Ingredients
In a separate medium bowl, whisk together the milk, egg whites, vanilla extract, and almond extract (if you’re using it). Make sure your egg whites are at room temperature; they’ll incorporate much better into the batter. Just a gentle whisking to combine everything is all you need.
Step 4: Combine
Now for the fun part! In the bowl of your stand mixer (or a large bowl with an electric hand mixer), beat the softened butter on medium speed until it’s light and creamy. Gradually add the sugar and continue beating for about 3-5 minutes, until the mixture is pale and fluffy. This creaming process is where a lot of the cake’s lightness comes from. With the mixer on low, gradually add the dry ingredients, alternating with the wet ingredients. Start and end with the dry ingredients. Mix *just* until combined. Seriously, don’t overmix! A few streaks of flour are okay; they’ll disappear as you fold.
Step 5: Prepare Filling
For a simple glaze: Whisk together the powdered sugar, 2 tablespoons of milk, and vanilla extract. If it’s too thick, add more milk, a teaspoon at a time, until it’s pourable but not too thin. For cream cheese frosting: Beat softened cream cheese and butter until smooth. Gradually add sifted powdered sugar, then vanilla, beating until light and fluffy. Adjust sweetness and consistency as needed.
Step 6: Layer & Swirl
Divide the batter evenly between your prepared cake pans. Use a spatula to gently spread it out so it’s even. Tap the pans on the counter a couple of times to release any air bubbles. You’re aiming for a nice, smooth surface so your cake layers bake up flat.
Step 7: Bake
Pop those pans into your preheated oven. Bake for 28-35 minutes, or until a wooden skewer or toothpick inserted into the center of the cakes comes out clean. Ovens can be a bit quirky, so start checking around the 28-minute mark. You want them to be golden around the edges but not browned. A slight spring back when you gently touch the top is a good sign too.
Step 8: Cool & Glaze
Once they’re baked, let the cakes cool in their pans on a wire rack for about 10-15 minutes. Then, carefully invert them onto the wire rack to cool completely. This is super important! If you try to frost or glaze a warm cake, it’ll all melt off. Once they are completely cool, you can either dust them with powdered sugar, or apply your prepared glaze or frosting.
Step 9: Slice & Serve
Once your cake is frosted or glazed, it’s ready to be sliced and enjoyed! I like to use a sharp knife dipped in hot water and wiped clean between slices for the cleanest cuts. Serve at room temperature for the best flavor and texture. Enjoy every bite!
What to Serve It With
This white cake is so wonderfully versatile, you can truly serve it with almost anything! For a lovely morning treat, I often just dust it with a little powdered sugar and pair it with a steaming mug of my favorite coffee. It’s not too sweet, so it feels just right to start the day. For a more leisurely brunch, I’ll frost it with a light vanilla buttercream or a raspberry cream cheese frosting and serve it alongside fresh berries and a mimosa. It feels elegant without being over the top. As a dessert, it’s a dream! It’s the perfect canvas for rich chocolate ganache, a bright lemon curd, or a dollop of whipped cream and fresh strawberries. It holds up beautifully to heavier flavors. And for those cozy, quiet moments when you just need a little something sweet? A simple slice, maybe warmed up just slightly, with a glass of milk is pure comfort. My kids, bless their hearts, are usually happy with just a simple glaze, but they’ll happily devour it with any frosting I’ve got on hand. It’s just that universally loved flavor!
Top Tips for Perfecting Your White Cake
Over the years, I’ve learned a few things that really make this white cake sing. First, the quality of your vanilla extract makes a big difference. I’m not saying you need to splurge on the most expensive stuff, but avoid the imitation vanilla if you can. The real stuff has a depth of flavor that just can’t be replicated. Also, make sure your butter and egg whites are truly at room temperature. Cold butter won’t cream properly, and cold egg whites won’t emulsify as well, both impacting the final texture. I learned this the hard way after a few denser cakes! When mixing the batter, resist the urge to overmix once you add the flour. As soon as you see those last few streaks of flour disappear, stop. Overmixing develops the gluten in the flour, which can lead to a tough cake instead of a tender one. It’s a delicate balance, but totally achievable. For the glaze, I always start with less liquid than I think I need. You can always add more, but you can’t take it away! A slightly thicker glaze will set nicely, while a thinner one will run off more easily. If you’re frosting it, make sure the cake is *completely* cool. I mean it! Even a hint of warmth can make your frosting slide right off. And if your cake layers don’t bake up perfectly flat, don’t fret! A little leveling with a serrated knife can fix that right up before frosting. It’s all about practice and not being afraid to experiment a little. These are the tricks that have saved me countless times and ensure a perfect white cake every time.
Storing and Reheating Tips
This white cake is pretty forgiving when it comes to storage, which is another reason I love it so much! If it’s plain (just dusted with powdered sugar or with a simple glaze that has fully set), it can sit out at room temperature, well-covered with plastic wrap or in an airtight container, for about 2-3 days. The flavor and texture are actually best on day two, if it lasts that long! If you’ve frosted it with a buttercream or cream cheese frosting, it’s generally best to keep it in the refrigerator to prevent the frosting from melting, especially if your kitchen tends to be warm. In the fridge, it’ll stay good for about 4-5 days. Just make sure to store it in an airtight container to prevent it from drying out. If you need to reheat a slice (sometimes a slightly warmed cake is just heavenly!), you can do it gently in the microwave for about 10-15 seconds. Don’t overdo it, you just want to take the chill off. For longer storage, this cake freezes beautifully! Once completely cooled and unfrosted (or frosted with a sturdy buttercream), wrap it tightly in a double layer of plastic wrap, followed by a layer of aluminum foil. It can be stored in the freezer for up to 2-3 months. Thaw it overnight in the refrigerator, then let it come to room temperature before serving for the best texture.
Frequently Asked Questions
Final Thoughts
So there you have it – my absolute favorite white cake recipe. It’s the kind of cake that’s incredibly satisfying to make because it always turns out beautifully, and it brings so much joy when you share it. Whether you’re a seasoned baker or just starting out, this recipe is a wonderful one to have in your repertoire. It’s proof that sometimes, the simplest things are the most delicious. If you love this cake, I think you might also enjoy my Lemon Raspberry Loaf Cake or my Easy Chocolate Chip Cookie Bars – they’re in a similar vein of reliable, crowd-pleasing goodness! I truly hope you give this white cake a try. I’d love to hear how it turns out for you, what frosting you choose, and who you share it with! Happy baking!
white cake
Ingredients
Main Ingredients
- 2.5 cups all-purpose flour
- 1 tbsp baking powder
- 0.5 tsp salt
- 0.75 cup unsalted butter room temperature
- 2 tbsp vegetable oil
- 1.75 cups granulated sugar
- 6 large egg whites room temperature
- 1.125 cups milk room temperature
- 1 tbsp vanilla extract
Whipped Frosting
- 2.5 cups unsalted butter room temperature
- 10 cups powdered sugar
- 1 tbsp vanilla extract
- 5 tbsp heavy cream
- salt to taste
Instructions
Preparation Steps
- Preheat the oven to 350°F. Prepare three 8-inch cake pans with parchment paper and grease the sides.
- In a medium bowl, whisk together the flour, baking powder, and salt. Set aside.
- In a large bowl, cream together the butter, vegetable oil, and sugar until light and fluffy, about 2-3 minutes.
- Add the egg whites in three additions, mixing well after each addition. Scrape down the sides of the bowl as needed.
- Add half of the dry ingredients to the wet ingredients and mix until combined. Then add the milk and vanilla extract and mix well. Finally, add the remaining dry ingredients and mix until smooth.
- Divide the batter evenly between the prepared pans and bake for 20-23 minutes or until a toothpick inserted into the center comes out with a few crumbs.
- Remove cakes from the oven and cool in pans for 2-3 minutes before transferring to wire racks to cool completely.
- For the frosting, beat the butter until smooth. Gradually add powdered sugar, then vanilla, cream, and salt, mixing to desired consistency. Beat on medium-high speed for 3-5 minutes to whip.
- Trim the cake layers to level if necessary. Spread 1 cup of frosting on the first layer, stack the second, and repeat. Frost the outside of the cake smoothly.
- Decorate with piped shells or rosettes as desired. Store the cake in an airtight container.