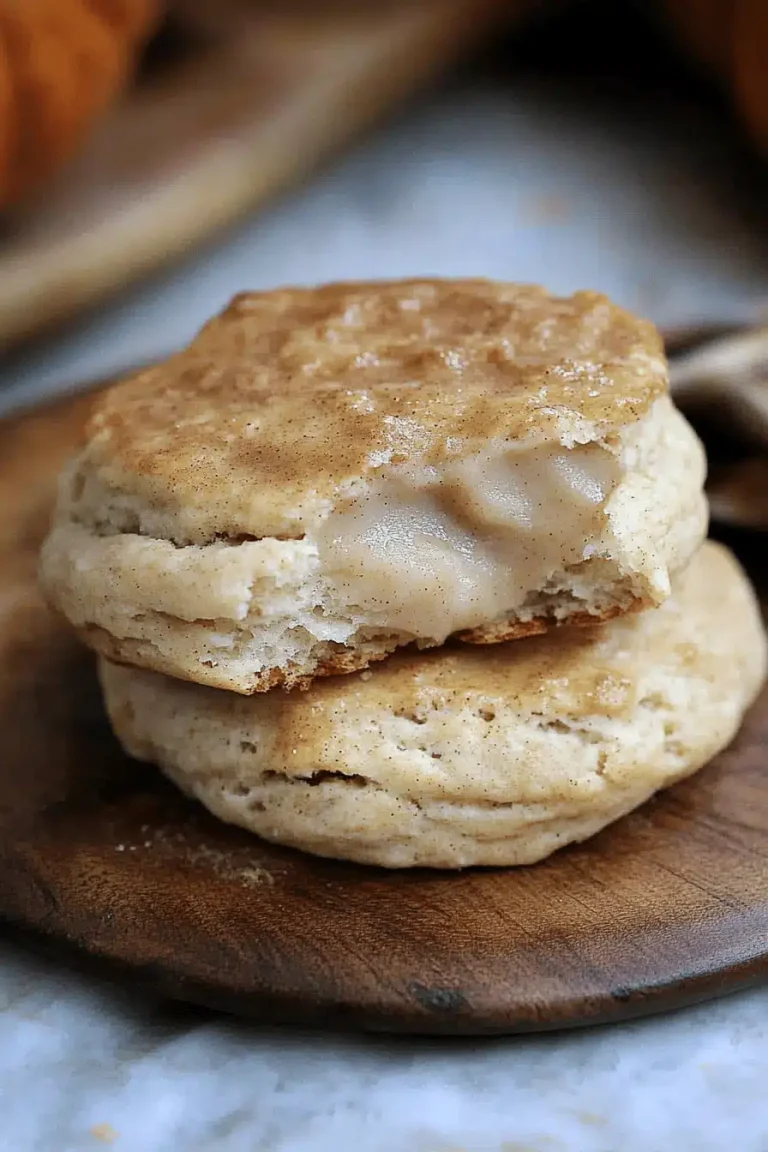
I can still remember the first time I tasted a peppermint patty that actually made me stop mid-chew and say, “Wow.” It was at my grandmother’s house, right after Christmas dinner. The smell of chocolate mingled with that unmistakable icy peppermint hit filled the room, and the kids were buzzing around begging for just one more piece. Honestly, peppermint patties have that remarkable power — they’re a little like the classic chocolate chip cookie, but with a refreshing twist that feels both nostalgic and fancy all at once. If you’re a fan of mint chocolate desserts but think making your own sounds intimidating, trust me, this recipe makes peppermint patties approachable and downright addictive. Plus, they’re so simple, even my kids can help — which means more fun in the kitchen and fewer store-bought sweets. Dive into these homemade peppermint patties and prepare to become everyone’s favorite gift-giver during the holidays — or really, any time you want a little sweet magic.
What is Peppermint Patties?
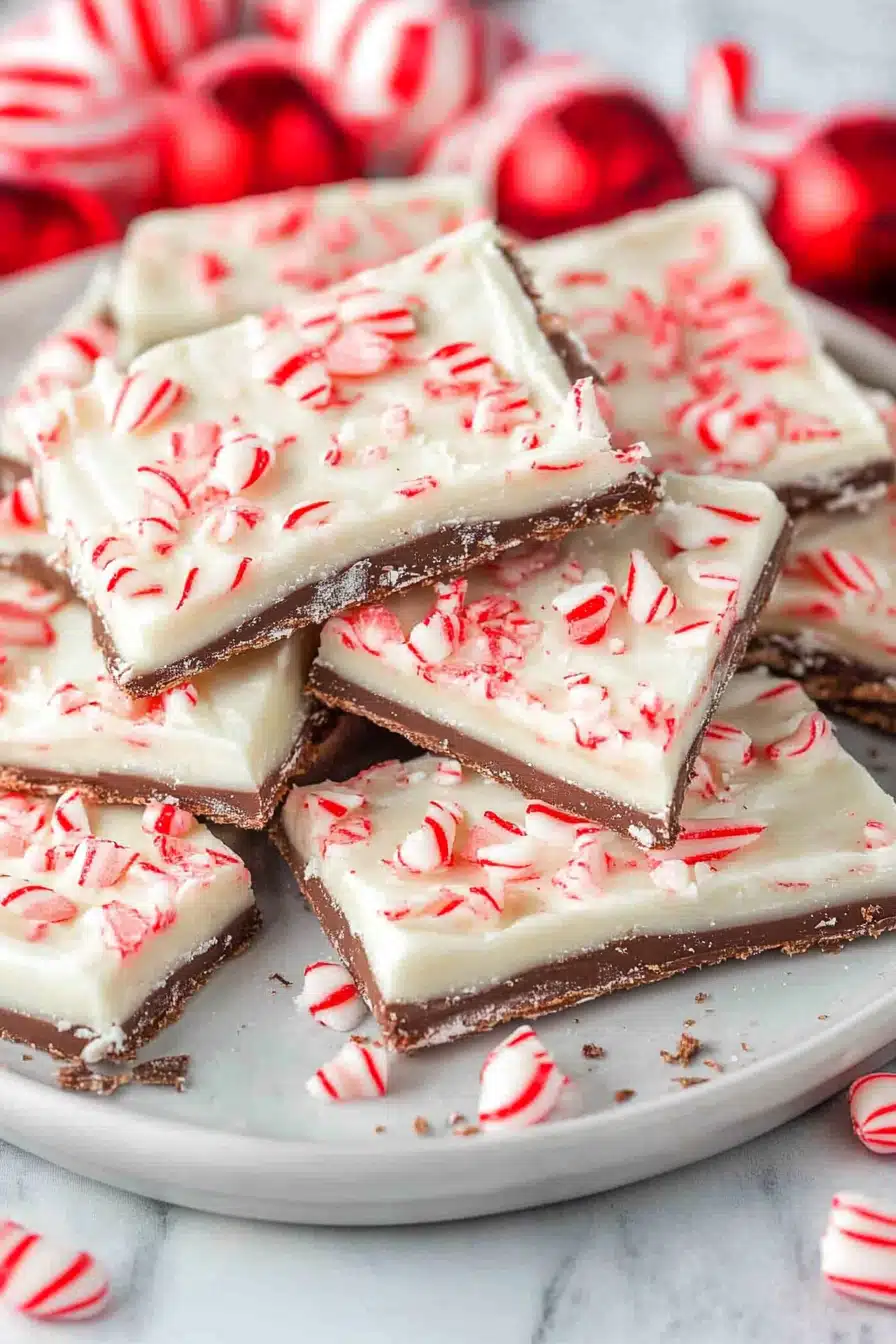
Think of peppermint patties as little pockets of joy: soft, creamy peppermint filling enrobed in a smooth layer of rich chocolate. The name comes from that classic minty punch combined with the “patty” shape — a perfect bite-sized treat that’s just the right balance of cool and sweet. It’s essentially a mint-flavored fondant center dipped in chocolate, and while it feels like something you’d find in a fancy candy shop, it’s surprisingly easy to make at home. For beginners, imagine rolling small discs of minty filling, chilling them until firm, and then coating those in melted chocolate. Simple, but the result is delightfully elegant. And you can tweak the mint intensity to suit your personal tastes. Honestly, these peppermint patties have been a favorite in my family for years, and I love sharing how straightforward it is to create candy magic right in your own kitchen.
Why you’ll love this recipe?
What is it like to make peppermint patties from scratch?
- Flavor: The fresh minty filling is creamy without being overly sugary, paired with bittersweet chocolate that perfectly offsets the zing. It’s a cool, refreshing candy that doesn’t taste artificial. I love that the flavor melts in your mouth and lingers just long enough to tease your taste buds.
- Simplicity: Seriously, this recipe is as straightforward as it gets. No candy thermometers or tricky tempering necessary. If you can mix, roll, and dip, you’re already halfway there. This one’s a lifesaver when you want to whip up something impressive without complicated steps.
- Cost-efficiency: What is the best way to measure cost-efficiency? The ingredients are nothing fancy — sugar, cream, peppermint extract, and some chocolate. You probably already have most of this in your pantry. Compared to buying those store-bought patties, homemade saves you money and lets you control the quality.
- Versatility: What I love most about this is how you can tweak it for different occasions. Add a splash of peppermint liqueur for adults, experiment with white chocolate coating, or even roll the patties in crushed candy canes for extra crunch. The core recipe is a perfect launcher for creativity.
This recipe reminds me a bit of homemade truffles or fudge in its melt-in-your-mouth quality but stands apart with that crisp, minty pop that’s pure candy bar nostalgia. Plus, my kids actually ask for these more than cookies around the holidays, so that says a lot!
How to Make Peppermint Patties
Quick Overview
Here’s the deal: first, you whip up a smooth, creamy peppermint filling that needs a bit of chill time. Then, roll the filling into small discs and pop them back in the fridge to firm up. Next, melt your chocolate — I always go with a mix of semi-sweet and dark for richness — and dip those chilled patties right in. Finally, let them set and you have candy magic ready for snacking. The best part? It’s hands-on but kid-friendly, and you don’t need any specialized gadgets — you basically become a candy artisan in your own kitchen. Trust me, the sense of pride when you bite into one of these babies is unbeatable.
Ingredients
For the Peppermint Filling:
- 2 cups powdered sugar (sifted for smoothness)
- 3 tablespoons unsalted butter (softened slightly; quality butter really enhances flavor)
- 2 tablespoons light corn syrup (helps with that classic chewy texture)
- 1 ½ teaspoons pure peppermint extract (fresh and pungent is key here — don’t skimp!)
- 2-3 tablespoons heavy cream or milk (to adjust consistency; I tested almond milk and it’s surprisingly creamy!)
For the Chocolate Coating:
- 8 ounces semi-sweet chocolate chips or chopped chocolate (I prefer 60-70% cocoa for depth)
- 2 ounces dark chocolate (optional, for added richness)
- 1 teaspoon coconut oil or vegetable oil (for a silky smooth finish when melting chocolate)
Optional Toppings:
- Crushed candy canes (to sprinkle on top before the chocolate sets)
- Sea salt flakes (for a trendy sweet-salty contrast)
Step-by-Step Instructions
Step 1: Preheat & Prep Pan
Since we’re not baking here, no oven preheating needed, which is the best part! Just line a baking sheet with parchment paper or a silicone mat — this is where your patties will chill and harden. This avoids sticking and makes cleanup a breeze. If you’re using crushed candy canes later, have those ready nearby.
Step 2: Mix Dry Ingredients
Sift the powdered sugar into a large mixing bowl. This step is a game-changer because it avoids lumps and makes your filling silky smooth. Then, you’ll fold in the softened butter, which needs to be room temp but not melted — that helps everything combine evenly. Take your time here; you’re building a smooth, creamy base.
Step 3: Mix Wet Ingredients
Add the corn syrup and peppermint extract to the sugar-butter mix. Then, slowly drizzle in the heavy cream or milk, stirring until the mixture comes together into a soft dough. It should be pliable but not sticky — if it feels dry, add a teaspoon of cream at a time. This part is the moment you get to smell that unmistakable peppermint aroma — I swear, it brightens my mood instantly!
Step 4: Combine
Keep stirring until you have a cohesive dough that holds together. This is where a wooden spoon or a sturdy silicone spatula shines. Don’t overwork it — just enough for everything to mesh into a shiny ball. Too much mixing can toughen the filling, so be gentle but thorough. If it feels crumbly, a touch more cream will save the day.
Step 5: Prepare Filling
Turn the dough out onto a sheet of wax or parchment paper and flatten it into a disc about ½ inch thick. Wrap it up and pop it into the fridge for at least 30 minutes to an hour — this step firms up the filling so you can roll and slice it easily without it falling apart. Pro tip: I almost always make this the night before and chill it overnight. It’s even better chilled!
Step 6: Layer & Swirl
Once chilled, you can either roll the dough out with a rolling pin between two sheets of parchment and slice into shapes with a cookie cutter or knife, or simply scoop and roll little balls flattened into discs right on your lined baking sheet. There’s no strict rule here — I usually aim for uniform sizes so they dip evenly, but the homemade charm is in the slight imperfections. Want to add crushed candy canes? Sprinkle them on top now or wait until after dipping.
Step 7: Bake
Skip the bake—no oven needed here! Instead, melt your chocolate gently in a double boiler or microwave in 20-second bursts, stirring each time. Add the coconut oil to thin it out and create that glossy finish. Warm chocolate dips easier and sets beautifully. You want it fluid but not scorching hot to avoid melting your mint patties on contact.
Step 8: Cool & Glaze
Quickly dip each peppermint patty into the melted chocolate, using a fork to lift it out and let excess drip off. Place it back on your lined tray. If you’re adding a topping or sea salt, sprinkle it on while the chocolate is still wet so it sticks. Let them set at room temperature or pop them in the fridge to harden faster (but I think room temp slow-setting keeps the best texture).
Step 9: Slice & Serve
If you rolled and cut your patties before dipping, they’re ready to enjoy as soon as the chocolate firms up. These treats are best served chilled or at cool room temperature so the peppermint stays crisp and not gooey. Presentation-wise, a little decorative plate or parchment cupcake liners make them feel extra special. I promise, these disappear in minutes at my house whenever I put them out!
What to Serve It With
For Breakfast: Pair your peppermint patties with a steaming cup of dark roast coffee or a peppermint-infused latte. It’s like a little wake-up call for your taste buds without the heaviness of typical breakfast sweets.
For Brunch: These little patties add a fresh pop to a brunch spread, especially alongside light bites like fruit salad or cucumber sandwiches. A sparkling water infused with lemon or mint complements the cool flavors nicely.
As Dessert: After a heavy meal, peppermint patties are a perfect palate cleanser — they’re not too rich but leave that addictive mint chocolate finish. Serve them up with a scoop of vanilla ice cream or a drizzle of hot fudge for an indulgent twist.
For Cozy Snacks: Charm your evening with hot cocoa and these peppermint delights by your side. My family loves this combo during snowy nights; the smell alone brings everyone to the kitchen. If you’re feeling extra festive, add a candy cane stirrer to the mug.
These little candies have been part of our family traditions for years, from holiday gatherings to spontaneous sweet cravings. They’re the kind of treat that makes you pause, smile, and savor the moment — perfect for sharing or sneaking a few just for yourself.
Top Tips for Perfecting Your Peppermint Patties
Peppermint Filling Prep: Use fresh peppermint extract — the kind that’s bright and clean, not artificial-tasting. If your filling is too wet, add a little extra powdered sugar; too dry, a tiny splash of cream. I learned the hard way that skipping the chilling step leads to a mess when rolling, so don’t skip it!
Mixing Advice: Don’t overmix the filling; it should be smooth but still soft. Overworking makes it dense and less creamy, which takes away from that melt-in-your-mouth feel. Use a spatula rather than an electric mixer — it gives you more control.
Swirl Customization: Want to get fancy? Early in the chilling stage, try swirling in a tiny bit of green food coloring for holiday vibes or adding finely chopped peppermint leaves for a rustic look. Just don’t overdo it — the charm is in subtlety.
Chocolate Choices: I prefer blending semi-sweet and dark chocolate for a nuanced flavor profile, but good quality milk chocolate works if you prefer sweeter. If your melted chocolate feels too thick, adding coconut oil helps without affecting flavor.
Baking Tips: Even though these don’t bake, storing the patties in a cool, dry place is critical to keep chocolate from blooming (that dusty white tint). Avoid sudden temperature changes — condensation can dull the chocolate’s shine.
Glaze Variations: Feel like switching it up? Try dipping in white chocolate and dusting with matcha powder, or drizzle dark chocolate over white chocolate-dipped patties. Experimentation here is half the fun!
After dozens of batches, I’ve found that the key to a smooth, elegant peppermint patty is patience — chilling well and gentle handling. Once you’ve mastered the basics, let your creativity run wild with toppings and flavors. It’s a sweet little canvas!
Storing and Reheating Tips
Room Temperature: You can keep peppermint patties at room temp for up to 3 days, covered in an airtight container. Just keep them in a cool, dry spot away from sunlight to avoid melting or chocolate bloom.
Refrigerator Storage: For longer storage, place them in a tightly sealed container and refrigerate for up to 2 weeks. That keeps the chocolate crisp and the mint filling firm without drying out. I always use parchment layers if stacking, or better yet, single layers to avoid sticking.
Freezer Instructions: If you want to stash them for holidays, freezing works great. Wrap patties individually or in small batches with parchment and store in a freezer-safe container for up to 3 months. Thaw in the fridge overnight before serving to keep the chocolate from sweating.
Glaze Timing Advice: Add your chocolate coating fresh before storing. If storing plain filling dough, keep it chilled tightly wrapped, but once dipped, treat them like chocolate truffles — cool but not freezing cold when served for best texture.
These methods have helped me keep that perfect peppermint patty texture, even when I need to make them ahead for parties or gifts. The key is protecting the chocolate from moisture and temperature swings.
Frequently Asked Questions
Final Thoughts
If you’re craving a sweet treat that feels like a warm hug wrapped in cool mint and rich chocolate, homemade peppermint patties are calling your name. They carry that beautiful mix of simplicity and elegance that’s rare in so-called “fancy” candies. What I love most is how this recipe brings my family to the kitchen every single time — whether it’s a quick after-school snack or part of our holiday dessert spread, it never fails to please. Plus, there’s true joy in taking something store-bought and transforming it into your own kitchen masterpiece, packed full of that fresh mint punch that I know you’ll adore.
If you’ve got peppermint lovers in your life, or you just want to surprise yourself with a candy that feels homemade from the heart, give this a try. And when you do, don’t forget to pop back and share your experience or your creative twists on the recipe — I love hearing how these little treats spark joy in your homes too. Happy dipping and snacking!

peppermint patties
Ingredients
Main Ingredients
- 1 jar marshmallow cream (Fluff) 7 ounce
- 10 Tbsp unsalted butter softened
- 1.5 tsp vanilla extract
- 1 tsp peppermint extract
- 5.5 cups powdered sugar
- 1 package Ghirardelli dark chocolate melting wafers 16 ounce
- 8 ounce Ghirardelli white chocolate melting wafers optional for football-shaped patties
Instructions
Preparation Steps
- In a large mixing bowl, beat marshmallow cream, softened butter, vanilla extract, and peppermint extract until fully combined. Gradually add powdered sugar and mix on medium speed until the mixture is smooth and well blended.
- Line a large baking sheet with parchment paper. Using about 1 tablespoon of filling, shape into balls and flatten for traditional patties, or shape into footballs by pinching the ends. Place shaped patties on the lined sheet, cover with plastic wrap, and freeze for about 2 hours or overnight.
- Melt the dark chocolate wafers according to package instructions. Using a toothpick, dip the frozen peppermint patties into the chocolate, tap off any excess, and place back on parchment paper to set. Repeat until all patties are coated.
- For football-shaped patties, melt white chocolate wafers and pipe laces on top using a small plastic bag with a cut corner. Allow to set for a few minutes.
- Store peppermint patties in a covered container at room temperature and enjoy within a week.