Okay, so you know how some recipes just feel like a warm hug? This one is absolutely that for me. It all started one rainy Saturday afternoon when I was desperately craving something chocolatey, but the thought of pulling out all the stops for a big cake just felt like too much. My kids were buzzing around, and I remembered seeing something online about homemade candy that mimicked those amazing chocolate bars we all love. I tinkered, I tested, and after a few tries (some… more successful than others!), I landed on this Kit Kat Bites recipe. Honestly, it’s become my go-to when I need a serious chocolate fix without a whole lot of fuss. It’s like getting all the crunch and delicious chocolatey goodness of a full-sized bar, but in these perfectly poppable little pieces. My friends rave about them, and my family devours them in minutes! If you’ve ever loved a good Kit Kat, you’re going to be obsessed with these bites.
What are Kit Kat bites?
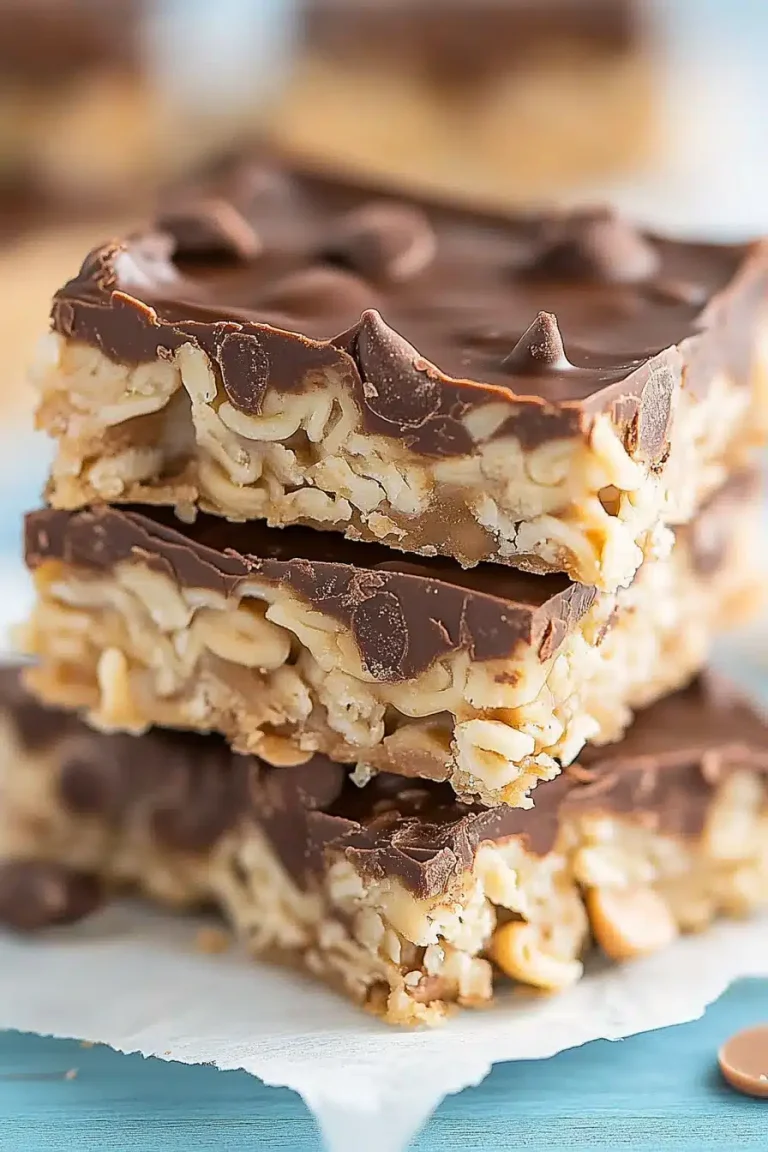
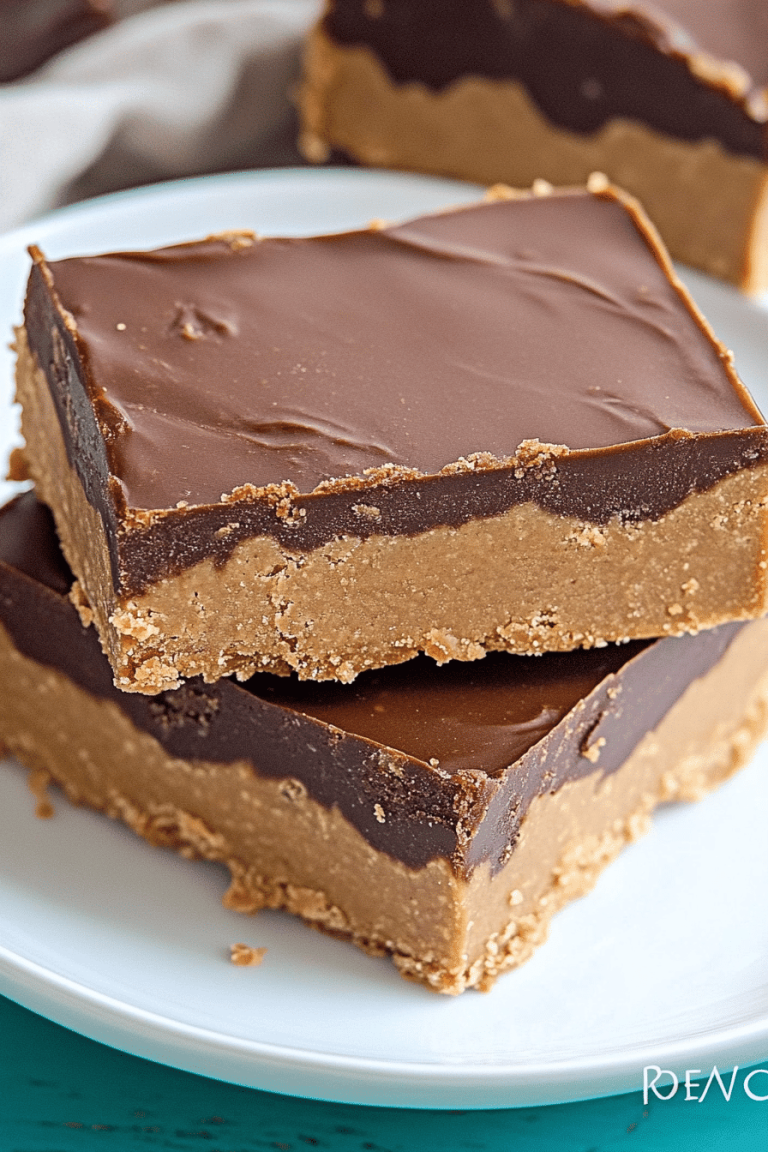
So, what exactly *are* these little marvels? Think of them as bite-sized, homemade versions of that iconic chocolate wafer bar we all know and love. They’re essentially layers of crispy, delicate wafer cookies sandwiched together with a creamy, rich chocolate filling, all then enrobed in a smooth, satisfying chocolate coating. The magic is in that layered crunch combined with the decadent chocolate. It’s not just about the taste, though; it’s about the texture too. That satisfying snap when you bite into one, followed by the creamy center and the melty chocolate shell – it’s a symphony of deliciousness! I call them Kit Kat Bites because they capture that same addictive flavor profile and texture that makes the original so popular, but in a format that’s perfect for sharing (or not sharing, no judgment here!). They’re essentially a DIY shortcut to chocolate bar bliss.
Why you’ll love this recipe?
Seriously, there are so many reasons why this recipe has become a staple in my kitchen. First and foremost, the flavor is just out of this world. It’s that perfect balance of sweet, creamy chocolate and crispy wafer that just hits all the right notes. It’s not overly sweet, which I really appreciate, and the quality of the chocolate really shines through. Then there’s the simplicity. Now, I know “homemade candy” might sound intimidating, but trust me, this recipe is surprisingly straightforward. The steps are all manageable, and the result is so impressive, people will think you spent hours in the kitchen! It’s also surprisingly budget-friendly. You can often pick up the ingredients without breaking the bank, especially if you’re savvy about sales. And versatility? Oh yeah. While they’re amazing on their own, I’ve also used them crumbled over ice cream, tucked into gift boxes, or even just scattered on a dessert platter. What I love most about these Kit Kat Bites, though, is that they bring a little bit of joy and nostalgia to every bite. They remind me of simpler times, and the process of making them feels like a fun little kitchen adventure. Compared to trying to make elaborate cakes or cookies, these are a lifesaver on busy nights when you still want to create something special.
How do I make Kit Kat Bites?
Quick Overview
Here’s the lowdown: we’re going to whip up a simple, luscious chocolate filling, layer it between crisp wafer cookies, and then enrobe the whole thing in melted chocolate. It’s a straightforward process that yields incredibly impressive results. The key is good quality ingredients and a little patience as things set up. You’ll be amazed at how quickly these come together, and the satisfying crunch and creamy chocolate combination is absolutely worth every second. It’s a foolproof way to get that beloved candy bar flavor right in your own home!
Ingredients
What is the chocolate filling?
Here’s where the creamy magic happens. I always use good quality semi-sweet chocolate chips for this. You want something that melts smoothly and has a nice, rich flavor without being too bitter. You can also use chopped chocolate bars, but chips are usually easier. Make sure they are good quality ones; it makes a difference!
For the Wafer Cookies:
You’ll want plain, crisp wafer cookies. Think those thin, stacked ones you can find in most grocery stores. They need to be sturdy enough to hold the filling but also light enough to give you that signature Kit Kat crunch. Sometimes I find brands that are a little thicker, and those work great too. Just make sure they’re *plain* – no added flavors!
For the Chocolate Coating:
This is for dipping. I usually go for a good quality melting chocolate or compound chocolate. It’s formulated to set up nicely and give you that smooth, shiny finish. If you prefer, you can use regular chocolate chips and add a tiny bit of coconut oil or shortening to help them melt smoothly and prevent them from seizing up. You want it to be fluid enough for dipping but thick enough to coat nicely.
Step-by-Step Instructions
Step 1: Preheat & Prep Pan
Get your baking sheet ready! Line it with parchment paper or wax paper. This is crucial because our little bites will need a place to chill and set, and you don’t want them sticking. I usually have a couple of these ready to go, especially if I’m making a bigger batch.
Step 2: Mix Dry Ingredients
Wait, there are no dry ingredients for the *filling* part? Yep, that’s part of the beauty of this recipe! The wafer cookies themselves provide all the “dry” structure we need. So, this step is more about getting your wafer cookies ready and making sure you have them easily accessible for layering.
Step 3: Mix Wet Ingredients
This is where we make our dreamy chocolate filling. Gently melt your semi-sweet chocolate chips. You can do this in a double boiler over low heat, stirring constantly until smooth, or in the microwave in 30-second intervals, stirring well between each one, until just melted and creamy. Don’t overheat it! Once melted, stir in a tablespoon or two of heavy cream or a neutral oil (like vegetable or canola) to make it extra smooth and spreadable. You’re looking for a consistency that’s like thick pudding – spreadable but not runny.
Step 4: Combine
Here’s where the assembly begins. Take one wafer cookie, spread a thin, even layer of your chocolate filling over it, making sure to go almost to the edges. Then, carefully place another wafer cookie on top, pressing down gently to sandwich the filling. It’s like making mini wafer sandwiches! Work relatively quickly so the filling doesn’t start to set too much.
Step 5: Prepare Filling
This step is actually covered in Step 3! The “filling” is the smooth, melted chocolate mixture that goes between the wafer layers.
Step 6: Layer & Swirl
This is the layering part! Take one wafer cookie, spread a thin, even layer of your chocolate filling over it, making sure to go almost to the edges. Then, carefully place another wafer cookie on top, pressing down gently to sandwich the filling. It’s like making mini wafer sandwiches! Work relatively quickly so the filling doesn’t start to set too much. You’ll end up with these lovely little layered wafer stacks.
Step 7: Chill & Cut
Once you have your wafer sandwiches made, place them on your prepared baking sheet. Now, here’s the important part: pop them into the freezer for about 10-15 minutes, or until the chocolate filling is firm. This makes them much easier to cut! Once chilled, carefully slice these wafer sandwiches into bite-sized pieces. They should cut cleanly without too much mess. I usually aim for pieces that are about 1-inch squares or rectangles. Place the cut pieces back onto the parchment-lined sheet.
Step 8: Coat & Set
Melt your coating chocolate according to package directions (again, a double boiler or microwave in short bursts works well). You want it smooth and fluid. Now, dip each wafer bite into the melted chocolate, ensuring it’s fully coated. You can use a fork or a toothpick to help you lift and place them onto the parchment paper. Let any excess drip off before placing them down. As soon as you’ve coated a few, pop the tray back into the fridge or freezer for about 5-10 minutes to let the chocolate coating set completely. This is how you get that beautiful, smooth shell!
Step 9: Slice & Serve
Your Kit Kat Bites are ready to enjoy! Once the chocolate coating is completely firm, they’re ready to be devoured. You can serve them immediately, or store them for later. They are best enjoyed when they’re still cool and firm, but honestly, they’re delicious at any temperature!
What to Serve It With
These little Kit Kat Bites are incredibly versatile, which is another reason I love them so much. For breakfast, they’re a fun surprise! Imagine a small plate alongside your morning coffee or tea – just one or two is the perfect little sweet treat to start the day without being overwhelming. For brunch, they add a touch of elegance to any spread. I love arranging them on a tiered stand with fresh berries and a dollop of whipped cream. They look so professional! As a dessert, they’re pure indulgence. Serve them after dinner with a scoop of vanilla bean ice cream, or alongside a rich, dark coffee. They’re the perfect way to satisfy a sweet craving without needing to bake a whole pie. And for those cozy, quiet moments, a few Kit Kat Bites with a glass of milk or a warm mug of hot chocolate are pure comfort food. My family has a tradition of putting a few out on Christmas Eve, and they always disappear first!
Top Tips for Perfecting Your Kit Kat Bites
Over the years, I’ve learned a few tricks that really make a difference when I’m whipping up these Kit Kat Bites. First, about the wafer cookies: make sure they’re fresh! Stale wafers won’t give you that satisfying crispness. If you can, buy them closer to when you plan to make these. For the chocolate filling, resist the urge to overheat it! Burnt chocolate is a tragedy. Melt it low and slow, and if it seems a little too thick, add just a teaspoon more of cream or oil until it’s perfectly spreadable. When you’re layering the wafers, don’t go overboard with the filling. A thin, even layer is key; too much and it’ll ooze out everywhere when you cut them. And speaking of cutting, chilling those sandwiches before slicing is a game-changer. I learned that the hard way after trying to cut them when the filling was still soft – it was a sticky mess! For the coating, if you find your chocolate is seizing or getting clumpy, it might be too hot, or you might have introduced a tiny bit of moisture. Sometimes adding a tablespoon of vegetable shortening can help rescue it and make it smooth again. I’ve also found that a shallow bowl or a wide mug is easier for dipping than a deep pot, giving you better control. If you want to get fancy with the coating, you can drizzle some contrasting chocolate (like white or dark) over the set coating once it’s hardened. It makes them look super professional! And finally, don’t be afraid to experiment a little with the filling. A tiny bit of espresso powder can add a lovely depth, or a swirl of peanut butter can be amazing if you’re a PB lover. Just remember, the simpler, the better for that classic flavor!
Storing and Reheating Tips
Proper storage is key to keeping these little gems tasting their best. At room temperature, they’ll stay fresh for about 3-4 days, provided your kitchen isn’t too warm. I like to keep them in an airtight container, but make sure they’re not stacked too high, or the chocolate coating could get smudged. If you live in a warmer climate or want them to last a bit longer, the refrigerator is your best friend. They’ll keep well in an airtight container for up to a week, and honestly, I think they taste even better cold and crisp. Just let them sit out for a few minutes before you eat them if they’re too hard straight from the fridge. Freezing is also an option for long-term storage. Wrap individual bites or small batches tightly in plastic wrap, then place them in a freezer-safe bag or container. They can last for up to 2-3 months this way. To thaw, just transfer them from the freezer to the refrigerator overnight. The glaze should be applied *after* they’ve been cut and are firm, but before they’re fully set if you’re freezing them, to ensure good adhesion. Honestly, though, these usually don’t last long enough in my house to worry too much about freezing!
Frequently Asked Questions
Final Thoughts
Honestly, making these Kit Kat Bites is such a rewarding experience. It’s one of those recipes that feels like a real treat, both to make and to eat, without being overly complicated. The combination of crispy wafers and smooth chocolate is just pure joy, and seeing the smiles on people’s faces when they try them makes it all worthwhile. They’re perfect for parties, thoughtful DIY gifts, or just a little something special to brighten up your day. If you loved this recipe and are looking for more fun chocolatey adventures, you might also enjoy my recipes for homemade chocolate truffles or my decadent chocolate lava cakes. They bring that same sense of homemade happiness! I really hope you give these Kit Kat Bites a try. I’m always so excited to hear how they turn out for you all! Don’t forget to leave a comment below and let me know what you think, or share your own special tips and variations. Happy baking (or should I say, candy-making)!

Kit Kat Bites
Ingredients
Main Ingredients
- 0.75 cup unsalted butter
- 0.75 cup heavy cream
- 1.5 cup granulated sugar
- 25 pieces marshmallows regular sized
- 12 ounce milk chocolate morsels
- 1 ounce unsweetened baking chocolate
- 4.5 cup Rice Krispies cereal
- 11 ounce butterscotch morsels
- 1 cup peanut butter morsels
Instructions
Preparation Steps
- In a large mixing bowl, add marshmallows, milk chocolate morsels, and baking chocolate. Set aside.
- In a large pot, bring to a boil the sugar, cream, and butter over medium-high heat. Boil for 4 minutes, stirring constantly. Remove from heat.
- Pour hot mixture over marshmallows and chocolate. Using an electric mixer, beat until chocolate has melted and mixture is smooth, about 2 minutes.
- Melt butterscotch and peanut butter morsels together in microwave-safe bowl for one minute. Stir and heat at 30-second intervals until fully melted.
- In a large bowl, combine Rice Krispies cereal, melted butterscotch mixture, and about one-third of the chocolate mixture. Mix completely.
- Line a 13x9 inch baking dish with parchment paper. Pour one-third of the chocolate mixture onto the bottom, spreading evenly. Top with cereal mixture and press firmly.
- Pour the remaining chocolate mixture over the cereal layer, spreading evenly with a knife.
- Refrigerate for 1-2 hours until set. Remove and cut into bite-sized pieces. Enjoy!