You know those nights? The ones where the clock is ticking way too fast, the kids are hovering with hungry eyes, and the idea of cooking anything complicated feels like climbing Mount Everest in flip-flops? Yeah, I live for those nights because I’ve got my secret weapon: these incredible chicken bowls. Seriously, they’re a lifesaver. I remember the first time I whipped these up, I was completely stressed about a deadline and rummaging through the fridge for inspiration. What I pulled together turned out to be so ridiculously good, so satisfying, and surprisingly simple, that it’s become a staple in our house. It’s the kind of meal that feels like a warm hug in a bowl, but it’s elegant enough that you could totally serve it when guests drop by unexpectedly. If you’ve ever loved a really good loaded baked potato, think of these chicken bowls as its sophisticated, incredibly flavorful cousin. They’re just… everything you want in a meal, all at once.
What are some of the best chicken bowls?
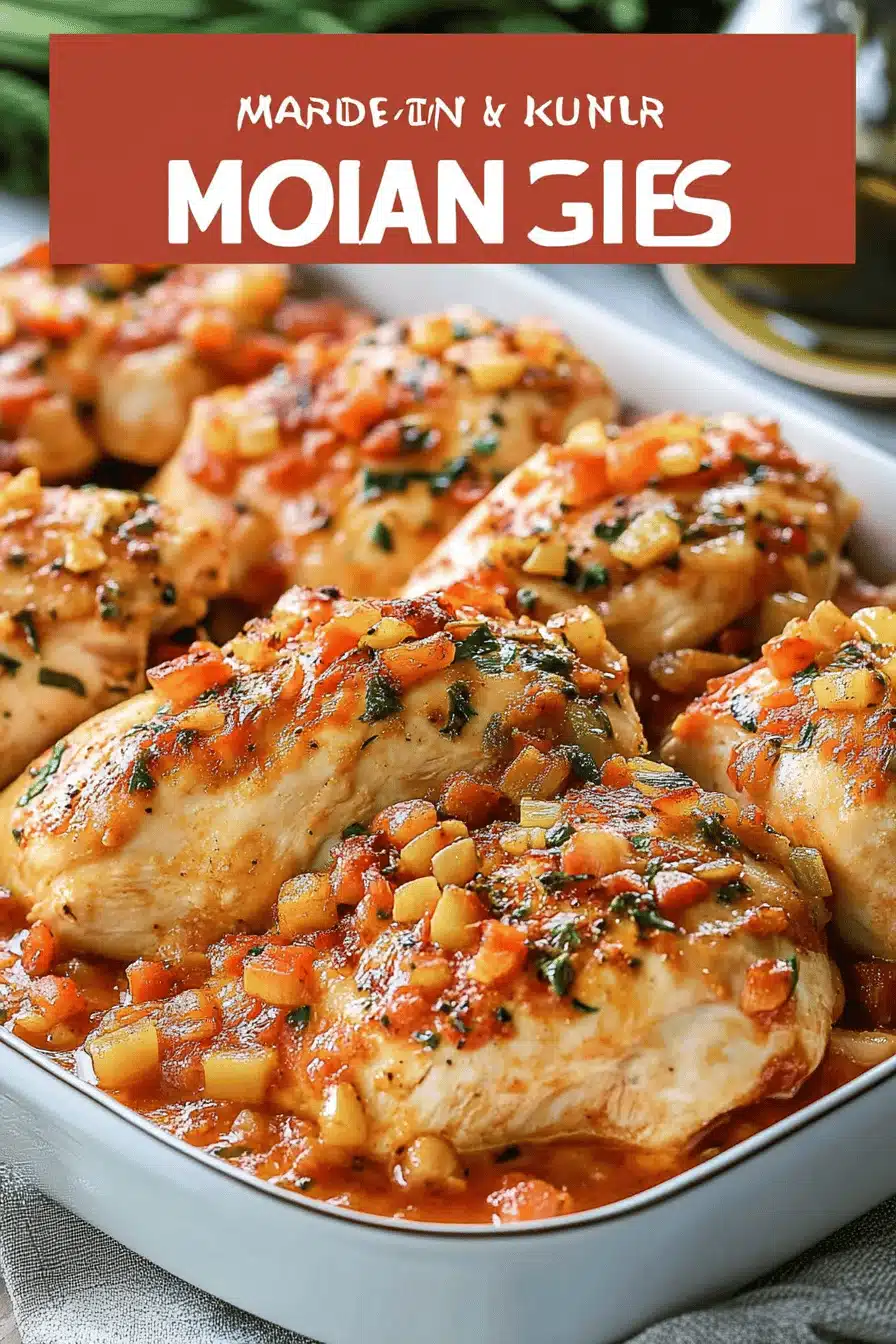
So, what exactly *are* these magical chicken bowls? Honestly, the name just kind of stuck because it felt right. It’s not just a plain old bowl of rice and chicken, oh no. This is a symphony of textures and flavors all nestled together. Think tender, perfectly seasoned chicken, a creamy, dreamy sauce that coats everything in pure comfort, and then all your favorite toppings piled high. It’s like a deconstructed, more exciting version of all your favorite comfort foods, all rolled into one. It’s essentially a customizable experience, where you get to be the artist of your own delicious meal. The beauty of it is that it’s so forgiving and adaptable. If you’ve ever loved a really hearty stew or a rich pasta dish, you’re going to adore the vibe of these chicken bowls. They’re the ultimate crowd-pleaser, and the best part? They’re ridiculously easy to throw together, even when you’re feeling anything but inspired.
Why you’ll love this recipe?
Okay, let me tell you why this recipe has earned a permanent spot on my recipe card holder (and probably yours too, once you try it!). First off, the flavor is just out of this world. We’re talking savory chicken, a sauce that’s so rich and comforting without being heavy, and then all those delightful toppings that add pops of freshness and crunch. It hits every single note. And the simplicity? Oh my goodness. I’ve made this with my eyes half-closed after a long day, and it still turns out perfectly. It’s one of those recipes that makes you feel like a culinary genius without actually having to break a sweat. It’s also wonderfully cost-efficient. You’re likely to have most of the base ingredients already in your pantry, and chicken is usually a budget-friendly protein. Plus, it’s incredibly versatile. You can switch up the toppings, serve it over rice, quinoa, or even just enjoy it as is. What I love most about this is that it’s pure comfort food that actually feels good to eat. It’s a far cry from those heavy, greasy meals that leave you feeling sluggish. This one leaves you feeling satisfied, happy, and ready for anything. It’s like a warmer, more flavorful, and way more exciting version of a simple chicken and rice dish, and that’s saying a lot!
How do I make these amazing chicken bowls?
Quick Overview
The magic of these chicken bowls lies in their beautiful simplicity and the layering of flavors and textures. In essence, we’re creating a delicious, tender chicken base that’s bathed in a luscious, savory sauce, and then we’ll top it all off with a variety of goodies that bring it to life. It’s a straightforward process that involves minimal prep and cooking time, making it perfect for busy weeknights or lazy Sundays. You’ll cook the chicken, whip up a quick sauce, and then assemble with your favorite fixings. It’s so easy, you’ll wonder why you haven’t been making chicken bowls forever!
Ingredients
For the Chicken & Base: For the Chicken & Base: For the Chicken & Base: For the Chicken & Base: For the Chicken
1.5 lbs boneless, skinless chicken thighs or breasts, cut into bite-sized pieces (I personally prefer thighs for extra tenderness, but breasts work wonderfully too!)
2 tablespoons olive oil (or your favorite cooking oil)
1 medium yellow onion, finely chopped (adds a sweet, savory base)
2 cloves garlic, minced (essential for that aromatic punch!)
1 cup low-sodium chicken broth (the foundation of our sauce)
1/2 cup heavy cream (or half-and-half for a lighter version, this makes it luxurious!)
1 tablespoon all-purpose flour (just a touch to thicken our sauce)
Salt and freshly ground black pepper, to taste (don’t be shy with this!)
Optional: A pinch of red pepper flakes for a little warmth.
For Serving & Toppings (Get Creative!):
Cooked rice (white, brown, jasmine – whatever you love!) or quinoa
Shredded cheddar cheese or Monterey Jack (a melty, cheesy hug)
Diced avocado or guacamole (creamy goodness)
Chopped fresh cilantro or parsley (for a burst of freshness)
Diced tomatoes or pico de gallo (bright, tangy notes)
Sour cream or Greek yogurt (a cooling dollop)
Crushed tortilla chips or crispy fried onions (for that essential crunch!)
Salsa or hot sauce (for an extra kick!)
Steamed broccoli or corn (to add some greens or sweetness)
Step-by-Step Instructions
Step 1: Sear the Chicken Perfection
Start by getting a large skillet or Dutch oven nice and hot over medium-high heat. Add your olive oil. Once it’s shimmering, add your seasoned chicken pieces in a single layer. Don’t overcrowd the pan; you might need to do this in batches. We want to get a beautiful golden-brown sear on all sides. This step is crucial because it locks in the juices and adds so much flavor. Once they’re nicely browned, remove the chicken from the pan and set it aside on a plate. Don’t worry if they’re not cooked through yet; they’ll finish cooking in the sauce.
Step 2: Sauté the Aromatics
Lower the heat to medium. If your pan looks a little dry, you can add another splash of olive oil. Add your chopped onion to the pan and cook, stirring occasionally, until it’s softened and translucent, about 5-7 minutes. Then, add the minced garlic and cook for another minute until fragrant, being careful not to burn it. This step builds the flavor base for our entire dish.
Step 3: Build the Luscious Sauce
Sprinkle the tablespoon of flour over the onions and garlic. Stir it around and let it cook for about a minute. This is what will help thicken our sauce. Gradually pour in the chicken broth, scraping up any browned bits from the bottom of the pan – that’s pure flavor gold! Bring the mixture to a simmer, stirring until it starts to thicken slightly.
Step 4: Creamy Dreams Happen Here
Now, pour in the heavy cream (or half-and-half). Stir everything together until it’s well combined and the sauce is smooth and creamy. Season generously with salt and freshly ground black pepper. If you like a little warmth, this is where you can add those red pepper flakes. Taste the sauce and adjust seasonings as needed. It should taste delicious on its own!
Step 5: Reintroduce the Star
Return the seared chicken pieces (and any juices that have accumulated on the plate) back into the skillet with the sauce. Give it a good stir to coat all the chicken. Bring the sauce back to a gentle simmer, then reduce the heat to low, cover the pan, and let it cook for about 10-15 minutes, or until the chicken is cooked through and tender. The sauce will thicken up beautifully.
Step 6: Assemble Your Masterpiece Bowl
This is the fun part! Grab your serving bowls. Start with a generous scoop of your cooked rice or quinoa at the bottom. Ladle the creamy chicken mixture over the top. Now, go wild with your toppings! I love to add shredded cheese, diced avocado, a spoonful of salsa, and some fresh cilantro. Don’t forget those crispy fried onions or crushed tortilla chips for texture!
Step 7: Serve and Devour
Serve these glorious chicken bowls immediately while everything is hot and the cheese is melty. Watch your family’s faces light up – mine always do!
What to Serve It With
Oh, the possibilities are endless when it comes to pairing these fantastic chicken bowls! For a hearty breakfast that will power you through the morning, I love serving a smaller portion over a bed of fluffy scrambled eggs with a sprinkle of cheese and a dollop of salsa. It’s surprisingly satisfying and a welcome change from the usual. Brunch calls for a bit more elegance, so I’ll present these in individual ramekins, perhaps over a bed of wild rice or a creamy polenta, topped with fresh chives and a drizzle of crème fraîche. It looks and tastes so gourmet! As a dessert, you might be thinking, “dessert?” But hear me out! If you make a slightly sweeter version (maybe with a touch of honey in the sauce) and top it with toasted almonds and a light dusting of cinnamon, it can actually be a wonderfully comforting sweet treat, especially on a chilly evening. For cozy snacks, it’s the ultimate comfort food. I’ll often just have a bowl with extra avocado and some crispy tortilla strips for a late-night craving, and it’s incredibly satisfying without feeling too heavy. My family also loves it served alongside a simple green salad or some roasted sweet potatoes. It’s just one of those dishes that adapts so beautifully to any mealtime or craving!
Top Tips for Perfecting Your Chicken Bowls
After making these chicken bowls more times than I can count, I’ve picked up a few tricks that I think make a big difference. First, when it comes to the chicken, whether you use thighs or breasts, make sure you don’t overcrowd the pan when you’re searing. Giving the chicken enough space allows it to brown properly, which creates those irresistible crispy bits that add so much flavor. If you pack the pan, the chicken will steam instead of sear, and you’ll miss out on that depth of flavor. Also, don’t be afraid to season your chicken well *before* it hits the pan. Salt and pepper are your best friends here. For the sauce, the flour is key for thickening, but make sure you cook it with the onions and garlic for about a minute before adding the liquid. This cooks out that raw flour taste and helps create a smoother, richer sauce. Speaking of the sauce, using chicken broth instead of water makes a world of difference – it adds another layer of savory goodness. When it comes to ingredient swaps, if you don’t have heavy cream, half-and-half is a decent substitute, but the sauce might be a little less rich. You can even use milk thickened with a bit more flour or cornstarch, but the cream really is superior for that luxurious texture. I once tried using evaporated milk, and it worked in a pinch! For an extra layer of flavor, some people like to add a splash of white wine to the pan after sautéing the garlic and before adding the broth – let it reduce for a minute, and it adds a lovely subtle tang. Don’t skip the final taste test and seasoning adjustment; this is your chance to make it perfect for *your* palate. And finally, the toppings are where you can really have fun. I’ve found that a mix of creamy (avocado, sour cream), fresh (cilantro, tomatoes), and crunchy (tortilla chips, fried onions) elements creates the most satisfying bite.
Storing and Reheating Tips
One of the best things about these chicken bowls is how well they store and reheat, making them an absolute winner for meal prep or leftovers. If you have any that don’t disappear immediately (which is rare in my house!), let the mixture cool completely before storing. For room temperature storage, it’s best to keep it in an airtight container and consume within two hours. It’s really meant to be eaten warm or chilled. For refrigerator storage, transfer the chicken and sauce mixture into an airtight container. It should stay perfectly delicious for up to 3-4 days. When it comes to reheating, I find the best way is to gently warm it up on the stovetop over low heat, stirring occasionally. You can add a tablespoon or two of chicken broth or water if the sauce seems a little thick from refrigerating. Microwaving is also an option; just cover the bowl loosely and heat in 30-second intervals, stirring in between, until heated through. For the best texture, I recommend adding fresh toppings like avocado, cilantro, and crunchy elements *after* reheating. The cheese can be added before or after reheating, depending on whether you want it melted or just incorporated. Freezing isn’t my top recommendation for this particular dish because the cream-based sauce can sometimes separate or become a bit grainy upon thawing. However, if you absolutely need to freeze it, make sure the chicken and sauce are cooled completely. Wrap them tightly in plastic wrap, then in aluminum foil, or place them in a heavy-duty freezer bag. It should keep for about 1-2 months. Thaw overnight in the refrigerator and reheat gently as described above. You might need to whisk in a little extra liquid to revive the sauce.
Frequently Asked Questions
Final Thoughts
I really hope you give these chicken bowls a try. They’ve brought so much joy and stress-free deliciousness to my table, and I truly believe they can do the same for yours. They’re a reminder that sometimes the most comforting and satisfying meals are the simplest ones, especially when made with a little bit of love and your favorite flavor combinations. If you loved this recipe, you might also enjoy my Creamy Tuscan Chicken Pasta or my Sheet Pan Lemon Herb Chicken and Veggies – they’re all about that easy, flavorful, weeknight-friendly magic! I can’t wait to hear what you think, and I’d absolutely love to see your creations. Tag me or leave a comment below sharing your favorite topping combinations or any fun twists you’ve tried. Happy cooking, and even happier eating!
Chicken Bowls
Ingredients
Main Ingredients
- 1 pound boneless skinless chicken thighs
- 0.25 cup 1% plain Greek yogurt
- 1 teaspoon olive oil
- 0.5 tablespoon red wine vinegar
- 2 cloves garlic finely chopped
- 0.5 teaspoon dried oregano
- 0.5 teaspoon ground turmeric
- 0.75 teaspoon kosher salt plus more for sprinkling
- 0.125 teaspoon red pepper flakes optional
- 3 each Persian cucumbers thinly sliced
- 1 cup cherry tomatoes halved
- 0.25 each red onion thinly sliced
- 2 cups cooked quinoa
- 1 cup tzatziki sauce from own recipe or store-bought
- 0.25 cup feta cheese crumbled, authentic brine style
- 12 each castelvetrano olives smashed
Instructions
Preparation Steps
- Cut chicken thighs into 1-inch pieces.
- In a large bowl, whisk yogurt, olive oil, red wine vinegar, garlic, oregano, turmeric, kosher salt, red pepper flakes, and black pepper to create marinade.
- Add chicken pieces to marinade, stir to coat, cover and refrigerate for at least 1 hour and up to 8 hours.
- Preheat grill or grill pan to medium-low heat.
- Thread chicken onto wooden or metal skewers, discard marinade, sprinkle with salt and pepper.
- Grill skewers turning occasionally until golden brown and cooked through, about 15 minutes.
- In a medium bowl, whisk olive oil and red wine vinegar; season with salt and pepper.
- Add cucumbers, cherry tomatoes, and red onion; toss to combine for salad.
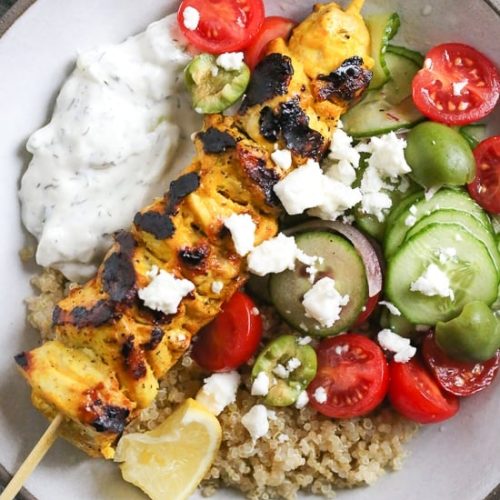
- Divide quinoa evenly among 4 bowls.
- Top quinoa with cucumber tomato salad, a spoonful of tzatziki, crumbled feta, and 3 olives.
- Place 1 chicken skewer on top of each bowl and serve immediately.