There’s something about chocolate and peanut butter together that just feels like a warm hug on a chilly day, right? I still remember the first time I tried my hand at these chocolate peanut butter cookies—it was a rainy afternoon, the kind where the smell of freshly baked treats makes the whole house feel cozy. My kids were hanging around the kitchen, sneaking bites of dough and begging for “just one more” the moment the cookies cooled. If you’ve ever loved the classic Reese’s combo but wished for a soft, chewy cookie that melts in your mouth… you’re going to adore this recipe. I swear, these cookies bring that nostalgic candy bar magic but with a homemade, tender crumb that’s so satisfying. Plus, they’re surprisingly quick to whip up—perfect for when you want something decadently sweet without waiting forever. Trust me when I say these chocolate peanut butter cookies will become your new go-to.
What is chocolate peanut butter cookies?
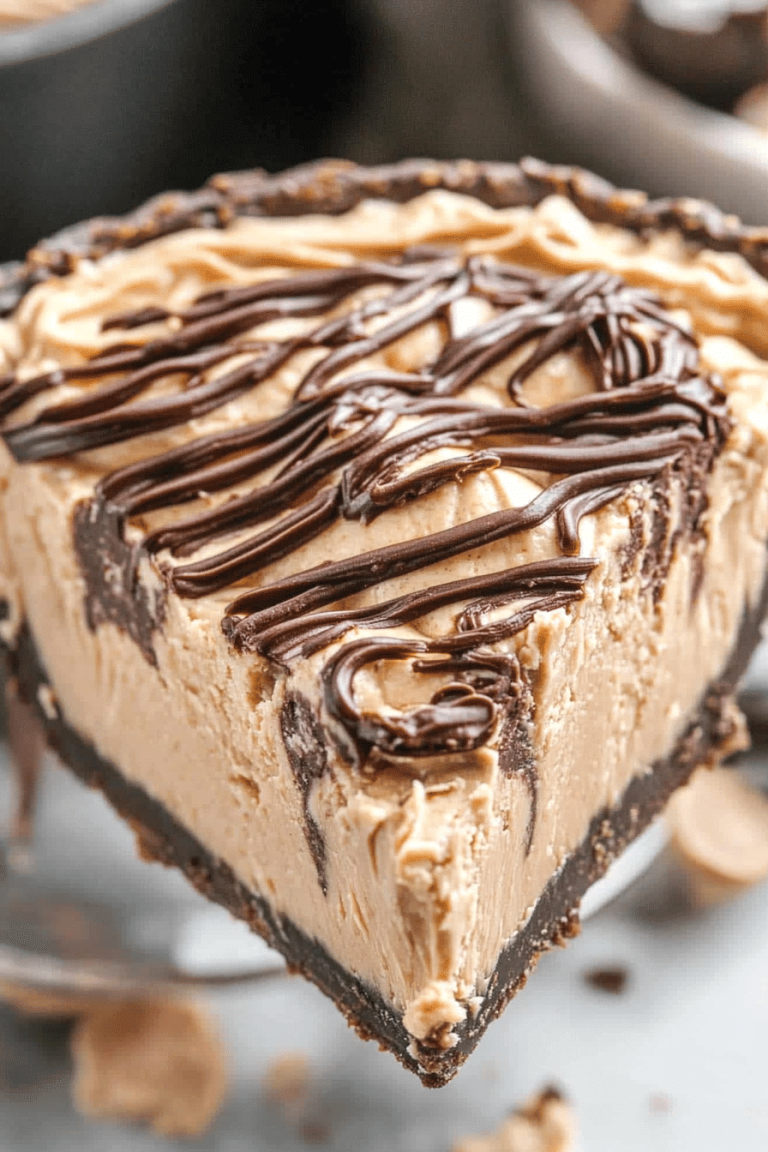
Think of chocolate peanut butter cookies as a delicious lovechild of two all-time favorites: the rich, slightly bitter depth of chocolate and the creamy, salty sweetness of peanut butter. It’s essentially a soft cookie base with pockets of peanut butter goodness swirled or stuffed in the center. The name says it all, but what makes these cookies special is how the two flavors dance together, creating something way more interesting than just “peanut butter” or “chocolate” alone.
These cookies are rooted in the classic peanut butter cookie tradition but elevated with cocoa powder or melted chocolate to give it that beautiful chocolaty hue and extra oomph of flavor. It’s approachable for home bakers and kids alike—no fancy techniques, just pure, rich comfort in cookie form. I like to think of them as the cookie version of comfort food: familiar, a little indulgent, but always a hug in edible shape.
Why you’ll love this recipe?
What I love most about this chocolate peanut butter cookies recipe is how it nails that perfect balance between sweet and salty, soft and chewy. Every time I bake a batch, the house fills with that warm aroma that just pulls everyone in the door faster than I can set the timer. The flavor? It’s like a gentle chocolate whisper that pairs perfectly with bold peanut butter, and the texture is tender with just the right amount of chewiness around the edges.
The simplicity can’t be overstated either. I’ve made versions with fancy ingredients and substitutions, but honestly, sticking to the simple pantry staples always worked best. You don’t need any crazy gadgets or specialty baking flours—just ingredients you probably already have. That’s what makes this recipe such a lifesaver on busy nights or when unexpected guests drop by. Plus, it’s really budget-friendly, which means you can indulge those chocolate and peanut butter cravings without breaking the bank.
Another thing I adore is versatility. You can make these as classic cookies, turn them into sandwich cookies by adding a peanut butter cream in the middle, or even flatten and use them as a base for an ice cream sandwich. I love how they cross over between a casual snack and a sweet treat to impress, depending on how you dress them up. If you enjoy other indulgent combos like chocolate chip cookies or peanut butter brownies, this one’ll quickly earn a permanent spot in your baking repertoire. My kids actually ask for seconds and sometimes thirds—it’s always chaotic but so worth it!
How do I make chocolate peanut butter cookies?
Quick Overview
This recipe is all about mixing up a simple chocolate-spiked cookie dough, preparing a luscious peanut butter filling, and gently swirling or stuffing the two together before baking to gooey perfection. What makes this method special is that you don’t have to worry about complex layering or fancy piping—the technique is straightforward but creates a marbled, irresistibly rich cookie every time. You’ll be slicing into warm, soft edges with a hint of peanut butter right in the center, which is magic. Plus, I always encourage letting the cookies cool just long enough so you don’t miss that molten center vibe, yet they’re firm enough to hold together.
Ingredients
For the Main Batter:
- 1 cup unsalted butter, softened – the richer the better, and room temp for easy mixing
- 1 cup granulated sugar – or you can blend with brown sugar for a chewy kick
- 2 large eggs – I always use fresh, free-range for better yolk flavor
- 1 teaspoon vanilla extract – pure vanilla is worth the small splurge
- 1/2 cup cocoa powder – natural unsweetened for that deep chocolate flavor
- 2 cups all-purpose flour – sifted, to keep the cookie light and airy
- 1 teaspoon baking soda – helps with rise and chewiness
- 1/2 teaspoon salt – balances all the sweetness beautifully
For the Filling:
- 3/4 cup creamy peanut butter – homemade or store-bought, but the creamy makes for the best smooth center
- 1/4 cup powdered sugar – adds just the right touch of sweetness and thickens the filling
- 1 teaspoon vanilla extract – tip: this really lifts the peanut buttery flavor
- Optional: A pinch of sea salt for a salty-sweet surprise
For the Glaze:
- 1/2 cup semi-sweet chocolate chips – melt these gently for a shiny, crackly finish
- 1 teaspoon coconut oil or butter – helps with smoothness and shine
- Optional: Sprinkle of chopped peanuts or flaky sea salt for texture
Step-by-Step Instructions
Step 1: Preheat & Prep Pan
First things first, get your oven warmed up to 350°F (175°C). I like to line a baking sheet with parchment paper—trust me, it makes cleanup so much easier and keeps the bottoms from getting too crunchy. If you want softer edges, you could try silicone baking mats instead. While the oven’s heating, set your other ingredients ready to go so you’re not rushing.
Step 2: Mix Dry Ingredients
In a medium bowl, whisk together the cocoa powder, flour, baking soda, and salt. This step not only evenly distributes the cocoa but ensures the baking soda won’t leave those weird metallic spots that sometimes happen if not properly mixed. The mix should look evenly chocolatey with no lumps.
Step 3: Mix Wet Ingredients
Grab a large bowl and beat the softened butter and sugars together until light and fluffy, usually about 3-4 minutes with an electric mixer. It smells heavenly here—a real sweet butter cloud. Then add your eggs one at a time, beating well after each addition. Finally, stir in the vanilla extract. The batter should have a creamy, glowing texture that’s soft but stable.
Step 4: Combine
Gradually incorporate the dry ingredients into the wet batter with a spatula or mixer on low. The trick is to avoid overmixing; stop once you see the flour mostly incorporated and no big streaks remain. Overworking the dough can make the cookies tough, and we want that soft, tender crumb. The dough will be thick but scoopable, almost like a thick brownie batter.
Step 5: Prepare Filling
In a small bowl, combine the peanut butter, powdered sugar, and vanilla extract until smooth and creamy. It should be thick enough to hold shape but soft enough to easily scoop or spread. If you want, toss in some sea salt flakes here for that little pop of salty-sweet contrast I’m obsessed with.
Step 6: Layer & Swirl
Scoop a heaping tablespoon of the chocolate batter onto the prepared pan. Make a small indentation or well in the middle with your thumb or the back of a spoon. Spoon a dollop of the peanut butter filling into that well, then top it with another tablespoon of chocolate batter. Take a toothpick or skewer and gently swirl the peanut butter into the chocolate to create a marbled effect. Don’t overdo it; you want visible swirls that hint at the filling waiting inside.
Step 7: Bake
Pop the tray into the oven and bake for 10-12 minutes. Keep a close eye after 10 minutes—you want the cookies just set but still soft in the center. The edges will look firm and slightly cracked, but the middle’s where the magic happens. If you wait too long, the peanut butter center tends to firm up and lose some of that melty goodness.
Step 8: Cool & Glaze
Let the cookies cool on the pan for about 5 minutes before transferring to a wire rack. While still warm, drizzle or spread the melted chocolate glaze over the tops. If you want, sprinkle with chopped peanuts or sea salt here for crunch and visual wow factor. The glaze adds a glossy finish that makes these cookies look so irresistible.
Step 9: Slice & Serve
These cookies are best served slightly warm or at room temperature. Use a sharp knife to slice if you made larger, bar-style cookies or just grab them by hand if you made individual rounds. If you want to dress it up, a scoop of vanilla ice cream or a cold glass of milk make perfect partners. My favorite way? Wrapped in a napkin on the go—ideal for quick afternoon treats!
What to Serve It With
For Breakfast: A hot cup of strong black coffee or vanilla oat milk pairs wonderfully with these cookies. Try breaking them into chunks over Greek yogurt for a sweet, nutty crunch in the morning—it feels indulgent but totally doable on busy weekday starts.
For Brunch: These cookies can bring a playful, rich note to a brunch spread. Arrange them on a pretty plate with sliced bananas and a dusting of powdered sugar, plus a pot of freshly brewed chai or fruity herbal tea to balance the richness.
As Dessert: Serve a warm cookie alongside vanilla bean ice cream and a drizzle of caramel sauce for a show-stopper after dinner. I learned this combo impresses even the toughest cookie critics in my family.
For Cozy Snacks: On lazy weekend afternoons, we love to munch on these cookies with hot chocolate topped with whipped cream. Sometimes I chop a few cookies and mix them into the hot drink for a double dose of chocolate-peanut butter bliss.
One of my favorite little family traditions is serving these fresh from the oven alongside popcorn and a movie night—because, why not mix salty and sweet in the same sitting? It’s always a hit and the cookies disappear in minutes!
Top Tips for Perfecting Your Chocolate Peanut Butter Cookies
Butter Quality: Use good-quality unsalted butter at room temperature for the creamiest batter. Too hard, and your dough won’t mix well; too soft or melted, and the cookies can spread too thin in the oven.
Mixing Advice: When combining your wet and dry ingredients, gently fold rather than aggressively stir. The batter is thick, so it’s tempting to overmix, but stiffer doughs make chewier, more tender cookies. I learned this after my first crispy batch when I was in a hurry!
Swirl Customization: Don’t hesitate to experiment with your swirling technique. Using a toothpick to create defined patterns can turn ordinary cookies into miniature works of art, and I promise, they taste just as great no matter how messy the swirl looks.
Filling Tweaks: Try swapping some of the powdered sugar in the peanut butter filling for honey or maple syrup to give it a natural sweetness twist. I tested almond butter once and it gave a lovely nutty depth, making these cookies less traditional but still addictive.
Baking Tips: Oven temps vary, so use your nose and eyes as guides. The cookies should smell rich and chocolatey just before you pull them out. Pulling them a bit early gives a softer result, while waiting longer makes for more structure but less ooze.
Glaze Variations: For a lighter glaze, swap half the chocolate chips for white chocolate or drizzle with peanut butter glaze instead. I like to add a tiny pinch of espresso powder to the glaze sometimes—this really intensifies the chocolate flavor in an unexpected but fabulous way.
Storing and Reheating Tips
Room Temperature: Keep your cookies in an airtight container at room temp for up to 3 days. Line the bottom with parchment paper and add layers separated by wax paper to prevent sticking. This keeps the soft texture intact without drying out.
Refrigerator Storage: Store leftovers in a sealed container or zipbag in the fridge for up to a week. They tend to firm up a bit—the peanut butter center becomes more pronounced—so I recommend warming them slightly in the microwave for 10-15 seconds before eating.
Freezer Instructions: These freeze beautifully. Wrap each cookie individually in plastic wrap, then place in a freezer-safe bag or container for up to 3 months. Thaw at room temperature or gently warm in the oven at 300°F (150°C) for 5-7 minutes.
Glaze Timing Advice: If you’re storing for more than a day, wait to add the glaze until just before serving. This keeps the glaze shiny and fresh instead of cracking or dulling. Alternatively, freeze without glaze and drizzle once thawed—your guests will think you’re a baking superstar!
Frequently Asked Questions
Final Thoughts
So there you have it—the chocolate peanut butter cookies that have become a cherished ritual in my kitchen and, I hope, yours soon too. They offer that perfect balance of chocolate richness and peanut butter decadence with a soft, tender bite that’s impossible to resist. Beyond just the flavors, there’s something comforting about making these cookies—the kind of recipe that invites you to slow down, savor, and share with the ones you love. Whether you’re baking for a special occasion, an after-school pick-me-up, or just because you deserve a treat, these cookies deliver that cozy little moment of joy.
If you try them out, don’t forget to drop a comment or share your twists and turns with the recipe—I’m always excited to hear how others make it their own. And if you like experimenting with sweet and nutty combos, you might also enjoy my peanut butter chocolate chip bars or fudgy chocolate swirl brownies. Happy baking, and can’t wait to hear how yours turns out!
chocolate peanut butter cookies
Ingredients
Main Ingredients
- 1 stick butter
- 1.67 cups sugar
- 0.5 cup milk
- 0.25 cup cocoa powder
- 1 cup peanut butter creamy
- 2 tsp vanilla extract
- 3 cups quick cook oats
- 0.25 tsp salt
Instructions
Preparation Steps
- In a large bowl, stir together oats and salt. Set aside.
- In a small saucepan over medium-high heat, whisk together butter, sugar, milk, and cocoa powder.
- Bring the mixture to a boil for about a minute, then remove from heat.
- Whisk in peanut butter and vanilla extract until well combined.
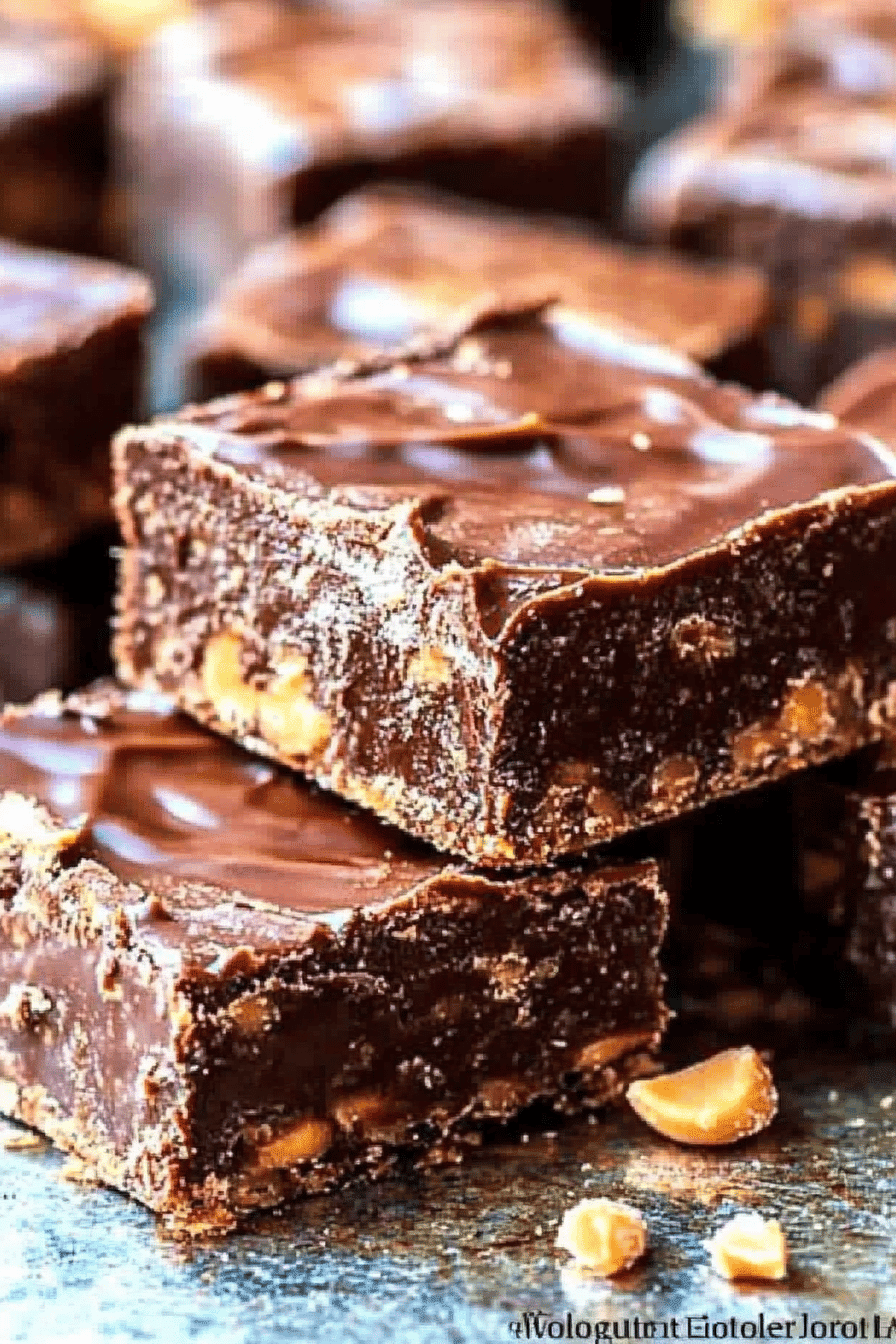
- Pour the chocolate peanut butter mixture over oats and stir until combined.
- Line a baking sheet with wax paper. Drop cookies onto the wax paper using a medium cookie scoop.
- Let the cookies cool on the countertop. Store in the refrigerator once cookies are cool and dry.