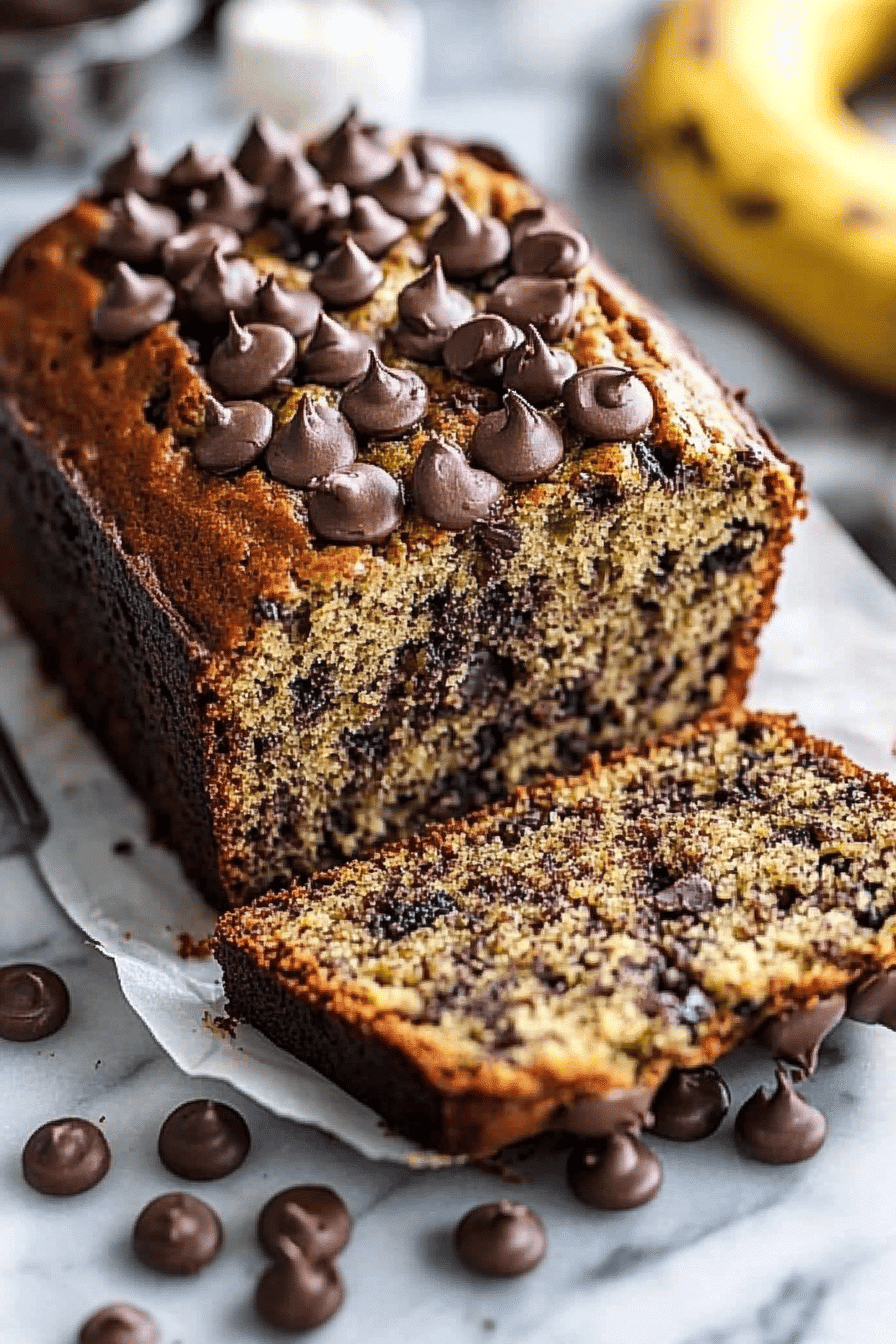
There’s something utterly comforting about the smell of banana nut bread baking in the oven—a warm, sweet aroma that drifts through the house and pulls everyone into the kitchen, no matter what they were doing. I remember grabbing my mom’s slightly lumpy, perfectly golden loaf fresh out of the oven as a kid, sneaking warm slices before dinner with a smear of butter that melted right in. This banana nut bread hits that same nostalgic note every single time, but with a little twist of mine to make it even softer and more flavorful. It’s easy to whip up, uses those overripe bananas you’d otherwise toss, and tastes far more indulgent than it really is. Honestly, if you love a good banana bread but find them dry or bland, this is the one to keep stashed in your recipe box. It’s like the comforting hug of a cinnamon roll without all the fuss. Trust me, my kids ask for this all the time, and I’m betting yours will too.
What is banana bread?
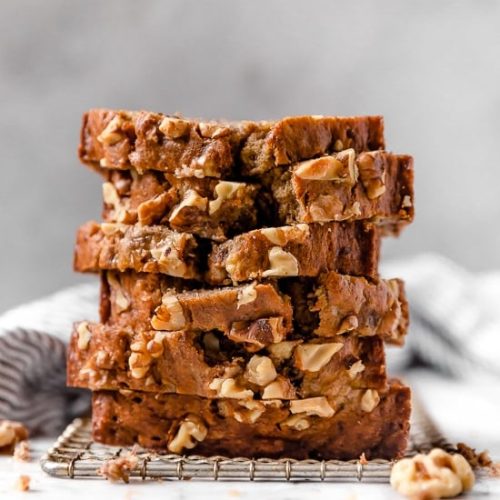
Banana nut bread is basically a deliciously moist quick bread, packed with ripe bananas and crunchy nuts, usually walnuts or pecans. The name says it all—it’s bread you make with bananas and nuts. It’s not a loaf you’ll slice for sandwiches, but rather a sweet treat or breakfast side that’s got all those rich, familiar flavors with a crumb that’s soft yet sturdy. Think of it as a cousin to your favorite banana muffins, but more loaf-like and perfect for slow, savoring moments. The “nut” part adds a satisfying crunch and a toasty edge to the sweetness from the bananas. It’s the kind of thing you can make in just about any kitchen, no fancy gadgets needed, and it’s forgiving enough that it rarely disappoints—even if your bananas are a bit less ripe than you’d like. Plus, that moment you slice into it, with the nutty aroma wafting up and the golden crust beckoning, is seriously irresistible.
Why you’ll love this recipe?
What I love most about this banana nut bread recipe has got to be the perfect balance it strikes between the rich, natural sweetness of the bananas and the toasty, slightly crunchy walnuts that sneak in here and there. It’s not one of those super-sweet quick breads that leave you feeling like you just ate dessert for breakfast. Instead, it’s wholesome and comforting with just enough sweetness to satisfy your cravings without going overboard. The texture is dreamy—moist and tender on the inside, with a little crispness on the outside crust that makes every bite interesting.
This recipe is also crazy simple and fast, which is a lifesaver on busy mornings or lazy weekends. I always keep a stash of overripe bananas in my freezer so I can throw this together last-minute. Plus, bananas and nuts are budget-friendly staples in most pantries, so it’s a cost-effective way to treat yourself or a crowd without breaking the bank. And the versatility? You can jazz it up with chocolate chips, swap out nuts, or even swirl in a cinnamon-sugar filling like I do sometimes. It pairs beautifully with a cup of coffee or a scoop of ice cream if you’re feeling indulgent.
It’s also the kind of recipe that’s stood the test of time in my kitchen. Unlike many sweets that can be hit or miss, this one’s a guaranteed crowd-pleaser. If you’ve enjoyed my Almond Zucchini Bread or the classic Pumpkin Spice Loaf, you’ll find this banana nut bread just as comforting but with its unique personality. Plus, the smell alone makes the kitchen feel like home.
How do you make banana bread?
Quick Overview
This banana nut bread comes together in just a few simple bowls. You’ll mix dry ingredients in one, whisk up your wet ingredients in another, then gently fold them together with the star players—ripe bananas and crunchy nuts. What sets this recipe apart is how it balances gentle mixing for a tender crumb with just enough structure so the loaf holds its shape and develops a crunchy crust. It’s straightforward, no weird steps or fancy tools, and almost fault-tolerant if you keep an eye on the bake time. I love that you don’t have to be overly precise for it to turn out just right every time.
Ingredients
For the Main Batter:
- 3 very ripe bananas (the more spotted, the better!): They give moisture, sweetness, and that signature banana flavor.
- 1/2 cup unsalted butter, melted: Adds richness and keeps the bread tender.
- 3/4 cup brown sugar: For subtle caramel notes, but feel free to reduce slightly if you want less sweet.
- 2 large eggs: Help bind and add structure without drying the bread out.
- 1 tsp vanilla extract: Boosts depth and warmth.
- 1 3/4 cups all-purpose flour: The backbone to keep everything together.
- 1 tsp baking soda: That perfect rise helper.
- 1/2 tsp salt: Balances the sweetness and enhances flavor.
For the Filling:
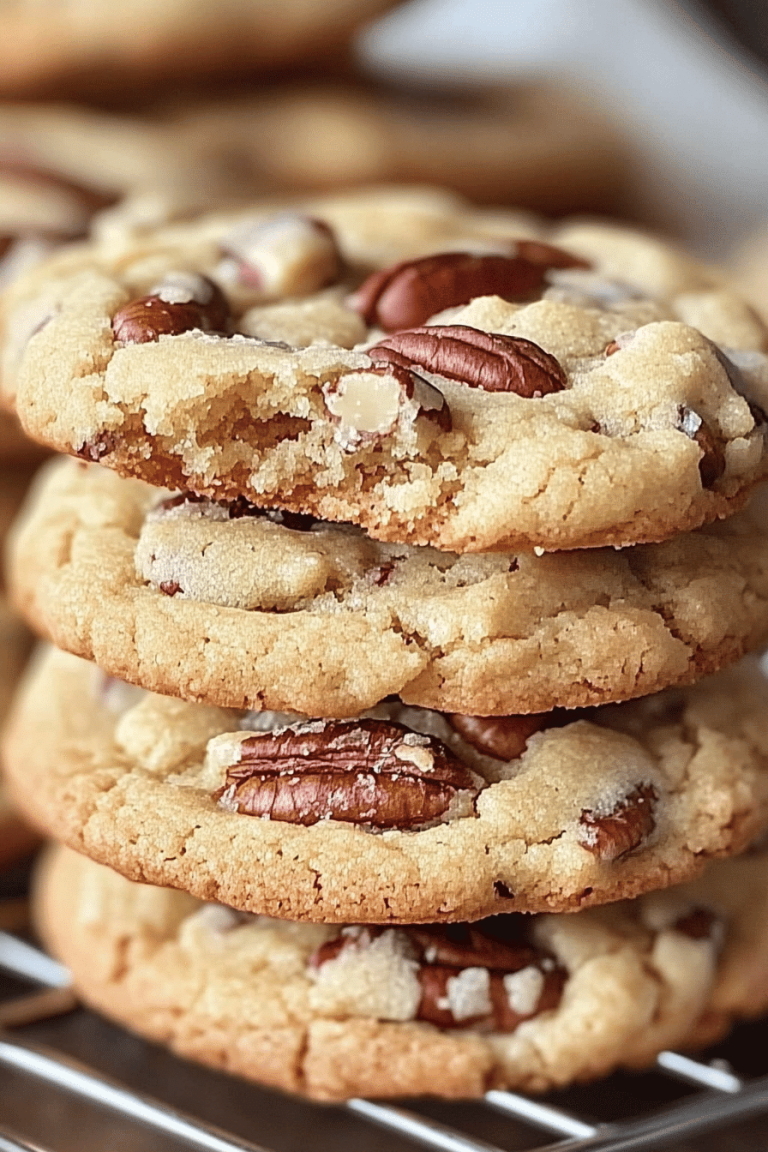
- 1 cup chopped walnuts (toasted if you have time): Adds crunch and a toasty nuttiness. Pecans work great too.
For the Glaze (optional but recommended):
- 1/2 cup powdered sugar
- 1-2 tbsp milk or cream (I sometimes use almond milk for a subtle twist)
- 1/2 tsp vanilla extract or a pinch of cinnamon for a little warmth
It should be smooth and pourable but thick enough to hold on the bread’s surface without running off.
Step-by-Step Instructions
Step 1: Preheat & Prep Pan
Preheat your oven to 350°F (175°C). Grease a 9×5-inch loaf pan with butter or nonstick spray and line it with parchment paper if you want an ultra clean removal. The parchment helps keep the crust nicely browned while ensuring nothing sticks—my secret to perfect slices every time.
Step 2: Mix Dry Ingredients
In a large bowl, whisk together the flour, baking soda, and salt. You want to make sure the baking soda is evenly distributed so your bread rises uniformly. This step also aerates the flour, which helps keep the texture light. I always sift them once for a finer crumb, but it’s not mandatory.
Step 3: Mix Wet Ingredients
In another bowl, mash the bananas until mostly smooth but leaving a few chunks gives texture and extra banana bursts as you bite in. Stir in the melted butter, brown sugar, eggs, and vanilla extract until fully combined. At this point, you’ll notice the batter feels rich and smells wonderfully sweet.
Step 4: Combine
Pour the wet mixture into the dry and fold gently using a spatula or wooden spoon. Stop mixing as soon as you don’t see dry flour streaks—overmixing leads to a tougher loaf, and that’s the easiest mistake to make. The batter should be thick and slightly lumpy, not smooth like cake batter.
Step 5: Prepare Filling
Fold in about three-quarters of your chopped nuts into the batter, reserving the rest for sprinkling on top. If you want, give your nuts a quick toast in a dry pan until fragrant—a little toasty magic that amplifies flavor.
Step 6: Layer & Swirl
Pour half the batter into your prepared pan. Sprinkle half of the reserved nuts on top, then dollop the remaining batter over that. Finish with a scattering of the remaining nuts. If you’re feeling fancy, grab a skewer or butter knife and give it a few gentle swirls to create a rustic marbled look. It’s totally optional but looks gorgeous and adds some nice texture contrast.
Step 7: Bake
Bake for 55-65 minutes, but start checking around 50 minutes. The top should be golden brown with those nuts toasty and edges pulling slightly away from the pan. Insert a toothpick in the center—it’s done when it comes out mostly clean with a few moist crumbs. If it’s too wet, give it more time but cover the top loosely with foil if it browns too fast. I once burned the top because I got distracted—lesson learned!
Step 8: Cool & Glaze
Let the bread cool in the pan for about 15 minutes to firm up, then transfer to a rack. Once it’s completely cool, drizzle your glaze over the top for a subtle sweetness and pretty finish. The glaze adds just the right touch of sweetness without overpowering the banana and nut flavors.
Step 9: Slice & Serve
Use a sharp serrated knife for clean cuts and slice about an inch thick. This bread is delicious enjoyed slightly warm but also well after it’s cooled. Serve with a spread of butter or a swipe of cream cheese if you’re feeling cozy. It keeps well and makes a fantastic grab-and-go breakfast or afternoon snack. Just be ready for everyone to reach for more!
What to Serve It With
For Breakfast: Nothing pairs better than a strong cup of coffee or your favorite chai latte. I like to keep a little homemade whipped cream or even nut butter handy for spreading. It makes breakfast feel a little indulgent without much effort.
For Brunch: Plate slices alongside fresh fruit, a light yogurt dollop, or scrambled eggs for a well-rounded spread. A glass of fresh orange juice or sparkling water with a lemon twist complements the nutty sweetness perfectly.
As Dessert: Warm a slice and top it with vanilla ice cream or a drizzle of caramel sauce. Some toasted pecan halves on top elevate it to something truly special and unexpected. You’ll get those “wow” moments from your guests for sure.
For Cozy Snacks: An afternoon tea or cocoa with banana nut bread is simple yet comforting. My family loves it with a little extra butter and a sprinkle of cinnamon sugar—a cozy way to feel snug during chilly days or after school.
We have a little tradition here where my kids and I package slices in little bags for neighbors or friends—it’s such an easy, thoughtful gift that always brings a smile. The slightly nutty, sweet aroma lingers in the air and makes any gathering feel a bit more special.
Top Tips for Perfecting Your Banana Nut Bread
Bananas Prep: Use very ripe bananas, the ones with lots of brown spots. I even freeze mine if they’re too ripe and mash them right from frozen—it adds moisture and deep sweetness. No need to peel off the skin yourself, but make sure you don’t use green bananas or it’ll fall flat.
Mixing Advice: Be gentle when folding your wet and dry ingredients. The batter should look a bit lumpy; overmixing is the quickest way to get dense, rubbery bread. Trust me, it’s tempting to stir more, but stop as soon as the flour disappears.
Swirl Customization: If you want that marbled look, swirl the batter gently with a knife or skewer, but avoid mixing it up too much. For a visual pop, you can also add a cinnamon sugar swirl or even a layer of cream cheese before folding in the nuts.
Ingredient Swaps: I’ve swapped walnuts for pecans, almonds, and even chopped hazelnuts. All delicious! For flour, I’ve tested this with half whole wheat for a nuttier note—the texture is denser but still good. Greek yogurt or sour cream can substitute some butter for tang and moisture.
Baking Tips: Use the middle rack of your oven for even heat, and if your oven runs hot, tent the bread with foil halfway through baking. Toothpick testing is key—every oven is different, so don’t rely on timing alone. I’ve learned to rotate my pan for even browning, especially in older ovens.
Glaze Variations: Try lemon glaze for a bright twist, or add a teaspoon of espresso powder to your glaze for a subtle mocha flavor. You can skip the glaze and dust with cinnamon sugar or powdered sugar too—still delightful and less sweet.
I learned over the years that little tweaks like toasting the nuts or adding a pinch of cinnamon can take this humble banana nut bread from everyday to “OMG this is incredible.” Plus, resting the batter for 10 minutes before baking helps intensify the flavors, a trick I stole from my grandma’s baking books!
Storing and Reheating Tips
Room Temperature: Store wrapped in foil or in an airtight container at room temperature for up to 3 days. I usually cover mine loosely with a tea towel if I plan to eat it quickly; it keeps the crust nice without getting soggy.
Refrigerator Storage: Wrap tightly in plastic wrap or put in a sealed container. It’ll last about a week, though it’s best eaten within 5 days to keep that fresh-baked moisture. Cold slices reheat wonderfully with a quick zap in the microwave for a few seconds.
Freezer Instructions: Whole or sliced, wrap the bread tightly in plastic wrap and then aluminum foil or place in a freezer bag. Freeze up to 3 months. Defrost at room temperature or warm gently in the oven wrapped in foil. This is my go-to when I bake a double batch and want to keep the extra fresh.
Glaze Timing Advice: Apply glaze once fully cooled if you’re planning to freeze or refrigerate. If serving soon, a warm drizzle is lovely, but glazing too early can cause it to melt and disappear during storage.
I always keep a spare loaf wrapped in the freezer—it’s a little treasure for busy weeks or unexpected guests, popping out a fresh slice that tastes like it was just made. That’s the magic of banana nut bread!
Frequently Asked Questions
Final Thoughts
This banana nut bread recipe is one I come back to again and again, especially when the house needs that cozy, comforting vibe only baking can bring. It’s simple enough to pull together on a whim and forgiving enough that even my busiest, sleep-deprived mornings can produce something amazing. The combination of sweet banana, crunchy nuts, and that hint of vanilla in a soft, tender crumb is magic every time. Whether you’re sneaking slices with coffee or using it as a small bit of comfort after a long day, it feels like a little homemade gift in every bite.
If you enjoy this, you might want to tackle my other quick breads or try adding a little cinnamon swirl next time—you won’t regret it. And don’t be shy with the nuts; toasting them in a pan really amps up the flavor more than you’d expect.
Go ahead, bake a loaf this week—it’ll disappear faster than you think. I’d love to hear how yours turns out or any fun tweaks you discover. Drop a comment, give it a rating, and share your banana nut bread stories. Happy baking, friend!
Banana Nut Bread
Ingredients
Main Ingredients
- 7 medium ripe bananas mashed chunky with fork (about 22 oz or 2 2/3 cups total)
- 0.5 cup unsweetened apple sauce 4 oz
- 2.5 cups unbleached all purpose flour 13.5 ounces
- 1.5 tsp baking soda
- 0.5 tsp salt
- 4 tbsp butter 2 oz softened
- 1 cup light brown sugar 6.5 oz
- 4 large egg whites
- 1 tsp vanilla extract
- 3 oz chopped walnuts 3/4 cup
- baking spray
Instructions
Preparation Steps
- Preheat oven to 350°F. Grease two 8x5 inch loaf pans with baking spray.
- In a medium bowl, combine the flour, baking soda, and salt with a wire whisk. Set aside.
- In a large bowl, cream butter and sugar with an electric or stand mixer. Add egg whites, apple sauce, and vanilla, and beat at medium speed until thick. Scrape down sides of the bowl.
- Add one-third of the dry ingredients and blend at low speed until combined, repeat with second third. Add remaining dry ingredients and mashed bananas and blend at low speed until just combined. Do not overmix. Stir in the walnuts.
- Pour the batter into loaf pans and bake on the center rack for 50 to 52 minutes, or until a toothpick inserted in the center comes out clean.
- Let the pans cool at least 20 minutes; bread should be room temperature before slicing. Makes 2 loaves.